There is nothing quite like the intoxicating aroma of a freshly baked garlic parmesan herb loaf wafting through your kitchen. This isn’t just a side dish; it’s a show-stopping centerpiece that combines the rustic beauty of a braided artisan loaf with the indulgent flavors of roasted garlic butter and sharp parmesan cheese.
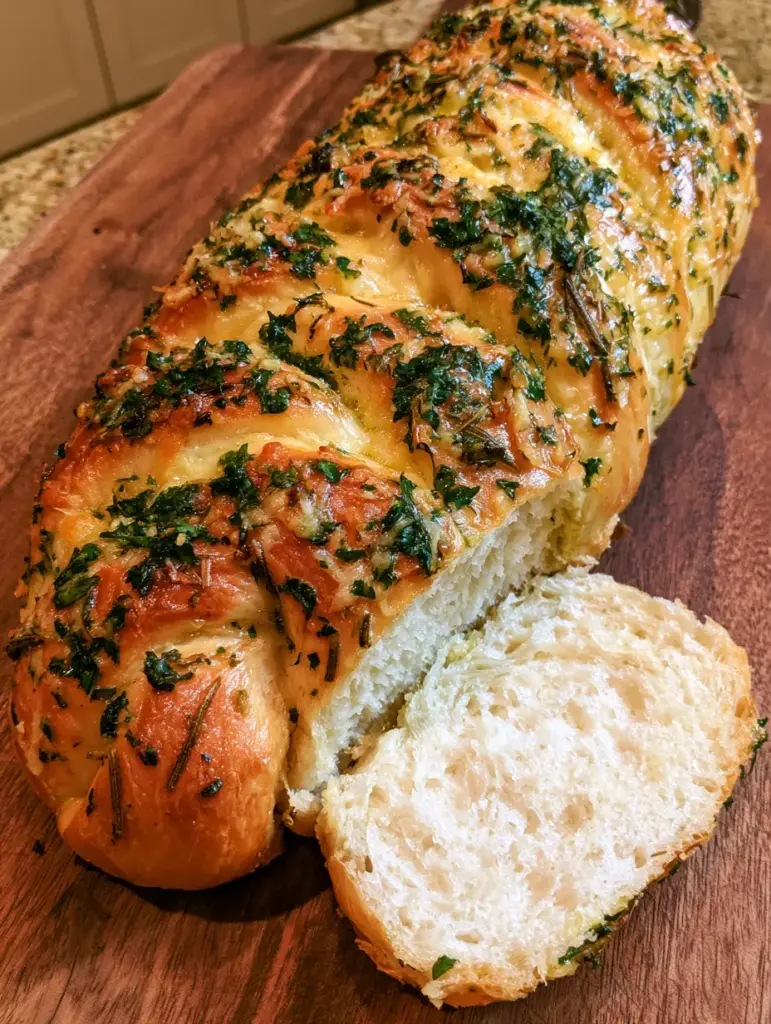
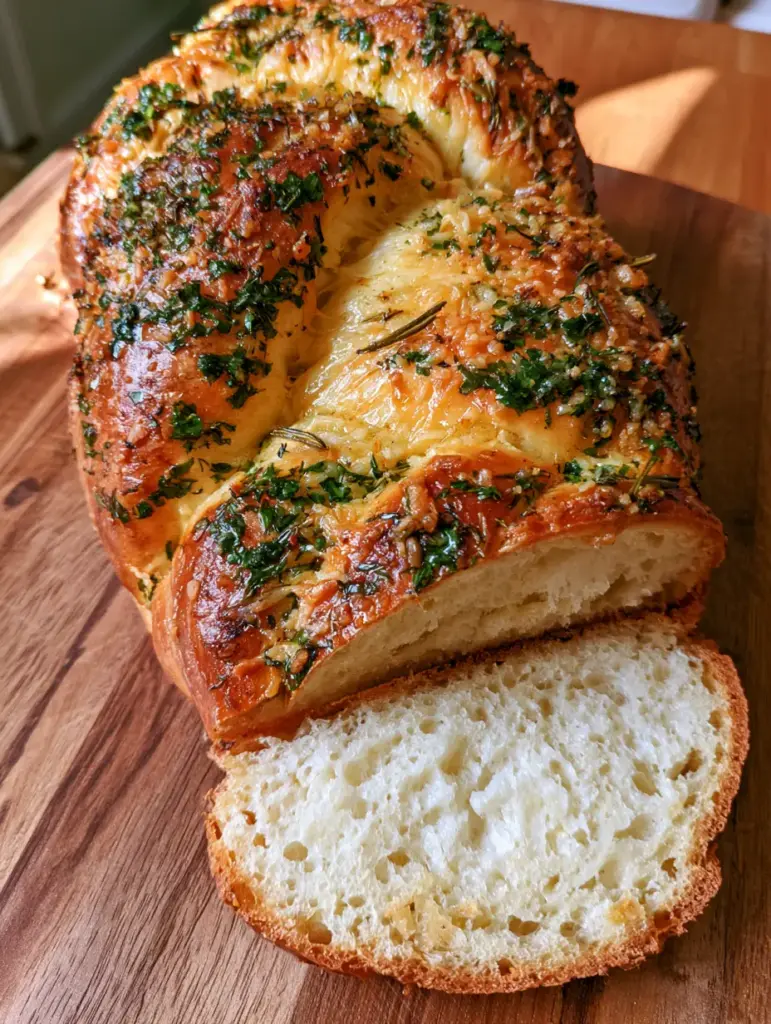
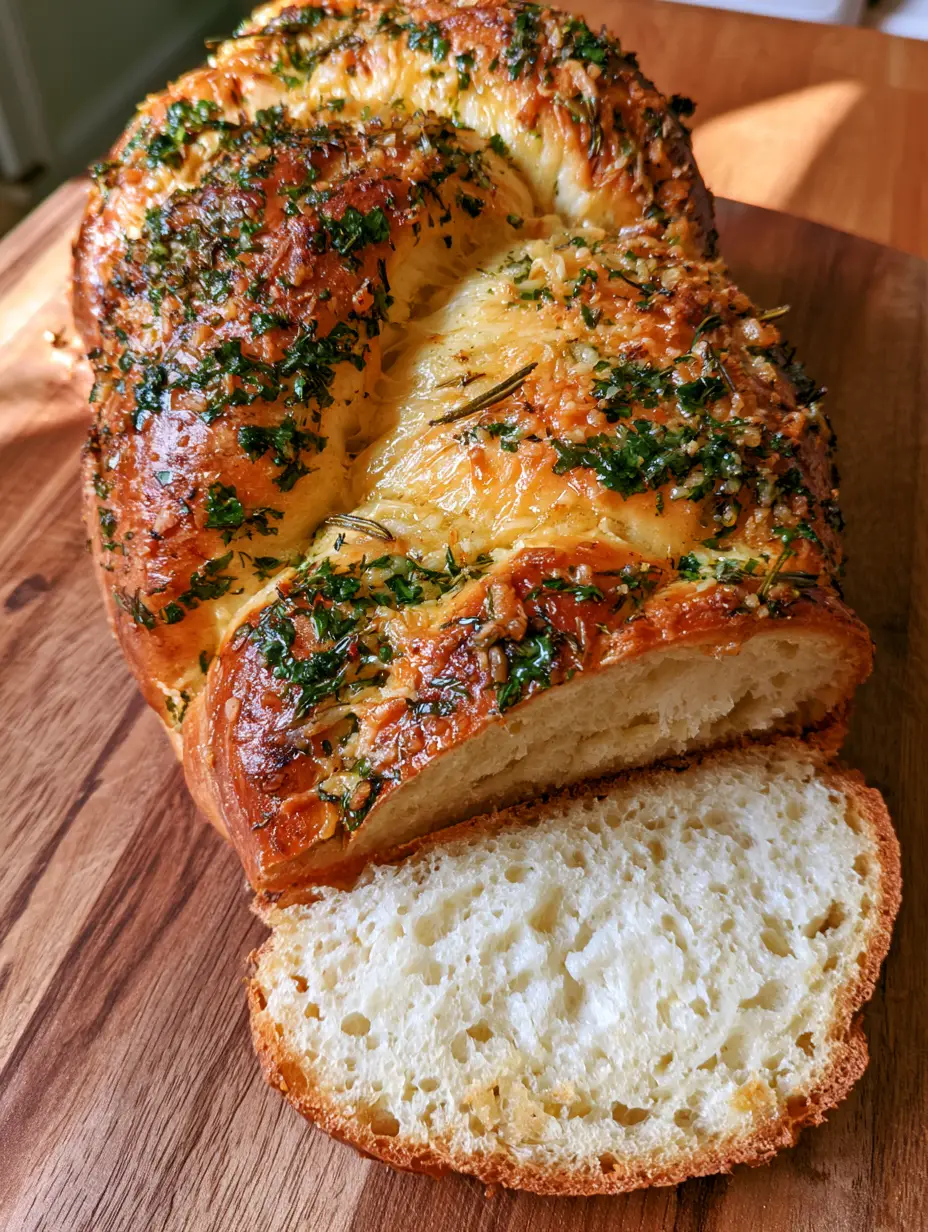
The visual appeal is undeniable. Imagine a golden-brown crust, glistening under a generous coating of melted butter, encrusted with toasted parmesan flakes and vibrant flecks of fresh parsley and rosemary. When you pull away that first thick slice, you’re met with an incredibly fluffy, steaming white interior crumb that practically melts in your mouth.
Whether you are hosting a dinner party or simply want to elevate your weekend baking, this garlic parmesan herb loaf is designed to impress both the eyes and the palate. Let’s dive into the science and soul of this artisan masterpiece.
Why This Braided Herb Loaf Will Be Your New Obsession
- The Perfect Crumb: High-protein bread flour and precise hydration create a cloud-like, soft white interior that stays moist for days.
- Double Garlic Impact: We use roasted garlic inside the butter for a mellow sweetness and minced garlic for a savory punch.
- Artisan Braiding: The three-strand braid technique maximizes surface area, allowing more room for the parmesan and herbs to nestle into the crust.
- Sensory Excellence: From the crackle of the golden crust to the “vibrant green” visual of fresh rosemary and parsley, every sense is engaged.
Essential Elements for a Show-Stopping Bread
Bread Flour (500g / approx. 4 cups): Unlike all-purpose flour, bread flour has a higher protein content, which is essential for developing the gluten structure needed to support a braided shape without losing its height.
Active Dry Yeast (7g / 2 ¼ tsp): This is the engine of your loaf. Ensure your water is between 105°F and 115°F (40°C-46°C) to wake the yeast without killing it.
Warm Water (300ml / 1 ¼ cups): Foundational hydration. Using filtered water can sometimes help the yeast bloom more consistently if your tap water is heavily chlorinated.
Granulated Sugar (15g / 1 tbsp): While it adds a hint of sweetness, its primary role is to feed the yeast, accelerating the fermentation process for a faster rise.
Olive Oil (30ml / 2 tbsp): Adding fat to the dough interferes with gluten strands just enough to ensure the final crumb is soft and tender rather than chewy like a baguette.
Fine Sea Salt (10g / 2 tsp): Salt is a flavor enhancer, but it also regulates yeast activity, preventing the dough from rising too quickly and becoming structurally weak.
Roasted Garlic (1 whole head): Slow-roasting garlic transforms pungent cloves into a buttery, sweet paste that serves as the base for our glistening herb coating.
Unsalted Butter (115g / ½ cup): This is melted and infused with herbs to create that “glistening golden” look seen in our visual blueprint.
Fresh Parsley & Rosemary (30g / 2-3 tbsp each): Use fresh herbs only. The “vibrant green” specks against the golden crust are a hallmark of this recipe’s aesthetic.
Grated Parmesan Cheese (50g / ½ cup): Grate your own from a wedge for the best melting properties. Pre-shredded cheese is often coated in starch which prevents it from bonding beautifully to the crust.
Flaky Sea Salt (for topping): This adds a final crystalline crunch and pops of flavor that contrast the richness of the butter.
The Tools of the Trade
To achieve that professional “handheld smartphone photo” aesthetic, you’ll need a few key tools. A sturdy stand mixer with a dough hook will save your arms during the 8-minute knead. A digital kitchen scale is highly recommended for precision, as flour volume can vary wildly by how it is scooped.
You will also need a sharp bench scraper to divide your dough into three perfectly even strands for the braid. A pastry brush is non-negotiable for achieving that glistening, even coat of herb butter that defines this garlic parmesan herb loaf.
Step-By-Step: Engineering the Perfect Artisan Braid
Step 1: The Fermentation Foundation
In the bowl of your stand mixer, combine the warm water, sugar, and yeast. Let it sit for about 5-10 minutes until it becomes foamy and smells slightly nutty. This “bloom” is your insurance policy that the yeast is alive and ready to work.
Step 2: Mixing and Kneading for Structure
Add the olive oil, sea salt, and half of the bread flour. Start the mixer on low, gradually adding the remaining flour. Increase the speed to medium and knead for 7-8 minutes. You are looking for the “windowpane test”—the dough should be smooth, elastic, and able to be stretched thin enough to see light through it without tearing.
Step 3: The First Rise
Place the dough in a lightly oiled bowl, cover with a damp cloth, and let it rise in a warm, draft-free spot. After about 60-90 minutes, the dough should have doubled in size. It should look puffy and feel full of air when lightly poked.
Step 4: Preparing the Roasted Garlic Herb Infusion
While the dough rises, mash your roasted garlic cloves into a smooth paste. Melt the butter in a small saucepan and stir in the garlic paste, half of the chopped parsley, and half of the minced rosemary. The aroma should be intensely savory. Set this aside to cool slightly so it doesn’t melt the dough during application.
Step 5: Dividing and Braiding
Punch down the risen dough to release excess gas. Turn it onto a lightly floured surface and divide into three equal portions. Roll each portion into a long rope, roughly 15 inches (38cm) in length. Pinch the three ropes together at one end and tuck them under. Perform a standard three-strand braid, keeping the tension consistent but not too tight, as the dough needs room to expand. Pinch and tuck the other end.
Step 6: The Final Proof and Topping
Place the braided loaf on a parchment-lined baking sheet. Cover and let rise for another 30-45 minutes. Brush the loaf generously with the garlic butter. Sprinkle the grated parmesan cheese and the remaining fresh herbs over the top, ensuring the “toasted parmesan flakes” have plenty of surface area to brown.
Step 7: The Bake
Preheat your oven to 375°F (190°C). Bake the loaf for 25-30 minutes. Look for a “golden brown crust” that sounds hollow when tapped on the bottom. The cheese should be bubbling and slightly browned. Immediately after removing from the oven, brush with any remaining garlic butter for that signature glistening finish.
Expert Tips for a Flawless Loaf
- Don’t Rush the Rise: Temperature affects yeast. If your kitchen is cold, the rise might take longer. Use your oven with just the light on as a DIY proofing box.
- The Flour Factor: If the dough is too sticky to handle, add flour one tablespoon at a time. It should be tacky but not cling to your fingers.
- Herb Freshness: If you don’t have fresh rosemary, use thyme or oregano. Avoid dried herbs for the topping as they can burn and become bitter in the high heat of the oven.
- Steam for Crust: For an even more artisan crust, place a shallow pan of water on the bottom rack of the oven during the first 10 minutes of baking.
Maximizing Your Garlic Parmesan Herb Loaf Experience
This bread is a versatile beast. While it’s perfect on its own, it truly shines when paired with hearty dishes. The soft interior crumb is designed for mopping up sauces and gravies.
Consider serving a thick, steaming slice alongside creamy beef stroganoff or use it to scoop up a hot spinach artichoke dip. If you’re looking for a full meal, it complements slow cooker chicken thighs beautifully, providing a textural contrast to the tender meat.
For a lighter pairing, a slice of this garlic parmesan herb loaf works wonders with a crisp salad or as a side to honey balsamic brussels sprouts.
Frequently Asked Questions
Absolutely! Use the ‘Dough’ setting to mix and first-proof. Once done, remove it, braid by hand, and follow the remaining steps for the second rise and bake.
Yes, but the loaf will be slightly less chewy and might not hold its braided shape as prominently. Bread flour’s higher protein content is ideal for structure.
The secret is a double-brushing technique. Brush with herb butter before baking for flavor infusion and again immediately after baking for that glossy shine.
Cut the top off a garlic head, drizzle with olive oil, wrap in foil, and bake at 400°F (200°C) for 40 minutes until the cloves are soft and caramelized.
The most common reasons are expired yeast or water that was too hot (killing the yeast) or too cold (not activating it). Ensure water is 105-115°F.
The Ultimate Garlic Parmesan Herb Loaf Recipe
Garlic Parmesan Herb Loaf: The Ultimate Braided Artisan Bread
Ingredients
Equipment
Method
- Combine warm water, sugar, and yeast in a mixer bowl. Let stand for 10 minutes until foamy.
- Add olive oil, salt, and flour. Knead with a dough hook for 7-8 minutes until smooth and elastic.
- Place in an oiled bowl, cover, and let rise for 60-90 minutes until doubled.
- Divide dough into three ropes. Braid them together on a baking sheet, pinching ends to secure.
- Cover and let rise for 45 minutes while preheating oven to 375°F (190°C).
- Brush with half of the garlic-herb butter and sprinkle with parmesan. Bake for 25-30 minutes until golden brown.
- Brush with remaining butter and sprinkle with flaky sea salt while hot.
Notes
If the crust is browning too quickly, tent with foil for the last 10 minutes.
Storage and Reheating Advice
This bread is best enjoyed fresh and steaming, but it does store well. Keep it in an airtight bag at room temperature for up to 2 days. For longer storage, wrap it tightly in foil and then a freezer bag; it will stay fresh for up to 3 months.
To reheat and restore that “glistening” look, wrap the loaf in foil and bake at 350°F (175°C) for 10 minutes. For a single slice, a quick 15 seconds in the microwave followed by a brief toast in a pan with a little butter works wonders.
Join the Wholesome Skillet Community!
Did you make this garlic parmesan herb loaf? We want to see your beautiful braids! Tag us on social media and follow our journey for more artisan baking tips. If you loved this recipe, please leave a comment below and share it with your fellow bread lovers on Pinterest. Your feedback helps our community grow and thrive!