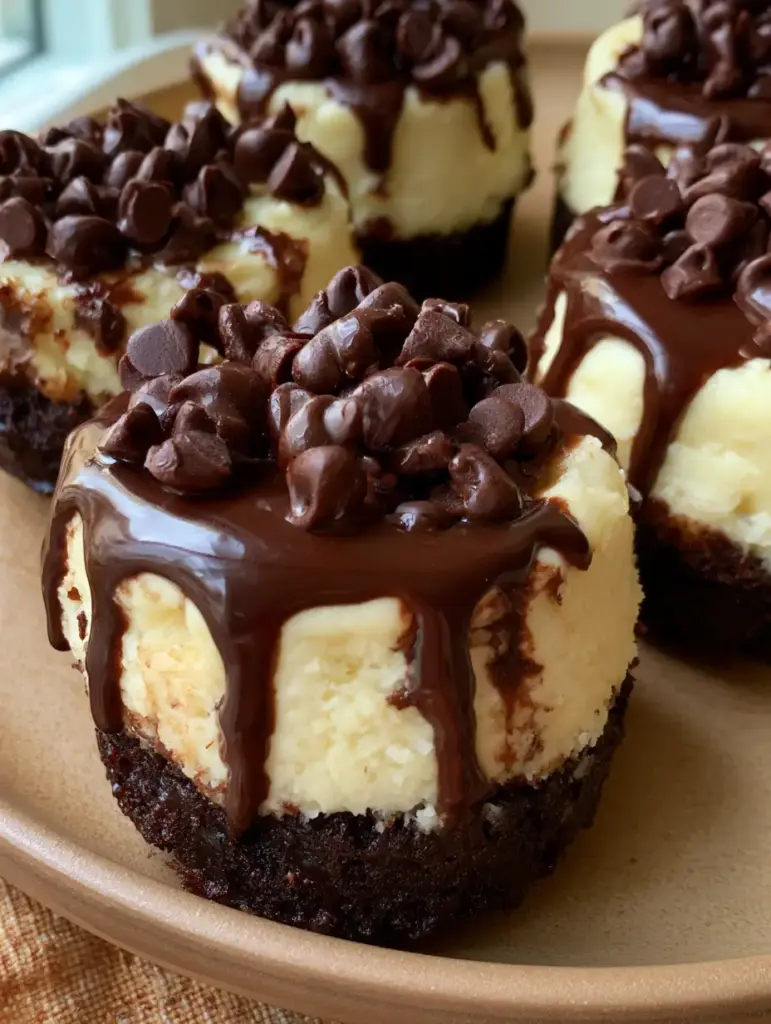
When you cannot decide between the chewy, fudgy satisfaction of a brownie and the silky, tangy elegance of a cheesecake, the answer is simple: combine them into brownie bottom cheesecakes. This recipe creates a stunning high-contrast dessert that looks as though it stepped right out of a high-end pâtisserie window. Every bite delivers a dense dark chocolate foundation followed by a light-as-air cheesecake center, topped with a professional-grade ganache drip.
Achieving that perfect “handheld smartphone photo” aesthetic requires more than just luck; it requires specific culinary techniques. From the way we layer the batter to the temperature of the chocolate chips, every detail contributes to the final masterpiece. These bite-sized treats are designed to be the focal point of any modern ceramic plate, offering a sophisticated flavor profile that satisfies the most intense chocolate cravings.
Whether you are hosting a formal dinner party or looking for the ultimate weekend baking project, these mini cheesecakes provide a reliable, impressive result. The dark chocolate brownie provides a sturdy, moist base that perfectly supports the creamy white cheesecake layer. With natural side lighting and a little patience during the cooling process, your kitchen will yield results that look exactly like professional food photography.
Why You’ll Obsess Over These Fudgy Cheesecake Bites
- The Perfect Texture Contrast: You get the dense, fudgy bite of a dark chocolate brownie followed immediately by the smooth, melt-in-your-mouth creaminess of baked cheesecake.
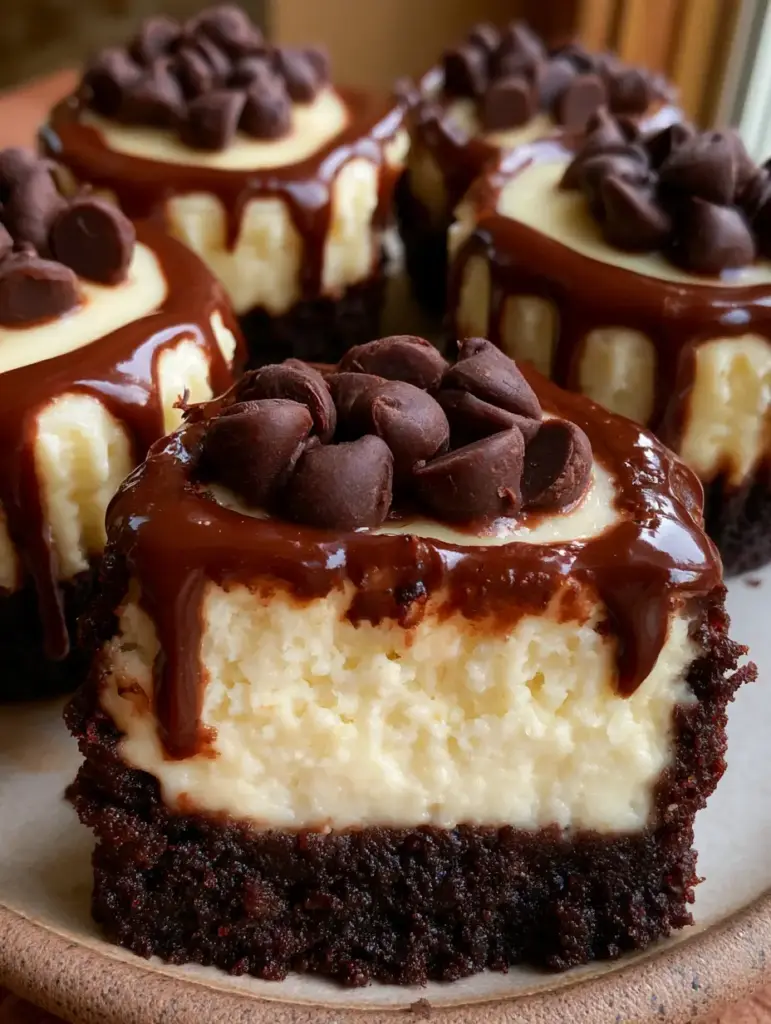
- Visual High-Contrast Layers: The stark white cheesecake resting on the deep, dark brownie base creates a professional-looking “stack” that is naturally photogenic.
- Glossy Ganache Finish: A thick, shiny chocolate drip provides that “wow” factor and a rich mouthfeel that balances the tanginess of the cream cheese.
- Bite-Sized Portability: These are ideal for gatherings, allowing guests to enjoy a decadent dessert without the need for a fork and knife.
- Customizable Garnishes: While we use semi-sweet chocolate chips for that classic look, the blueprint allows for endless variations once you master the base.
Decoding the Ingredients for a Fudgy and Creamy Masterpiece
Creating the ultimate brownie bottom cheesecakes requires a balance of fats, proteins, and sugars. Each ingredient serves a specific structural purpose to ensure the layers don’t bleed into each other during the baking process.
The Brownie Base Essentials:
Unsalted Butter (1/2 cup / 115g): We melt the butter to create a dense, fudgy texture rather than a cakey one. Butter provides the essential fat that carries the chocolate flavor across your palate.
Granulated Sugar (1 cup / 200g): Sugar isn’t just for sweetness; it breaks down during the melting process to create that signature crackly brownie top and keeps the base moist.
Unsweetened Cocoa Powder (1/2 cup / 45g): Using a high-quality Dutch-processed cocoa ensures a deep, dark color that provides the visual contrast against the white cheesecake.
Large Egg (1 unit): A single egg acts as the binder for our brownie base, providing just enough structure to hold the cheesecake layer without rising too much.
All-Purpose Flour (1/2 cup / 65g): We keep the flour content low to ensure the brownie remains fudgy and dense, rather than light and airy.
The Creamy Cheesecake Layer:
Full-Fat Cream Cheese (8 oz / 226g): It is imperative to use block cream cheese at room temperature. This ensures a “perfectly smooth creamy white” center without any lumps.
Granulated Sugar (1/4 cup / 50g): We use a smaller amount here to allow the tanginess of the cheese to shine through and contrast with the sweet brownie.
Sour Cream (2 tbsp / 30g): Sour cream adds a subtle acidity and a silkier texture to the cheesecake layer, preventing it from becoming too heavy.
The Finishing Touches:
Semi-Sweet Chocolate Chips (1/2 cup / 90g): These provide a textural pop on top of the ganache and reinforce the “high-quality” visual aesthetic described in our blueprint.
Heavy Cream (1/4 cup / 60ml): When combined with dark chocolate, heavy cream creates the “glossy chocolate ganache” that drips perfectly down the sides of the mini bites.
Essential Tools for Achieving Perfect High-Contrast Layers
To replicate the “modern ceramic plate” presentation, you need the right equipment to ensure clean edges and even layers. A standard 12-cup muffin tin is the foundation for these mini brownie bottom cheesecakes.
Paper liners are recommended for easy removal, but if you want that “naked” look seen in handheld smartphone photos, use a silicone muffin pan or grease your metal tin exceptionally well. A small offset spatula is your best friend for smoothing out the cheesecake layer to achieve that “perfectly smooth” surface.
Finally, a piping bag or a simple sandwich bag with the corner snipped off is essential for the ganache drizzle. This gives you the control needed to create the “thick glossy chocolate ganache dripping down the sides” without making a mess of the plate.
Mastering the Fudgy Dark Chocolate Brownie Base
The secret to a successful brownie bottom cheesecake is partially baking the base. If you pour the cheesecake batter directly onto raw brownie batter, the layers will swirl together, ruining the high-contrast look we are aiming for.
Start by whisking your melted butter and sugar until well combined. Incorporate the egg and a splash of vanilla, then gently fold in your cocoa powder, flour, and a pinch of salt. You are looking for a thick, dark, and glossy batter.
Distribute about 1.5 tablespoons of brownie batter into each cavity of your muffin tin. Bake at 350°F (175°C) for just 8-10 minutes. The edges should be set, but the center should still be slightly soft. This creates the “dense fudgy dark chocolate” foundation that won’t dry out during the second bake.
Whisking the Silky Smooth Cheesecake Layer
While the brownie bases are having their first stint in the oven, prepare the cheesecake filling. The most important rule: do not overbeat the mixture once the egg is added. Overbeating introduces air bubbles, which can cause the cheesecake to crack or puff up like a soufflé.
Beat the room-temperature cream cheese and sugar until completely smooth. Scrape down the sides of the bowl frequently. Add the sour cream and vanilla, mixing until just combined. Finally, fold in the egg by hand or on the lowest mixer setting.
Spoon the creamy white mixture over the pre-baked brownie bases. Smooth the tops with the back of a spoon or an offset spatula. Lower the oven temperature to 325°F (160°C) to ensure the cheesecake bakes gently, maintaining its pristine white color without browning.
The Art of the Glossy Ganache Drizzle
Once the cheesecakes have baked and cooled completely in the refrigerator (at least 4 hours, but preferably overnight), it is time for the ganache. This is what provides that “glossy” finish mentioned in the blueprint.
Heat your heavy cream until it just begins to simmer—do not let it boil. Pour the hot cream over finely chopped dark chocolate or mini chips. Let it sit for 5 minutes, then whisk gently from the center outward until a thick, shiny emulsion forms.
Wait for the ganache to cool slightly so it thickens. If it’s too hot, it will run off the cheesecake; if it’s too cold, it won’t drip. Aim for a consistency similar to warm honey. Drizzle it over the center of each cheesecake, allowing it to move naturally toward the edges. Top immediately with semi-sweet chocolate chips so they adhere to the wet ganache.
Visual Cues: How to Know When Your Cheesecakes are Perfect
Baking is a sensory experience. To achieve the results seen in high-resolution food photography, look for these specific cues:
- The Brownie Base: It should look “dense” and “fudgy.” If the edges are pulling away from the liner too much, it’s overbaked.
- The Cheesecake Center: Look for a “slight jiggle” in the very center when you tap the side of the pan. The edges should be set but the top should remain “perfectly smooth and creamy white.”
- The Ganache: It should be “glossy” and reflect the natural side lighting from your window. If it looks dull, it likely seized or the cream wasn’t fatty enough.
- The Chocolate Chips: These should look like “high-quality” additions, not melted blobs. Add them only when the ganache has cooled enough to hold them but is still wet enough to stick.
Preserving the Freshness of Your Cheesecake Bites
Because of the dairy content in the cheesecake and the ganache, these brownie bottom cheesecakes must be stored in the refrigerator. Place them in an airtight container to prevent them from absorbing any fridge odors.
They will stay fresh and delicious for up to 5 days. For the best texture, let them sit at room temperature for about 15 minutes before serving. This allows the brownie base to soften slightly while keeping the cheesecake layer cool and refreshing.
If you wish to freeze them, do so without the ganache and chocolate chips. Wrap each mini cheesecake tightly in plastic wrap and store in a freezer bag for up to 3 months. Thaw in the refrigerator overnight before adding the fresh ganache drizzle.
Complementary Flavors: What to Serve Alongside These Bites
These brownie bottom cheesecakes are quite rich, so they pair beautifully with contrasting flavors. If you are hosting a dessert bar, consider serving them alongside something fruity or salty.
For a complete dessert spread, you might also like these cinnamon sugar twists for a bit of crunch. If you want to lean further into the cheesecake theme, my banana pudding cheesecake offers a lighter, fruit-forward alternative.
To satisfy the ultimate chocoholic, serve these bites with a side of extra chocolate whipped frosting for dipping, or pair them with a slice of dark chocolate layer cake for a truly decadent chocolate tasting event.
Frequently Asked Questions
Yes, you can use a boxed mix, but ensure you only fill the muffin cups about 1/3 full and pre-bake it for 8-10 minutes to ensure it’s sturdy enough to support the cheesecake.
While a muffin tin is best for mini bites, you can make this in an 8×8 inch square pan. You will need to increase the baking time for both the brownie base and the cheesecake layer.
Let the ganache cool until it reaches a honey-like consistency. If it’s too thin, it will run; if it’s too thick, it won’t move. Test a small amount on the edge of one cheesecake first.
Cracking is usually caused by overbeating the eggs, which incorporates too much air, or by overbaking. Ensure your ingredients are room temperature and bake just until the center has a slight jiggle.
Low-fat or spreadable cream cheese contains more water and stabilizers, which can prevent the cheesecake from setting properly and lead to a grainy texture.
The Ultimate Recipe for Mini Brownie Bottom Cheesecakes
Ready to create these high-contrast, fudgy delights? Follow the detailed measurements and steps below to ensure your brownie bottom cheesecakes turn out perfectly every single time.
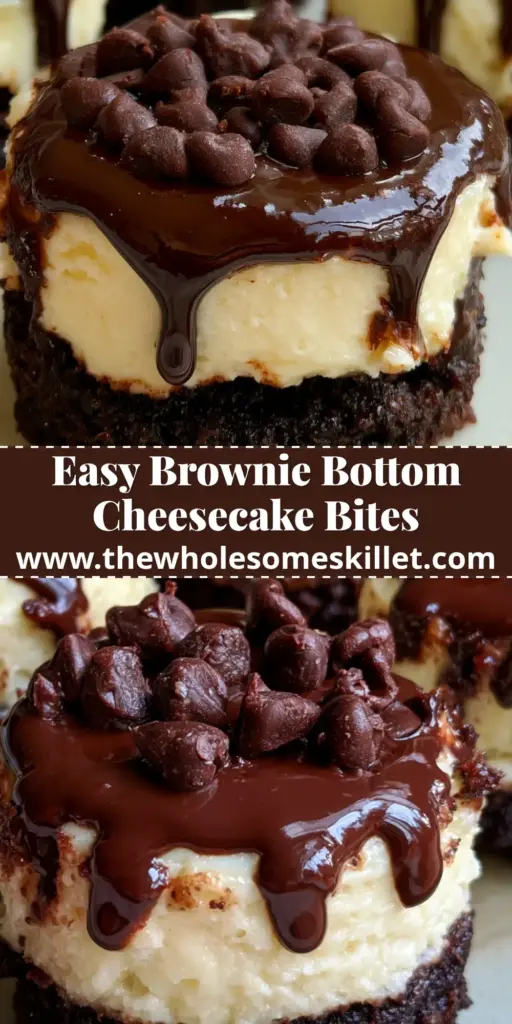
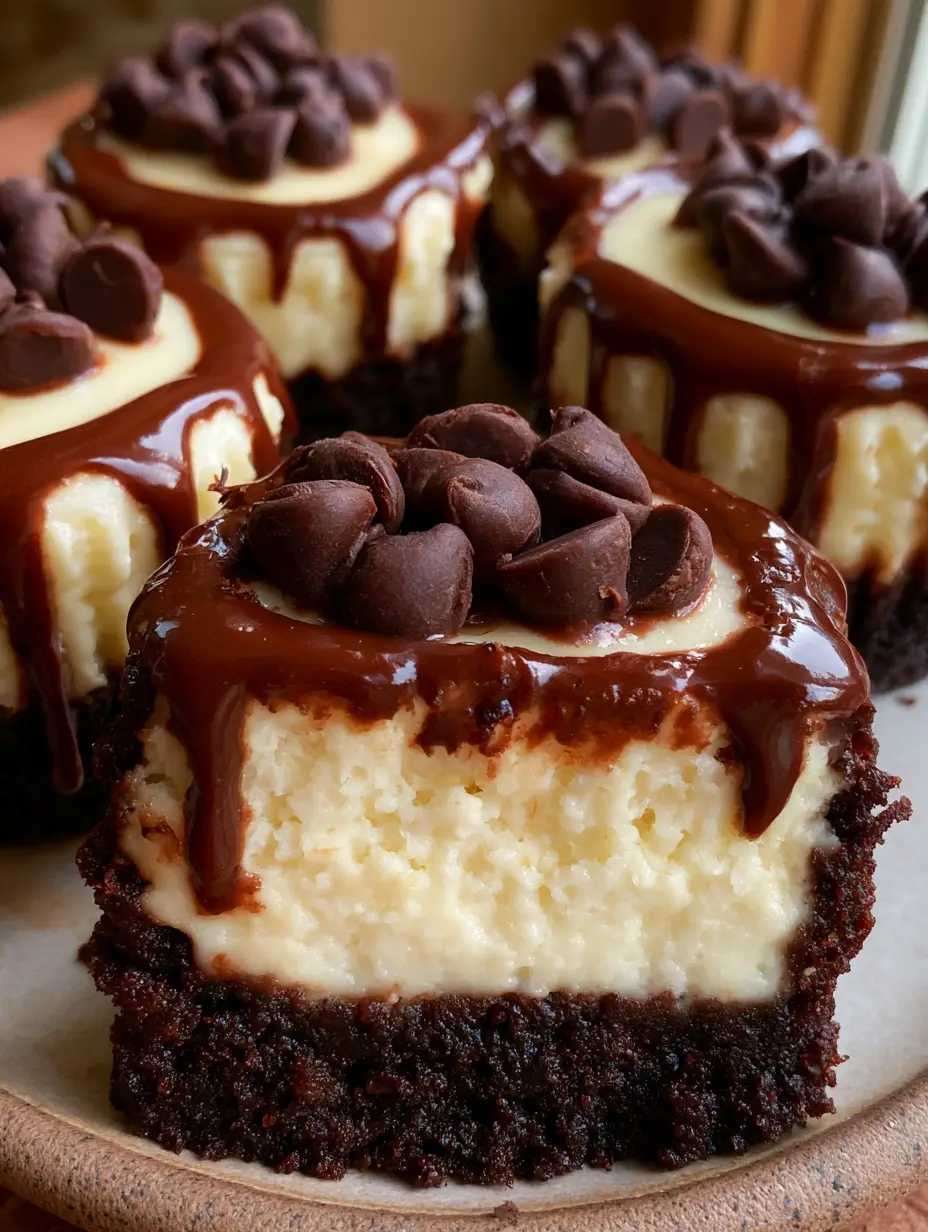
Brownie Bottom Cheesecakes with Glossy Dark Chocolate Ganache
Ingredients
Equipment
Method
- Preheat oven to 350°F (175°C). Whisk melted butter and 1 cup sugar. Add 1 egg and mix until combined.
- Fold in cocoa powder and flour until just combined. Distribute into 12 muffin cups.
- Bake for 8-10 minutes. Remove and let cool while preparing cheesecake.
- Lower oven to 325°F (160°C). Beat cream cheese and 1/4 cup sugar until smooth. Mix in sour cream.
- Gently fold in the remaining egg until just incorporated. Do not overmix.
- Spoon over brownie base. Bake for 15-18 minutes until edges are set but center jiggles slightly.
- Heat heavy cream and pour over chocolate chips. Let sit for 5 minutes, then stir until glossy.
- Drizzle over chilled cheesecakes and top with semi-sweet chocolate chips.
Notes
Chill the cheesecakes for at least 4 hours before adding the ganache for the best drip effect.
Closing & Call to Action
These brownie bottom cheesecakes are the ultimate fusion of two world-class desserts. With their fudgy dark chocolate base and silky white cheesecake top, they are guaranteed to be the star of your next event. The glossy ganache and chocolate chip finish provide the perfect professional touch that will have everyone asking for the recipe.
If you enjoyed making these, please leave a comment below and let me know how they turned out! Don’t forget to snap a photo and share it on Pinterest so others can see your beautiful creation. For more indulgent recipes and baking tips, be sure to sign up for our newsletter!