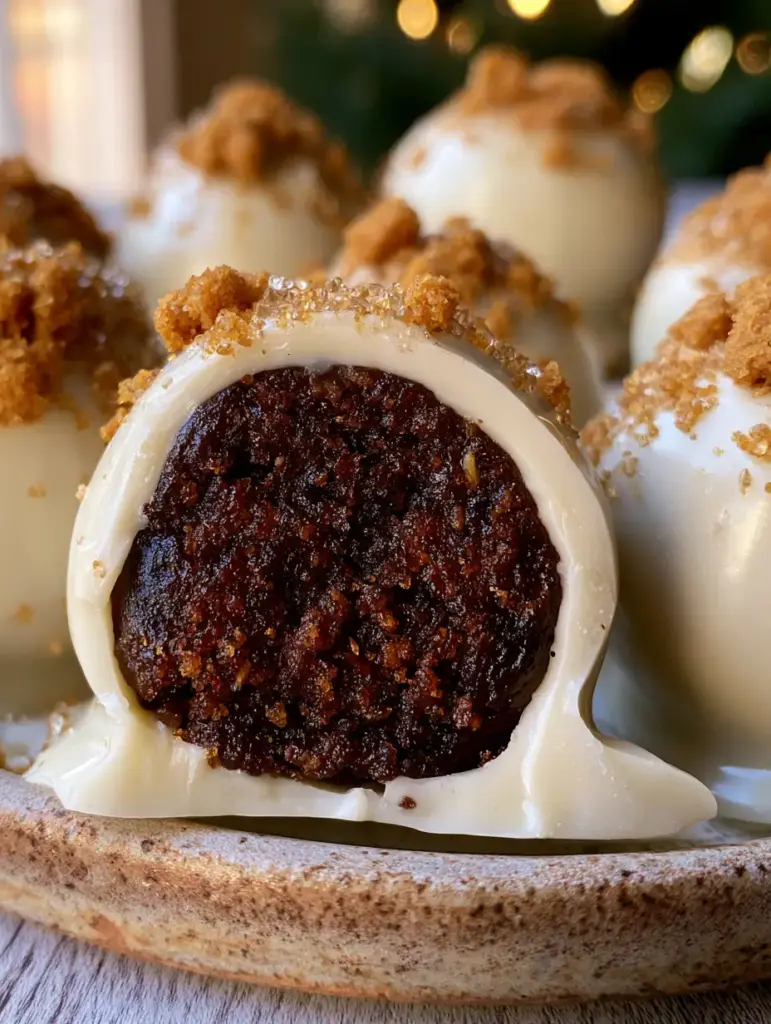
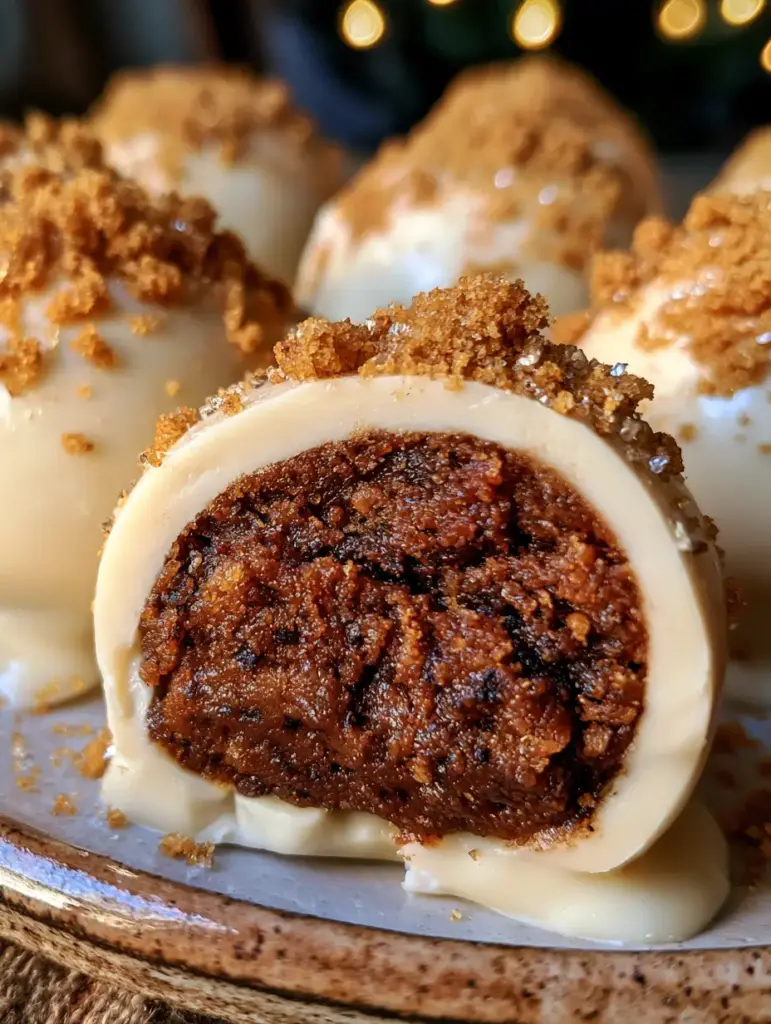
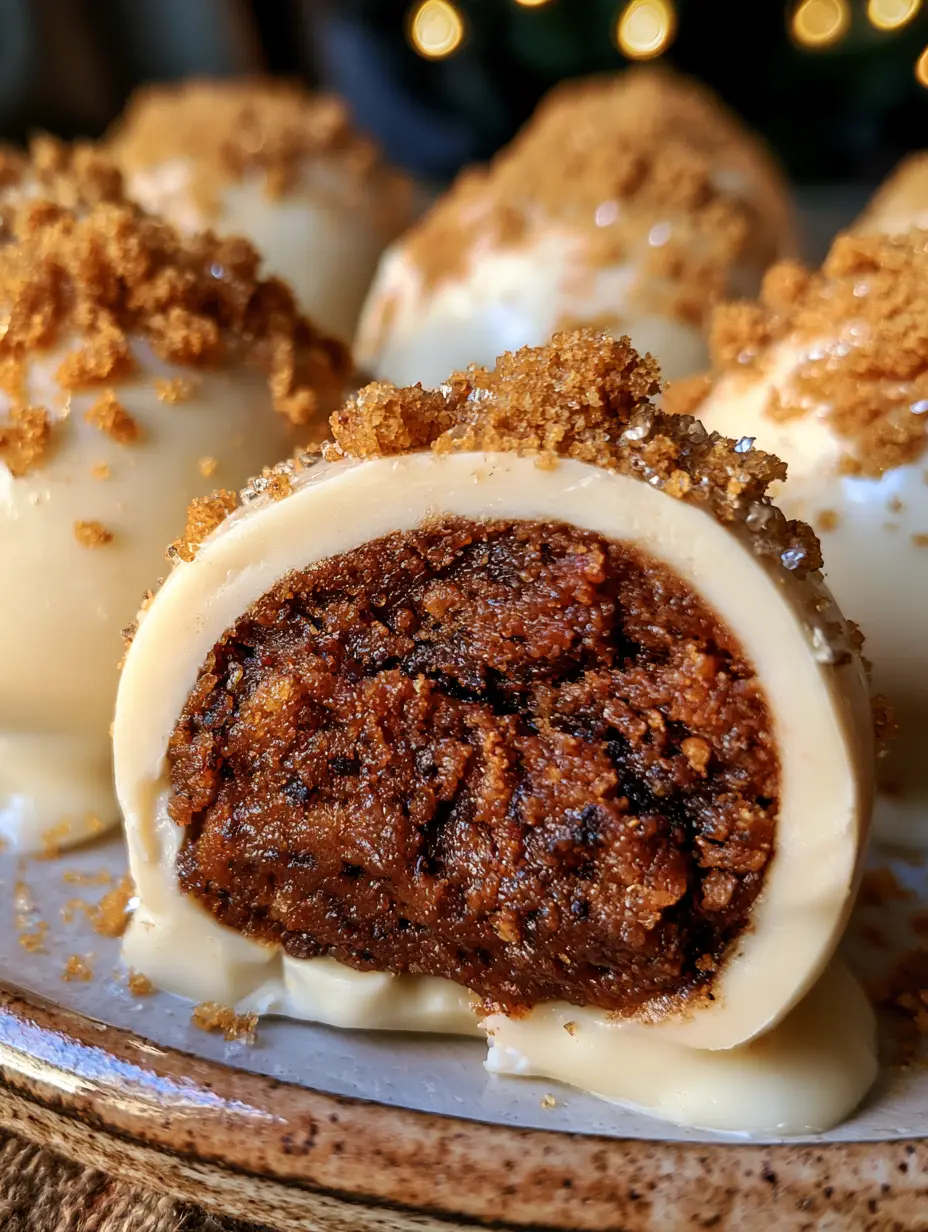
There is nothing quite like the first bite of a decadent gingerbread truffles morsel during the height of the holiday season. Imagine a thick, glossy shell of white chocolate that snaps under your teeth to reveal a moist, dark, and intensely chewy gingerbread center.
This handheld smartphone photo of our latest batch captures the rustic elegance of these treats, served on a ceramic plate with the soft bokeh of a Christmas tree shimmering in the background. The warm morning light hits the tiny sparkling sugar crystals, making them look like fallen snow against the golden cookie crumbs.
Whether you are looking for a show-stopping addition to your cookie exchange or a simple no-bake dessert that tastes like a professional bakery creation, these truffles are the answer. They perfectly encapsulate the warm spices of winter in a bite-sized package that is as beautiful as it is delicious.
Why You Will Fall in Love With These Spiced Holiday Gems
- The Perfect Snap: A thick layer of melted white chocolate provides a satisfying structural contrast to the soft interior.
- Moist, Dark Center: Thanks to the addition of molasses, the center stays chewy and develops a deep, rich color with visible spice flecks.
- Effortless Elegance: Topped with sparkling sugar pearls and cookie dust, these look like high-end confections with minimal effort.
- No-Bake Simplicity: Achieve gourmet results without ever turning on your oven, perfect for busy holiday schedules.
The Essential Components for Perfect Gingerbread Truffles
Creating the perfect truffle requires a balance of moisture, spice, and structure. Each ingredient in this list serves a specific culinary purpose to ensure your gingerbread truffles have the exact texture shown in our visual blueprint.
The Foundational Dry Ingredients
Gingerbread Cookie Crumbs: 2 cups (200g) of finely crushed cookies act as the base of our truffle dough. These provide the essential structure and the initial layer of toasted ginger flavor.
Warm Spice Blend: A combination of 1/2 tsp (1.5g) ground cinnamon, 1/2 tsp (1g) ground ginger, and 1/4 tsp (0.5g) ground nutmeg. These ground spices create the “visible spice flecks” mentioned in our recipe blueprint, ensuring every bite is aromatic.
Sparkling Sugar Pearls: 1 tbsp (15g) of these tiny crystals adds a festive crunch and a shimmering visual appeal. They catch the light beautifully, providing that “holiday magic” look.
The Binding & Flavor Agents
Full-Fat Cream Cheese: 4 oz (115g) of softened cream cheese acts as the primary binder. It provides the creamy mouthfeel and a slight tang that balances the sweetness of the white chocolate.
Unsulfured Molasses: 1 tbsp (15ml) of dark molasses is the secret to the “dark, chewy center.” It adds moisture, a deep amber color, and that iconic old-fashioned gingerbread depth.
Vanilla Extract: 1 tsp (5ml) of high-quality vanilla enhances the floral notes of the white chocolate and rounds out the sharp edges of the ginger.
The Glossy Exterior
High-Quality White Chocolate: 8 oz (225g) of chopped white chocolate or high-end melting wafers. This creates the thick, smooth, glossy exterior that gives the truffles their professional finish.
Refined Coconut Oil: 1 tsp (5ml) mixed into the melted chocolate. This “invisible” ingredient ensures the chocolate is fluid enough for a smooth dip and gives the shell a slightly softer bite so it doesn’t shatter completely when you eat it.
Must-Have Tools for Truffle Success
To achieve the professional macro-shot look of these truffles, a few specific tools will make your life much easier. You don’t need a commercial kitchen, but these basics ensure consistency.
A food processor is the most efficient way to get “finely ground” crumbs that blend seamlessly with the cream cheese. If you don’t have one, a heavy rolling pin and a sealed freezer bag will work for a more rustic texture.
A small cookie scoop (about 1 tablespoon capacity) is vital for ensuring every truffle is uniform in size. This ensures they all chill at the same rate and look uniform on your rustic ceramic serving plate.
Crafting the Dark and Chewy Gingerbread Center
The magic of these gingerbread truffles lies in the contrast between the pale exterior and the dark, spiced heart. Follow these steps to ensure the perfect texture.
Step 1: Pulverizing the Cookies
Place your gingerbread cookies into a food processor and pulse until they reach the consistency of fine sand. You want to avoid large chunks, as these will make the truffles crumble when you try to roll them.
If you enjoy a bit of varied texture, you can reserve a tablespoon of coarser crumbs to sprinkle on top later. Set aside about 2 tablespoons (15g) of the finest dust specifically for the final garnish.
Step 2: Mixing the Spiced Dough
In a large mixing bowl, beat the softened cream cheese until smooth and lump-free. Add the molasses, cinnamon, ginger, nutmeg, and vanilla, mixing until the color is a uniform deep brown.
Fold in the cookie crumbs. The mixture should be thick, moist, and hold its shape when squeezed. If it feels too soft, chill the bowl for 15 minutes before attempting to roll the balls.
Step 3: Shaping and Chilling
Scoop rounded tablespoons of the mixture and roll them between your palms to form smooth spheres. Place them on a parchment-lined baking sheet.
Crucial Tip: Chill the rolled centers for at least 30 minutes in the refrigerator or 15 minutes in the freezer. Cold centers are much easier to dip in warm chocolate without melting or losing their shape.
Achieving the Perfect White Chocolate Coating
The visual appeal of these gingerbread truffles depends on that “thick, smooth layer of glossy white chocolate.” White chocolate can be finicky, so temperature control is key.
Melting for Maximum Gloss
Melt your white chocolate and coconut oil in 30-second intervals in the microwave, stirring vigorously between each. White chocolate burns at a lower temperature than dark chocolate, so be patient.
Once smooth, let the chocolate sit for 2 minutes to cool slightly. If the chocolate is too hot, it will run off the truffle and leave a thin, transparent coating rather than the opaque white finish we want.
The Dipping Technique
Use a fork or a specialized dipping tool to submerge each chilled gingerbread ball into the chocolate. Lift it out and tap the fork gently against the side of the bowl to let excess chocolate drip off.
Slide the truffle back onto the parchment paper. While the chocolate is still wet, immediately garnish with a pinch of reserved cookie crumbs and a few sparkling sugar pearls.
Expert Tips for Bakery-Quality Truffles
- Room Temp Cream Cheese: Ensure your cream cheese is truly at room temperature. If it is cold, you will end up with tiny white lumps in your dark gingerbread center.
- The Double Dip: If you want an extra-thick shell like the one seen in our macro photo, let the first coat set completely, then dip a second time.
- Sifting the Spices: Sift your cinnamon and ginger into the cream cheese to prevent “spice clumps” and ensure those beautiful flecks are evenly distributed.
- Cleaning the Base: If your chocolate pools at the bottom of the truffle, use a sharp paring knife to trim the “feet” off once the chocolate has fully hardened.
Serving and Pairing Suggestions
These truffles are a stand-alone star, but they also play well with others. For a full holiday dessert spread, consider serving these alongside a rich pumpkin cheesecake or some raspberry jam cookies for a pop of color.
If you love the flavor profile of these gingerbread truffles, you will absolutely adore our gingerbread latte cupcakes, which use a similar warm spice blend. For a creamy, no-bake alternative, these truffles share many textural qualities with our tiramisu cheesecake.
How to Store Your Holiday Truffles
Because these contain cream cheese, they must be stored in the refrigerator. Place them in an airtight container with layers separated by parchment paper to prevent the chocolate from scuffing.
Refrigerator: They will stay fresh and delicious for up to 7 days. For the best flavor, let them sit at room temperature for 10 minutes before serving so the center softens slightly.
Freezer: You can freeze these for up to 2 months. Thaw them overnight in the refrigerator. Note that extreme temperature changes can sometimes cause the white chocolate to “sweat,” but they will still taste amazing.
Frequently Asked Questions
Absolutely. Flash freeze them on a tray first, then transfer to a freezer-safe bag. They will last for up to 2 months. Thaw in the fridge before serving.
Yes! These are actually better when made a day in advance as the spices have more time to meld. They keep perfectly in the fridge for up to a week.
While the cookie crumbs provide flavor, the molasses is what creates the ‘dark, chewy center’ and deepens the spice profile. It is highly recommended for the best texture.
If the dough is too soft, the cream cheese might have been too warm. Chill the mixture in the refrigerator for 20-30 minutes to firm it up before rolling.
White chocolate is sensitive to heat. Ensure you melt it in short intervals and add a teaspoon of coconut oil to help thin it out and provide that glossy finish.
The Complete Gingerbread Truffles Recipe
Gingerbread Truffles: The Ultimate No-Bake White Chocolate Holiday Treat
Ingredients
Equipment
Method
- Place gingerbread cookies in a food processor and pulse until they become fine crumbs. Reserve 2 tablespoons for topping.
- In a bowl, beat softened cream cheese, molasses, vanilla, and spices until dark and smooth. Fold in cookie crumbs until a thick dough forms.
- Scoop 1-tablespoon portions and roll into smooth balls. Place on parchment paper and chill in the freezer for 15 minutes.
- Melt white chocolate and coconut oil in the microwave in 30-second bursts until glossy and smooth.
- Using a fork, dip each chilled ball into the chocolate, let excess drip off, and return to parchment.
- Immediately top with reserved crumbs and sugar pearls before the chocolate sets.
Notes
If the chocolate is too thick, add an extra half teaspoon of coconut oil to thin it out for a smoother finish.
Bring the Magic of Gingerbread Home
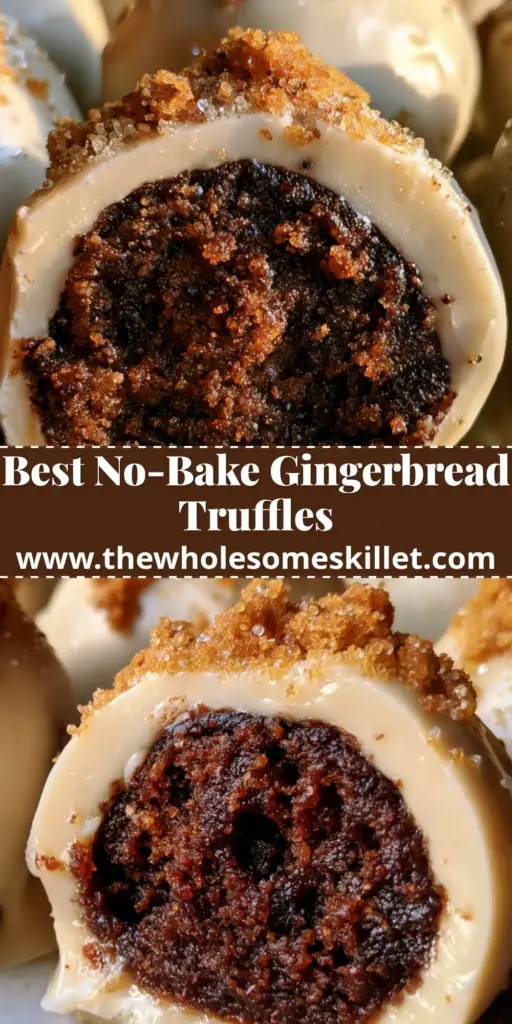
These gingerbread truffles are more than just a sweet treat; they are a festive experience captured in a single bite. The combination of deep molasses, aromatic spices, and velvety white chocolate creates a holiday memory that your family will ask for year after year.
If you enjoyed this recipe, please leave a comment below and tell us how yours turned out! Don’t forget to follow us on Pinterest for more holiday inspiration and share your photos with us. Happy holiday snacking!