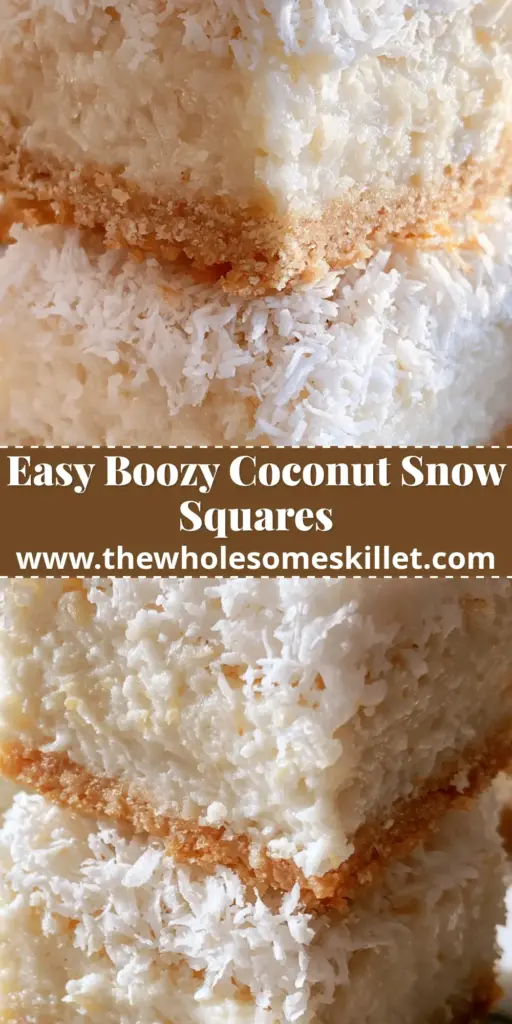
When the holiday season arrives, there is a specific kind of magic we look for in our dessert spreads—a combination of nostalgic comfort and elevated, sophisticated flavor. These coconut snow squares are the embodiment of that festive spirit, offering a stunning visual of “freshly fallen snow” paired with the deep, tropical warmth of dark rum and buttery shortbread. If you have been searching for a treat that looks like a winter wonderland but tastes like a Caribbean getaway, this is the definitive recipe for your repertoire.
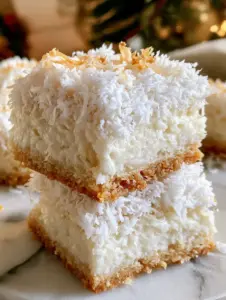
The beauty of these bars lies in their structural integrity and textural contrast. We start with a crisp, golden-brown buttery crust that provides a sturdy foundation for the star of the show: a dense, moist, and incredibly creamy white middle layer. This fudge-like center is infused with premium dark rum, cutting through the sweetness of the coconut cream with a complex, oaky finish. Finally, we crown the squares with a generous coating of fluffy shredded coconut and a scatter of toasted flakes for that essential professional touch.
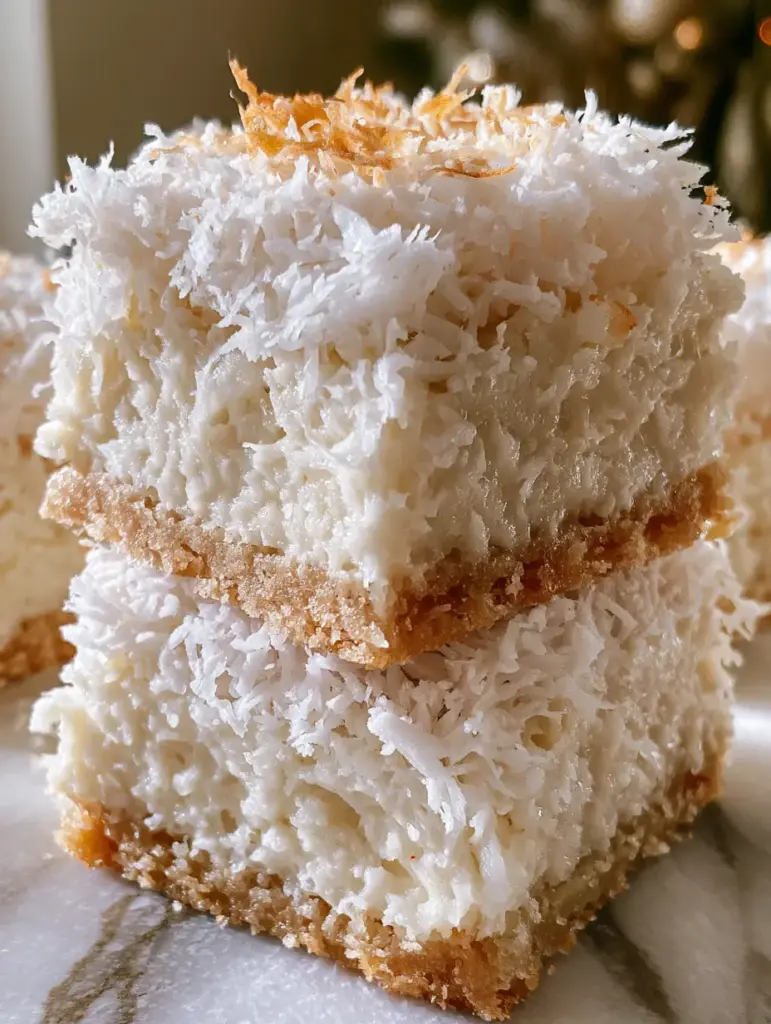
Why These Boozy Coconut Squares Are the Ultimate Crowd-Pleaser
- Textural Perfection: You get the crunch of the golden butter cookie base, the velvet-smooth fudge interior, and the airy finish of the coconut “snow.”
- Sophisticated Flavor Profile: Unlike standard coconut bars, the dark rum infusion adds a “grown-up” depth that pairs beautifully with the rich coconut cream.
- Visual Showstopper: With the bright white topping and the occasional glint of toasted amber flakes, these squares look like they belong in a high-end boutique bakery.
- Make-Ahead Convenience: These bars actually improve with time as the rum flavors meld, making them perfect for busy holiday hosting.
Creating a dessert that mimics the soft, handheld appeal of a smartphone photo requires attention to detail. We aren’t just making a snack; we are building a multi-layered experience. Much like a tiramisu cheesecake, these squares rely on the perfect balance of moisture and structure to ensure clean, sharp edges when sliced on a marble surface.
Essential Ingredients for the Perfect Golden Crust and Creamy Center
Butter Cookie Crumbs: 2 cups (240g). Use high-quality shortbread or butter cookies pulverized into a fine sand to achieve that signature golden-brown, crisp base described in the visual blueprint.
Melted Unsalted Butter: 1/2 cup (115g). This acts as the binder for your crust, ensuring it doesn’t crumble when you lift the square; it provides that rich, “bakery-style” mouthfeel.
Full-Fat Coconut Cream: 1 cup (240ml). Note that this is coconut cream, not milk; it provides the high fat content necessary for a dense, moist middle layer that stays creamy at room temperature.
White Chocolate Chips: 1.5 cups (255g). These provide the “fudge” structure, melting into the coconut cream to create a stable, sliceable white middle.
Dark Rum: 2 tbsp (30ml). A quality aged dark rum adds notes of molasses and spice, elevating the coconut from simple to spectacular.
Unsweetened Shredded Coconut: 2 cups (150g). This is used both inside the fudge for texture and on top to create the fluffy “snow” effect.
Toasted Coconut Flakes: 1/4 cup (15g). Just a few golden-brown flakes are needed to provide the visual contrast seen in the side-lit photography of the blueprint.
Fine Sea Salt: 1/4 tsp (1.5g). A foundational “invisible” ingredient that balances the sweetness and makes the coconut flavor pop.
Must-Have Kitchen Tools for Professional Results
To achieve the “thick, stacked” look from our visual guide, you will need an 8×8 inch (20x20cm) square baking pan. Using a smaller pan ensures the layers are high and impressive rather than thin and flat. A heavy-bottomed saucepan is essential for melting the coconut cream and white chocolate without scorching the delicate fats.
I also highly recommend using parchment paper with a “sling” overhang. This allows you to lift the entire block of coconut snow squares out of the pan once chilled, ensuring you can cut them into perfect, sharp-edged cubes on your marble board without damaging the golden crust. For the topping, a small dry skillet is all you need to achieve those perfectly toasted flakes.
Step-by-Step Guide to Mastering These Tropical Snow Squares
Building the Golden Butter Cookie Foundation
Start by preheating your oven to 350°F (175°C). While these are largely no-bake, a quick 10-minute toast of the crust is the secret to that “crisp, golden-brown” visual confirmed in our blueprint. Mix your finely ground butter cookie crumbs with the melted butter and a pinch of salt until it looks like wet sand.
Press the mixture firmly into the bottom of your lined pan. Use the bottom of a flat measuring cup to pack it down hard. Bake for 8-10 minutes until you smell a rich, nutty aroma and the edges turn a deep amber. Let this cool completely before adding the filling; a warm crust will absorb the moisture from the fudge and lose its crunch.
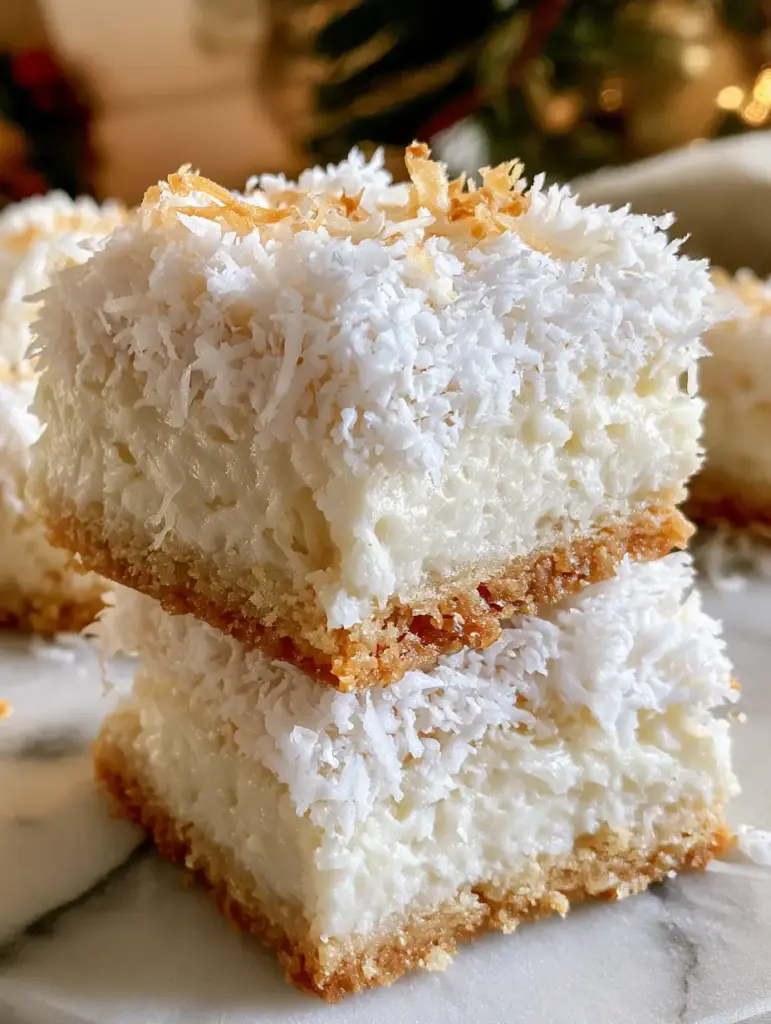
Crafting the Thick Coconut Cream Rum Fudge
In your saucepan over low heat, combine the coconut cream and white chocolate chips. Stir constantly with a silicone spatula. You are looking for a visual cue of a completely smooth, glossy white liquid with no visible chocolate fragments. Once smooth, remove from the heat immediately.
Whisk in the dark rum and the fine sea salt. The smell of the warm rum hitting the coconut cream is one of the best sensory experiences in the kitchen. Fold in 1 cup (75g) of the shredded coconut. This adds the “dense, moist” texture to the middle layer. Pour the mixture over your cooled crust, smoothing the top with an offset spatula.
Applying the Fluffy Snow Topping
While the fudge layer is still tacky, generously coat the top with the remaining shredded coconut. You want it to look “generously coated” and “snow-like,” just like the handheld smartphone photo describes. Press very lightly with your palms to ensure the coconut adheres to the fudge center.
In a small skillet, toast your larger coconut flakes over medium heat for 2-3 minutes. Stay focused—they go from white to burnt in seconds. Sprinkle these golden flakes sparingly over the white snow. The contrast between the matte white shreds and the shiny toasted flakes is what makes the side-lighting in photos really “pop.” Chill the bars for at least 4 hours, or ideally overnight, to set the rum fudge.
Expert Tips for Achieving a Professional Dessert Bar Texture
- Temperature Control: Never boil the coconut cream and white chocolate. High heat can cause the cocoa butter to separate, resulting in a greasy middle layer rather than a creamy one.
- The Rum Factor: If you prefer a non-alcoholic version, replace the dark rum with 1 tsp of rum extract and 1 tbsp of heavy cream to maintain the moisture balance.
- Clean Slicing: For those perfect “stacked” photos, run a large chef’s knife under hot water, wipe it dry, and make one clean downward stroke. Wipe the knife clean between every single cut.
- Coconut Choice: Use unsweetened shredded coconut for the topping. Sweetened coconut is often too moist and sticky, which prevents that “fluffy, snow-like” appearance we are aiming for.
How to Store and Preserve Your Coconut Squares
These coconut snow squares are quite stable due to the white chocolate fudge base. Store them in an airtight container in the refrigerator for up to 7 days. If you are serving them at a party, they can safely sit out at room temperature for 2-3 hours, though they are best enjoyed slightly chilled to maintain the crispness of the butter cookie crust.
For long-term storage, these bars freeze beautifully. Wrap individual squares in plastic wrap and place them in a freezer-safe bag for up to 3 months. Thaw them in the fridge overnight. The “snow” might lose a tiny bit of its fluffiness after freezing, but a quick dusting of fresh coconut before serving will revive the visual appeal.
Best Pairings for Your Boozy Coconut Treats
To lean into the tropical vibes, serve these squares alongside a bowl of mango sticky rice rolls for a texture-rich dessert platter. If you are hosting a holiday brunch, the rich coconut flavors complement the tartness of a cheesecake fruit salad perfectly.
For a drink pairing, a dark roast coffee or a glass of aged rum on the rocks mirrors the infusion in the fudge. If you want to double down on the coconut theme, try serving them with a small portion of creamy coconut rice pudding for a sophisticated “Coconut Two Ways” dessert course.
Frequently Asked Questions
Yes! Simply replace the dark rum with 1 teaspoon of rum extract and 1 tablespoon of heavy cream to maintain the correct consistency of the fudge layer.
While technically no-bake if you use pre-set crumbs, baking the crust for 10 minutes at 350°F (175°C) is highly recommended to achieve the crisp, golden-brown texture seen in the photos.
In an airtight container in the refrigerator, these squares stay fresh and delicious for up to 7 days.
Use a warm, sharp knife and wipe it completely clean between every slice. This prevents the white coconut fudge from smearing over the golden crust.
This usually happens if the coconut cream wasn’t high-fat or if the white chocolate ratio was too low. Ensure you use canned coconut cream (not milk) and chill the bars for at least 4 hours.
Recipe: Handheld Rum-Infused Coconut Snow Squares
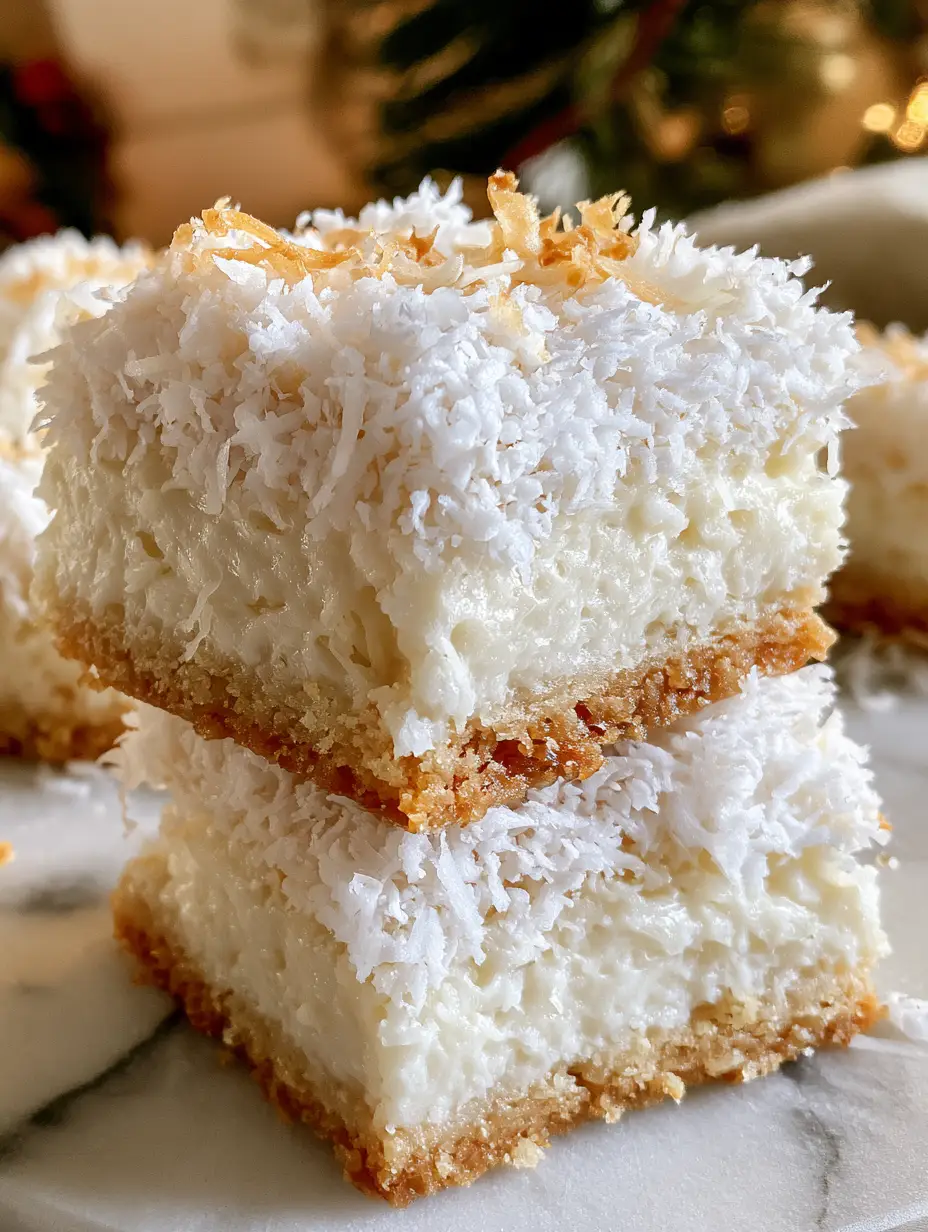
Coconut Snow Squares with Dark Rum and a Golden Butter Cookie Crust
Ingredients
Equipment
Method
- Combine butter cookie crumbs, melted butter, and salt until it resembles wet sand.
- Press firmly into an 8x8 pan and bake at 350°F (175°C) for 10 minutes until golden brown. Cool completely.
- In a saucepan over low heat, melt white chocolate chips and coconut cream until smooth and glossy.
- Remove from heat. Whisk in dark rum, then fold in 1 cup of shredded coconut.
- Pour over the cooled crust and smooth the top.
- Generously coat the top with the remaining shredded coconut while the fudge is still warm.
- Sprinkle toasted coconut flakes over the top. Chill for at least 4 hours before slicing.
Notes
For clean cuts, wipe the knife with a hot, damp cloth between each slice.
Share Your Snowy Creations!
These coconut snow squares are more than just a recipe; they are a visual and sensory experience designed to bring a bit of tropical luxury to your kitchen. Whether you are stacking them high for a holiday party or enjoying a single boozy square with your evening coffee, the combination of dark rum and toasted coconut is sure to impress.
I would love to see how your bars turned out! If you captured a shot on your marble surface, tag me or leave a comment below. Don’t forget to pin this recipe to your favorite dessert boards on Pinterest so you can find it every holiday season!