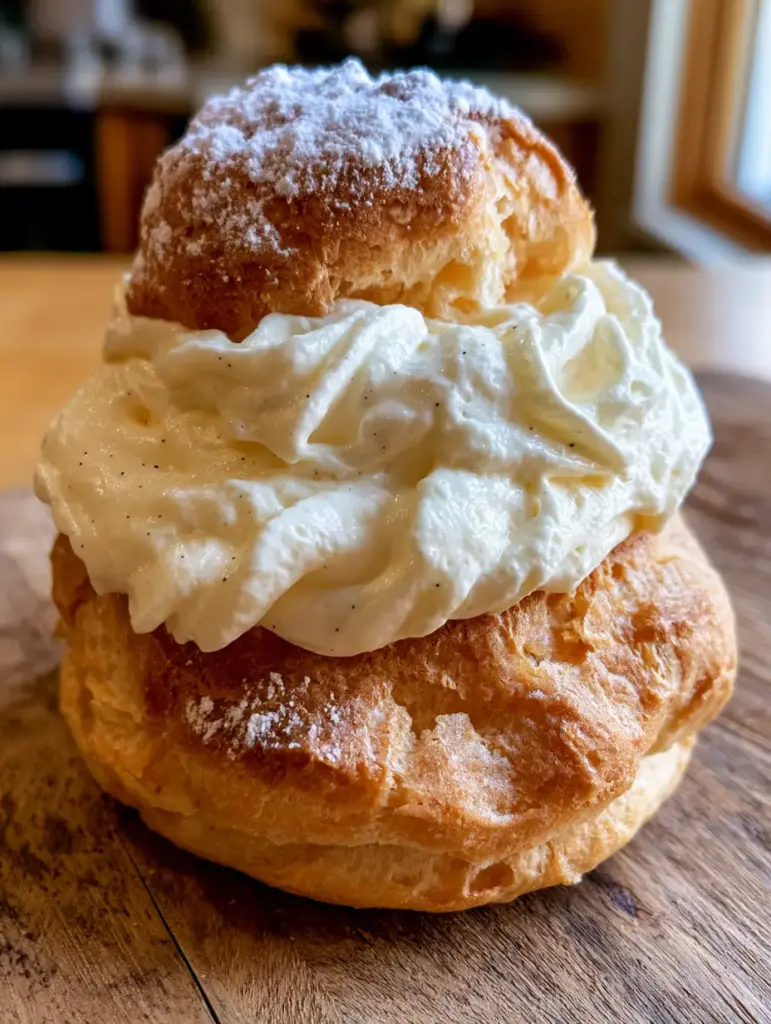
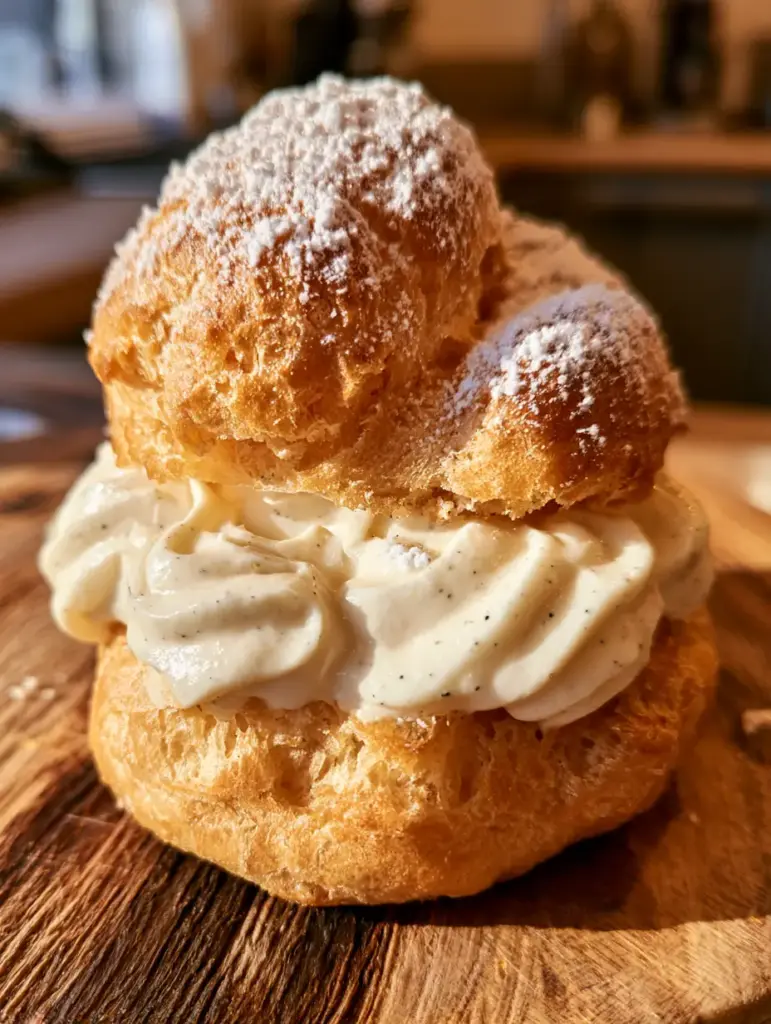
There is nothing quite as evocative of a classic French patisserie as the sight of towering cream puffs. These delicate, golden-brown spheres are a testament to the magic of steam-leavened baking. When you bite into one, you are greeted by a crisp, airy shell that shatters slightly before revealing a heart of thick, velvety vanilla bean whipped cream. This recipe focuses on achieving that specific professional aesthetic: a towering pastry perched on a rustic board, its craggy surface catching the morning light, finished with a snowfall of powdered sugar.
Making homemade choux pastry might seem intimidating to the uninitiated, but it is a fundamental culinary skill that, once mastered, opens the door to endless dessert possibilities. The key lies in the balance of moisture and heat. We aren’t just baking dough; we are engineering a vessel for flavor. By following this guide, you will create a dessert that looks exactly like a high-end food photograph—overflowing with cream that shows those tell-tale tiny black specks of real vanilla bean.
Why This Cream Puffs Recipe Works Every Single Time
- Perfectly Crispy Shells: By using a specific dual-temperature baking method, we ensure the exterior becomes a deep golden-brown while the interior stays hollow and dry.
- Visual Precision: This recipe is designed to produce the “towering” effect seen in professional macro photography, with a sturdy enough base to support an abundance of cream.
- Gourmet Filling: We move beyond basic extract to use real vanilla beans, providing a complex flavor profile and the signature visual specks that signal high-quality craftsmanship.
- Scientific Ratios: The hydration levels of the flour and butter are calibrated to create maximum steam expansion, resulting in an ultra-light texture.
The Anatomy of a Perfect Golden-Brown Shell: Essential Ingredients
Success starts with high-quality ingredients. To achieve the rustic, textured look described in our visual blueprint, each component serves a specific structural and aesthetic purpose. Do not skip the salt or the precise measurements of the water, as these dictate the rise.
All-Purpose Flour: 1 cup (125g). Flour provides the gluten structure necessary to trap steam. Without this protein network, your puffs will collapse into flat pancakes rather than rising into majestic towers.
Unsalted Butter: 1/2 cup (115g). The fat in butter coats the flour particles, creating a tender crumb within the crispy shell. It also contributes to that rich, golden-brown hue as the milk solids caramelize in the oven.
Large Eggs: 4 pieces (approx. 200g). Eggs are the primary leavening agent and emulsifier. They provide the glossiness to the raw dough and the structural strength to the baked pastry.
Water: 1 cup (240ml). Water creates the steam that forces the dough upward. While some use milk for a softer shell, water is essential for achieving that specific “crispy texture” mentioned in our visual prompt.
Kosher Salt: 1/2 tsp (3g). Salt is the invisible hero that sharpens the flavor of the butter and balances the sweetness of the vanilla cream filling.
Heavy Whipping Cream: 2 cups (480ml). You need a high fat content (at least 36%) to achieve a “thick velvety” consistency that can overflow without losing its shape.
Vanilla Bean: 1 whole pod (or 1 tsp vanilla bean paste). This provides the “tiny black specks” that make the filling visually stunning and aromatically superior to synthetic imitations.
Powdered Sugar: 1/4 cup (30g) for the cream, plus extra for dusting. This provides a delicate sweetness and that “catching the light” finish on the final product.
Professional Tools for Patisserie Success
To recreate the macro-photography-ready result, you will need a few specific tools. A heavy-bottomed saucepan is vital for cooking the “panade” (the dough base) evenly without scorching the butter. A sturdy stand mixer or handheld mixer will help you incorporate the eggs until the dough is perfectly glossy.
For piping, use a large pastry bag fitted with a plain 1/2-inch (1.3cm) round tip. This ensures your cream puffs are uniform in size, allowing them to bake at the same rate. Finally, a fine-mesh sieve is non-negotiable for that “delicate dusting” of powdered sugar that defines the rustic aesthetic. If you enjoy working with pastry, you might also find success using these skills for apple custard puff pastries later on.
Step-by-Step Guide to Mastering Choux Pastry
Creating the Panade (The Dough Base)
Combine the water, butter, and salt in your saucepan over medium heat. Bring the mixture to a rolling boil, ensuring the butter is completely melted before the water evaporates too much. In one quick motion, add the flour and stir vigorously with a wooden spoon.
Continue cooking and stirring for about 2 minutes. You are looking for a specific sensory cue: a thin film should form on the bottom of the pan, and the dough should pull away into a smooth, cohesive ball. This step cooks the starches, allowing them to absorb more liquid and eventually expand further in the oven.
Incorporating the Eggs for Maximum Rise
Transfer the warm dough to a mixer bowl and beat on low for a minute to let the steam escape. You don’t want to cook the eggs instantly! Add the eggs one by one, beating thoroughly after each addition. The dough will look curdled at first, but keep going.
Stop adding eggs when the dough reaches the “V-stage.” When you lift the beater, the dough should fall slowly, leaving a V-shaped tail. It should be glossy, thick, and hold its shape. If it’s too stiff, your puffs won’t rise; if it’s too runny, they will spread. This precision is what creates the “light and airy” interior.
Piping and the Dual-Stage Bake
Preheat your oven to 425°F (220°C). Pipe mounds about 2 inches (5cm) wide and 1 inch (2.5cm) high onto a parchment-lined sheet. Use a damp finger to smooth down any peaks to prevent burning. Spray the tray lightly with a mist of water—this extra moisture creates a steam-rich environment for the initial rise.
Bake at the high temperature for 15 minutes, then reduce to 375°F (190°C) for another 20 minutes. Do not open the oven door! The sudden drop in temperature could cause the puffs to deflate. You are looking for a deep, rustic golden-brown color. Once out, immediately prick the side of each puff with a toothpick to let the internal steam escape, ensuring the “crispy texture” remains intact.
Whisking the Velvety Vanilla Bean Cream
While the shells cool completely on a wire rack, prepare the filling. Pour the cold heavy cream into a chilled bowl. Slice the vanilla bean lengthwise and scrape the seeds into the cream. Add the powdered sugar. Whip until stiff peaks form—the cream should be thick enough to hold its shape when piled high.
For an extra layer of decadence, some bakers like to serve these alongside a scoop of holiday-themed ice cream or even a drizzle of melted cookie butter. However, the classic vanilla bean specks are the star of the show here.
Expert Tips for Visual and Textural Perfection
- Room Temperature Eggs: Always use room temperature eggs to ensure they emulsify perfectly with the warm dough base.
- The “Speck” Secret: If you don’t have fresh vanilla beans, use high-quality vanilla bean paste to ensure you still get those gorgeous black specks in your “overflowing” cream.
- Avoid Sogginess: Never fill your cream puffs until right before serving. The moisture in the cream will eventually soften the crisp shell.
- Drying the Shells: If your kitchen is humid, leave the baked shells in a turned-off oven with the door propped open for 10 minutes to ensure they are bone-dry and crispy.
Storage, Freezing, and Reheating Instructions
Unfilled shells can be stored in an airtight container at room temperature for up to 2 days, or frozen for up to a month. To crisp them back up after storage, place them in a 300°F (150°C) oven for 5-8 minutes.
Filled puffs should be eaten immediately. If you have leftovers, store them in the refrigerator, but be aware the pastry will lose its crunch within a few hours. For a different texture profile entirely, you might enjoy the chilled creaminess of earl grey panna cotta if you prefer make-ahead desserts.
What to Serve With These Golden Delights
These cream puffs are a showstopper on their own, but they pair beautifully with other textures. Serve them as part of a dessert platter with raspberry pistachio bars for a pop of color, or alongside caramelized air fryer bananas for a warm-and-cold contrast. The rustic wooden board presentation calls for simple beverage pairings like a dark roast coffee or a glass of dry sparkling wine.
Frequently Asked Questions
Yes, you can refrigerate the raw dough in a piping bag for up to 2 days. However, for the best rise, it is often recommended to pipe and bake the dough while it is still slightly warm from the initial preparation.
Use a fresh vanilla bean pod. Slice it open and scrape the thousands of tiny seeds into your heavy cream before whipping. Alternatively, use high-quality vanilla bean paste which includes these seeds.
Puffs usually collapse because they weren’t baked long enough to dry out the interior walls, or the oven door was opened too early. Pricking the shells with a toothpick immediately after baking helps release steam and prevents collapse.
This happens if you add the eggs too quickly or add too many. Always add eggs one at a time and stop once the dough reaches the ‘V-stage’ where it holds its shape but remains glossy.
The Master Cream Puffs Recipe
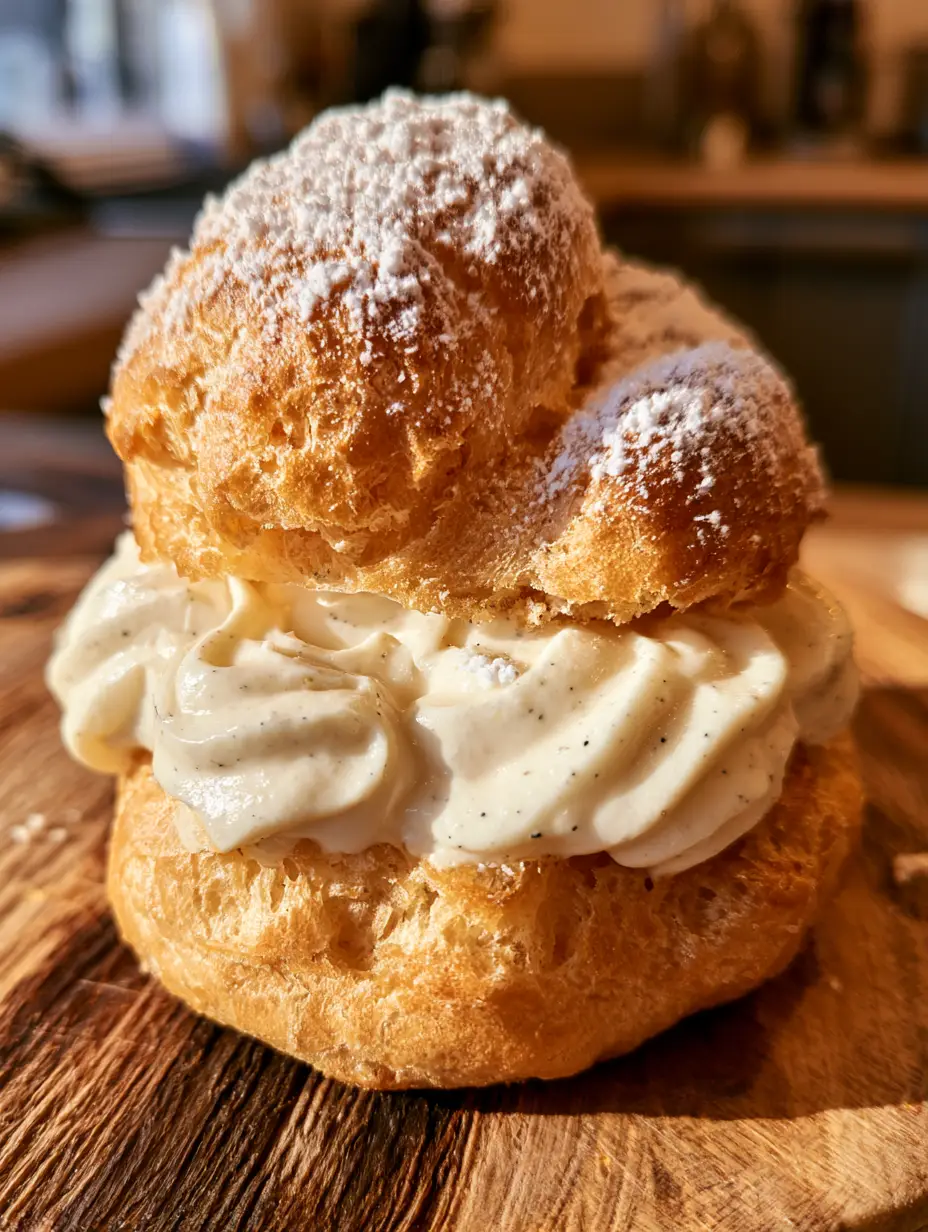
Cream Puffs with Thick Vanilla Bean Whipped Cream: The Ultimate Recipe
Ingredients
Equipment
Method
- In a heavy saucepan, combine water, butter, and salt. Bring to a rolling boil over medium heat until butter is melted.
- Add the flour all at once. Stir vigorously with a wooden spoon until a dough forms and pulls away from the sides, leaving a film on the pan.
- Transfer dough to a mixer. Add eggs one by one, beating until glossy and it forms a 'V' shape when lifted.
- Transfer to a piping bag. Pipe 2-inch mounds onto a parchment-lined baking sheet.
- Bake at 425°F (220°C) for 15 mins, then 375°F (190°C) for 20 mins until deep golden-brown.
- Whip heavy cream, vanilla bean seeds, and powdered sugar until stiff, velvety peaks form.
- Slice cooled puffs in half. Pipe cream into the centers and dust with powdered sugar.
Notes
Ensure cream is very cold before whipping for maximum thickness.
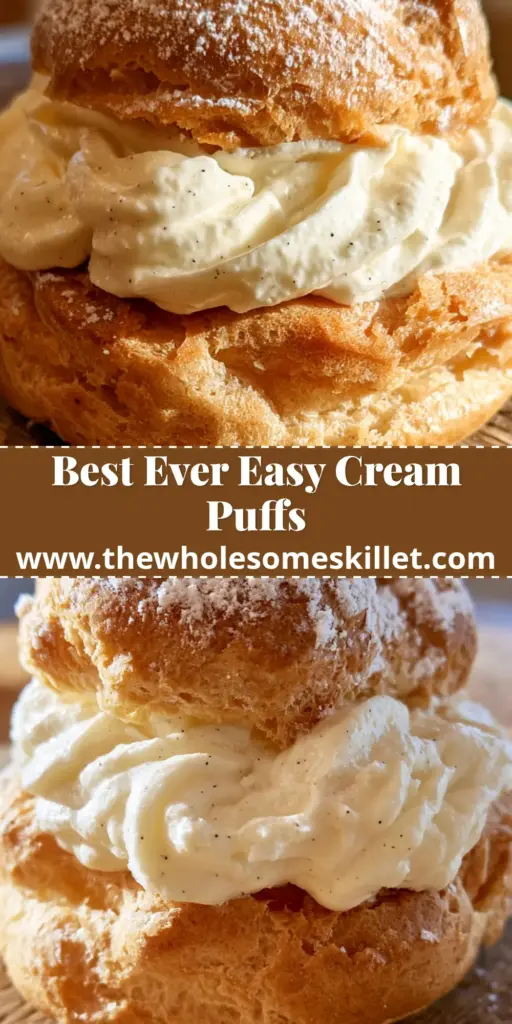
Bring the French Bakery to Your Kitchen
Mastering cream puffs is a journey into the heart of pastry science. By focusing on the visual cues—the golden-brown hue, the velvety specks of vanilla, and the towering structure—you create more than just a dessert; you create a culinary experience. Whether you’re hosting a formal dinner or a cozy morning brunch, these puffs are guaranteed to impress.
If you loved this recipe, please leave a comment below and share your results! You can also follow us for more visual inspiration on Pinterest. Don’t forget to pin this to your favorite dessert boards for your next baking project!