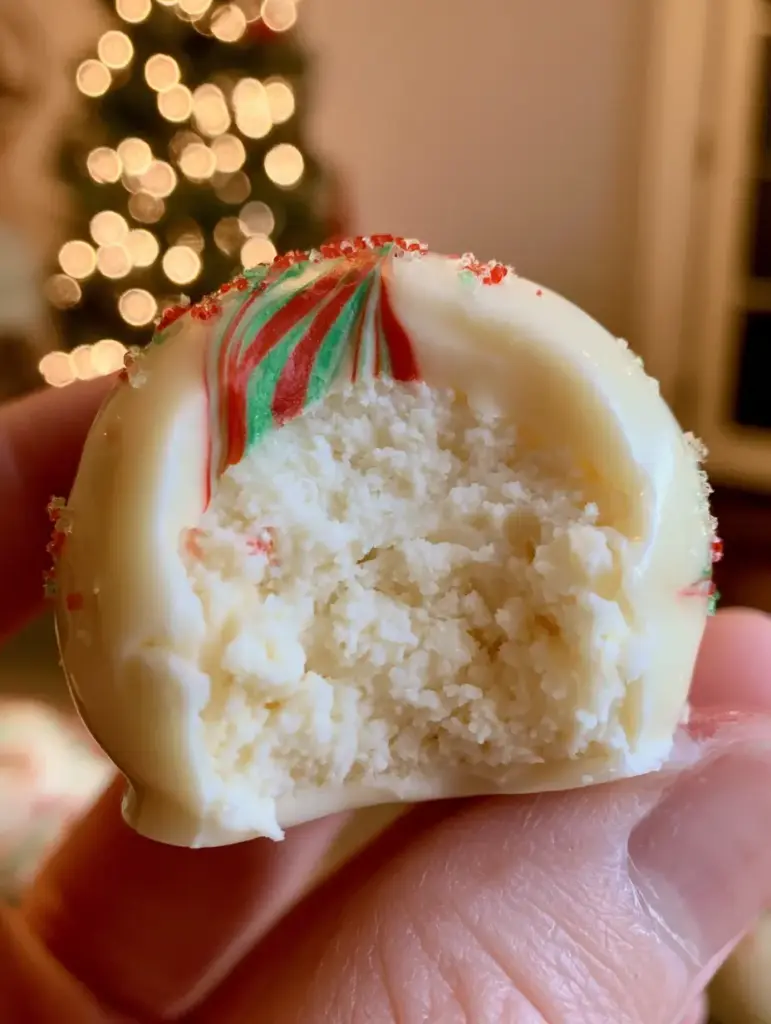
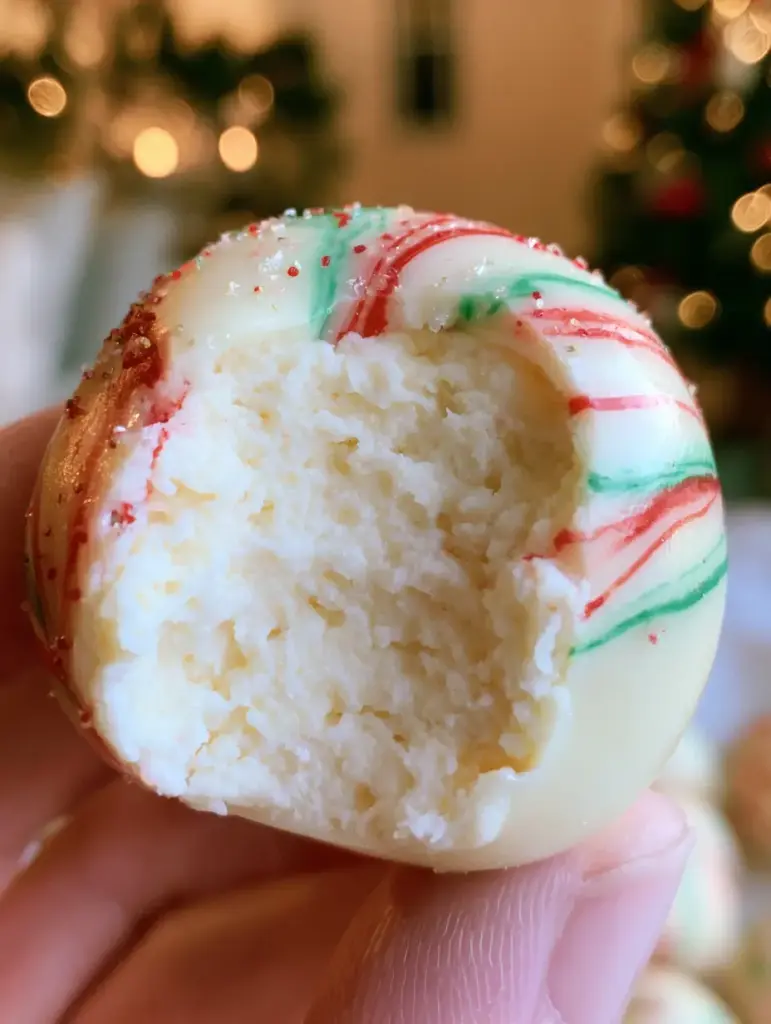
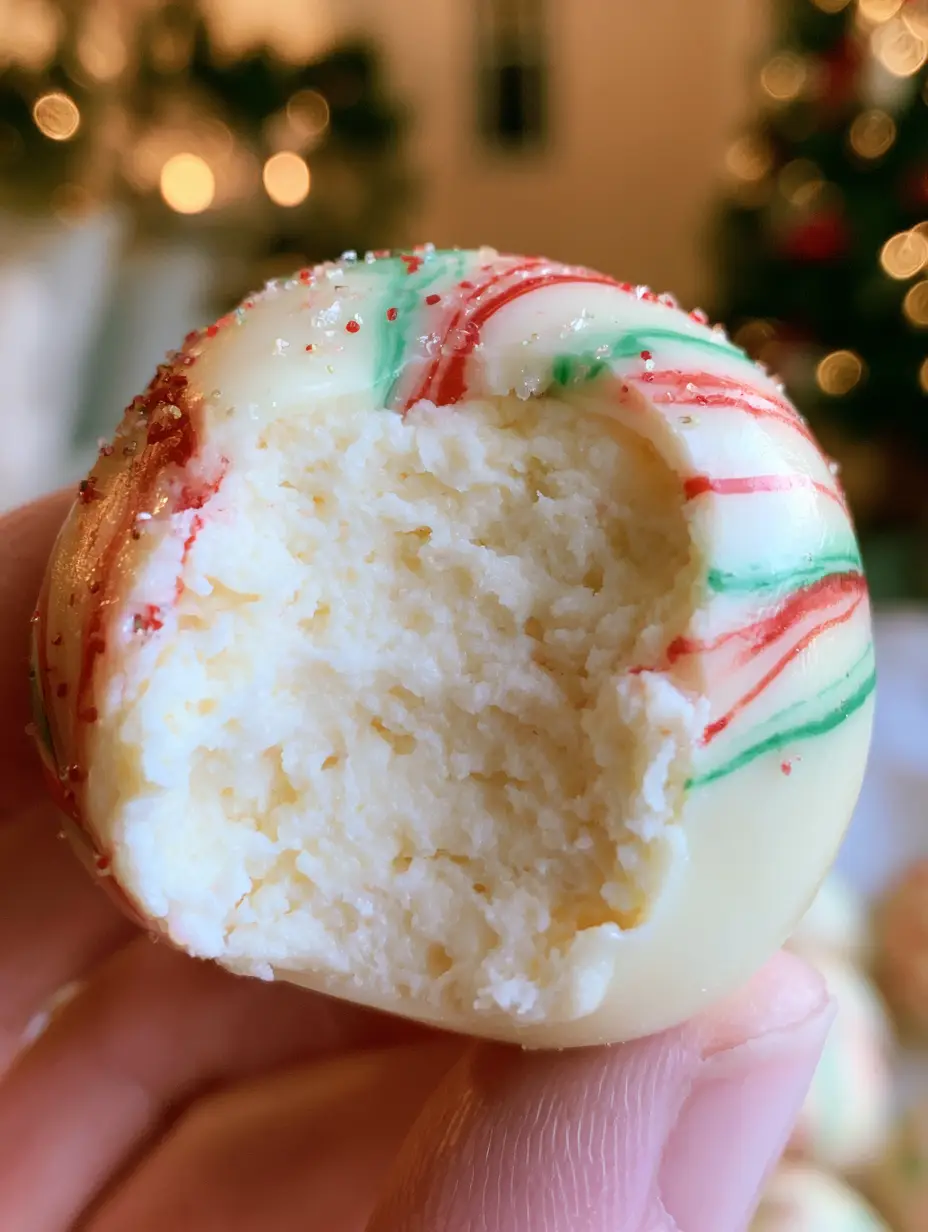
Imagine holding a perfectly chilled, glossy white sphere in your hand, the soft winter light catching the sparkle of tiny holiday nonpareils. As you take that first bite, the crisp snap of premium white chocolate gives way to a dense, creamy, and velvety smooth cheesecake interior that melts on your tongue. These cheesecake truffles are more than just a dessert; they are a bite-sized celebration of the holiday season, designed to look as stunning as they taste.
Whether you are looking for the perfect addition to your Christmas dessert spread or a thoughtful homemade gift, this no-bake recipe delivers professional results with minimal effort. We have meticulously crafted this guide to ensure your truffles have that signature “snap” on the outside and a rich, tangy center that mirrors the best New York-style cheesecake you’ve ever had. Get ready to master the art of the holiday drizzle and create a treat that looks like it came straight from a boutique confectionery.
Why These No-Bake Holiday Treats Are a Seasonal Essential
- Unmatched Texture: The contrast between the glossy, smooth white chocolate coating and the dense, creamy cream cheese filling provides a professional sensory experience.
- Festive Visual Appeal: Featuring vibrant red and green chocolate swirls and sparkling nonpareils, these truffles are a holiday showstopper.
- No-Bake Simplicity: Achieve gourmet results without ever turning on your oven, making these perfect for busy holiday schedules.
- Customizable Base: While this version celebrates Christmas, the foundation is perfect for exploring other festive holiday treats throughout the year.
The Festive Pantry: Everything You Need for Holiday Truffles
To achieve the specific visual and structural results seen in our professional blueprint, selecting the right ingredients is paramount. We aren’t just looking for flavor; we are looking for the chemical stability required for a no-bake masterpiece.
Full-Fat Cream Cheese: You will need 8 oz (226g) of brick-style cream cheese. Ensure it is full-fat to provide the structural integrity and rich mouthfeel necessary for a dense interior; avoid whipped or tub versions as they contain too much air and moisture.
Graham Cracker Crumbs: 1.5 cups (150g) of finely ground crumbs act as the “flour” in this no-bake dough. They absorb the moisture from the cheese, creating a moldable texture that holds its shape at room temperature.
Powdered Sugar: 0.5 cups (60g) of confectioners’ sugar provides sweetness without the graininess of granulated sugar. It also helps to stiffen the filling so it doesn’t collapse during the dipping process.
Pure Vanilla Extract: 1 tsp (5ml) of high-quality vanilla is essential for that classic cheesecake aroma. It cuts through the richness of the fats, providing a balanced flavor profile.
High-Quality White Chocolate: 12 oz (340g) of white chocolate melting wafers or chopped couverture chocolate. This forms the glossy, smooth outer shell that protects the creamy interior.
Festive Decorating Chocolates: 2 oz (57g) each of red and green chocolate melting wafers. These are specifically formulated to melt smoothly for that perfect, thin drizzle.
Holiday Nonpareils: A sprinkle of red and green nonpareils adds a “sparkling” texture. These tiny beads provide a subtle crunch that contrasts beautifully with the soft filling.
Specialized Tools for Confectionery Success
To replicate the handheld perfection of our cheesecake truffles, you will need a few key pieces of equipment. A small cookie scoop (about 1 tablespoon capacity) ensures every truffle is uniform in size, which is critical for even chilling and coating.
A double boiler or a microwave-safe glass bowl is necessary for gently melting the white chocolate without scorching it. You will also want parchment paper or a silicone baking mat to prevent the chocolate from sticking as it sets. Finally, small piping bags or even a simple fork will help you achieve the signature red and green swirls described in our visual blueprint.
The Step-by-Step Guide to Perfect No-Bake Bites
Phase 1: Creating the Creamy Cheesecake Core
In a large mixing bowl, beat the 8 oz (226g) of softened cream cheese until it is completely smooth and free of lumps. This is the foundation of your cheesecake truffles, so take your time—any lumps now will be visible in the final bite. Once smooth, stir in the vanilla extract and powdered sugar until fully incorporated.
Gradually fold in the 1.5 cups (150g) of graham cracker crumbs. The mixture should transition from a soft cream to a dense, malleable dough. If the dough feels too sticky to handle, you can add an additional tablespoon of crumbs, but be careful not to over-dry it, or the interior will lose its creamy “melt-in-your-mouth” quality.
Phase 2: Portioning and the Critical Chill
Using your cookie scoop, portion out the dough into 1-inch spheres. Roll them between your palms until they are perfectly round and smooth. Place the spheres on a parchment-lined tray.
Now comes the most important step: the chill. Place the tray in the freezer for at least 30 to 60 minutes. Chilling the centers ensures that they won’t melt or lose their shape when dipped into the warm melted white chocolate. A firm center is the secret to achieving that professional, smooth outer finish.
Phase 3: The Art of the White Chocolate Dip
Melt your white chocolate in 30-second intervals in the microwave, stirring vigorously in between. If the chocolate is too thick, you can add a teaspoon of coconut oil to thin it out to a dipping consistency. Using a fork or a specialized dipping tool, submerge each chilled truffle into the chocolate. Lift it out, tap off the excess, and slide it back onto the parchment paper.
Phase 4: Festive Drizzling and Garnishing
Once the white base has set, melt your red and green chocolate wafers. Transfer them to small piping bags with a tiny tip snipped off. While the white coating is firm but the drizzle is still wet, apply the swirls in a fast, back-and-forth motion. Immediately follow with a dusting of the red and green nonpareils so they adhere to the drizzle. This creates the “sparkling holiday” look confirmed in our visual prompt.
Expert Tips for Confectionery Excellence
- Temper Your Expectations: White chocolate burns at a lower temperature than dark chocolate. Always use low heat and stir often to maintain that glossy, smooth finish.
- Avoid Condensation: If you see “sweat” on your truffles after taking them out of the fridge, let them sit at room temperature for a few minutes and gently pat them dry before dipping. Moisture is the enemy of a smooth chocolate coating.
- Uniformity is Key: Use a scale or scoop to ensure all truffles are the same size. This isn’t just for aesthetics; it ensures they all chill and set at the same rate.
- Flavor Variations: Once you’ve mastered this, try adding different mix-ins, much like our sweet and salty variations or even creamy peanut butter versions (coming soon).
Storage, Shelf Life, and Serving Suggestions
Because these cheesecake truffles contain real cream cheese, they must be stored in the refrigerator. Place them in an airtight container with layers separated by parchment paper. They will stay fresh and delicious for up to 5 days.
For the best texture, serve them slightly chilled. If you are gifting them, keep them in a cool environment to prevent the chocolate from softening. These truffles also freeze beautifully! You can keep them in a freezer-safe bag for up to 3 months—just thaw them in the fridge overnight before serving.
Creative Pairings for Your Holiday Dessert Table
These festive truffles are a standout on their own, but they also pair beautifully with other decadent treats. Consider serving them alongside classic Southern cheesecake flavors or even a tray of Biscoff-infused bites for a variety of textures.
For a complete holiday spread, contrast the richness of the white chocolate with something fruity, like tangy raspberry pastries. The vibrant colors of the truffles will pop against a dark mahogany serving board or a white ceramic platter surrounded by evergreen sprigs.
Frequently Asked Questions
Absolutely! These freeze very well. Place them in a single layer to freeze, then transfer to a freezer bag for up to 3 months. Thaw in the refrigerator before serving.
Yes, but white chocolate chips often contain stabilizers that prevent them from melting smoothly. If using chips, add 1 teaspoon of coconut oil or shortening to help achieve a dippable consistency.
Yes, because the filling is made with real cream cheese, these must be stored in the refrigerator. They can stay at room temperature for 1-2 hours during serving, but should be returned to the fridge for safety.
Cracking happens when the cold truffle expands slightly as it warms up inside the set chocolate. To prevent this, don’t freeze the centers too hard; a firm refrigerator chill or a brief 30-minute freeze is best.
This usually happens if the cream cheese was too warm or if not enough graham cracker crumbs were added. Try chilling the mixture for 30 minutes before rolling, or add 2 tablespoons more of crumbs.
The Ultimate Festive Cheesecake Truffles Recipe
Cheesecake Truffles with Festive Christmas Drizzles
Ingredients
Equipment
Method
- Beat softened cream cheese, vanilla, and powdered sugar until completely smooth.
- Fold in graham cracker crumbs until a dense, moldable dough forms.
- Scoop 1-tablespoon portions and roll into smooth spheres.
- Place on parchment paper and freeze for 30-60 minutes until firm.
- Melt white chocolate and dip chilled spheres to coat completely. Tap off excess.
- Melt red and green chocolate and drizzle over set truffles.
- Immediately add nonpareils to the wet drizzle for a sparkling effect.
Notes
Ensure truffles are fully chilled before dipping to prevent melting.

A Sweet Conclusion to Your Holiday Baking
Mastering these cheesecake truffles is a gateway to endless holiday creativity. The dense, creamy interior and the snap of the festive chocolate coating create a professional-grade dessert that anyone can make at home. We hope these become a staple in your holiday tradition! If you enjoyed this recipe, please leave a comment below and share your creations with us on Pinterest.