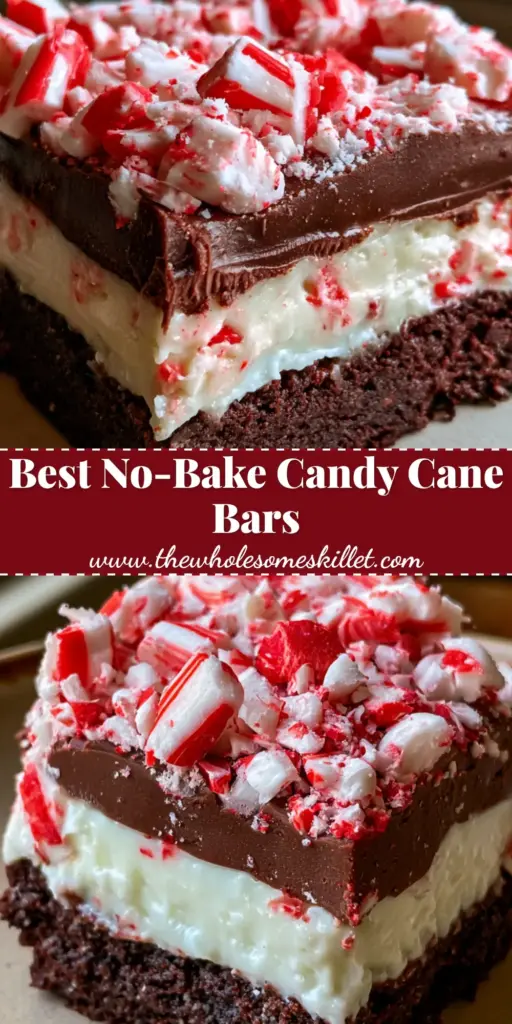
When the holiday season rolls around, there is one flavor profile that reigns supreme: the cooling zing of peppermint paired with the deep, earthy richness of dark chocolate. These peppermint dessert bars are designed to be the showstopper of your holiday dessert table. With a striking visual contrast between the midnight-black crust, snowy white cream, and vibrant crimson candy cane shards, they are as beautiful as they are delicious.
Inspired by the classic combination of bark and cheesecake, these bars take texture to the next level. Imagine biting through a dense, buttery cocoa cookie base into a cloud-like vanilla cream center, finished with a snap of tempered chocolate and the iconic crunch of peppermint candy. Whether you are hosting a festive gathering or looking for the perfect giftable treat, these bars deliver professional-grade results from your home kitchen.
This recipe is specifically engineered for those who appreciate culinary forensics—where every layer serves a purpose. From the specific cocoa fat content required for the crust to the stabilized cream filling that holds its shape at room temperature, we are diving deep into the science of holiday baking. Get ready to master the art of the peppermint dessert bars.
Why You Will Fall in Love With These Peppermint Dessert Bars
- The Ultimate Texture Contrast: You get the dense chew of the dark chocolate cookie crust, the silky mouthfeel of the vanilla cream, and the sharp, refreshing snap of crushed candy canes.
- Visual Showstopper: The high-contrast layers of black, white, and red make these bars look like they came straight from a high-end patisserie window.
- Perfectly Balanced Sweetness: By using semi-sweet chocolate and a hit of sea salt in the crust, we ensure the peppermint candy doesn’t make the dish cloyingly sweet.
- Make-Ahead Friendly: These bars actually improve after a few hours in the fridge, making them the ultimate stress-free holiday entertaining recipe.
The Anatomy of a Perfect Dark Cocoa Cookie Crust
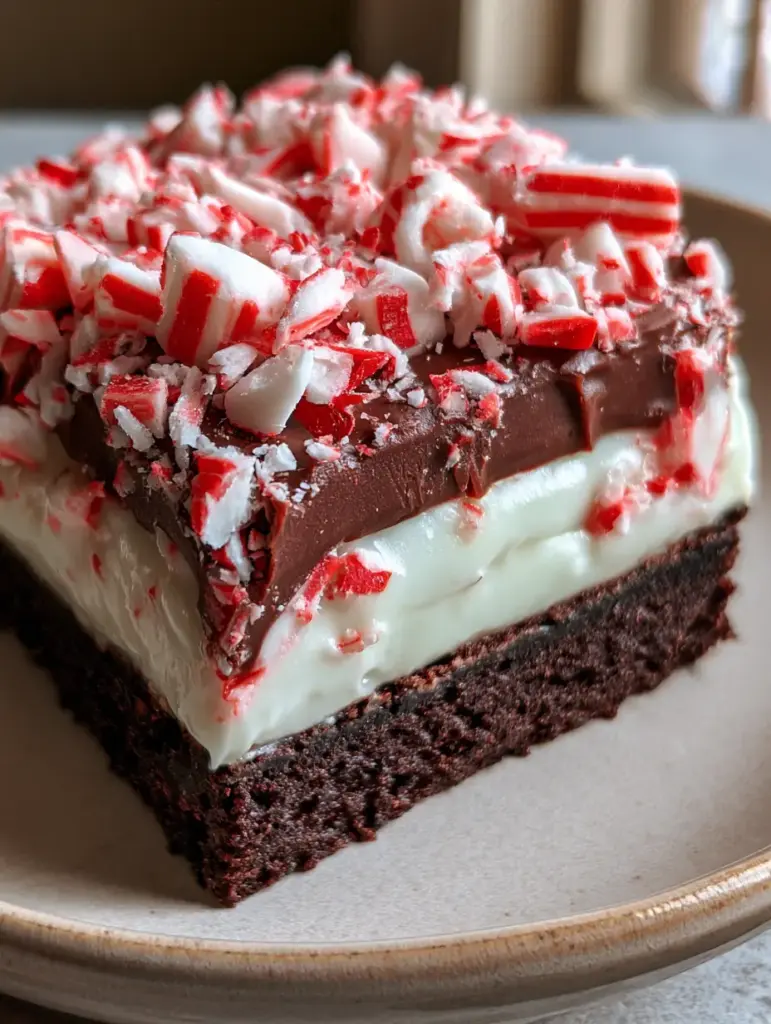
The foundation of these peppermint dessert bars is a dense, dark cocoa cookie base. Unlike a standard graham cracker crust, we are looking for a “brownie-adjacent” texture—sturdy enough to hold the weight of the cream but soft enough to bite through without shattering. We achieve this by using a high ratio of dark cocoa powder and just enough melted butter to bind the crumb.
2 cups (200g) Dark Chocolate Cookie Crumbs: Use a high-quality chocolate wafer or even the chocolate halves of sandwich cookies (creme removed) to achieve that signature “dark cocoa” look mentioned in our visual blueprint. The fine crumb ensures a tight, professional-looking base.
6 tbsp (85g) Unsalted Butter, Melted: Butter acts as the structural adhesive here. When chilled, the saturated fats solidify, creating a base that supports the thick vanilla cream layer without becoming soggy.
1/4 tsp (1.5g) Fine Sea Salt: Salt is the invisible hero of chocolate desserts. It cuts through the sugar and amplifies the floral notes of the cocoa, providing a sophisticated depth to the peppermint dessert bars.
Engineering the Silky Vanilla Cream Filling
The “silky white creamy pudding center” described in our visual prompt requires a balance of stability and aeration. We aren’t just making a pudding; we are creating a stabilized cream layer that mimics the texture of a light mousse or a no-bake cheesecake. This ensures that when you cut into the bars, the layers stay distinct and sharp.
16 oz (450g) Full-Fat Cream Cheese, Softened: This provides the body and a slight tang that balances the sweet topping. Ensure it is at room temperature to avoid lumps, which would ruin the “silky” visual requirement.
1 cup (120g) Powdered Sugar, Sifted: We use powdered sugar instead of granulated to maintain that perfectly smooth, grit-free texture. Sifting is non-negotiable for a professional finish.
1.5 cups (360ml) Heavy Whipping Cream, Cold: When whipped into the cream cheese, this introduces tiny air bubbles, resulting in the “cloud-like” texture seen in the cross-section of the peppermint dessert bars.
1 tsp (5ml) Pure Peppermint Extract: A little goes a long way. We want a refreshing breeze of mint, not a medicinal punch. Using pure extract ensures a clean, natural flavor.
The Topping: Semi-Sweet Drizzle and White Chocolate Streaks
To achieve the complex visual described—semi-sweet chocolate drizzle with white chocolate streaks—we use a dual-tempering method. The dark chocolate provides a bitter counterpoint to the vanilla cream, while the white chocolate adds a decorative “streak” that highlights the holiday theme.
1/2 cup (90g) Semi-Sweet Chocolate Chips: Melted with a touch of oil, this creates a ganache-like drizzle that stays slightly soft, preventing the topping from cracking when you slice the bars.
1/4 cup (45g) White Chocolate Chips: These are melted separately to create the contrasting streaks that define the visual aesthetic of these peppermint dessert bars.
1/2 cup (60g) Crushed Peppermint Candy Canes: These should be broken into various sizes—some fine dust and some larger shards—to provide the “crunchy peppermint” texture described in the visual prompt. Always add these last to prevent the red dye from bleeding into the white cream.
Essential Equipment for Professional Dessert Bars
To replicate the handheld smartphone photo of a single, thick candy cane dessert bar, you need the right tools for precision. A 9×9 inch (23x23cm) square baking pan is the ideal vessel for achieving that specific “thick” layer height. Lining the pan with parchment paper with an overhang (a “sling”) is critical for lifting the entire block out for clean slicing.
An offset spatula is your best friend for the vanilla cream layer. It allows you to smooth the filling into the corners and create a perfectly level surface for the chocolate drizzle. Finally, a heavy-duty rolling pin or a meat tenderizer is the best way to crush your candy canes inside a sealed freezer bag to contain the mess.
Step-by-Step Evolution of the Peppermint Dessert Bars
1. Constructing the Dark Cocoa Foundation
Preheat your oven to 350°F (175°C). In a medium bowl, combine the dark chocolate cookie crumbs, melted butter, and salt. Stir until the mixture resembles wet sand. Press the mixture firmly into the bottom of your lined 9×9 inch pan, using the bottom of a flat measuring cup to ensure an even, dense layer. Bake for 8-10 minutes just to set the crust, then allow it to cool completely. This “par-baking” step prevents the crust from being crumbly and ensures it can support the heavy layers above.
2. Whipping the Silky Vanilla Cream
In a large mixing bowl, beat the softened cream cheese and powdered sugar until completely smooth and aerated. In a separate chilled bowl, whip the heavy cream and peppermint extract until stiff peaks form. Gently fold the whipped cream into the cream cheese mixture in three stages. The goal is to maintain the airiness while achieving a uniform, snowy white consistency. Spread this over the cooled crust and use your offset spatula to level the top. Chill for at least 2 hours to set.
3. The Artistic Chocolate Drizzle
Once the cream layer is firm to the touch, melt the semi-sweet chocolate with a teaspoon of coconut oil in 30-second bursts in the microwave. Do the same with the white chocolate in a separate bowl. Drizzle the semi-sweet chocolate in a zigzag pattern across the bars. While still wet, use a toothpick to swirl in the white chocolate streaks. This creates the marbleized effect seen in high-end peppermint dessert bars.
4. The Peppermint Crowning
Immediately after drizzling the chocolate, shower the top with the crushed peppermint candy canes. The wet chocolate acts as a glue, securing the shards in place. For the best visual result, aim for a “heavy topping” as per the visual blueprint. Return the bars to the refrigerator for another hour to allow the chocolate to snap set.
Expert Tips for the Ultimate Holiday Bar
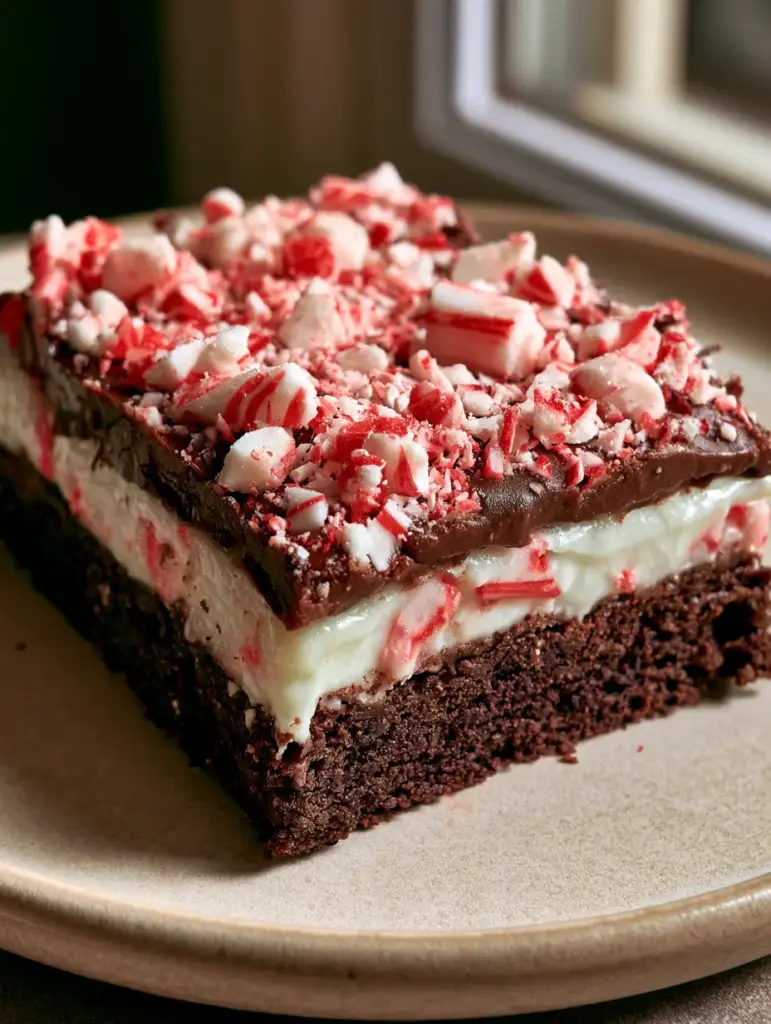
- The Clean Cut Secret: For those perfectly sharp side-view layers, run a sharp chef’s knife under hot water and wipe it dry between every single cut. This melts through the chocolate drizzle without squishing the cream layer.
- Avoid “Pink” Cream: Do not mix the crushed peppermint into the cream filling. The moisture in the cream will cause the red dye in the candy to bleed, turning your elegant white layer pink. Keep the peppermint strictly on top!
- Cocoa Matters: If you can find Dutch-processed cocoa cookies, use them. The alkalization process makes the cocoa darker and smoother, which is essential for that “dense dark cocoa” look.
- Stability Hack: If you are serving these in a warm room, you can add 1 tsp of gelatin (bloomed in water) to the cream filling to ensure it stays “silky” and upright for hours.
Storage and Festive Freshness
These peppermint dessert bars should always be stored in the refrigerator in an airtight container. They will remain fresh and delicious for up to 5 days. However, be aware that the peppermint candy shards will eventually start to soften and “weep” (become sticky) due to the moisture in the fridge after 48 hours. For the absolute best crunch, top with fresh peppermint just a few hours before serving.
Can you freeze these? Yes! Wrap the entire block (before slicing) tightly in plastic wrap and foil. Freeze for up to 3 months. Thaw in the refrigerator overnight before slicing and adding the fresh peppermint topping. If you enjoy this format of layered dessert, you might also love our Oreo dessert lasagna or the tropical vibes of our coconut snowball dessert bars.
Pairing Your Peppermint Treats
These bars are incredibly rich, so they pair best with beverages that offer a bit of contrast. A dark roast coffee or a shot of espresso cuts through the sugar beautifully. If you’re serving these at a holiday party, consider a spread that includes peppermint meltaways for a variety of minty textures, or some raspberry pistachio bars for a different festive color palette.
For a complete dessert platter, you might also include homemade Bounty bars or even a light cranberry mousse parfait to cleanse the palate between bites of the dense chocolate crust.
Frequently Asked Questions
Yes! Simply swap the chocolate cookie crumbs for a gluten-free chocolate wafer or sandwich cookie crumb. The filling and toppings are naturally gluten-free.
Peppermint oil is much more concentrated than extract. If substituting, start with just a few drops, as oil is roughly 4 times stronger than alcohol-based extract.
The secret is temperature and a hot knife. Ensure the bars are fully chilled. Dip a sharp chef’s knife in hot water, wipe it completely dry, and make one clean slice. Repeat for every cut.
This usually happens if the cream cheese wasn’t full-fat or if the heavy cream wasn’t whipped to stiff peaks. Ensure all ingredients are cold before whipping to maintain structural integrity.
Peppermint candy is pure sugar, which is hygroscopic. It absorbs moisture from the refrigerator. To keep them crunchy, add the peppermint shards just a few hours before serving.
The Ultimate Peppermint Dessert Bars Recipe
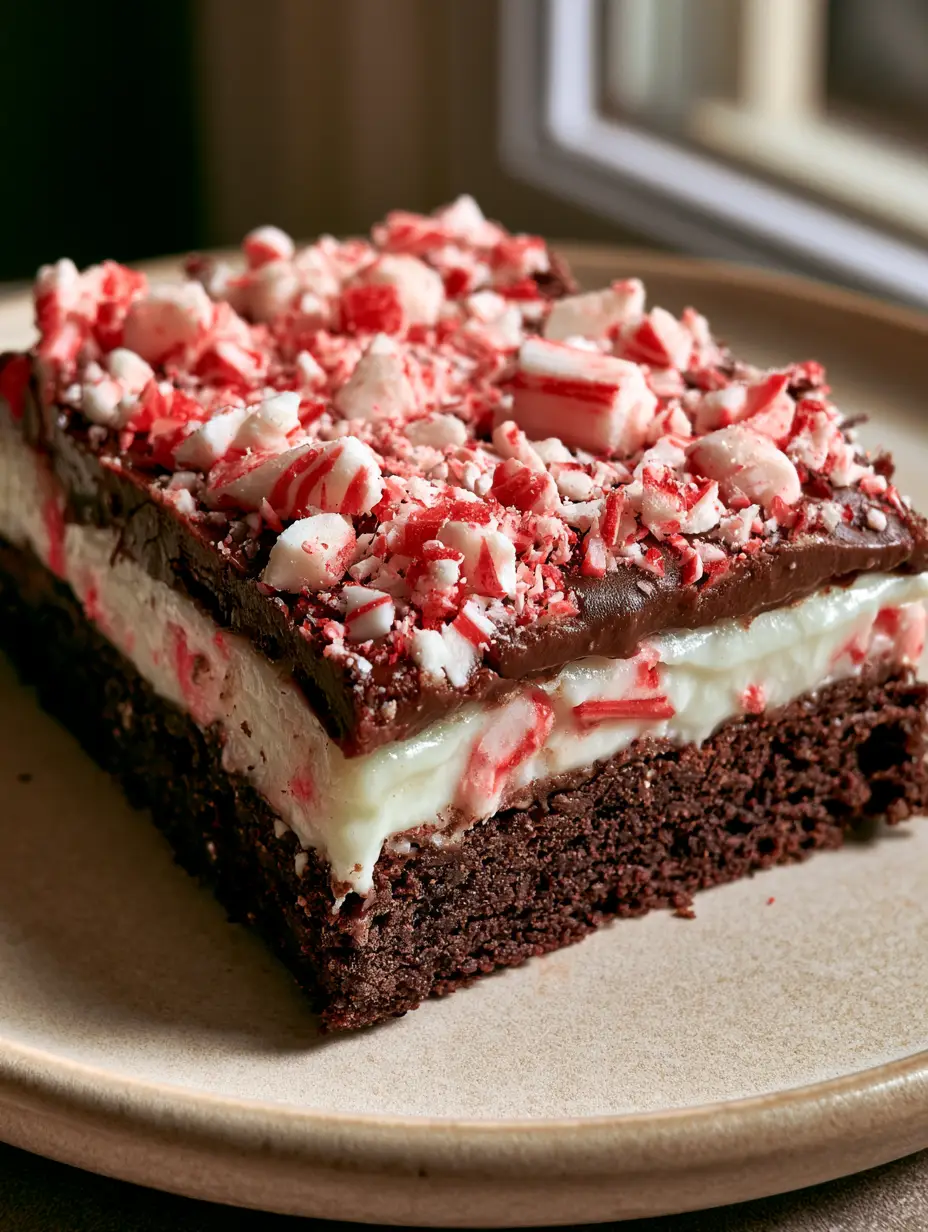
Peppermint Dessert Bars: A Triple-Layer Chocolate and Cream Holiday Treat
Ingredients
Equipment
Method
- Combine dark chocolate cookie crumbs, melted butter, and salt until it resembles wet sand. Press into a lined 9x9 inch pan.
- Bake at 350°F (175°C) for 8-10 minutes until set. Cool completely before adding the filling.
- Beat softened cream cheese and powdered sugar until smooth. In a separate bowl, whip heavy cream and peppermint extract to stiff peaks.
- Gently fold the whipped cream into the cream cheese mixture. Spread over the cooled crust and chill for 2 hours.
- Drizzle melted semi-sweet chocolate and white chocolate over the chilled cream layer. Swirl with a toothpick.
- Immediately sprinkle with crushed candy canes. Chill for 1 more hour before slicing with a hot knife.
Notes
Do not mix candy canes into the cream filling to avoid color bleeding.
Closing & Call to Action
These peppermint dessert bars are more than just a sweet treat; they are a celebration of holiday textures and flavors. With their distinct layers and bold peppermint crunch, they are guaranteed to be the first thing to disappear from your dessert tray. The combination of the dark cocoa base and the silky cream is a match made in culinary heaven.
If you made these bars, we want to see your results! Tag us in your photos and share your baking journey. Don’t forget to follow thewholesomeskillet on Pinterest for more holiday inspiration and decadent dessert recipes. Happy baking!