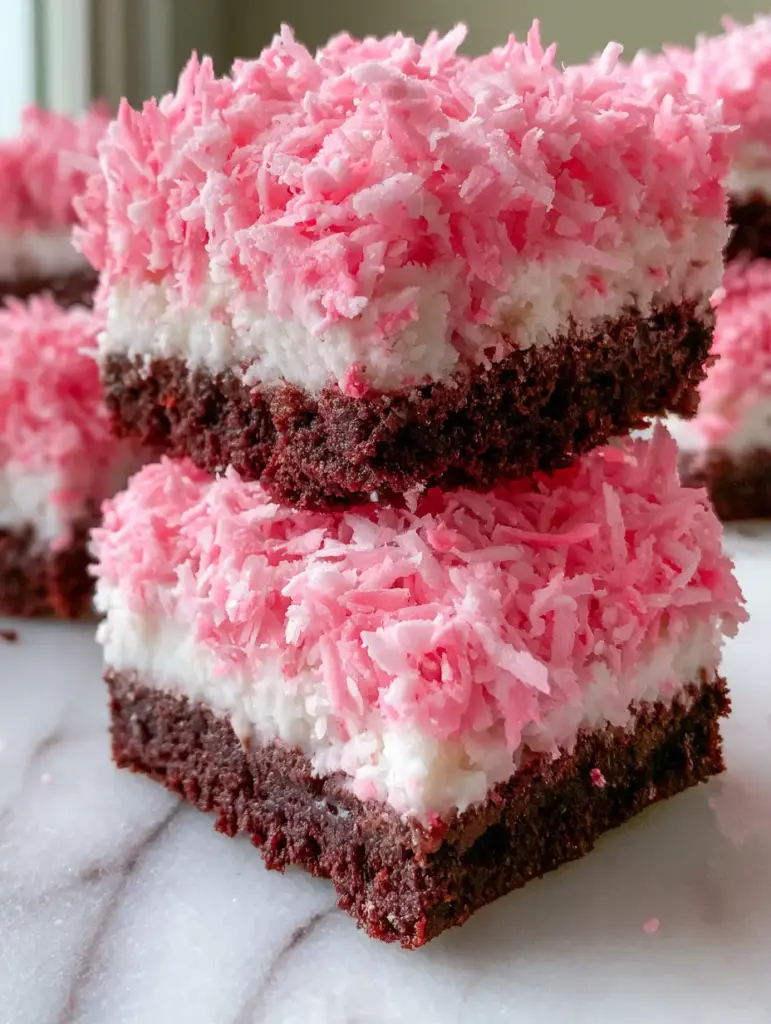
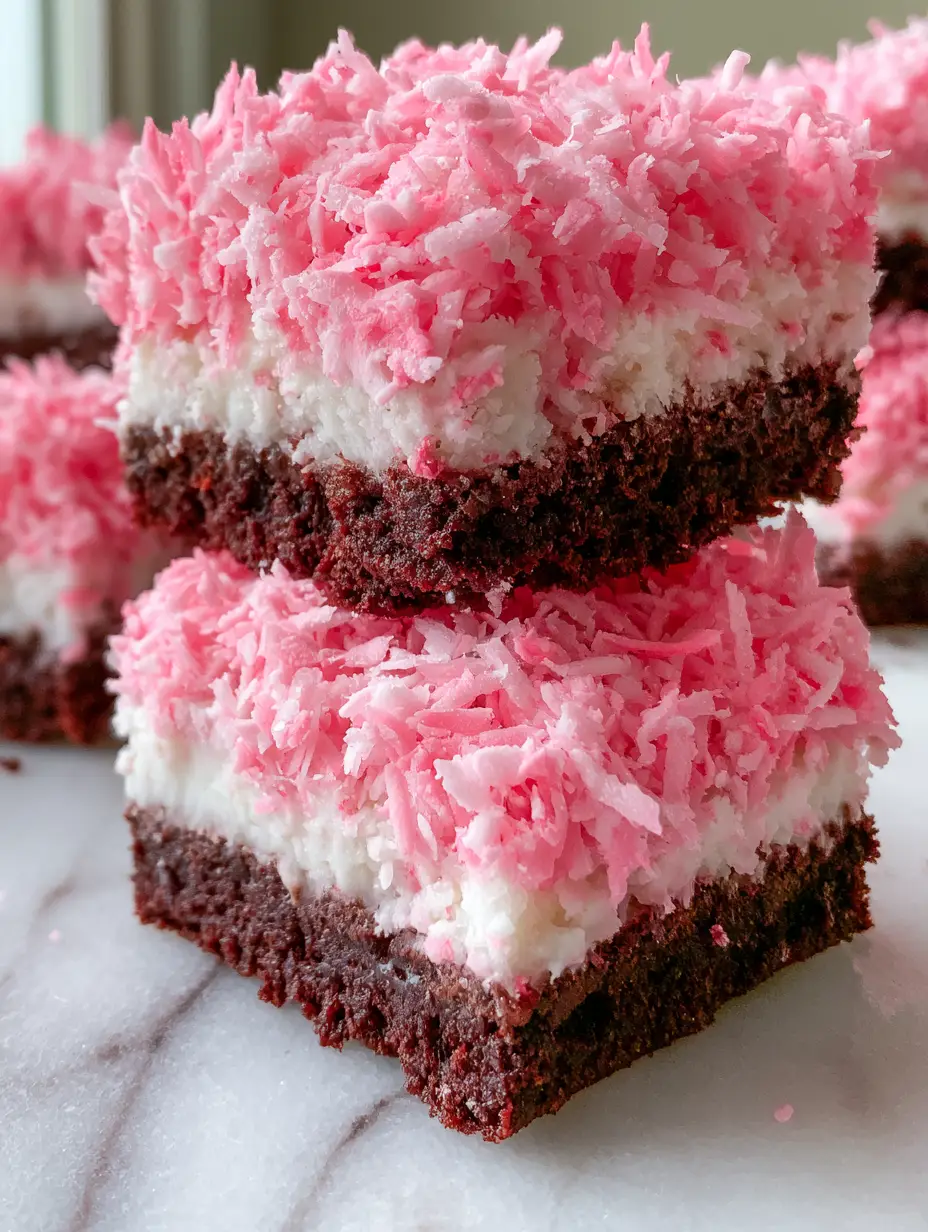
When nostalgia meets modern aesthetic, you get the coconut snowball dessert bars. These striking treats are a gourmet evolution of the classic childhood snack cake, featuring a deep, moist dark chocolate cake base, a luscious thick coconut cream layer, and a cloud-like topping of neon pink shredded coconut.
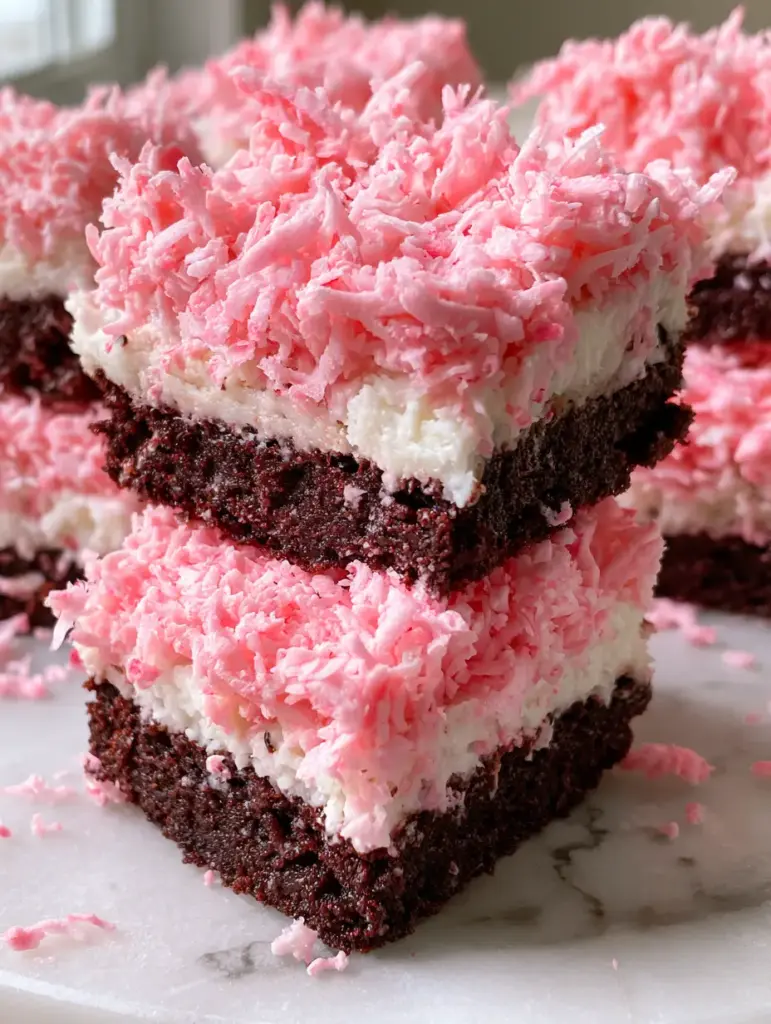
Capturing the perfect handheld smartphone photo of these bars on a white marble countertop requires a balance of rich textures and vibrant colors. In this guide, we will break down the culinary science behind achieving that distinct neon hue and the structural secrets to a perfectly layered bar.
Whether you are preparing these for a festive party or looking to brighten up your weekend baking, the contrast between the dark cocoa and the brilliant pink topping makes these coconut snowball dessert bars an absolute showstopper. Let’s dive into the professional techniques required to master this recipe.
Why These Vibrant Coconut Snowball Dessert Bars Are a Baking Essential
- Dramatic Visual Contrast: The stark transition from the midnight-black chocolate base to the snowy white cream and neon pink topping creates an incredible cross-section.
- Multi-Textural Experience: You get the moist, tender crumb of the cake, the silky smoothness of the coconut cream, and the chewy, fluffy bite of the shredded coconut.
- Sophisticated Nostalgia: We have taken the essence of the classic snowball and elevated it with high-quality dark cocoa and real coconut cream for a more refined palate.
- Photography Ready: These bars are designed to pop against neutral backgrounds, making them a favorite for social media food photography.
The Anatomy of a Perfect Layered Dessert Bar
To achieve the result seen in our visual blueprint, every layer must be treated with precision. The foundation is a dark chocolate cake that isn’t just sweet—it is deeply aromatic and structurally sound enough to hold the heavy cream layer above it.
The middle layer is a stabilized coconut cream. Unlike a simple frosting, this layer needs to be thick and velvety, providing a cool contrast to the rich cake. Finally, the neon pink coconut isn’t just a garnish; it provides the signature “snowball” texture that defines this dessert.
If you enjoy layered treats, you might also want to explore our raspberry coconut magic bars or the decadent chocolate coconut dream cake for more flavor inspiration.
Essential Ingredients for the Dark Chocolate Base
All-Purpose Flour: 1 ½ cups (190g). This provides the necessary structure for the cake base, ensuring it doesn’t crumble when sliced into clean bars.
Dark Cocoa Powder: ¾ cup (65g). Use Dutch-processed cocoa to achieve that signature “dark chocolate” look and a smooth, mellow flavor profile.
Granulated Sugar: 1 ½ cups (300g). Sugar not only sweetens but also helps tenderize the crumb by interfering with gluten development.
Baking Powder & Soda: 1 tsp (5g) each. This dual leavening system ensures the cake rises evenly without becoming too domed in the center.
Large Eggs: 2 units. Eggs provide protein for structure and emulsifiers to keep the batter cohesive and moist.
Vegetable Oil: ½ cup (120ml). Oil stays liquid at room temperature, which guarantees a moist mouthfeel that butter-based cakes often lose when chilled.
Boiling Water: ¾ cup (180ml). Adding boiling water at the end “blooms” the cocoa powder, releasing the full depth of the chocolate flavor.
Components for the Thick Coconut Cream Layer
Cream Cheese: 8 oz (225g). Softened cream cheese provides the “thick” body needed to support the coconut topping without sliding off the cake.
Sweetened Condensed Milk: ½ cup (150g). This adds a milky sweetness and a smooth, fudge-like consistency to the coconut layer.
Coconut Extract: 1 tsp (5ml). While we use real coconut, the extract reinforces the tropical aroma that can sometimes be lost during the mixing process.
Heavy Whipping Cream: 1 cup (240ml). Folded in at the end, this aerates the mixture, making it light yet stable enough for stacking.
Achieving the Fluffy Neon Pink Coconut Topping
Shredded Sweetened Coconut: 2 cups (200g). The “shredded” variety provides the best fluffy texture compared to thicker flakes or desiccated coconut.
Neon Pink Gel Food Coloring: 2-3 drops. Gel coloring is essential because it provides intense pigment without adding excess moisture that would make the coconut soggy.
Water: 1 tsp (5ml). A tiny amount of water helps distribute the gel dye evenly across every strand of coconut.
Critical Equipment for Success
9×13 Inch (23x33cm) Baking Pan: A metal pan is preferred for sharp, clean edges, which are vital for the “layered bar” aesthetic.
Parchment Paper: Always leave an overhang. This allows you to lift the entire block of bars out of the pan for precise slicing on your marble surface.
Stand Mixer or Hand Mixer: To achieve a “thick creamy white coconut layer,” you need the mechanical power to whip the cream and cream cheese into a stable fluff.
Off-set Spatula: This is the secret to getting a perfectly flat, even middle layer that looks professional in cross-section photos.
Step-by-Step Instructions for the Dark Chocolate Base
Mixing the Dry and Wet Foundations
Preheat your oven to 350°F (175°C). In a large bowl, sift together your flour, cocoa powder, sugar, baking powder, baking soda, and a pinch of salt. Sifting is non-negotiable here; it prevents cocoa clumps which can ruin the “moist dark chocolate cake” texture.
In a separate vessel, whisk the eggs, milk, oil, and vanilla until fully combined. Slowly pour the wet ingredients into the dry, stirring gently. The batter will be thick at first, but don’t worry—the next step changes everything.
Blooming the Cocoa
Pour the boiling water into the batter. Whisk by hand until the mixture is smooth and thin. You will see small bubbles forming; this is the leavening agents reacting to the heat.
Pour the batter into your lined pan. Bake for 28-32 minutes. Look for a visual cue: the edges should just start to pull away from the parchment paper, and a toothpick should come out with a few moist crumbs attached. Let the cake cool COMPLETELY before adding the next layer.
Creating the Thick Creamy White Coconut Layer
Whipping the Base
In your mixer, beat the softened cream cheese until it is completely smooth and devoid of lumps. Slowly drizzle in the sweetened condensed milk and coconut extract. Continue beating until the mixture looks like a thick, glossy frosting.
Folding for Aeration
In a cold bowl, whip the heavy cream until stiff peaks form. Gently fold the whipped cream into the cream cheese base using a silicone spatula. This technique preserves the air bubbles, ensuring the layer is “thick and creamy” rather than dense and heavy.
Spread this mixture over the cooled chocolate cake. Use your off-set spatula to smooth it from edge to edge. Place the pan in the refrigerator for at least 1 hour to set before adding the topping.
Mastering the Neon Pink Shredded Coconut
The Coloring Technique
Place your shredded coconut into a large gallon-sized zip-top bag. In a small shot glass, mix the neon pink gel dye with the teaspoon of water. Drizzle the dye into the bag.
Seal the bag with plenty of air trapped inside and shake vigorously. The air allows the coconut to tumble, ensuring every flake is coated in that vibrant neon pink. Continue shaking until the color is uniform and the coconut looks “fluffy.”
The Final Assembly
Take the chilled cake out of the fridge. Generously pile the neon pink coconut over the cream layer. Press down very lightly with the palm of your hand just to ensure the coconut adheres to the cream. Return to the fridge for another 2 hours. This “curing” time is what allows for the clean, handheld smartphone photo slices you see in the blueprint.
Expert Tips for Bakery-Quality Results
- The Hot Knife Trick: To get the clean layers seen on the white marble surface, dip a sharp chef’s knife in hot water and wipe it dry between every single cut.
- Temperature Control: Never attempt to frost a warm cake. The coconut cream layer contains fat that will melt instantly, ruining the distinct layering.
- Natural Window Lighting: For the best photos, place your marble slab near a north-facing window. The soft shadows will highlight the “extremely detailed food texture” of the fluffy coconut.
- Gel vs Liquid: Avoid liquid food coloring. It will make the coconut sticky and clumped together rather than fluffy and light.
Storage, Reheating, and Freezing
These coconut snowball dessert bars must be stored in the refrigerator due to the dairy content in the cream layer. They will stay fresh and moist in an airtight container for up to 5 days. We do not recommend reheating, as these are best served chilled.
For freezing, slice the bars first and flash-freeze them on a tray for one hour. Once firm, wrap them individually in plastic wrap and store in a freezer bag for up to 3 months. Thaw in the refrigerator overnight before serving.
What to Serve With These Festive Bars
These bars are quite rich, so they pair beautifully with a bitter beverage like a dark roast coffee or a cold glass of milk. If you are hosting a dessert party, consider serving them alongside our raspberry pistachio bars for a varied color palette.
For a full tropical-themed spread, you could also offer slices of brazilian coconut custard cake or some air fryer bananas for a warm contrast. The neon pink also makes them a great companion to pink sugar cookie bars during Valentine’s Day or themed birthdays.
Frequently Asked Questions
Yes, you can substitute a dark chocolate or devil’s food cake mix, but ensure you bake it in a 9×13 pan and allow it to cool completely before layering to maintain the bar structure.
Sweetened condensed milk provides a specific fudgy thickness to the middle layer. If you substitute it with powdered sugar, the texture will be more like a traditional frosting rather than a dense cream layer.
Use neon pink gel food coloring rather than liquid. Shake the shredded coconut in a zip-top bag with a few drops of gel and a teaspoon of water to distribute the color evenly without making it soggy.
This usually happens if the cake base was still slightly warm when frosted or if the cream cheese wasn’t beaten enough to stabilize the heavy cream. Ensure the cake is cold and the cream is whipped to stiff peaks.
The Ultimate Coconut Snowball Dessert Bars Recipe
Coconut Snowball Dessert Bars: A Neon Pink Dark Chocolate Delight
Ingredients
Equipment
Method
- In a large bowl, sift together flour, sugar, cocoa, baking powder, baking soda, and salt.
- Add eggs, oil, milk, and vanilla. Mix until just combined, then stir in boiling water by hand until smooth.
- Pour into a lined 9x13 pan and bake at 350°F (175°C) for 30 minutes. Cool completely.
- Beat cream cheese and condensed milk until smooth. Fold in whipped heavy cream and coconut extract.
- Spread the cream mixture over the cooled cake base and refrigerate for 1 hour.
- Shake shredded coconut with neon pink gel dye in a bag until fluffy and evenly colored.
- Top the bars with the pink coconut and chill for 2 hours before slicing.
Notes
Ensure the cake is 100% cool before adding the cream layer to prevent melting.
Closing & Call to Action
These coconut snowball dessert bars are more than just a treat; they are a visual and culinary experience. The combination of moist dark chocolate and vibrant pink coconut is guaranteed to impress any guest and brighten up your dessert table. If you enjoyed this recipe, please leave a comment below and share your photos with us!
Be sure to follow us on Pinterest for more visually stunning and delicious recipes. Don’t forget to save this to your “Dessert Bars” board so you can find it whenever the craving for a neon-pink treat strikes!