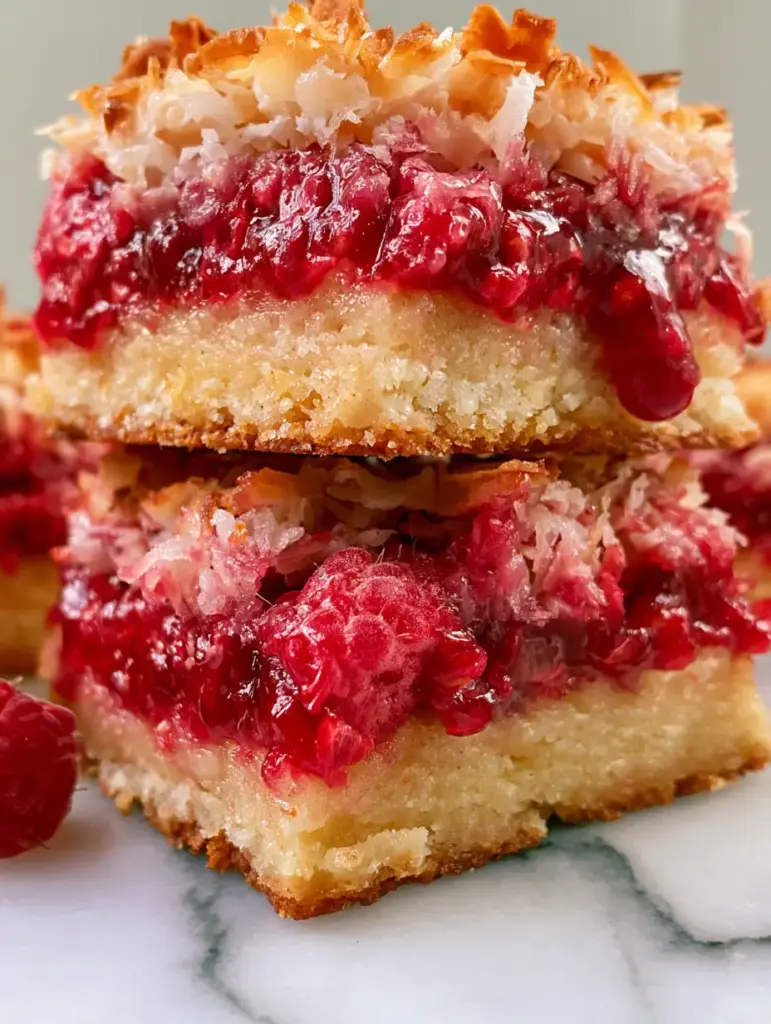
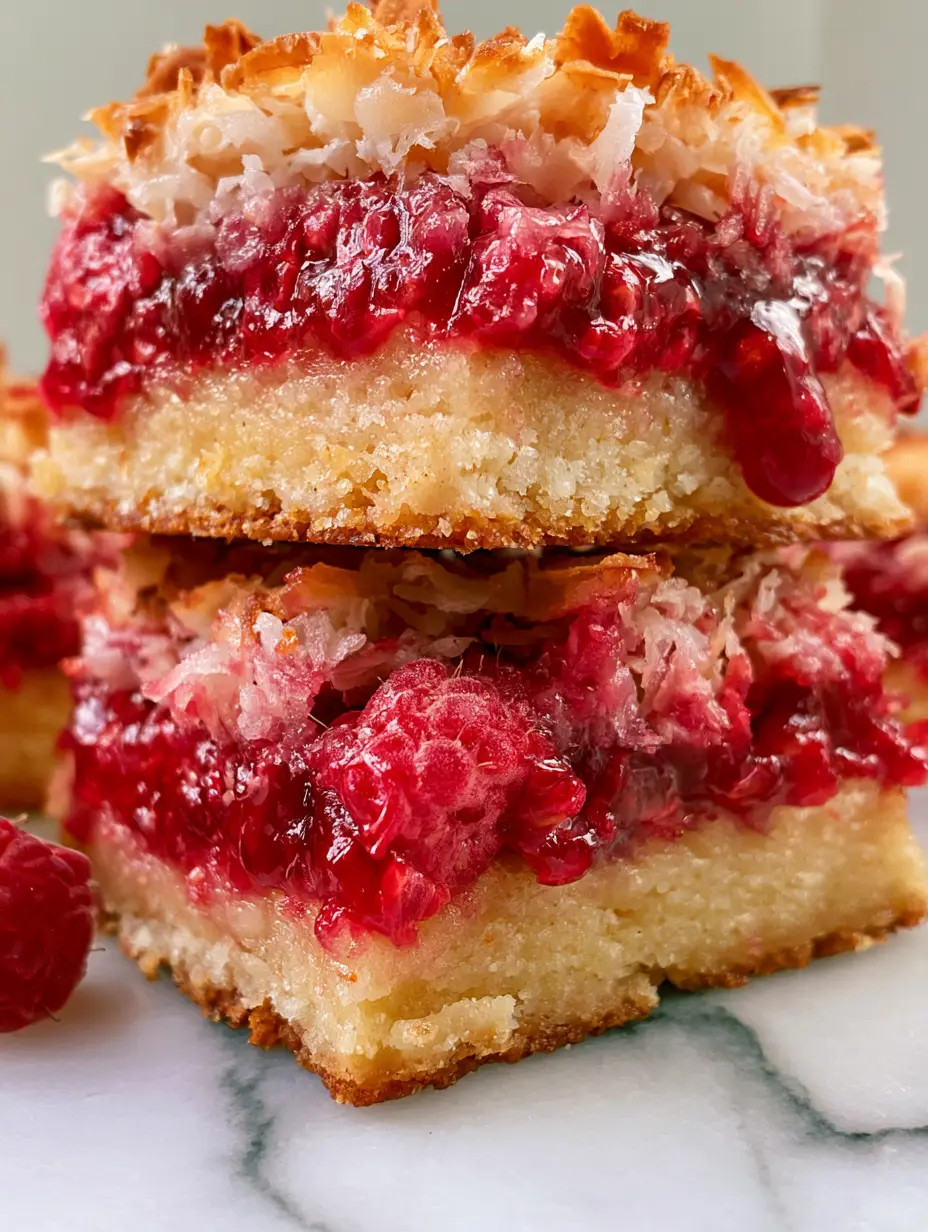
Imagine standing in your kitchen as the soft natural morning light hits your countertop, illuminating a stack of the most decadent raspberry coconut magic bars you have ever laid eyes on. These aren’t just your standard dessert bars; they are a masterclass in textural contrast, featuring a thick, golden buttery shortbread crust that provides a sturdy foundation for an oozing, vibrant red jammy raspberry filling. Every bite is crowned with a mixture of crispy, golden-brown toasted shredded coconut and delicate toasted coconut flakes that shatter upon impact.
The visual appeal of these bars is undeniable, especially when served on a clean white marble surface where the bright fruit and sticky textures can truly shine. Whether you are looking for a show-stopping addition to a weekend brunch or a sophisticated treat for a mid-afternoon pick-me-up, these raspberry coconut magic bars deliver a professional-grade culinary experience with the comforting soul of a home-baked classic.
By combining the tartness of fresh raspberries with the tropical sweetness of coconut and the rich, salt-kissed notes of a professional shortbread, we create a flavor profile that is balanced, nuanced, and utterly addictive. In this guide, we will walk through the forensic culinary details required to achieve that perfect “ooze” while maintaining a crust that never goes soggy.
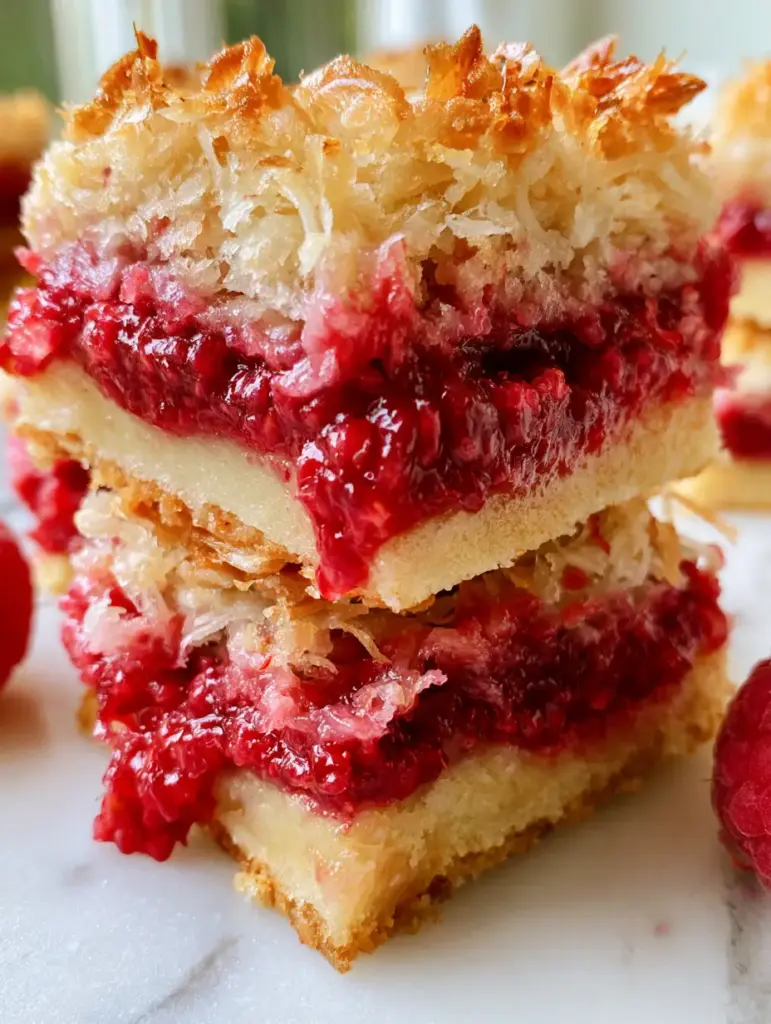
The Culinary Blueprint for Perfect Raspberry Coconut Magic Bars
- Textural Contrast: A dual-layer coconut topping provides both a chewy, moist interior and a crispy, toasted exterior that catches the light.
- Forensic Visual Layers: We utilize a specific layering technique to ensure the vibrant red raspberry jam stays distinct from the golden crust, preventing a muddy appearance.
- Structural Integrity: The shortbread base is par-baked to a deep golden-brown to ensure it can support the weight of the fresh fruit and condensed milk without crumbling.
- Symphony of Raspberry: By using both high-quality raspberry jam and fresh raspberries, we achieve a depth of flavor that alternates between sweet-cooked notes and bright, acidic pops.
The Essential Elements for Your Dessert Masterpiece
Unsalted Butter (1 cup / 226g): We use high-fat European-style butter to create a shortbread crust that is exceptionally flaky and rich. The butter must be cold and cubed to maintain the structural pockets of fat that define a professional crumb.
All-Purpose Flour (2 cups / 250g): This provides the necessary protein structure for our base. It is sifted to ensure no lumps interfere with the delicate “short” texture of the crust.
Granulated Sugar (1/2 cup / 100g): Just enough sweetness for the base to complement the tart berries. It also aids in the browning process, giving us that essential golden-brown visual cue.
Fine Sea Salt (1/2 tsp / 3g): A critical “invisible” ingredient that heightens the flavor of the coconut and cuts through the richness of the sweetened condensed milk.
Raspberry Jam (1 cup / 320g): Choose a seedless or low-seed variety with a vibrant red hue. This acts as the “glue” and the primary color driver for the middle layer.
Fresh Raspberries (1.5 cups / 185g): These provide the “oozing” texture described in our visual blueprint. As they bake, they release their juices, creating those beautiful jammy pockets.
Sweetened Shredded Coconut (1.5 cups / 140g): This variety stays moist and sticky, providing the classic “magic bar” chewiness that pairs so well with fruit.
Toasted Coconut Flakes (1/2 cup / 30g): Added toward the end of the bake, these larger flakes provide the “crispy” visual element and a deeper, nuttier flavor profile.
Sweetened Condensed Milk (1 can / 396g): The magical binder. It seeps through the coconut layers, caramelizing slightly to create a fudge-like consistency that holds the fruit in place.
Professional Tools for Baking Success
To achieve the perfectly defined layers seen in our visual prompt, you will need a 9×9 inch (23×23 cm) square baking pan. Lining this pan with parchment paper with an overhang is non-negotiable; it allows you to lift the entire block of bars out for clean, sharp slicing once they have set.
A pastry cutter or a food processor is essential for incorporating the cold butter into the flour for the shortbread. You are looking for a texture resembling coarse meal with a few pea-sized pieces of butter remaining. Additionally, a sharp chef’s knife is required to achieve the clean “stacked” look, especially when cutting through the sticky jam and fibrous coconut layers.
The Step-by-Step Evolution of the Magic Bar
Engineering the Golden Shortbread Crust
Preheat your oven to 350°F (175°C). In a large bowl, whisk together the flour, sugar, and salt. Using your pastry cutter, work the cold butter into the dry ingredients until the mixture holds together when squeezed in your palm.
Press this mixture firmly into the bottom of your prepared pan. Use the bottom of a flat measuring cup to ensure the crust is even and compact. Bake for 18–20 minutes. You are looking for a sensory cue: the edges should be a light golden-brown and the kitchen should smell intensely of toasted butter. This par-bake is the secret to preventing a soggy bottom once the raspberry jam is added.
Layering the Vibrant Raspberry Filling
While the crust is still warm, spread the raspberry jam in an even layer from edge to edge. The warmth of the crust will help the jam spread smoothly without tearing the shortbread. Next, scatter the fresh raspberries evenly over the jam. Press them down slightly so they are partially submerged; this ensures that as they burst, their juices mix with the jam for that “luscious and oozing” effect.
If you love this fruit profile, you might also enjoy the textural complexity of our raspberry pistachio bars, which offer a similar tart-and-sweet balance but with a nutty crunch.
The Coconut Transformation
In a medium bowl, toss the sweetened shredded coconut with about 1/4 cup (60ml) of the sweetened condensed milk just to moisten it. Sprinkle this over the raspberries. Then, pour the remaining sweetened condensed milk evenly over the entire surface. This ensures every strand of coconut is coated and will caramelize properly.
Return the pan to the oven and bake for another 25–30 minutes. Watch for the visual cue: the condensed milk should be bubbling and the coconut should be turning a beautiful, variegated golden-brown. In the final 5 minutes of baking, sprinkle the larger coconut flakes on top to get that extra crispy finish without burning them.
Expert Tips for Perfect Dessert Bars
- The Chill Factor: Do not attempt to cut these bars while warm! The jam and condensed milk need at least 4 hours (or overnight) in the refrigerator to set. This is the only way to get those perfectly defined layers.
- Clean Slices: Dip your knife in hot water and wipe it clean between every single cut. This prevents the sticky raspberry filling from smearing onto the white coconut topping.
- Temperature Matters: Ensure your raspberries are dry before adding them. Excess water on the berries can lead to a steam-filled bake, which softens the crust.
- Toast Control: If the shredded coconut is browning too quickly, tent the pan loosely with foil for the final 10 minutes to allow the center to set without scorching the top.
The Art of Storage and Preservation
These raspberry coconut magic bars are remarkably hardy. They can be stored in an airtight container at room temperature for up to 2 days, but for the best texture and the cleanest “ooze,” we recommend keeping them in the refrigerator for up to 7 days. The cold temperature keeps the butter in the crust firm and the jam layer stable.
For long-term storage, these bars freeze beautifully. Wrap individual squares in plastic wrap and store them in a freezer-safe bag for up to 3 months. Simply thaw in the fridge overnight before serving. The flavors of the coconut and raspberry actually deepen after a day of resting, making these an ideal make-ahead dessert.
What to Serve With These Vibrant Bars
To lean into the tropical vibes, serve these bars alongside a chilled glass of coconut milk or a light coconut ricotta cake for a themed dessert spread. The acidity of the raspberries also pairs beautifully with a sharp espresso or a tart hibiscus tea.
If you are looking for more coconut-focused treats to round out your baking weekend, consider our coconut snowball bars or these elegant toasted coconut vanilla bars for a variety of textures and visual styles.
Frequently Asked Questions
You can substitute the butter with a vegan buttery stick and use sweetened condensed coconut milk for a dairy-free version that still maintains the magic bar texture.
Yes, you can use frozen raspberries, but do not thaw them first. Add them directly to the jam layer to prevent excess moisture from making the crust soggy.
If the coconut is browning too quickly before the center is set, loosely cover the pan with aluminum foil for the final 10 minutes of baking.
Absolutely. Par-baking ensures the crust is firm and golden. Without this step, the moisture from the raspberry jam would soak into the raw dough, resulting in a mushy bottom.
This usually happens if the bars haven’t chilled long enough. The jam and condensed milk need at least 4 hours in the fridge to fully set and bond the layers together.
The Official Raspberry Coconut Magic Bars Recipe
Raspberry Coconut Magic Bars: The Ultimate Buttery and Jammy Dessert
Ingredients
Equipment
Method
- Preheat oven to 350°F (175°C). Combine flour, sugar, and salt. Cut in cold butter until coarse crumbs form. Press firmly into a 9x9 lined pan.
- Bake the crust for 18-20 minutes until the edges are golden-brown and the center is set.
- Spread raspberry jam over the warm crust, then top with fresh raspberries, pressing them down slightly.
- Toss shredded coconut with 1/4 cup condensed milk and sprinkle over berries. Pour remaining condensed milk evenly over the top.
- Bake for 25-30 minutes. Add coconut flakes in the last 5 minutes. The top should be bubbly and golden-brown.
Notes
Dip your knife in hot water between cuts to prevent sticking.
Closing & Call to Action
These raspberry coconut magic bars are a testament to how simple ingredients, when handled with culinary precision, can create something truly extraordinary. The combination of the crispy toasted coconut and the vibrant, oozing raspberry filling is a sensory delight that looks just as good as it tastes. We hope you enjoy bringing this “Visual Recipe Blueprint” to life in your own kitchen!
Did you make these bars? We’d love to hear how they turned out! Leave a comment below and don’t forget to follow us on Pinterest for more visually stunning recipe inspiration. Share your photos and tag us—we love seeing your stacked dessert masterpieces!