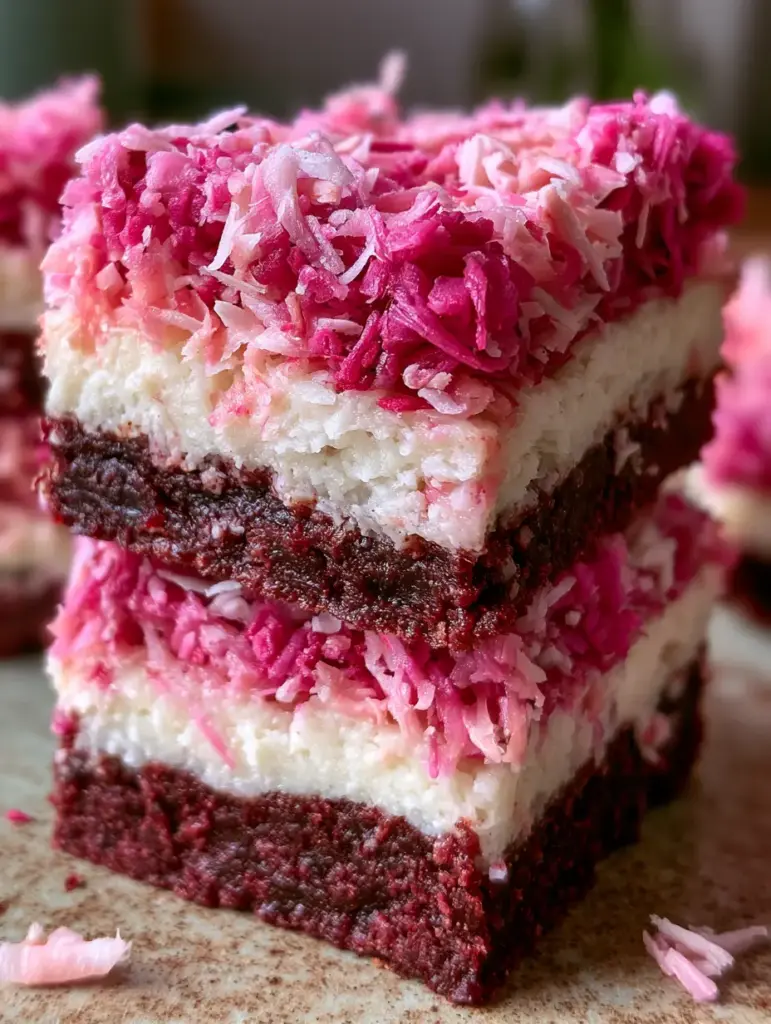
There is something inherently magical about the contrast between a deep, dark chocolate foundation and a cloud-like, vibrant pink topping. These coconut snowball bars are designed to be a showstopper, combining the fudgy intensity of a professional-grade brownie with the tropical sweetness of a thick vanilla coconut cream layer. Whether you are looking for a striking addition to a holiday dessert table or a whimsical treat for a weekend gathering, these bars deliver on every sensory level.
Inspired by the classic snowball snack cakes but elevated with premium ingredients, this recipe focuses on textural harmony. You will find the snap of desiccated coconut flakes meeting the plushness of a vanilla-infused filling, all resting on a moist, dark cocoa base that melts in your mouth. The striking magenta and pastel pink topping isn’t just for show—it provides a delicate crunch that rounds out every single bite.
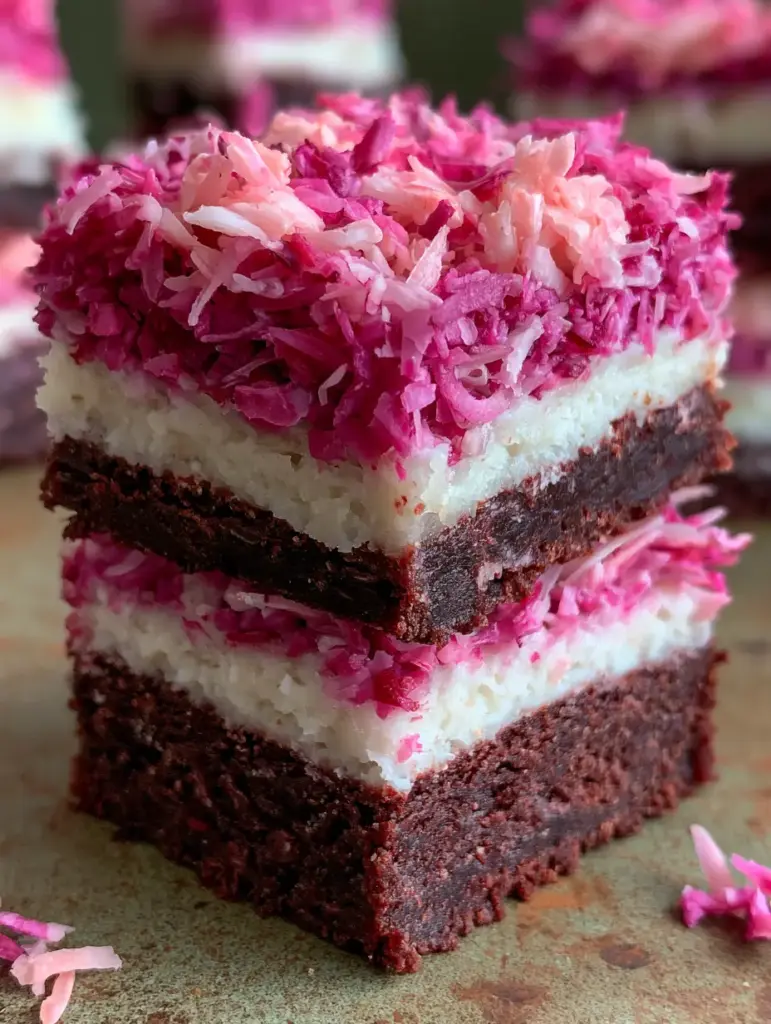
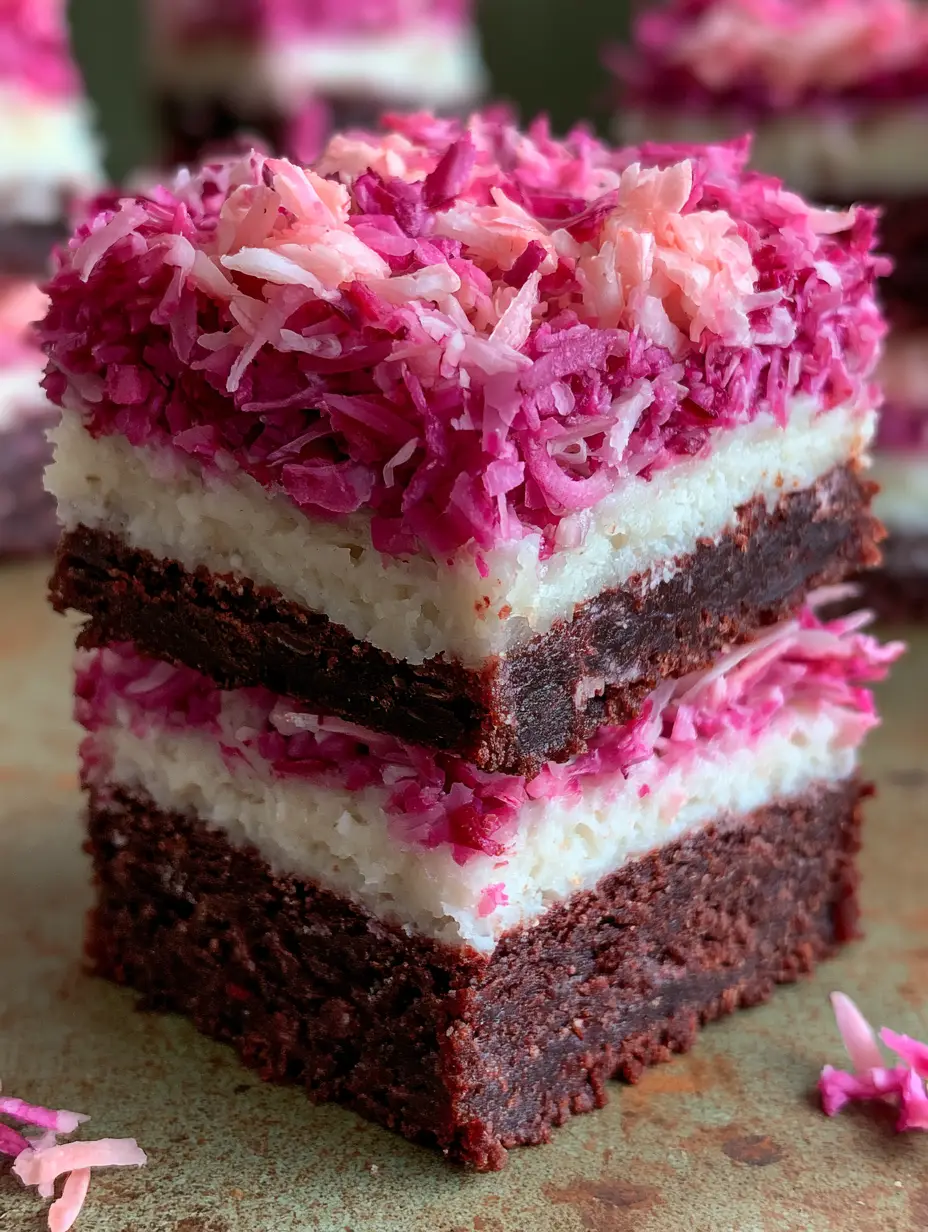
Captured in natural window lighting, these bars showcase a stunning three-layer stack that looks just as good as it tastes. The shallow depth of field in our visual guide highlights the intricate textures of the shredded coconut, and by following this guide, you can achieve that exact professional finish in your own kitchen. Let’s dive into the science of building the perfect coconut snowball bars.
Why You Will Crave These Layered Coconut Treats
- Triple-Layer Texture: You get a dense, fudgy brownie, a creamy center, and a light, airy coconut topping in every mouthful.
- Vibrant Aesthetic: The gradient of magenta and pastel pink shredded coconut makes these bars a visual masterpiece that requires no complex decorating skills.
- Deep Cocoa Contrast: Using high-quality dark cocoa powder ensures the base isn’t overly sweet, perfectly balancing the rich coconut cream.
- Make-Ahead Friendly: These bars actually improve after a few hours in the fridge, making them the ultimate stress-free entertaining dessert.
The Anatomy of a Perfect Coconut Snowball Bar: Essential Ingredients
Unsalted Butter (1 cup / 225g): We use melted butter in the base to create that signature fudgy brownie texture. It provides the necessary fat for a moist crumb that doesn’t dry out after baking.
Granulated Sugar (1.5 cups / 300g): This sweetens the cocoa and helps create that slightly crackly top on the brownie layer before we add the cream filling.
Dark Cocoa Powder (3/4 cup / 75g): Look for Dutch-processed cocoa to achieve that “dark brown chocolate” look specified in our visual blueprint. It offers a smoother, deeper chocolate flavor than natural cocoa.
Moist Cake Crumbs (1/2 cup / 50g): This is our “secret” ingredient for the base. Folding in fine chocolate cake crumbs adds an extra layer of moisture and a professional “bakery-style” density to the bottom layer.
Sweetened Condensed Milk (1 can / 400g): This acts as the binder for our thick vanilla coconut cream layer. It provides a luxurious, milky sweetness that pairs perfectly with coconut.
Shredded Coconut (4 cups / 340g): We use a mix of sweetened shredded coconut for the filling and fine desiccated coconut flakes for the topping to achieve varied textures. This mimics the “fine desiccated flakes” and “vibrant pink shredded coconut” seen in our visual guide.
Pink Gel Food Coloring: To achieve the “vibrant magenta and pastel pink” look, gel coloring is essential as it won’t alter the moisture content of the coconut flakes.
Pure Vanilla Extract (1 tbsp / 15ml): High-quality vanilla bridges the gap between the earthy cocoa and the tropical coconut flavors.
Professional Tools for Bakery-Style Results
To ensure your coconut snowball bars look like they were photographed for a high-end food blog, you’ll need a few specific tools. An 8×8 inch (20x20cm) square baking pan is the ideal size for achieving that “thick creamy white coconut filling” height. Lining your pan with parchment paper with an overhang is non-negotiable; this allows you to lift the entire block out for clean, sharp edges when slicing.
A silicone spatula is best for folding the cake crumbs into the brownie batter without overworking the gluten. For the topping, a large stainless steel bowl is perfect for tossing the coconut flakes with the pink dye to ensure even distribution. Finally, a sharp chef’s knife dipped in hot water between cuts is the secret to seeing those distinct layers clearly in every stack.
Step-by-Step: Mastering the Coconut Snowball Construction
Crafting the Intense Dark Cocoa Foundation
Start by preheating your oven to 350°F (175°C). In a large microwave-safe bowl, melt your 1 cup (225g) of unsalted butter. Whisk in the sugar and dark cocoa powder until the mixture is glossy and smooth; you’ll notice the aroma of the cocoa blooming immediately.
Add 2 large eggs and the vanilla extract, whisking vigorously until the batter looks like liquid silk. Gently fold in 3/4 cup (95g) of all-purpose flour, a pinch of salt, and those 1/2 cup (50g) of moist cake crumbs. Spread the batter into your lined pan and bake for 20-25 minutes. Look for the edges to be set while the center remains slightly soft—this ensures a “rich moist dark brown” result.
Whipping Up the Thick Vanilla Coconut Cream Filling
While the base cools completely, prepare the middle layer. In a medium bowl, combine the sweetened condensed milk with 3 cups (255g) of shredded coconut and a teaspoon of coconut extract. Stir until the mixture is heavy and thick.
This layer should be dense enough to hold its shape but soft enough to spread. Spread it evenly over the cooled brownie base using an offset spatula. Ensure you press down firmly to eliminate air pockets, creating that “thick creamy white” middle layer that provides the structural integrity for the stack.
How to Achieve That Vibrant Pink Shredded Topping
This is where the forensic visual accuracy comes into play. Take your remaining 1 cup (85g) of shredded coconut and divide it into two bowls. In one bowl, add a tiny drop of magenta gel coloring; in the other, a microscopic amount of pink for a pastel shade.
Toss the flakes vigorously with a fork until they are evenly coated. Mix the two shades together with some fine desiccated coconut flakes to create a multi-dimensional, “vibrant magenta and pastel pink” blend. Sprinkle this generously over the white coconut layer, pressing down lightly so the flakes adhere to the cream filling.
Final Assembly and Chilling for the Perfect Slice
Patience is key for the perfect coconut snowball bars. Transfer the pan to the refrigerator for at least 4 hours, or ideally overnight. This allows the fats in the coconut cream and the butter in the brownie to solidify, ensuring clean cuts.
When ready to serve, use the parchment paper handles to lift the bars out. Use a long, hot knife to slice them into squares. You should see a clear definition between the dark base, the white center, and the fluffy pink top. Scatter a few stray coconut flakes on your serving board for that “rustic countertop” aesthetic seen in the photos.
Expert Secrets for Flawless Layers
- Room Temperature Ingredients: Ensure your eggs are at room temperature to prevent the melted butter from seizing, which keeps the brownie base ultra-smooth.
- Don’t Overbake: The brownie layer will continue to firm up as it cools. If you overbake it, you lose that “moist” texture that defines the base of these coconut snowball bars.
- The “Clean Cut” Trick: Wipe your knife clean and re-dip it in hot water after every single slice to prevent the white coconut filling from smearing onto the dark brownie layer.
- Adjusting the Pink: If your pink coconut looks too “neon,” toss in more white desiccated flakes to soften the hue and add that “pastel pink” variety.
Keeping Your Coconut Bars Fresh and Delicious
Because of the moisture in the coconut filling, these bars are best kept in the refrigerator. Store them in an airtight container for up to 7 days. If you prefer a softer brownie base, let the bar sit at room temperature for 10 minutes before eating.
You can also freeze these bars for up to 3 months. Wrap individual squares in plastic wrap and then place them in a freezer-safe bag. This makes them a great “emergency” dessert for when guests drop by unexpectedly. Simply thaw in the fridge for a few hours before serving.
Creative Ways to Serve Your Pink Snowball Bars
These bars are a complete dessert on their own, but they also pair beautifully with other treats. If you love the combination of fruit and coconut, try serving these alongside some raspberry coconut magic bars for a stunning pink-themed dessert platter. The tartness of raspberries cuts through the richness of the dark cocoa base perfectly.
For a more decadent chocolate experience, you might also enjoy our chocolate coconut dream cake, which shares many of the same flavor profiles. If you’re hosting a brunch, these bars make a whimsical addition next to pink sugar cookie bars. To really lean into the coconut theme, consider a side of homemade bounty bars for the ultimate coconut lover’s spread.
Frequently Asked Questions About Coconut Desserts
You can substitute the butter with vegan butter, the eggs with flax eggs, and use sweetened condensed coconut milk for the filling layer.
Yes! You can use a small amount of beet juice or pitaya powder. However, gel coloring is recommended for the most vibrant magenta hue without adding extra liquid to the coconut.
No, this recipe features a baked brownie base with a no-bake coconut cream layer on top. This maintains the ‘snowball’ texture and keeps the filling creamy and white.
A mix of sweetened shredded coconut for the filling (for moisture) and fine desiccated coconut flakes for the topping (for the ‘snow’ look) works best.
This usually happens if the bars haven’t chilled long enough. The condensed milk filling needs at least 4 hours in the fridge to set completely. Also, ensure you press the layers down firmly during assembly.
The Ultimate Coconut Snowball Bars Recipe
Ready to create these stunning, triple-layered delights? Follow the detailed recipe card below to bring the visual blueprint to life. These coconut snowball bars are guaranteed to be the most talked-about treat at your next event!
Coconut Snowball Bars with a Rich Cocoa Brownie Base
Ingredients
Equipment
Method
- Preheat oven to 350°F (175°C). Combine melted butter, sugar, and cocoa powder. Whisk in eggs and vanilla until glossy.
- Gently fold in flour, salt, and cake crumbs until just combined. Pour into a lined 8x8 pan.
- Bake for 20-25 minutes until the edges are set. Let cool completely in the pan.
- Mix condensed milk, shredded coconut, and coconut extract. Spread evenly over the cooled base.
- Toss remaining coconut with food coloring until vibrant pink. Sprinkle over the white layer.
- Refrigerate for at least 4 hours before slicing into squares with a hot, sharp knife.
Notes
Store in the refrigerator for up to a week for best texture.
Closing & Call to Action
The beauty of these coconut snowball bars lies in the intersection of simple techniques and high-impact visual results. By focusing on the quality of your cocoa and the vibrancy of your pink coconut topping, you’ve created a dessert that is as much a work of art as it is a culinary delight. The moist brownie base and creamy coconut center provide a sophisticated flavor profile that appeals to adults and children alike.
If you enjoyed making this recipe, I would love to hear from you! Please leave a comment below with your results or any questions you might have. Don’t forget to share your creations on Instagram and tag us. For more visually stunning dessert inspiration, follow us on Pinterest and save this recipe to your favorite boards!