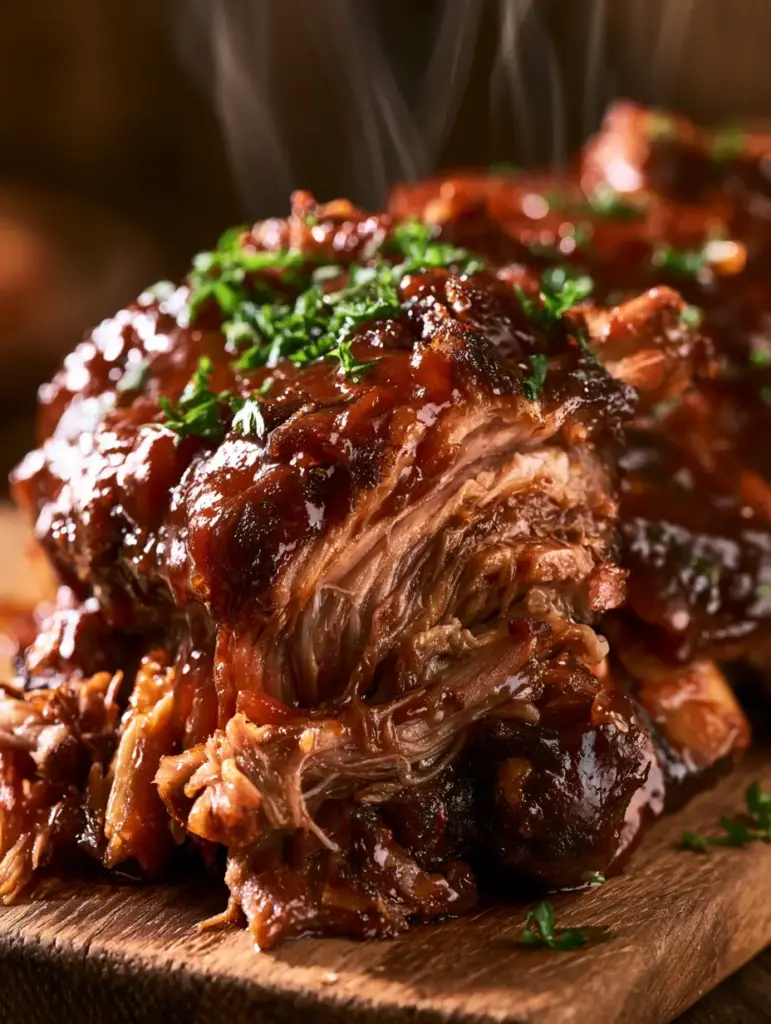
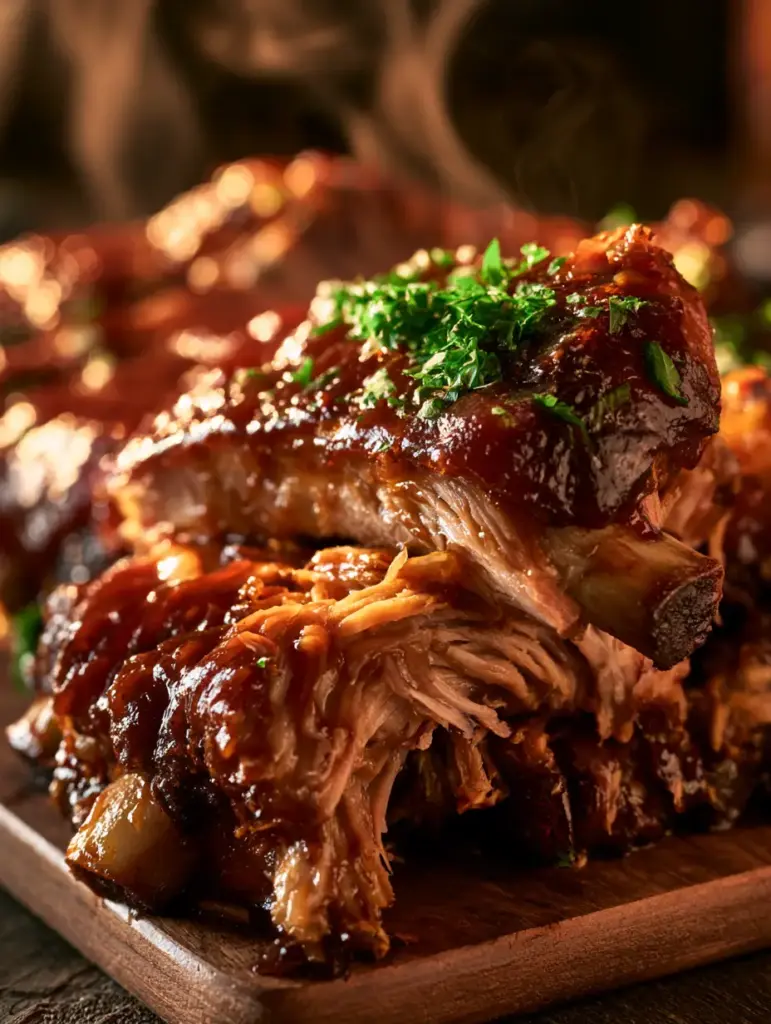
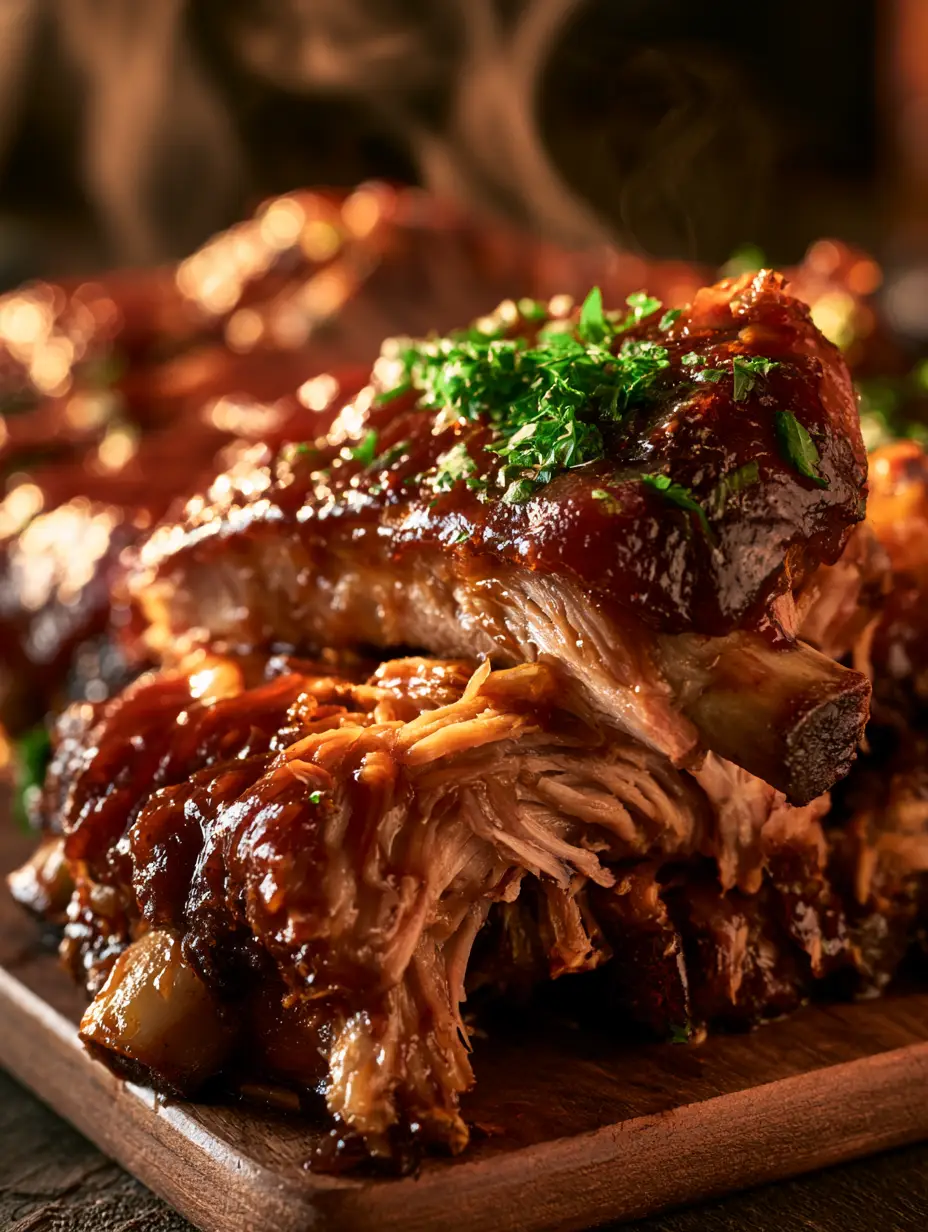
There is nothing quite as evocative in the world of outdoor cooking as the sight of bbq ribs glistening under a thick, smoky glaze. Imagine a rustic wooden serving board piled high with tender pork, where the steam rises in gentle curls, carrying the scent of hickory and brown sugar. As you reach for a piece, the juicy, shredded meat effortlessly pulls away from the bone, revealing a texture that has been perfected through hours of patient, slow-temperature cooking.
This recipe is designed to bridge the gap between amateur grilling and professional pitmaster results. We are focusing on that hyperrealistic visual appeal—a deep, mahogany caramelized crust contrasted by the vibrant green of freshly chopped parsley. Whether you are hosting a summer cookout or looking for a comforting weekend project, these ribs deliver a sensory experience that begins with the eyes and ends with complete culinary satisfaction.
Why This Caramelized Pork Recipe Rules the Grill
- The “Tug” Factor: We achieve the perfect balance where the meat is tender enough to be shredded with a fork but retains enough integrity to stay on the bone until you’re ready to bite.
- Multi-Dimensional Glaze: By layering a dry rub with a thick, sticky barbecue sauce, we create a complex crust that is both sweet, savory, and undeniably smoky.
- Forensic Visual Appeal: From the glistening surface to the rustic presentation on wood, this dish looks exactly like the high-end BBQ photography you see in professional culinary magazines.
- Accessible Techniques: While the results look professional, the methods—including the crucial foil-wrap phase—are easy for any home cook to master.
The Foundation of Flavor: What You Need for Tender Ribs
To achieve the result seen in our visual blueprint, every ingredient serves a dual purpose: structural integrity and flavor depth. We don’t just want sweetness; we want the chemical reaction that leads to a dark, glistening bark.
2 racks (approx. 4 lbs / 1.8kg) Pork Baby Back Ribs: These are leaner and more tender than spare ribs, making them ideal for that shredded, pull-away texture. Ensure the silver skin membrane is removed to allow the rub to penetrate the meat.
1/4 cup (50g) Dark Brown Sugar: This is the primary driver for caramelization. The molasses content in dark brown sugar creates a stickier, deeper glaze than light brown sugar or white sugar.
2 tbsp (15g) Smoked Paprika: This provides the signature “smoky” hue without needing a commercial smoker. It contributes to the vibrant red-brown color of the final glaze.
1 tbsp (15g) Kosher Salt: Salt is a foundational invisible ingredient that denatures the proteins. This allows the meat to retain moisture during the long cooking process, resulting in a juicy interior.
1 tsp (5g) Garlic Powder & Onion Powder: These aromatics provide a savory “umami” base. They melt into the fat of the ribs, creating a seasoned layer beneath the thick sauce.
1 cup (240ml) Thick Barbecue Sauce: Choose a sauce with a high sugar content (like a Kansas City style). This ensures the sauce “sets” and becomes glistening rather than just running off the meat.
2 tbsp (30ml) Apple Cider Vinegar: The acid cuts through the richness of the pork fat. It also helps tenderize the connective tissue during the slow-cook phase.
1/4 cup (15g) Fresh Parsley: The vibrant green color is essential for visual contrast. Flat-leaf Italian parsley offers the best flavor profile to balance the heavy smoke and sweetness.
Tools for Achieving a Sticky, Shredded Texture
Achieving pitmaster-level bbq ribs requires more than just a heat source; it requires heat management. You will need a large, rimmed baking sheet to catch the rendering fat and juices. High-quality heavy-duty aluminum foil is non-negotiable for the “Texas Crutch” method, which steams the meat to that shredded consistency.
A basting brush (silicone is best) is required to layer the sauce without disturbing the spice bark you’ve built. Finally, a sharp chef’s knife is needed to cleanly slice between the bones after the meat has rested, ensuring the shredded texture stays contained within each portion.
The Forensic Path to BBQ Perfection
Preparing the Canvas
Start by patting the ribs dry with paper towels. Removing surface moisture is the secret to getting the dry rub to adhere properly. Locate the thin, translucent membrane on the bone side of the ribs; use a butter knife to lift a corner, then grip it with a paper towel and pull it off in one motion. This ensures the meat can actually “pull away” from the bone as described in our visual guide.
The Spice Application
Combine your brown sugar, paprika, salt, garlic powder, onion powder, and a pinch of black pepper in a small bowl. Coat the ribs generously on both sides, massaging the spices into the meat. Let the ribs sit at room temperature for about 30 minutes; you will notice the sugar starts to look “wet”—this is the beginning of the caramelization process.
The Low and Slow Bake
Preheat your oven to 275°F (135°C). Wrap the ribs tightly in a double layer of foil, adding a splash of apple cider vinegar inside the packet before sealing. Place them on the baking sheet and bake for 2.5 to 3 hours. You are looking for a sensory cue: when you gently pierce the foil with a fork, the meat should feel soft and yielding, not springy.
The Glazing Transformation
Carefully open the foil packets (watch out for the hot steam!). Increase the oven temperature to 425°F (220°C) or turn on the broiler. Brush a thick layer of barbecue sauce over the top of the ribs. Return them to the oven for 5-10 minutes. Watch for the visual cue: the sauce should begin to bubble and turn a deep, dark mahogany color, creating that glistening, sticky glaze.
The Final Flourish
Remove the ribs from the oven and let them rest for at least 10 minutes. This allows the juices to redistribute, ensuring the meat is juicy and shredded rather than dry. Sprinkle the vibrant chopped parsley over the top just before serving on your wooden board. The contrast of the green herbs against the dark, caramelized sauce is the hallmark of a professional dish.
Pitmaster Secrets for the Ultimate Bark
- Don’t Rush the Rest: Slicing into ribs immediately after glazing causes the moisture to evaporate. A 10-minute rest ensures that “glistening” look remains on the plate.
- The Sugar Balance: If your BBQ sauce is very vinegary, add an extra tablespoon of honey to the final glaze to ensure it achieves that “sticky” Midjourney-style finish.
- Avoid Boiling: Never boil your ribs before cooking. It leaches out all the flavor and results in a rubbery texture rather than the tender, shredded meat we are aiming for.
- Temperature Control: Use an instant-read thermometer. For “fall-off-the-bone” texture, the internal temperature of the meat between the bones should be around 195°F-203°F (90°C-95°C).
Preserving Your Smoky Leftovers
Leftover bbq ribs stay delicious for 3-4 days when stored in an airtight container in the refrigerator. To maintain the shredded texture and glistening glaze, avoid the microwave. Instead, wrap the leftovers in foil with a tablespoon of water or extra sauce and heat in a 300°F (150°C) oven until warmed through.
You can also freeze these ribs for up to 3 months. For the best results, freeze them in a vacuum-sealed bag to prevent freezer burn. Defrost overnight in the fridge before following the reheating instructions above to restore that freshly-cooked steam and aroma.
Perfect Pairings for a Backyard Feast
To balance the intensity of the caramelized glaze, you need sides that offer creaminess or a refreshing crunch. A classic pairing is a baked mac and cheese, which provides a rich, cheesy counterpoint to the smoky pork. For a heartier meal, consider a cheesy potato bake.
If you prefer a simpler approach, these ribs are excellent alongside a beef macaroni soup for a multi-course winter feast. If you have extra meat that has pulled away from the bone, it makes a fantastic topping for a mashed potato meatloaf bake. For those who love the convenience of kitchen gadgets, you might also enjoy comparing this oven-finished method to slow cooker BBQ ribs.
Frequently Asked Questions
Use the ‘bend test.’ Pick up the slab with tongs from one end; if the meat starts to crack and pull away from the bone in the center, they are perfectly tender.
The key is the final high-heat phase. Brush on a sauce with high sugar content and bake at 425°F or broil for a few minutes until the sauce bubbles and caramelizes into a sticky glaze.
No, boiling ribs is not recommended as it leaches out the natural juices and flavor of the pork. For fall-off-the-bone tenderness, use the ‘low and slow’ oven or smoker method wrapped in foil.
The silver skin is a tough connective tissue on the bone side of the ribs. Removing it allows the dry rub to penetrate the meat and ensures the ribs are easy to shred and eat.
Barbecue sauce contains high amounts of sugar which burns quickly. Only apply the sauce during the last 10-15 minutes of cooking to create a glaze without scorching.
The Master Recipe for Sticky BBQ Ribs
BBQ Ribs with a Sticky Caramelized Glaze: The Ultimate Fall-Off-The-Bone Recipe
Ingredients
Equipment
Method
- Pat ribs dry with paper towels and remove the silver skin membrane from the back of the bones.
- Mix sugar and spices; massage the dry rub into both sides of the ribs. Rest for 30 minutes until the surface looks moist.
- Preheat oven to 275°F (135°C). Wrap ribs tightly in foil with a splash of apple cider vinegar.
- Place on a baking sheet and bake for 2.5 to 3 hours until tender.
- Increase oven to 425°F (220°C). Open foil, brush with thick BBQ sauce, and bake for 5-10 minutes until glistening and caramelized.
- Rest for 10 minutes, sprinkle with chopped fresh parsley, and serve on a wooden board.
Notes
Use a high-sugar sauce for the most glistening visual results.
Join the Wholesome Skillet Community
We hope these bbq ribs become a staple in your culinary repertoire. There is nothing more rewarding than seeing that steam rise off a perfectly glazed rack of pork served on a rustic board. If you enjoyed this recipe, please leave a comment below and share your results with us! Don’t forget to follow us on Pinterest for more visually stunning and scientifically sound recipes. Tag us in your photos—we love to see your glistening, caramelized masterpieces!