There is a specific kind of magic that happens when wholesome ingredients meet classic comfort food techniques. These healthy peanut butter cookies are the ultimate proof that you do not need refined flours or processed sugars to achieve a bakery-quality result. Imagine a cookie with a golden-brown, slightly crisp edge that gives way to a center so moist and fudgy it feels almost like a decadent truffle.
If you have ever been disappointed by dry, crumbly “healthy” desserts, this recipe is designed to change your mind. By focusing on the structural properties of oat flour and the natural fats in creamy peanut butter, we have engineered a treat that is as nourishing as it is indulgent. Every bite is accented by the crunch of sparkling sea salt flakes, balancing the deep, toasted notes of the nuts and the caramel undertones of pure maple syrup.
Whether you are looking for a post-workout protein snack or a guilt-free evening treat, these cookies deliver on every sensory promise. They look stunning on a platter with their signature deep cross-hatch marks, and they taste even better than they look. Let’s dive into the science and the soul of the perfect oat flour cookie.
The Anatomy of a Perfect Fudgy Cookie
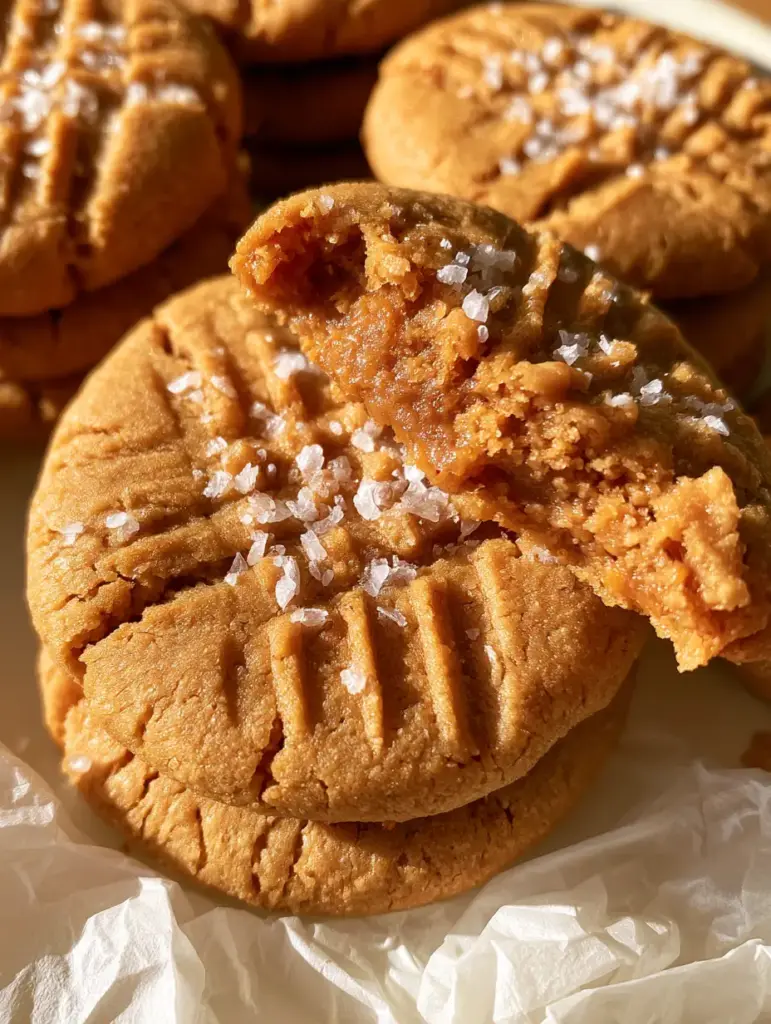
Achieving the specific texture described in our visual blueprint—a moist, dense, and fudgy center—requires more than just mixing ingredients. It requires an understanding of how moisture behaves in a gluten-free environment. Here is what makes these healthy peanut butter cookies stand out from the crowd:
- The Dual-Texture Experience: You get a satisfyingly crisp exterior that shatters slightly upon the first bite, followed immediately by a tender, melt-in-your-mouth interior.
- Natural Sweetness Profile: Instead of the harsh spike of white sugar, we use maple syrup which provides a floral complexity and essential moisture.
- The Fork-Press Signature: Those deep cross-hatch marks aren’t just for tradition; they help the dense dough bake evenly without drying out the middle.
- Visual Flourish: The addition of large sea salt flakes adds a professional, high-end food blog aesthetic while elevating the peanut flavor profile.
The Master Ingredient List for Flourless Success
Every ingredient in this recipe serves a specific culinary function, working in harmony to create a structurally sound and delicious cookie. We have selected these components to ensure the recipe remains gluten-friendly while maximizing the “hearth” feel of a homemade snack.
1 cup (250g) Creamy Peanut Butter: This acts as the primary fat source and the flavor base. Use a well-stirred, natural variety where the only ingredients are peanuts and salt to ensure a rich, authentic taste.
3/4 cup (90g) Oat Flour: This provides the structure and a subtle, nutty sweetness. Oat flour is excellent at absorbing moisture, which is the secret to that dense, fudgy center we are aiming for.
1/2 cup (120ml) Pure Maple Syrup: This is our liquid gold sweetener. It provides the necessary hydration for the oat flour to bloom while contributing to the golden-brown edges during caramelization.
1 Large Egg: The egg acts as the primary binder and leavening agent. It provides the protein structure needed to hold the cookie together and gives the crumb a slight lift.
1 tsp (5ml) Vanilla Extract: A foundational aromatic that bridges the gap between the salty peanut butter and the sweet syrup. It adds a layer of sophistication to the overall flavor profile.
1/2 tsp (3g) Sea Salt (Fine): This goes inside the dough to enhance all other flavors. If your peanut butter is already heavily salted, you can reduce this to a pinch.
Maldon Sea Salt Flakes: These are for the visual finish. They provide the “sparkle” mentioned in our prompt and a delightful burst of salinity that cuts through the richness.
1/2 tsp (2.5g) Baking Soda: This is an “invisible” essential. It reacts with the slight acidity in the maple syrup to ensure the cookies brown beautifully and develop those crisp edges.
Essential Kitchen Tools for Professional Results
To recreate the high-end food blog aesthetic of a handheld smartphone photo in natural light, you need the right tools for the job. Precision is key when working with oat flour to avoid a “sandy” texture.
First, a digital kitchen scale is highly recommended for measuring the oat flour, as it can be easily packed down in a measuring cup. You will also need a sturdy mixing bowl and a silicone spatula to ensure every bit of peanut butter is fully incorporated into the batter.
A standard dinner fork is required to create those iconic cross-hatch marks. For the best bake, use a heavy-gauge rimmed baking sheet lined with crinkled white parchment paper. The crinkled paper not only prevents sticking but also adds that organic, rustic texture to your final presentation.

Step-by-Step Instructions to Golden-Brown Perfection
Preparing the Dough for Maximum Density
Begin by preheating your oven to 350°F (175°C). In your large mixing bowl, combine the creamy peanut butter and maple syrup. Use your spatula to whisk them together until the mixture is smooth and glossy; this emulsification is the first step toward a fudgy center.
Add the egg and vanilla extract to the mixture. Beat vigorously until the egg is fully incorporated and the batter looks slightly thickened. This ensures the proteins are distributed evenly to prevent the cookies from falling apart after baking.
Integrating the Dry Elements
Sift the oat flour and baking soda directly over the wet ingredients. While sifting might seem like an extra step, it is vital for preventing clumps of flour in your healthy peanut butter cookies. Use a folding motion to combine the ingredients until no streaks of white remain.
Let the dough rest for about 5 minutes. This “hydration rest” allows the oat flour to absorb the liquid from the syrup and egg, which is the professional secret to preventing a gritty texture. The dough should feel thick, slightly tacky, and hold its shape when rolled.
The Art of the Fork-Press
Scoop approximately 2 tablespoons (about 40g) of dough and roll it into a smooth ball between your palms. Place the balls on your prepared parchment paper, leaving at least 2 inches (5cm) of space between them. They won’t spread much, but they need airflow for those golden edges.
Take your fork and press it firmly into the center of each ball to flatten it to about 1/2-inch thickness. Rotate the fork 90 degrees and press again to create the deep cross-hatch marks. You should see the edges of the cookie crack slightly—this is a visual cue that your dough has the perfect moisture balance.
Baking for Sensory Cues
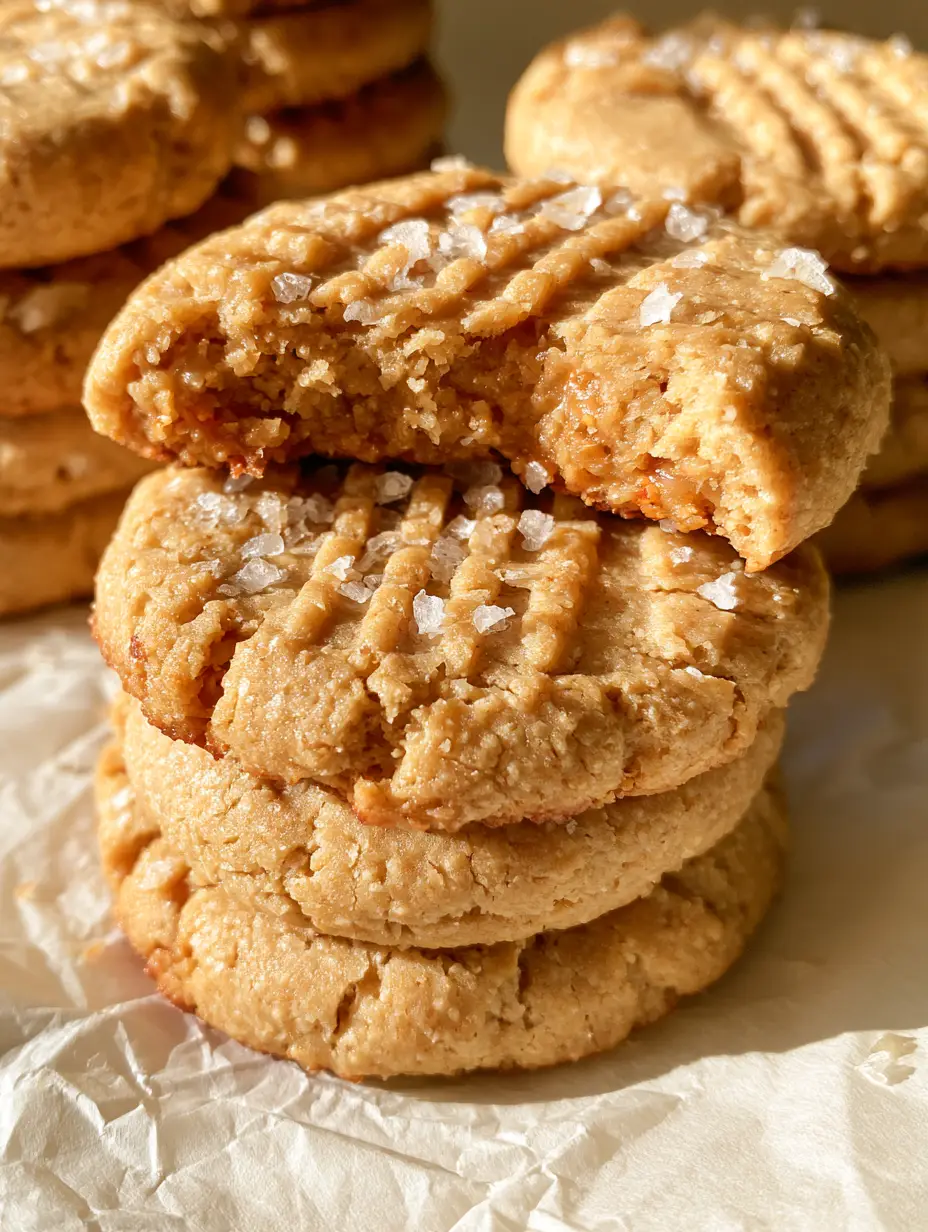
Slide the tray into the center rack of the oven. Bake for 10 to 12 minutes. You are looking for very specific visual cues: the edges should be a distinct golden brown and feel firm to the touch, while the centers should still look slightly soft and “underdone.”
Immediately upon removing the tray from the oven, sprinkle the tops with the sparkling sea salt flakes. The residual heat will help the flakes adhere to the surface. Allow the cookies to cool on the hot baking sheet for at least 10 minutes. This “carry-over cooking” is what creates the dense, fudgy interior while the exterior sets into a crisp shell.
Expert Tips for Success
- The “Snap” Test: Once cooled, a perfect cookie should snap cleanly at the edge but offer a soft, chewy resistance in the middle. If it’s too soft all over, bake for 2 more minutes.
- Oat Flour Quality: If you make your own oat flour by blending rolled oats, ensure you blend it until it is a fine, powdery dust. Coarse oats will lead to a crumbly cookie.
- Peanut Butter Choice: Avoid “no-stir” peanut butters containing palm oil if possible, as they can make the cookies greasy. Natural peanut butter provides the best structural integrity.
- Humidity Matters: On a very humid day, oat flour absorbs moisture from the air. You may need to add an extra tablespoon of flour if the dough feels too runny to roll.
Creative Pairings and Variations
While these cookies are a masterpiece on their own, they are incredibly versatile. If you want to lean into the indulgence, you might serve them alongside a slice of rich peanut butter cake for a themed dessert platter. The saltiness of these cookies also pairs beautifully with fruity flavors; try them as a side to raspberry jam cookies for a PB&J inspired experience.
For those who love a variety of textures in their cookie jar, consider making a batch of lemon sugar cookies to provide a bright, citrusy contrast to the deep, roasted flavor of the peanut butter. If you are catering to a crowd with diverse dietary needs, these pair excellently with keto chocolate cookies for a balanced dessert spread.
Storage and Freshness Guide
To maintain that specific “moist cookie crumb,” store these cookies in an airtight container at room temperature for up to 5 days. Placing a small piece of bread in the container can help keep them soft if you live in a dry climate.
These cookies also freeze beautifully. Place them in a single layer on a tray to freeze firm, then transfer to a freezer-safe bag for up to 3 months. To enjoy, let them thaw at room temperature for 30 minutes or pop them in a warm oven for 2 minutes to recapture that “just-baked” crisp edge.
Frequently Asked Questions
Yes! You can replace the egg with a flax egg (1 tablespoon ground flaxseed mixed with 3 tablespoons water). Note that the texture will be slightly denser and less ‘snappy’ at the edges.
Almond flour has a much higher fat content and no starch compared to oat flour. While it can work, the cookies will be very soft and may spread more. I recommend sticking to oat flour for the specific ‘fudgy’ results shown.
Dip your fork in a little bit of water or extra oat flour before pressing. This prevents the tines from sticking to the dough and ensures clean, deep cross-hatch lines.
A natural, drippy peanut butter where the only ingredients are peanuts and salt is best. Avoid ‘no-stir’ brands that contain palm oil or added sugars, as they change the structural chemistry of the bake.
Crumbly cookies usually result from over-measuring the oat flour or skipping the 5-minute hydration rest. Using a scale and allowing the dough to sit ensures the oats absorb the moisture fully.
The Ultimate Healthy Peanut Butter Cookie Recipe
Healthy Peanut Butter Cookies with Oat Flour and Sea Salt
Ingredients
Equipment
Method
- Preheat your oven to 350°F (175°C) and line a large baking sheet with crinkled white parchment paper.
- In a large bowl, whisk together the creamy peanut butter, maple syrup, egg, and vanilla extract until smooth and glossy.
- Sift the oat flour, baking soda, and fine sea salt into the wet mixture. Fold until just combined and no flour streaks remain.
- Allow the dough to rest for 5 minutes to let the oat flour hydrate, ensuring a fudgy rather than sandy texture.
- Roll 2-tablespoon portions of dough into balls. Place on the tray and use a fork to create a deep cross-hatch pattern, flattening them to 1/2-inch thickness.
- Bake for 10-12 minutes until edges are golden brown but centers remain soft. Sprinkle immediately with sea salt flakes.
Notes
Store in an airtight container for up to 5 days to maintain moisture.

The Final Snap: Why These Cookies Win
Creating healthy peanut butter cookies that don’t feel like a compromise is a culinary achievement. By utilizing the natural oils of peanut butter and the fiber-rich density of oat flour, we’ve created a snack that satisfies the deepest dessert cravings while providing steady energy. The contrast of the golden, toasted edges against the fudgy, soft center is a texture profile usually reserved for high-calorie bakery treats.
We invite you to try this recipe and experience the “snap” for yourself. If you love the result, please leave a comment below and share your photos with us! Don’t forget to follow The Wholesome Skillet on Pinterest for more vision-aligned, healthy recipes that never sacrifice flavor.