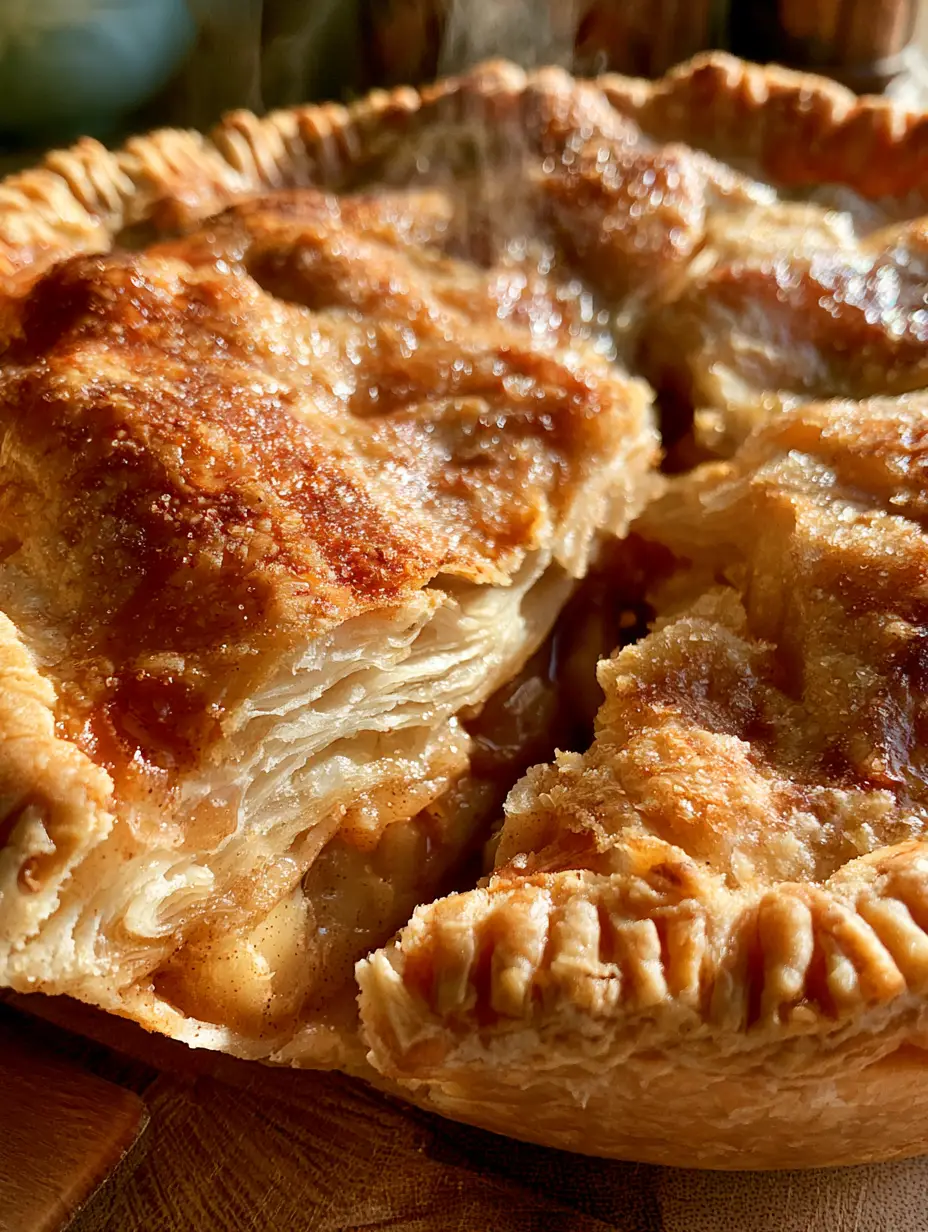
Mastering the perfect pie crust is the hallmark of an elite home baker. There is something deeply satisfying about pulling a golden-brown, rustic masterpiece from the oven, where the steam rises softly from a rich, spiced apple interior. This recipe focuses on achieving that elusive, shattering flakiness that defines a world-class dessert.
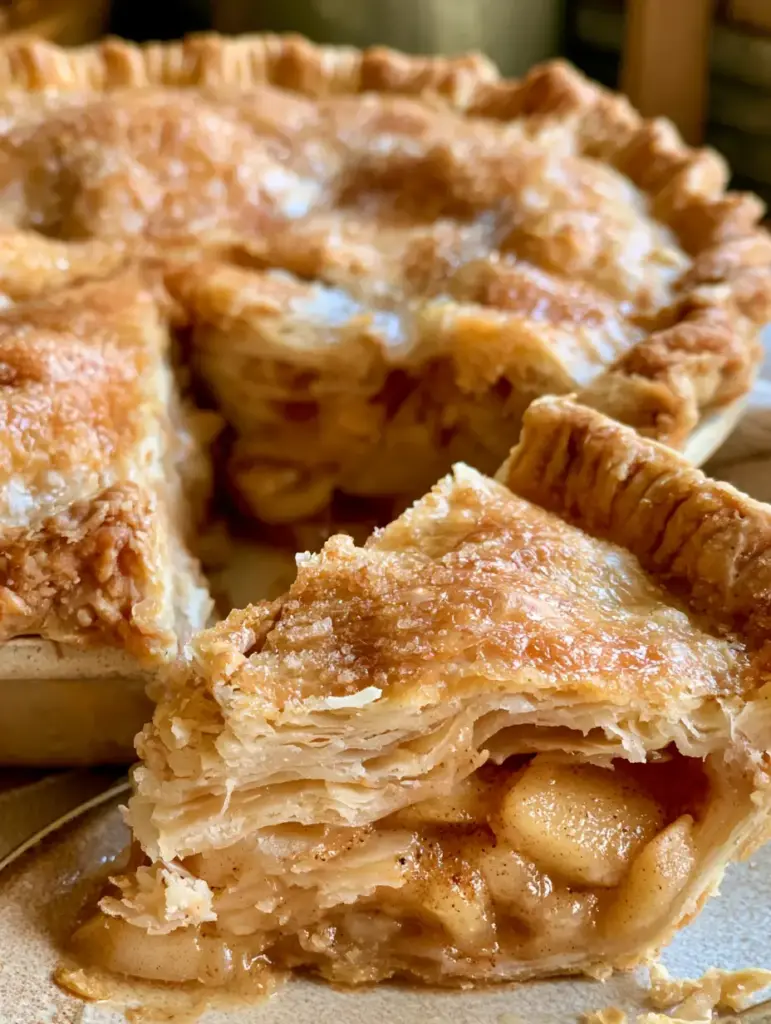
When you look at a professional apple pie, you notice the intricate, delicate layers of the crust and the way the light glints off visible sugar crystals. Our method ensures your crust isn’t just a container for the fruit, but a buttery, structurally sound highlight of the dish. Whether you are a beginner or a seasoned pro, this guide provides the forensic culinary details needed for success.
By focusing on temperature control and specific handling techniques, we will create a pie crust that rivals any high-end bakery. The contrast between the crisp, crimped edges and the gooey, warm spiced apple filling is what makes this recipe a perennial favorite. Let’s dive into the science of the perfect bake.
Why This Flaky Pie Crust Design Works
- Structural Lamination: By maintaining visible chunks of butter, we create steam pockets during baking that lift the flour into distinct, delicate layers.
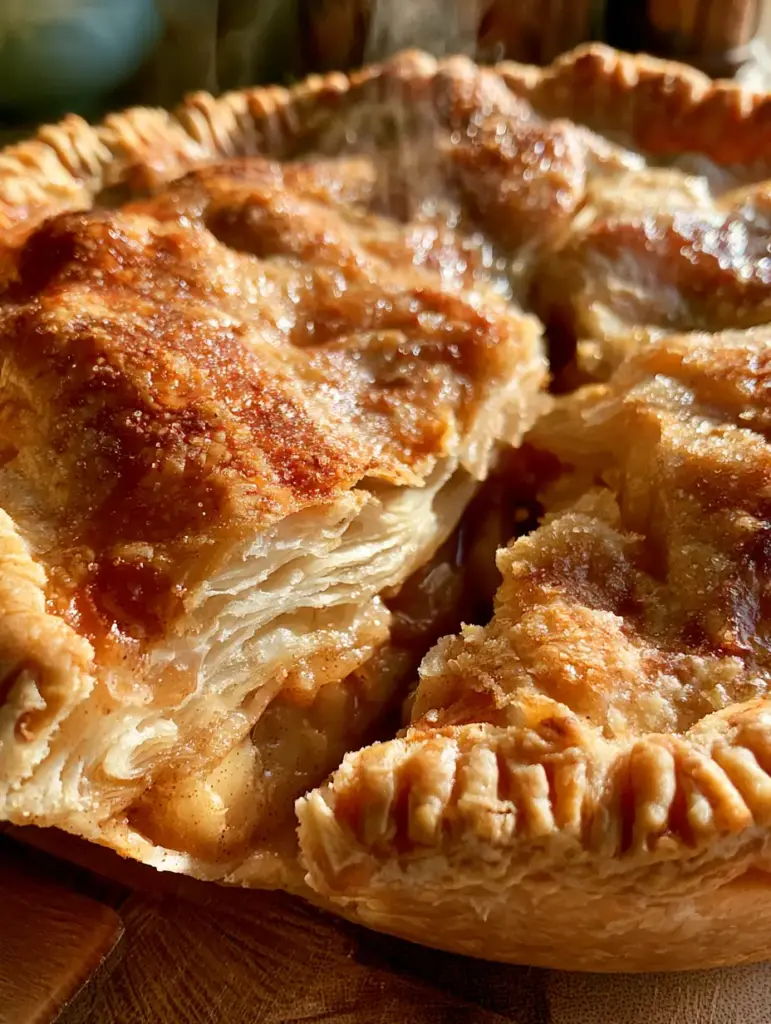
- Visual Brilliance: A specific egg wash and coarse sugar topping provide that glistening, professional finish and a satisfying crunch.
- Balanced Hydration: We use precise measurements of ice-cold water to ensure the dough is pliable enough to crimp without becoming tough or chewy.
- Perfect Pairing: While this crust is the star, it perfectly encases a filling of thinly sliced apples seasoned with aromatic cinnamon and nutmeg.
Essential Elements for a Superior Pie Crust
Every ingredient in this recipe serves a specific chemical and structural purpose to ensure a golden-brown result. Using high-quality fats and controlling gluten development are the keys to a tender crumb.
All-Purpose Flour: 2 ½ cups (315g)
This provides the necessary protein structure to hold the pie together while remaining tender enough to flake. Always fluff your flour before measuring to avoid packing too much into the cup.
Unsalted Butter (Cold): 1 cup (225g)
The butter must be kept ice-cold to prevent it from melting into the flour before it hits the oven. We use unsalted butter to have complete control over the seasoning of the pie crust.
Granulated Sugar: 1 tbsp (12g)
A small amount of sugar in the dough aids in the Maillard reaction, helping the crust achieve that deep, golden-brown hue. It also provides a subtle hint of sweetness to balance the savory fat.
Salt: 1 tsp (6g)
Salt is a flavor enhancer that tightens the gluten structure slightly and prevents the crust from tasting flat. It is the “invisible” hero that makes the buttery notes pop.
Ice Water: 6-8 tbsp (90-120ml)
Cold water binds the dough without melting the fat. Start with the minimum amount and add more only if the dough fails to hold together when pressed.
Egg Wash: 1 large egg whisked with 1 tbsp (15ml) water
This creates the glistening surface seen in professional photography. It acts as the “glue” for your decorative sugar crystals.
Coarse Sparkling Sugar: 2 tbsp (25g)
These crystals provide the macro-texture and sweetness that distinguish a rustic, homemade pie from a store-bought one. They catch the light and add a delightful textural contrast.
The Spiced Apple Filling Components
Thinly Sliced Apples: 6-7 cups (approx. 900g)
We recommend a mix of Granny Smith and Honeycrisp for a balance of tartness and structure. Slicing them thinly ensures they soften uniformly into a gooey interior.
Ground Cinnamon & Nutmeg: 1 ½ tsp (4g) and ¼ tsp (1g)
These warm spices are the soul of the apple pie. They provide the aromatic steam that greets you when the first slice is pulled away.
Professional Tools for Success
To achieve the macro-level detail of a perfect pie crust, you need the right equipment. A pastry blender is essential for cutting the butter into the flour without the heat of your hands melting the fat. A heavy-duty rolling pin allows for even pressure, ensuring the crust is a consistent thickness for even baking.
A glass or ceramic pie dish is preferred as they conduct heat steadily, helping to avoid the dreaded “soggy bottom.” Finally, a sharp paring knife is needed to create steam vents, which allow moisture to escape and prevent the crust from becoming waterlogged during the bake.
Mastering the Flaky Dough Technique
1. Incorporating the Fat
In a large chilled bowl, whisk together your flour, salt, and sugar. Add the cold, cubed butter and use a pastry blender to cut it in until the largest pieces are the size of peas. You should see visible chunks of butter; these are what create the flaky layers in your pie crust.
2. Hydrating and Chilling
Drizzle the ice water over the flour mixture one tablespoon at a time. Toss with a fork until the dough just begins to come together. Divide the dough into two discs, wrap in plastic, and chill for at least one hour. Chilling relaxes the gluten and ensures the butter stays solid.
3. Rolling and Shaping
On a lightly floured surface, roll one disc into a 12-inch (30cm) circle. Drape it into your pie plate, leaving an overhang. Add your sliced apple mixture, then roll out the second disc for the top. You can choose a full crust or a lattice, but ensure you have enough dough for a thick, crimped edge.
4. The Finishing Touches
Crimp the edges of the pie crust firmly between your thumb and forefinger to create a decorative, rustic border. Brush the entire surface with your egg wash and sprinkle generously with the coarse sugar crystals. Cut several vents in the top to allow steam to escape.
5. The Bake
Start your bake at 425°F (220°C) for the first 15 minutes to set the crust, then lower to 375°F (190°C) for the remaining 40-50 minutes. Look for a deep golden-brown color and filling that bubbles through the vents. This indicates the starches have thickened the juices.
Expert Tips for a Golden-Brown Finish
- Keep it Cold: If the dough feels warm or greasy at any point, put it back in the fridge for 15 minutes. Cold fat is the secret to lamination.
- Don’t Overwork: Handle the dough as little as possible. Overworking leads to gluten development, resulting in a tough, bread-like crust rather than a flaky one.
- Use a Baking Sheet: Place your pie on a preheated baking sheet. This helps cook the bottom crust quickly, ensuring it is as crisp as the top.
- Ventilation is Key: Large steam vents prevent the top crust from separating from the filling, keeping your layers tight and beautiful.
Optimal Storage and Reheating
Leftover apple pie can be kept at room temperature for up to 2 days, or in the refrigerator for up to 5 days. To maintain the integrity of the pie crust, avoid microwaving, which can make the pastry soggy. Instead, reheat slices in a 350°F (175°C) oven for 10 minutes to restore the crisp texture.
For long-term storage, you can freeze the unbaked pie. Wrap it tightly in several layers of plastic wrap and foil. Bake directly from frozen, adding about 20 minutes to the total cooking time.
Pairing Your Homemade Pie
While a slice of apple pie is iconic on its own, it pairs beautifully with other dessert textures. If you enjoy fruit-forward treats but want something lighter, try this crustless lemon wonder for a refreshing change of pace. The acidity of citrus is a great palate cleanser after a rich, buttery crust.
For those who love the combination of fruit and warm spices, our apple slab pie bars offer a similar flavor profile in a more portable format. If you find yourself with extra apples, you might also enjoy these cinnamon air fryer apple fries as a quick snack while your main pie cools.
If you prefer a chocolatey finish to your meal, consider serving the pie alongside no-bake chocolate treats to satisfy every sweet tooth at the table. The contrast between the warm, flaky pastry and a cool, creamy dessert is always a crowd-pleaser.
Frequently Asked Questions
Yes, a 50/50 mix of butter and shortening is common. Butter provides flavor and flakiness, while shortening has a higher melting point, helping the crust maintain its crimped shape.
Bake the pie on the lowest rack on a preheated baking sheet. This ensures the bottom crust gets immediate, intense heat to set the pastry before the fruit juices soak in.
An egg wash (one egg beaten with a splash of water) is the best method. It promotes browning and gives the crust a professional shine, especially when paired with a sprinkle of sugar.
A tough crust is usually caused by overworking the dough, which develops too much gluten, or by the butter melting before it reaches the oven. Keep ingredients cold and handle the dough minimally.
The Ultimate Flaky Apple Pie Recipe
Pie Crust Perfection for the Ultimate Flaky Homemade Apple Pie
Ingredients
Equipment
Method
- Whisk flour, 1 tbsp sugar, and salt in a cold bowl.
- Use a pastry blender to cut in cold butter until pea-sized chunks remain.
- Add ice water 1 tbsp at a time until dough holds when pressed. Divide into two discs, wrap, and chill for 1 hour.
- Roll one disc into a 12-inch circle and place in pie plate. Fill with sliced apples mixed with spices and sugar.
- Roll out second disc, place over filling, and crimp edges firmly. Cut steam vents.
- Brush with egg wash and sprinkle with coarse sugar until glistening.
- Bake at 425°F (220°C) for 15 mins, then 375°F (190°C) for 45 mins until golden-brown and bubbling.
Notes
Let the pie cool for at least 2 hours to allow the filling to set.
Sharing the Joy of Baking
There is nothing quite like the aroma of a freshly baked apple pie filling your kitchen. The combination of a perfectly executed pie crust and a spiced fruit filling is a testament to the art of home cooking. We hope this guide empowers you to create a dessert that is as visually stunning as it is delicious.
We would love to see your baking results! Please leave a comment below with your tips or questions. Don’t forget to share your rustic pie photos on Pinterest and tag us so we can celebrate your culinary success!