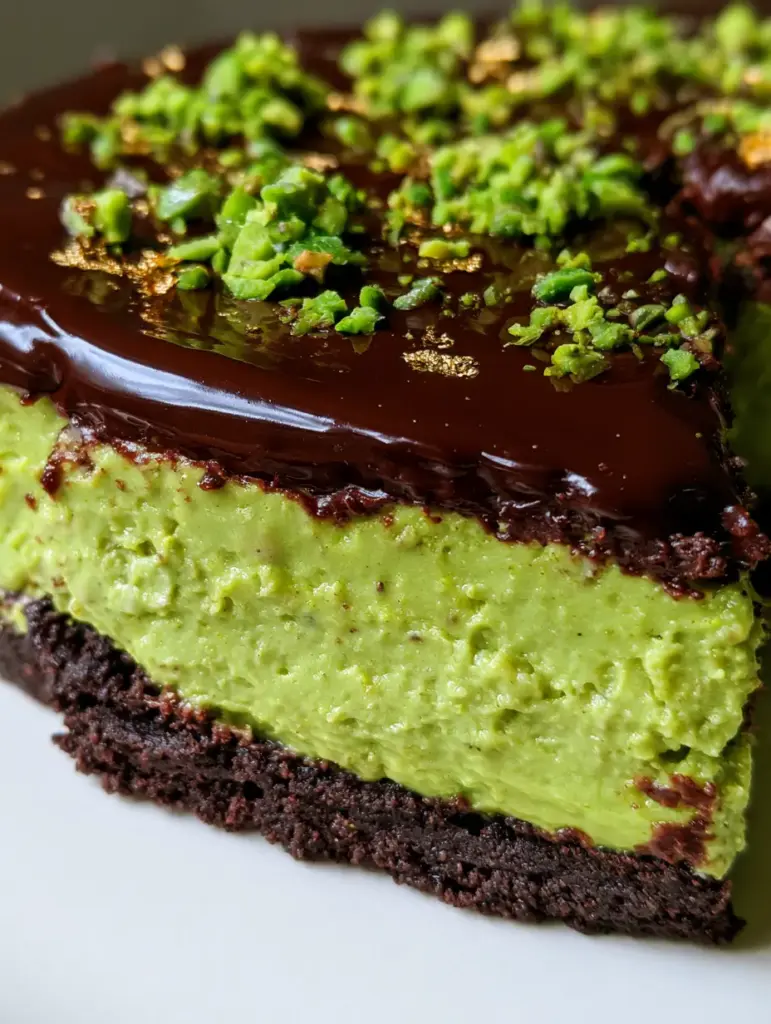
This pistachio chocolate tart is a masterclass in texture and color, inspired by the viral luxury chocolate bars of Dubai. Imagine a deep, dark cocoa cookie crust crumbling away to reveal a vibrant, neon-green pistachio praline that is as creamy as it is bold. It is a dessert designed to stop scrolls and satisfy the most intense cravings.
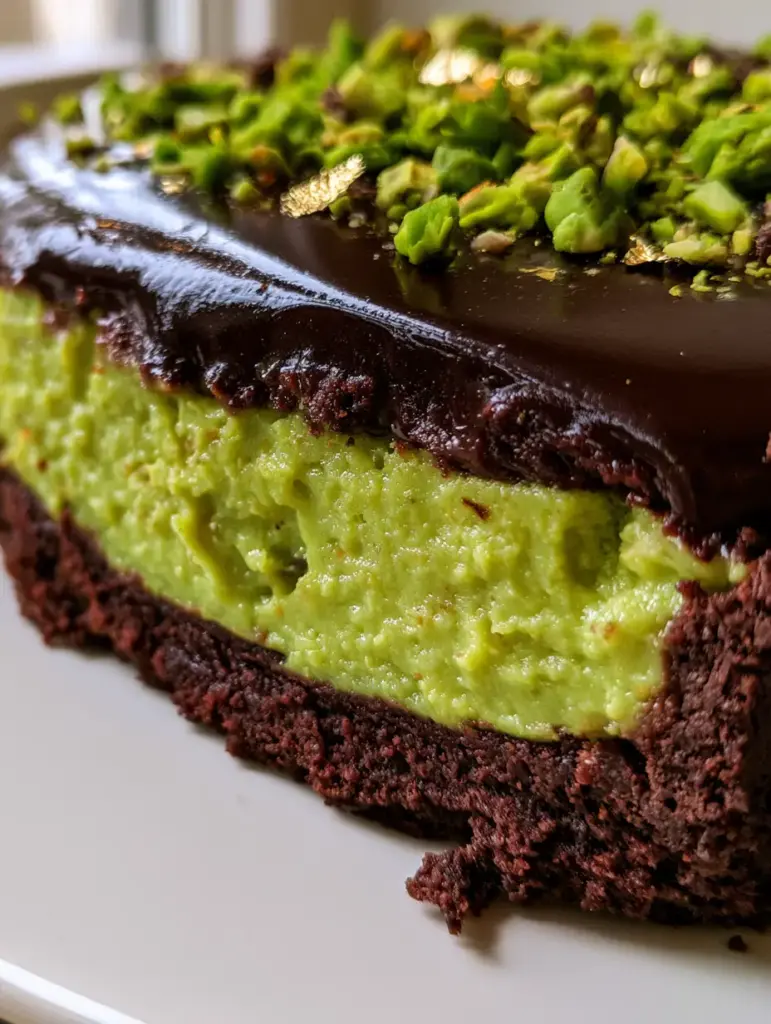
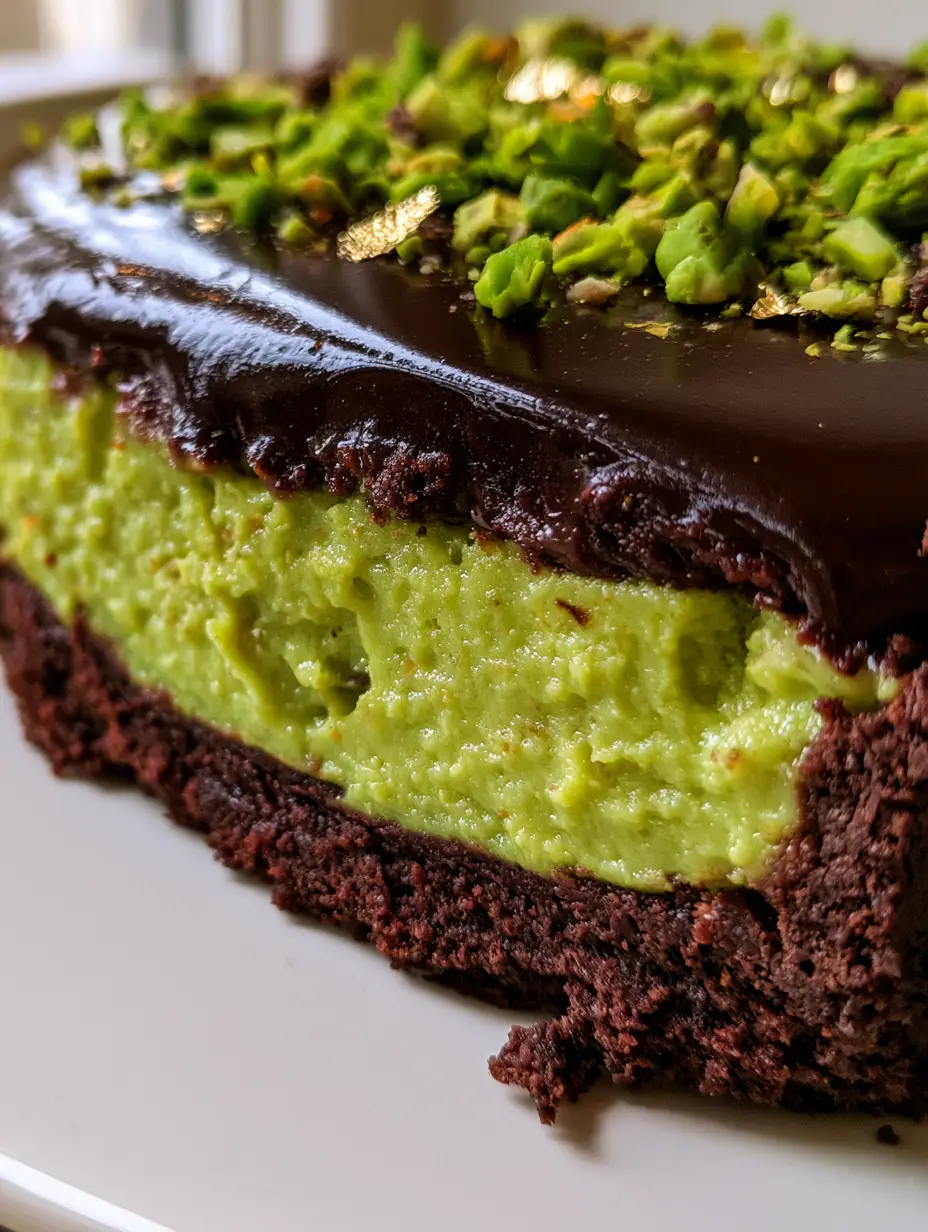
Every slice offers a striking side profile, featuring a thick, reflective layer of dark chocolate ganache that catches the light beautifully. Topped with crushed raw pistachios and delicate flakes of edible gold leaf, this tart is the epitome of modern patisserie. Whether you are a seasoned baker or a curious foodie, this recipe delivers a professional-grade result right in your home kitchen.
Why This Dubai-Style Tart Is a Total Showstopper
- Vibrant Visual Contrast: The neon-green pistachio interior against the midnight-black cocoa crust creates a stunning, high-fashion culinary aesthetic.
- Multi-Textural Experience: You get the crunch of the cookie, the silkiness of the praline, and the snap of the glossy ganache in every single bite.
- Ultra-Luxurious Garnish: The combination of bright green raw pistachios and 24k edible gold leaf makes this the perfect centerpiece for any celebration.
- Professional Finish: We use specific emulsification techniques to ensure your ganache is reflective and your filling stays moist and soft.
The Anatomy of a Perfect Pistachio Chocolate Tart
Creating this masterpiece requires high-quality ingredients that serve both structural and flavor roles. Using the right fats and stabilizers ensures the tart holds its shape while remaining melt-in-your-mouth tender.
Dark Cocoa Cookie Crumbs: 2 cups (200g) of finely ground chocolate sandwich cookies or chocolate wafers provide the structural base. The high fat content in these cookies helps create that “Dubai-style” thick, crumbly crust when mixed with butter.
Unsalted Butter: 6 tbsp (85g) of melted butter acts as the glue for our crust. It provides a rich mouthfeel and ensures the base sets firmly in the refrigerator.
Pure Pistachio Paste: 1 cup (250g) of high-quality, unsweetened green pistachio paste is the heart of the filling. This provides the intense, natural “neon” color and deep nutty flavor seen in the visual blueprint.
Pistachio Praline Base: 1/2 cup (120ml) of heavy cream and 1/4 cup (50g) of white chocolate are melted together to create a ganache-style binder. This turns the paste into an ultra-creamy, soft praline filling.
Dark Chocolate (60-70% Cacao): 1 cup (175g) of high-quality chopped chocolate ensures a sophisticated, bittersweet balance. Using real chocolate instead of chips provides a superior “reflective” gloss.
Heavy Whipping Cream: 3/4 cup (180ml) is used to emulsify the dark chocolate into a smooth glaze. This creates the thick, glossy layer that defines the tart’s top surface.
Garnish Elements: 1/4 cup (35g) of roughly chopped raw pistachios and a few sheets of edible gold leaf flakes. These are essential for the final touch of luxury and organic texture.
Essential Tools for Professional Patisserie Results
To achieve the sharp edges and smooth layers seen in the handheld smartphone photo of our pistachio chocolate tart, you will need a few specific tools. A 9-inch (23cm) tart pan with a removable bottom is non-negotiable for clean removal.
An offset spatula is your best friend for smoothing the pistachio praline and spreading the ganache to the very edges. You will also want a food processor to achieve that perfectly uniform, sandy texture for the cocoa crust. Finally, a small pair of tweezers is helpful for placing the delicate gold leaf flakes without them sticking to your fingers.
Crafting the Dark Cocoa Cookie Crust
Processing the Base
Pulse your chocolate cookies in a food processor until they resemble fine sand. There should be no large chunks remaining, as this ensures the crust is “thick and crumbly” rather than falling apart when sliced.
Mixing and Pressing
Pour the melted butter over the crumbs and pulse until the mixture looks like wet sand. Press the mixture firmly into the bottom and up the sides of your tart pan, using the bottom of a measuring cup to ensure an even, compact thickness.
The Set
Bake the crust at 350°F (175°C) for 8-10 minutes. This “sets” the proteins and sugars, ensuring it doesn’t get soggy once the moist filling is added. Allow it to cool completely before filling.
Engineering the Neon-Green Praline Filling
Creating the Creamy Emulsion
Heat your heavy cream until just simmering, then pour it over the white chocolate. Let it sit for 2 minutes, then whisk until smooth. This creates a stable base that prevents the pistachio oils from separating.
Incorporating the Pistachio Paste
Fold the vibrant green pistachio paste into the white chocolate mixture. Stir gently until it becomes an ultra-creamy, neon-green filling. If you want an even brighter color, a tiny drop of gel food coloring can be added, though high-quality paste usually provides this naturally.
The First Chill
Pour the filling into the cooled crust and smooth the top with an offset spatula. Place the tart in the fridge for at least 1 hour. This allows the praline to firm up enough to support the weight of the chocolate ganache layer.
Achieving the Reflective Dark Chocolate Glaze
The Ganache Method
Heat the remaining heavy cream and pour it over your chopped dark chocolate. Stir slowly in circular motions from the center outward. This “emulsifies” the fat and liquid, resulting in a glossy, reflective finish rather than a dull one.
The Final Pour
Pour the ganache over the chilled pistachio layer. Tilt the tart pan gently to let the chocolate flow to the edges naturally, which results in a smoother surface than spreading it with a knife. This mirrors the “thick, glossy” look from our visual prompt perfectly.
Luxury Garnishing and Sensory Cues
While the ganache is still slightly tacky, scatter your roughly chopped bright green pistachios around the border or in a rustic cluster. The “bright green” of the raw nuts should contrast beautifully with the dark chocolate.
Carefully apply the tiny flakes of edible gold leaf using tweezers or a dry toothpick. You are looking for a “luxurious, handheld” vibe, so don’t be afraid of a little intentional imperfection. Let the tart set in the refrigerator for at least 4 hours (or overnight) to ensure the side profile slice is clean and the textures are fully developed.
Expert Tips for the Perfect Tart
- Temperature Control: Ensure your crust is stone-cold before adding the filling. Adding warm filling to a warm crust leads to a greasy base.
- Clean Slices: To get that perfect side profile, dip a sharp knife in hot water and wipe it dry between every single cut.
- Pistachio Quality: Look for “Bronte” pistachios or Iranian pistachio paste if possible. These regions produce the most vibrant, naturally neon-green nuts.
- Avoid Bubbles: When stirring your ganache, keep the whisk or spatula submerged. Incorporating air creates bubbles that ruin the reflective finish.
How to Store and Serve Your Pistachio Masterpiece
This tart is best served slightly chilled but not ice-cold. Take it out of the fridge about 15-20 minutes before serving to allow the pistachio praline to soften into its “ultra-creamy” state.
Store any leftovers in an airtight container in the refrigerator for up to 5 days. We do not recommend freezing this tart, as the delicate emulsion of the pistachio praline may break, losing that moist, soft texture upon thawing.
What to Serve with This Pistachio Chocolate Tart
Because this dessert is so rich, it pairs beautifully with a sharp espresso or a glass of cold milk. If you are hosting a dessert party, consider serving it alongside lighter options like our strawberry banana pudding cake to balance the intensity.
For those who love the “Dubai-style” chocolate trend, you might also enjoy making a batch of chocolate chip cookies with a pistachio butter center. If you prefer a more traditional cake texture with these flavors, our pistachio pineapple sheet cake is a fantastic crowd-pleaser that uses similar nutty notes.
Frequently Asked Questions
Yes, but ensure it is smooth and unsweetened. If your pistachio butter contains added oils or sugars, you may need to reduce the white chocolate in the recipe to maintain the correct structural set.
The secret is using high-quality, 100% pure pistachio paste (often labeled as Bronte pistachio paste). If your paste is dull, a single tiny drop of neon-green gel food coloring can enhance the visual pop without affecting flavor.
Ensure the cookie crumbs are processed into a very fine sand and that you press them firmly into the pan. Baking the crust for 10 minutes ‘locks’ the structure so it crumbles into clean pieces rather than falling apart.
Inspired by viral Dubai chocolate bars, this style features an intense contrast between dark chocolate and a rich, creamy, and often crunchy pistachio-kunafa or praline center, emphasizing luxury textures and gold accents.
A dull ganache usually results from over-stirring or incorporating too much air. Stir slowly from the center in small circles and add a teaspoon of corn syrup or butter at the end for an extra reflective finish.
The Complete Pistachio Chocolate Tart Recipe Card
Pistachio Chocolate Tart: The Ultimate Dubai-Style Dessert Recipe
Ingredients
Equipment
Method
- Combine cookie crumbs and melted butter. Press firmly into the tart pan. Bake at 350°F (175°C) for 10 minutes, then cool completely.
- Heat 1/2 cup cream and pour over white chocolate; whisk until smooth. Fold in pistachio paste until ultra-creamy and neon green. Pour into crust and chill for 1 hour.
- Heat 3/4 cup cream and pour over dark chocolate; stir to create a reflective ganache. Pour over the chilled tart. Garnish with chopped pistachios and gold leaf. Chill 4 hours before serving.
Notes
High-quality pistachio paste is the secret to the vibrant green color.
Join the Wholesome Skillet Community!
We hope you enjoy crafting this luxurious pistachio chocolate tart. It is a recipe that proves home bakers can achieve professional, high-end results with the right techniques. If you make this, please leave a comment below and let us know how your neon-green filling turned out!
Don’t forget to take a photo of your beautiful creation and share it with us on Pinterest. For more decadent treats and kitchen inspiration, sign up for our newsletter today!