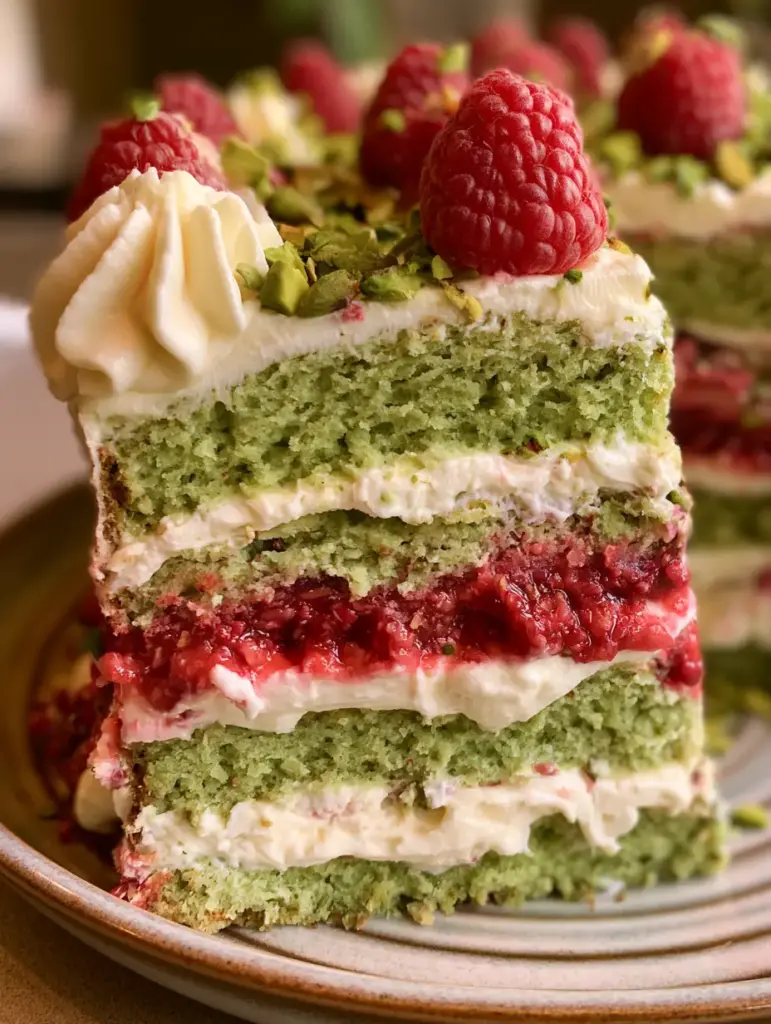
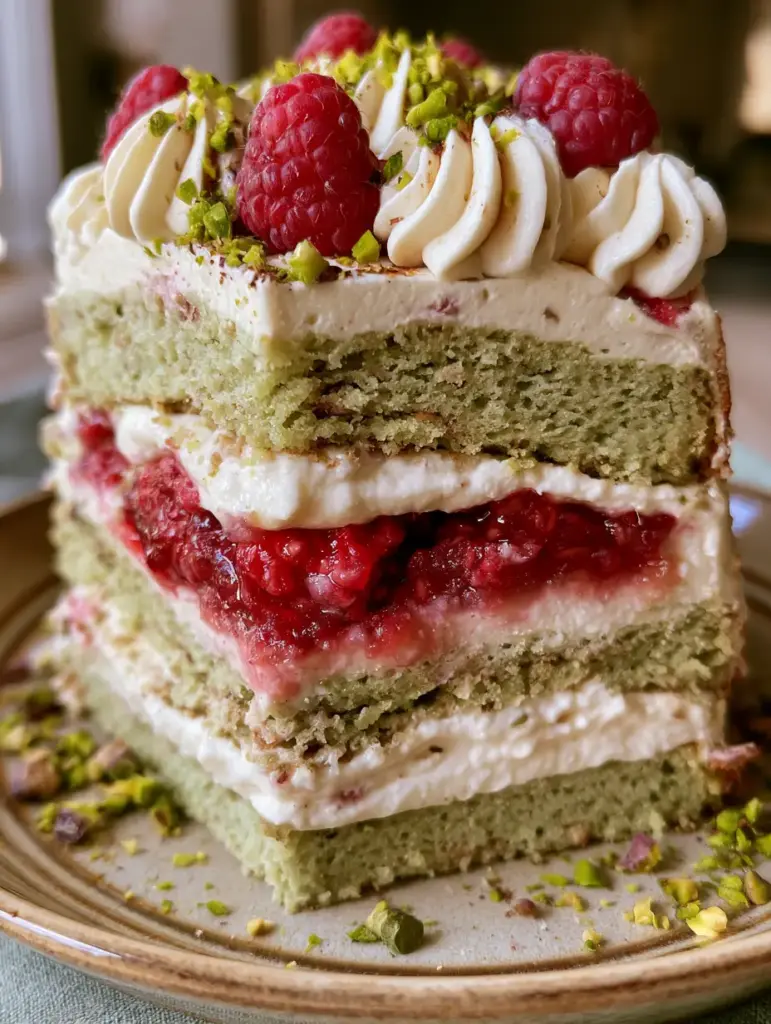
There is something undeniably magnetic about a tall, multi-layered pistachio raspberry cake standing proud on a ceramic plate. This isn’t just a dessert; it is a masterclass in texture and color contrast, featuring a moist green pistachio sponge that feels like a handheld luxury. In this guide, we are recreating the exact aesthetic of an unedited, soft-window-lit masterpiece, complete with thick layers of white vanilla whipped cream and a glowing, vibrant red raspberry jam center.
When you take your first bite, you aren’t just tasting sugar; you are experiencing the earthy, nutty depth of finely ground pistachios paired with the bright, tart snap of fresh raspberries. The visual of the bright green crumb against the snowy white frosting and the ruby-red jam is enough to stop any scroll. This recipe is designed for the home baker who wants professional, “culinary forensic” results without needing a commercial kitchen.
The Anatomy of a Perfect Pistachio Raspberry Cake
- The Moist Green Sponge: We achieve a natural, vibrant green hue and a tight yet tender crumb by using a combination of pistachio flour and high-quality extract.
- The Glowing Jam Core: A thick, seedless raspberry jam layer provides that luminous red center seen in the professional “smartphone photo” aesthetic.
- Stabilized Whipped Cream: Unlike standard whipped cream that wilts, our vanilla-infused version is thick enough for piped swirls and tall layers.
- Sensory Toppings: Whole fresh raspberries provide a burst of juice, while finely chopped bright green pistachios add a necessary crunch.
Essential Components for the Ultimate Pistachio Sponge
Creating a cake that is both structurally sound and incredibly moist requires specific ratios of fats and proteins. We use a reverse-creaming method to ensure the pistachio raspberry cake remains tender and doesn’t develop large, unsightly air pockets.
Shelled Pistachios (Ground): 1.5 cups (150g). These provide the essential nutty oils and the signature green flecks throughout the sponge layers.
All-Purpose Flour: 2 cups (250g). This provides the structural skeleton of the cake, ensuring it can support the weight of the jam and cream.
Granulated Sugar: 1.5 cups (300g). Sugar does more than sweeten; it tenderizes the crumb by slowing down gluten development.
Unsalted Butter (Softened): 1 cup (225g). High-quality butter is the primary fat source, offering a rich mouthfeel that oil-based cakes often lack.
Large Eggs (Room Temp): 4 eggs. These act as the binder, providing lift and richness to the pistachio-laden batter.
Whole Milk: 1 cup (240ml). Milk provides moisture and helps activate the leavening agents for a consistent rise.
Baking Powder: 2 tsp (10g). This is our “invisible” ingredient, essential for creating the tall, fluffy layers described in the visual blueprint.
Pistachio Extract: 1 tsp (5ml). This intensifies the green profile and ensures the flavor is unmistakable.
The Glowing Raspberry Jam & Cream Foundation
To achieve that iconic glowing center, the quality of your jam matters. If you are a fan of fruity centers, you might also find inspiration in my raspberry jam cookies which use a similar high-intensity fruit base.
Raspberry Jam (Seedless): 1 cup (320g). Look for a jam with a high fruit content to ensure a vibrant, translucent red glow when sliced.
Heavy Whipping Cream (Cold): 2 cups (480ml). It must be very cold to achieve the stiff peaks required for those beautiful piped swirls.
Powdered Sugar: 1/2 cup (60g). This sweetens the cream and helps stabilize the structure for multi-layered height.
Vanilla Bean Paste: 1 tsp (5g). The tiny black specks of vanilla bean add a touch of authentic home-kitchen aesthetic to the white frosting.
Fresh Raspberries: 1 pint. Used both for the top garnish and tucked into the jam layers for a surprise textural element.
Chopped Pistachios: 1/4 cup (35g). Finely chopped for the top to mimic the “bright green” dusting seen in the visual prompt.
Necessary Tools for Professional Cake Construction
To get the height and precision shown in the blueprint, you need the right gear. A tall, multi-layered slice doesn’t happen by accident; it requires even baking and stable assembly.
8-inch Cake Pans: Three pans are ideal for creating the “tall” appearance. This ensures plenty of surface area for the whipped cream and jam layers.
Food Processor: Essential for grinding your pistachios into a fine meal without turning them into pistachio butter.
Piping Bag & Star Tip: This allows you to recreate the piped cream swirls that decorate the top of the pistachio raspberry cake.
Offset Spatula: The secret to those thick, even layers of white vanilla whipped cream between the green sponge discs.
Step-by-Step Guide to the Perfect Pistachio Sponge
1. Preparing the Nutty Green Base
Start by pulsing your 1.5 cups (150g) of pistachios in a food processor until they reach the consistency of coarse sand. Be careful not to over-process. In a large bowl, whisk these ground nuts with your 2 cups (250g) of flour and 2 tsp (10g) of baking powder. This ensures the pistachio flavor is distributed evenly through every crumb of the cake.
2. Creaming for Volume and Texture
In a stand mixer, beat the 1 cup (225g) of softened butter and 1.5 cups (300g) of sugar until the mixture is pale and fluffy—usually about 3-4 minutes. Add the eggs one at a time, followed by the pistachio extract. You will notice the batter beginning to take on a beautiful, pale green hue. If you love this flavor profile, you should check out my pistachio chocolate loaf cake for a denser, more casual version of this nut-forward treat.
3. Incorporating Liquids for a Moist Crumb
Alternate adding your dry ingredients and the 1 cup (240ml) of milk to the butter mixture. Start and end with the dry ingredients. This “folding” technique prevents the batter from breaking and ensures the pistachio raspberry cake remains light and moist, just like the smartphone photo suggests.
4. The Bake and Visual Cues
Divide the batter equally among three greased pans. Bake at 350°F (175°C) for 25-30 minutes. Look for the “Visual Cue”: The edges should just begin to pull away from the pan, and the top should spring back when lightly touched. The sponge will be a soft, earthy green, not a neon artificial shade.
Assembling the Tall Multi-Layered Slice
1. Creating the Jam Glow
Once the cakes are completely cool, place the first layer on your plate. Pipe a small border of whipped cream around the edge to act as a “dam.” Fill the center with 1/3 cup (100g) of the raspberry jam. This prevents the jam from leaking out and ensures that vibrant red center is visible only when the cake is sliced.
2. The Whipped Cream Tiers
Spread a thick layer of vanilla whipped cream over the jam. Repeat this process for the second layer. The contrast of the white cream against the green sponge is the hallmark of a professional-grade pistachio raspberry cake. If you are experimenting with different frosting styles, you might consider the richness of a brown butter buttercream for future projects, though whipped cream is best for this specific light aesthetic.
3. The Piped Swirls and Garnish
For the top layer, pipe large, generous swirls of the remaining whipped cream around the perimeter. Place whole, fresh raspberries in the center and between the swirls. Finally, sprinkle the 1/4 cup (35g) of finely chopped bright green pistachios over the top. The result should look unedited and authentic, like it was captured in soft window light.
Expert Tips for Visual and Flavor Success
- Room Temperature Ingredients: Always ensure your eggs and milk are at room temperature. This creates an emulsion that traps air, leading to a fluffier sponge.
- Stabilize Your Cream: If you are serving this in a warm kitchen, add 1 tbsp (8g) of cornstarch or instant pudding mix to the whipped cream to help it hold those piped swirls longer.
- Sift the Nut Meal: For the most “meticulous detail” in your crumb, sift the ground pistachios to remove any large woody bits that might disrupt the texture.
- Jam Consistency: If your jam is too thick to spread, microwave it for 10 seconds to loosen it up, ensuring it creates that “glowing” look once it sets.
How to Keep Your Pistachio Sponge Fresh
Because this cake uses fresh whipped cream, it must be stored in the refrigerator. Use a cake dome or a large airtight container to prevent the sponge from absorbing “fridge smells.” This pistachio raspberry cake will remain moist and delicious for up to 3 days.
For freezing, it is best to freeze the sponge layers individually, wrapped tightly in plastic wrap. We do not recommend freezing the assembled cake, as the whipped cream and jam will lose their textural integrity upon thawing. For other freezer-friendly treats, our berry dessert lasagna is a fantastic alternative.
What to Serve With This Elegant Slice
This cake is a star on its own, but it pairs beautifully with a tart lemon sorbet or a glass of crisp sparkling rosé. If you are hosting a larger dessert bar, consider adding textures like the crunch found in pistachio kunafa chocolate cake to provide a variety of nutty experiences for your guests.
Frequently Asked Questions
While you can use frozen raspberries for the jam filling, we strongly recommend fresh whole raspberries for the topping and internal layers to avoid excess moisture and bleeding of color.
The key is using a high volume of finely ground, high-quality shelled pistachios. For an extra boost, a drop of pistachio extract or a small amount of natural pistachio paste will enhance the color without looking artificial.
Use heavy whipping cream with a high fat content (at least 36%) and ensure it is ice cold. Adding powdered sugar and a touch of vanilla bean paste helps, but you can also add 1 tablespoon of cornstarch for extra stability.
To prevent leaking, pipe a ‘dam’ or border of stiff whipped cream around the edge of the cake layer before adding the jam to the center. This holds the jam in place as you stack the next layer.
The Ultimate Pistachio Raspberry Cake Recipe
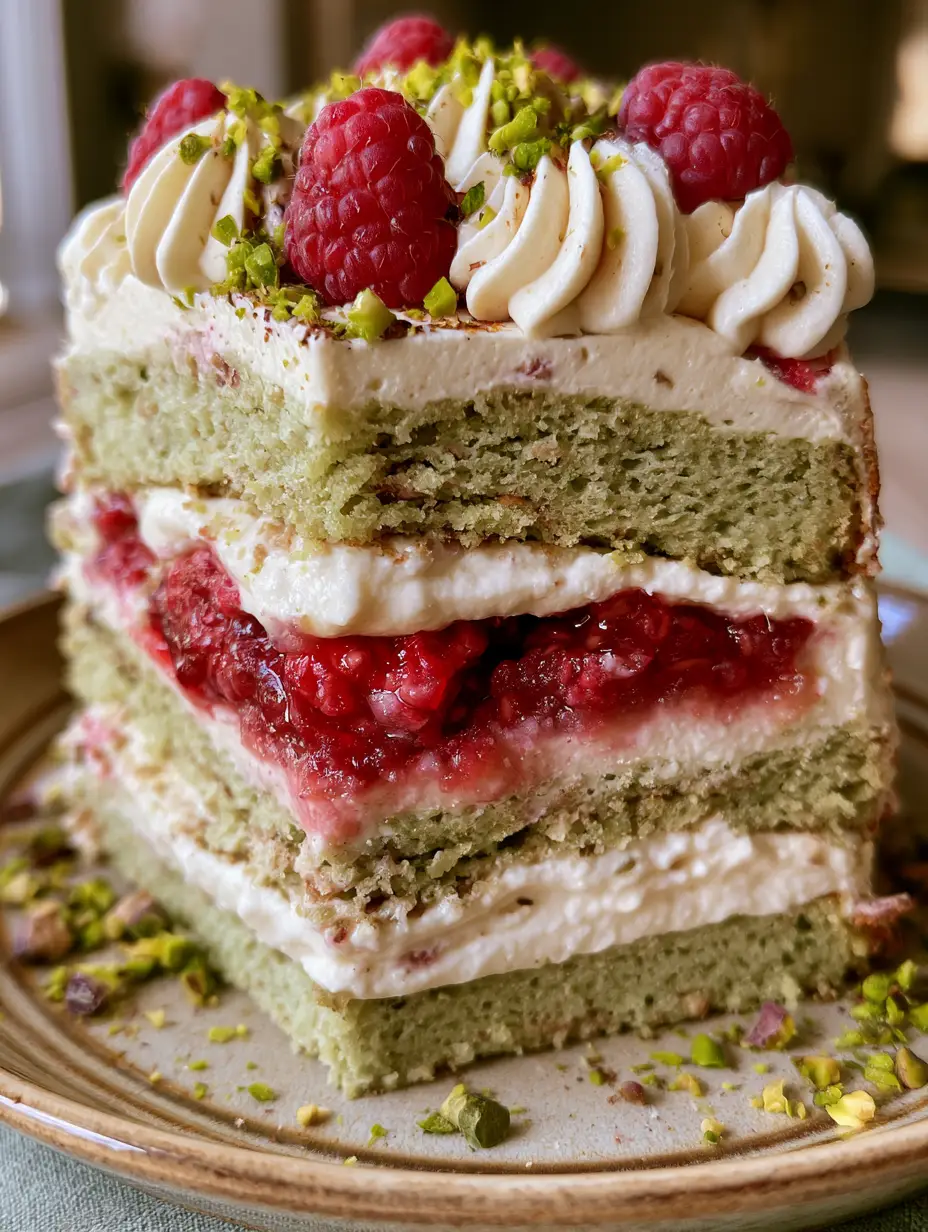
Pistachio Raspberry Cake with Glowing Jam Filling and Vanilla Whipped Cream
Ingredients
Equipment
Method
- Pulse 1.5 cups (150g) pistachios in a food processor until fine; mix with flour and baking powder.
- Cream butter and sugar until fluffy. Add eggs and extract. Alternate adding milk and dry ingredients.
- Divide batter into three 8-inch pans. Bake at 350°F (175°C) for 25-30 minutes until edges pull away.
- Beat heavy cream, powdered sugar, and vanilla to stiff peaks.
- Place sponge layer, pipe a cream border, fill with jam, and top with more cream. Repeat.
- Pipe swirls on top, garnish with whole raspberries and chopped pistachios.
Notes
Ensure the whipped cream is very cold before whipping to ensure stability for piping swirls.
Share Your Culinary Creation!
Building this pistachio raspberry cake is an exercise in both art and science. From the glowing jam center to the meticulous green crumb, it’s a recipe that rewards patience and attention to detail. We would love to see your results! Tag us in your photos and be sure to follow thewholesomeskillet on Pinterest for more visual recipe inspiration.