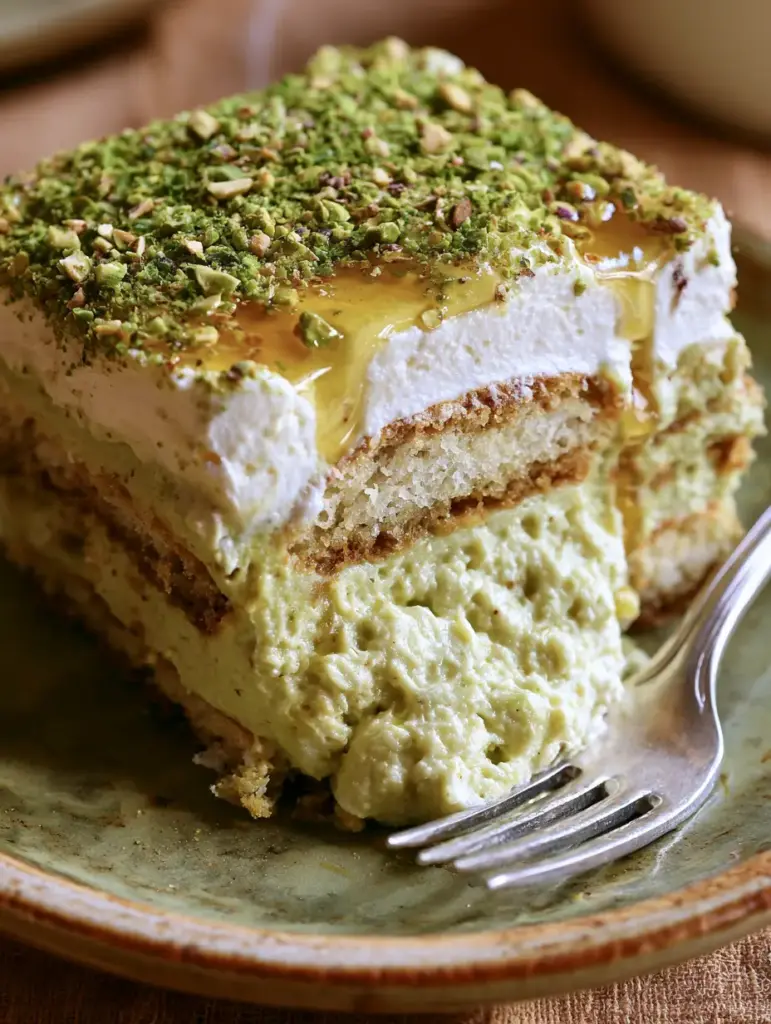
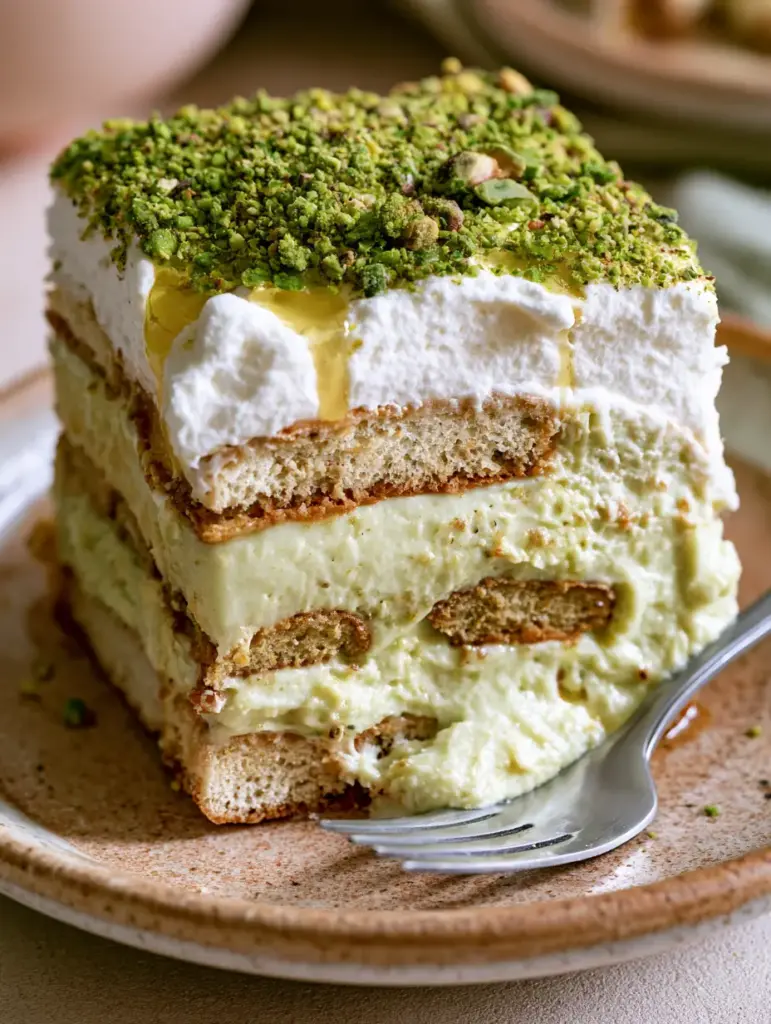
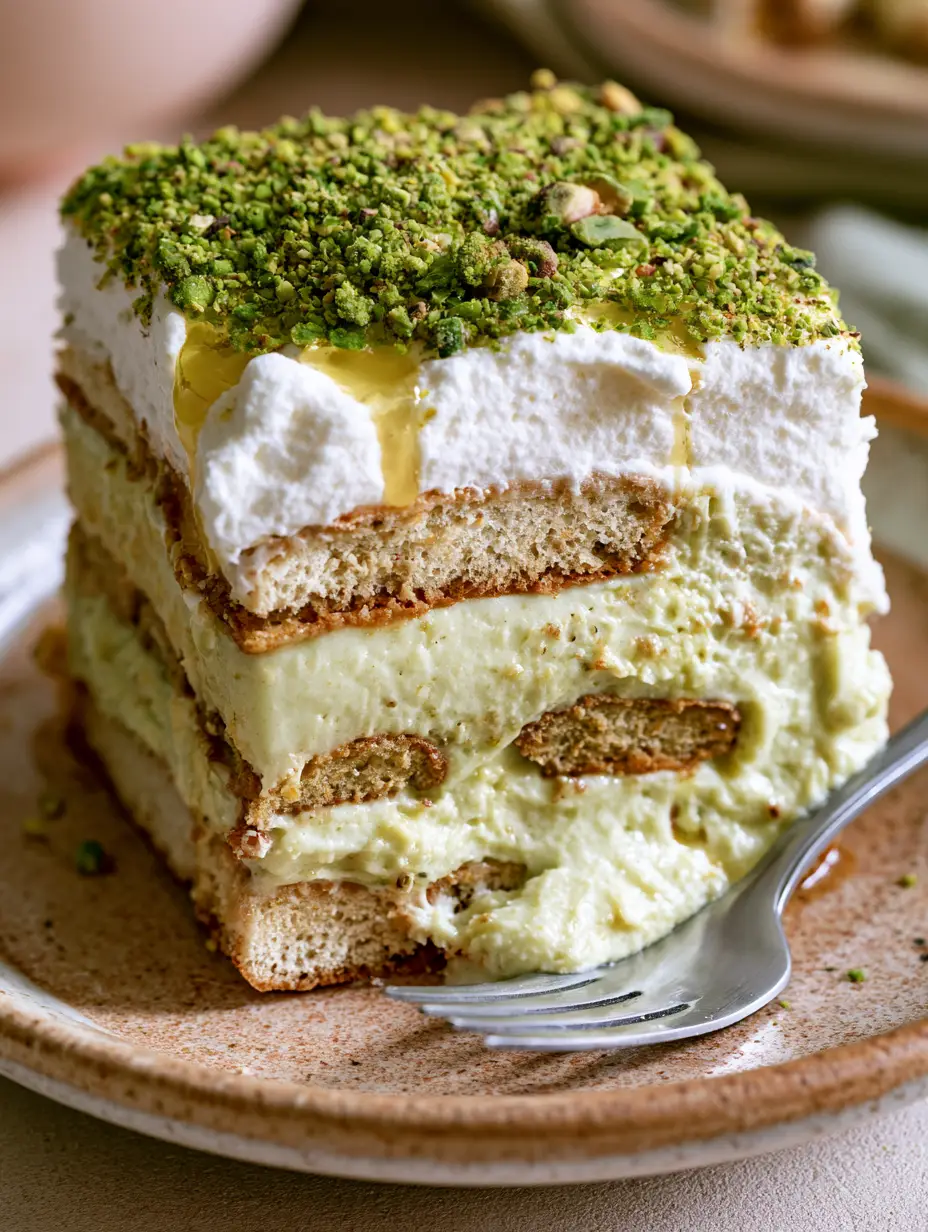
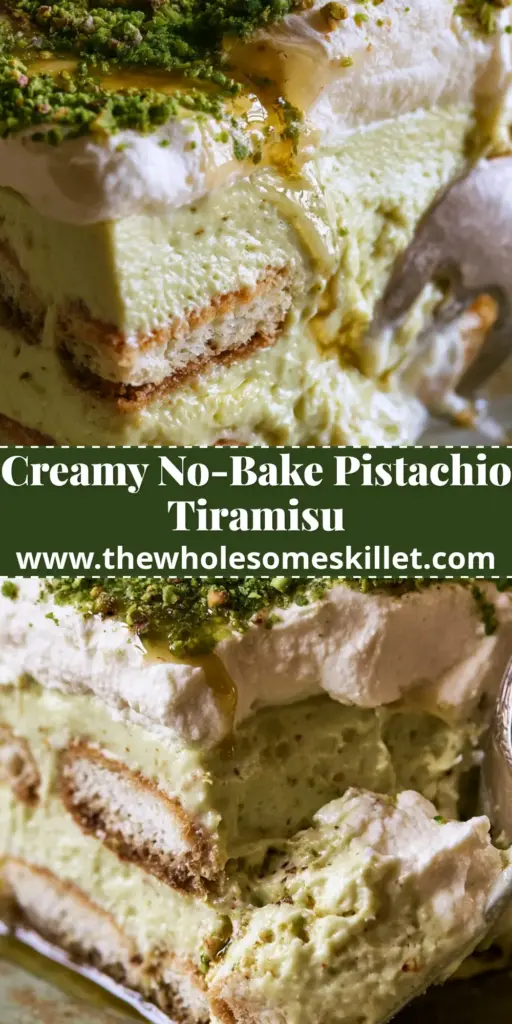
This pistachio tiramisu is a breathtaking evolution of the classic Italian pick-me-up, trading traditional cocoa for the vibrant, earthy elegance of emerald-green Sicilian nuts. Imagine a thick, square slice where every layer is a testament to texture: espresso-drenched ladyfingers provide a robust foundation, topped with a cloud-like, pale green pistachio mascarpone mousse that melts on the tongue.
As the soft morning window light hits your plate, you’ll see the distinct separation of colors—from the deep mahogany of the soaked biscuits to the airy white whipped cream topper. The final flourish of liquid pistachio butter and a heavy dusting of crushed roasted pistachios creates a dessert that is as visually arresting as it is delicious.
Whether you are a seasoned pastry enthusiast or looking for a show-stopping finale for your next dinner party, this recipe delivers professional results. The combination of bittersweet espresso and the buttery richness of pistachios creates a sophisticated flavor profile that lingers long after the last bite is taken with your silver dessert fork.
Why You Will Fall in Love With This Nutty Italian Masterpiece
- Distinct Multi-Textural Layers: You get the crunch of roasted nuts, the airiness of whipped cream, and the melt-in-your-mouth moisture of espresso-soaked savoiardi in every single forkful.
- Vibrant Natural Color: By using high-quality pistachio paste, we achieve that signature pale green hue in the mousse without a drop of artificial food coloring.
- Perfectly Balanced Sweetness: The bitterness of the espresso and the saltiness of the roasted pistachios cut through the rich mascarpone, ensuring the dessert isn’t cloying.
- Make-Ahead Convenience: Like its traditional cousin, this pistachio tiramisu actually improves after a 24-hour rest in the refrigerator, making it the ultimate stress-free hosting dessert.
Essential Components for the Ultimate Pistachio Mousse
To achieve the specific visual and structural results seen in our professional culinary blueprint, you need high-quality ingredients that behave predictably under the whisk. We are looking for a mousse that is stable enough to hold a sharp square edge when sliced, yet airy enough to feel like a cloud.
Authentic Italian Savoiardi (Ladyfingers): 24-30 pieces. These dry, crisp biscuits are engineered to absorb liquid without turning into mush; look for the “sugar-dusted” variety for the best structural integrity.
Mascarpone Cheese: 2 cups (450g). This ultra-rich Italian cream cheese provides the velvety mouthfeel; ensure it is at room temperature to prevent lumping when mixed with the pistachio paste.
Pure Pistachio Paste: 3/4 cup (180g). Use a 100% nut paste (often labeled as pistachio butter) to get that deep, authentic flavor and the pale green color required for the mousse layer.
Heavy Whipping Cream: 2 cups (480ml). Cold cream is essential for creating the “cloud-like” whipped topping and for folding into the mascarpone to lighten the texture.
Strong Espresso: 1.5 cups (350ml). The coffee must be high-intensity to stand up against the fatty richness of the nuts; let it cool completely before dipping to avoid melting the biscuits.
Granulated Sugar: 3/4 cup (150g). This sweetens the mousse and helps stabilize the egg yolks if you are using a traditional sabayon base, or simply sweetens the cream.
Roasted Sicilian Pistachios: 1/2 cup (60g). These will be crushed for the “emerald green” dusting; roasting them briefly awakens the natural oils and enhances the crunch.
Liquid Pistachio Butter: 2 tbsp (30ml). This is used for the final tempting drizzle; if your paste is too thick, thin it slightly with a teaspoon of neutral oil or warm it gently until it flows like honey.
Foundational Salt: 1/4 tsp (1.5g). A tiny pinch of fine sea salt is the “invisible” ingredient that makes the pistachio flavor explode on the palate.
The Professional Pastry Kit: Tools for Success
Creating those perfectly distinct layers requires a few specific tools. While the flavor comes from the ingredients, the “macro-shot” beauty comes from the technique and the equipment.
A 9×9 inch (23x23cm) square baking dish is ideal for achieving the “thick square slice” described in the visual prompt. You will also need a high-speed stand mixer or hand mixer to aerate the heavy cream into stiff, cloud-like peaks. A offset spatula is your best friend here for smoothing the pistachio mousse into a perfectly level layer before adding the next round of ladyfingers.
For the espresso soak, a wide, shallow bowl is better than a mug, allowing you to lay the ladyfingers flat for a quick, even dip. Finally, a sharp chef’s knife dipped in hot water and wiped clean between cuts is the secret to those “perfectly distinct” layers when serving.
Step-by-Step Evolution of the Pistachio Tiramisu
Preparing the Liquid Gold Espresso Soak
Brew your espresso and pour it into a shallow dish. If you prefer a slightly sweeter soak, add a tablespoon of sugar while the coffee is hot. For an adult twist, a splash of amaretto or pistachio liqueur can be added here, echoing the nutty notes in the tiramisu crinkle cookies. Let the liquid cool to room temperature; dipping ladyfingers into hot espresso will cause them to disintegrate instantly.
Mastering the Pale Green Pistachio Mousse
In a large bowl, whisk the room-temperature mascarpone with the pistachio paste and a pinch of salt until smooth and uniform in color. In a separate chilled bowl, whip 1 cup (240ml) of the heavy cream with half the sugar until stiff peaks form. Gently fold the whipped cream into the pistachio mixture using a silicone spatula. You are looking for a uniform, pale green color with a light, aerated texture that holds its shape.
The Art of the Ladyfinger Dip
Take a ladyfinger and submerge it in the espresso for exactly two seconds—one second per side. It should feel heavy but still maintain its shape. Arrange them in a tight single layer at the bottom of your ceramic dish. If you’ve mastered the dip here, you’ll find the process similar to preparing the base for german chocolate poke cake where moisture balance is key.
Layering for Visual Impact
Spread half of the pistachio mascarpone mousse over the first layer of ladyfingers. Use your offset spatula to push the mousse into the corners, creating a flat, even surface. Repeat with a second layer of espresso-soaked ladyfingers, followed by the remaining pistachio mousse. Smooth the top carefully; this flat surface is the foundation for your cloud-like topping.
Creating the Cloud-Like Whipped Topping
Whip the remaining 1 cup (240ml) of heavy cream with the rest of the sugar until it reaches a medium-stiff peak. It should look like soft, white clouds. Spread this over the top pistachio layer. For the “rustic” look from the prompt, you don’t need it to be perfectly flat—gentle swirls with the back of a spoon add beautiful shadows under the morning light.
The Final Emerald Flourish
Place your roasted pistachios in a zip-top bag and crush them with a rolling pin until you have a mix of fine dust and chunky emerald pieces. Dust the top of the tiramisu heavily. Just before serving, drizzle the liquid pistachio butter in a zig-zag pattern across the top. This adds the “tempting drizzle” that defines the macro visual appeal. If you enjoy this nutty profile, you might also love the texture of buttery crumble topping on other desserts.
Expert Tips for a Picture-Perfect Slice
- The “Two-Second Rule”: Never soak ladyfingers for more than two seconds total. They continue to soften as the dessert sits in the fridge. A dry center at the moment of assembly leads to a perfect texture 12 hours later.
- Temperature Control: Ensure your mascarpone is truly at room temperature. If it’s cold, it will clump when it hits the dense pistachio paste, ruining the “soft and airy” texture.
- The Clean Cut: To get the distinct layers shown in the macro shot, freeze the tiramisu for 30 minutes before slicing. Use a thin, sharp knife and wipe it clean with a damp cloth after every single cut.
- Paste Selection: Look for “Sicilian Pistachio Paste” if possible. The volcanic soil of Etna produces nuts with a more intense green color and a less toasted, more floral flavor.
Storage and Make-Ahead Instructions
Pistachio tiramisu is the ultimate make-ahead dessert. It requires at least 6 hours of refrigeration to set the mousse and allow the espresso to migrate through the ladyfingers. For the absolute best flavor, let it sit for 24 hours.
Refrigeration: Cover the dish tightly with plastic wrap or transfer slices to an airtight container. It will stay fresh and delicious for up to 4 days. Note that the crushed pistachios may lose some crunch after the first day due to the moisture in the cream.
Freezing: You can freeze this tiramisu for up to 2 months. Wrap the entire dish in a double layer of plastic wrap and then aluminum foil. Thaw overnight in the refrigerator before serving. Do not add the liquid pistachio butter drizzle or the final dusting of nuts until you are ready to serve, as these do not freeze and thaw with the same visual appeal.
What to Pair With Your Pistachio Tiramisu
This dessert is rich and nutty, making it a perfect companion for a variety of other treats. If you are hosting a dessert bar, consider serving it alongside raspberry pistachio bars for a tart contrast. The acidity of berries perfectly cuts through the heavy mascarpone.
For those who love a variety of Italian textures, almond ricotta cookies provide a soft, cake-like counterpoint to the creamy tiramisu. If you want to lean into the “pick-me-up” aspect, serve it with a small glass of Vin Santo or a fresh double shot of espresso to echo the soaked ladyfingers.
Frequently Asked Questions
Yes, this specific recipe uses a whipped cream and mascarpone stabilization method, making it naturally egg-free in the mousse layer, though ladyfingers typically contain eggs.
Absolutely. A strong decaf espresso will provide the same deep flavor profile without the caffeine kick, perfect for late-night dinner parties.
The key is using high-quality Sicilian or Bronte pistachio paste. These nuts are naturally more vibrant. Avoid ‘pistachio cream’ jars which are often diluted with sugar and oils.
In this recipe, they are essentially the same, provided they are made of 100% ground pistachios. Ensure yours is unsweetened and contains no added vegetable oils for the best flavor and color.
This usually happens if the mascarpone was over-mixed or if the heavy cream wasn’t whipped to stiff enough peaks before folding. Ensure all ingredients are at the specified temperatures.
The Ultimate Pistachio Tiramisu Recipe
Pistachio Tiramisu with Silky Mascarpone Mousse and Sicilian Nuts
Ingredients
Equipment
Method
- Brew 1.5 cups (350ml) of strong espresso and pour into a shallow dish to cool completely.
- Roast whole pistachios at 350°F (175°C) for 8-10 minutes until fragrant. Let cool and crush into emerald fragments.
- Whisk 2 cups (450g) mascarpone, 3/4 cup (180g) pistachio paste, and salt until smooth and pale green.
- Whip 1 cup (240ml) heavy cream with half the sugar until stiff peaks form, then gently fold into the mascarpone mixture.
- Dip ladyfingers into espresso for 1 second per side. Arrange a tight layer in the bottom of a 9x9 dish.
- Spread half of the pistachio mousse over the ladyfingers. Repeat with a second layer of soaked biscuits and the remaining mousse.
- Whip the remaining cream and sugar to cloud-like peaks and spread over the top. Chill for at least 6 hours.
- Before serving, dust heavily with crushed pistachios and drizzle with liquid pistachio butter.
Notes
Use 100% pistachio paste without added oils or sugars for the most authentic vibrant green color.
Closing & Call to Action
This pistachio tiramisu is more than just a dessert; it’s a sensory experience that brings the flavors of Sicily into your home kitchen. From the first sight of those emerald green nuts to the final lingering taste of espresso and cream, it is a recipe designed to impress and satisfy. The soft, airy texture and perfectly distinct layers make it a centerpiece worthy of any celebration.
If you enjoyed making this recipe, we would love to hear about it! Leave a comment below or share your gorgeous recreations on Pinterest and tag us. Don’t forget to sign up for our newsletter for more elite-level recipes delivered straight to your inbox. Happy baking!