Salted butter cookies are the quintessential expression of French pastry elegance, offering a delicate balance between rich, dairy-forward sweetness and the sharp, crystalline punch of premium sea salt. If you have ever craved a cookie that literally melts the moment it hits your tongue, you are looking for the perfect French Sablé. These cookies are not just snacks; they are a masterclass in texture, featuring a tender, sandy crumb and a golden-brown finish that captures the light beautifully.
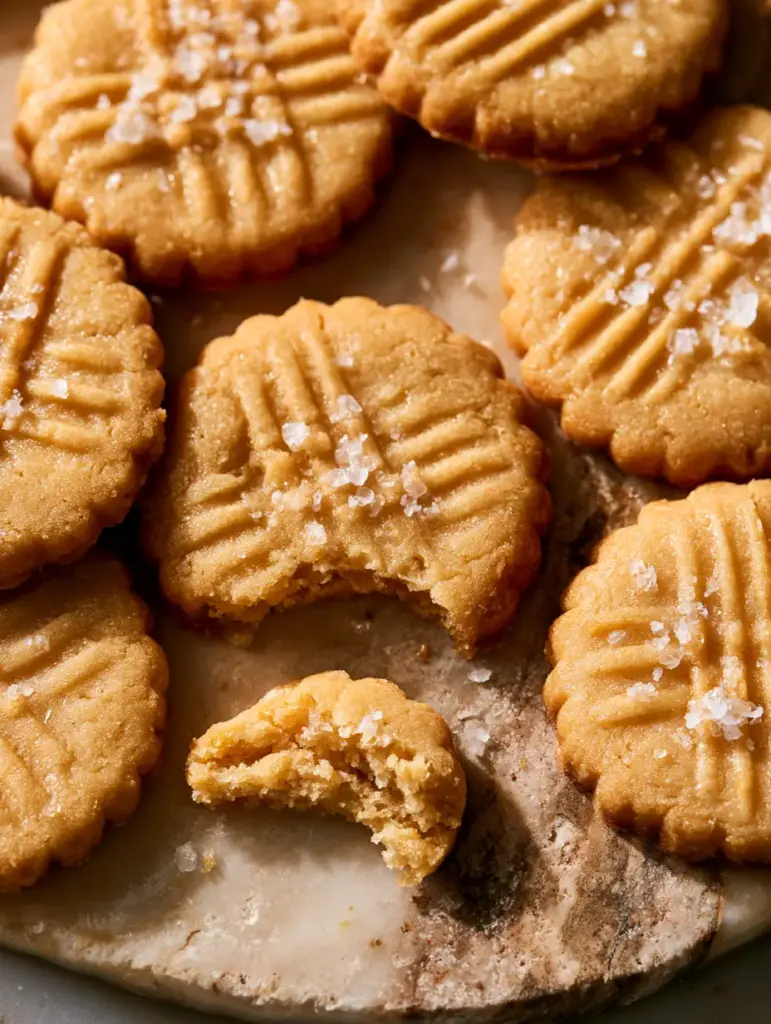
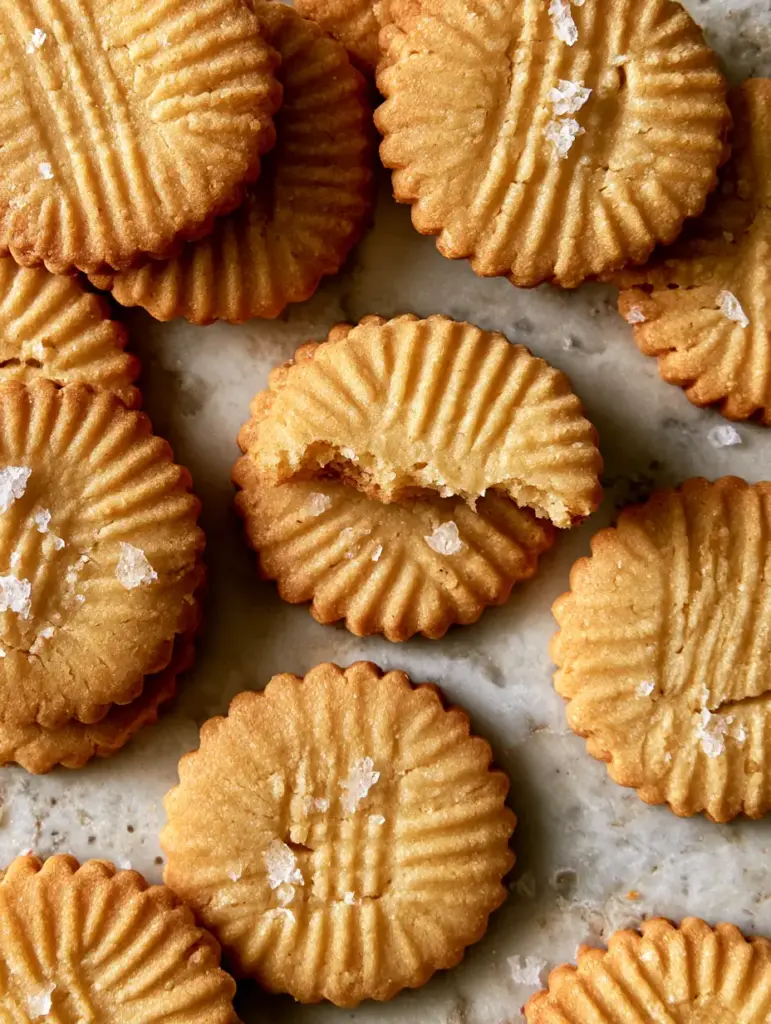
Imagine a top-down view of these golden treasures arranged on a cool, rustic marble surface. The soft, warm natural light catches the shimmering flakes of sea salt resting atop delicate fork-pressed ridges. As you snap one in half, the clean break reveals a tight, buttery interior that promises a luxurious mouthfeel. Whether you are serving these at a sophisticated tea party or enjoying them as a midnight snack, these cookies represent the pinnacle of home baking.
In this guide, we will explore the science of the “sablage” technique, the importance of temperature control, and the specific steps required to achieve those iconic scalloped edges and rustic textures. By the end of this article, you will be able to produce bakery-quality salted butter cookies that look exactly like a professional food photograph.
The Irresistible Allure of These Golden Sablé Cookies
- Unrivaled Texture: The high butter content ensures a “short” crumb that is incredibly tender and melt-in-the-mouth.
- Visual Sophistication: Scalloped edges and fork-pressed ridges provide a rustic yet elegant aesthetic that stands out on any dessert platter.
- The Salt Factor: Large sea salt crystals provide a flavor contrast that elevates the butter from simple to extraordinary.
- Golden Perfection: A precise bake time results in a beautiful golden-brown hue that signifies deep, caramelized flavor.
Essential Elements for the Perfect Buttery Crumb
To achieve the specific visual and structural results described in our blueprint, every ingredient must serve a culinary purpose. We are building a cookie that is structurally sound enough to hold a scalloped shape but delicate enough to crumble effortlessly.
High-Fat Unsalted Butter: You will need 1 cup (227g) of high-quality butter. Using unsalted butter allows us to control the seasoning precisely, ensuring the large sea salt crystals on top provide the primary salty note.
Fine Granulated Sugar: 3/4 cup (150g) of sugar provides sweetness and aids in the browning process. The sugar crystals also help aerate the butter during the creaming stage, creating those tiny air pockets essential for a light crumb.
Egg Yolks: 2 large egg yolks (approximately 36g) are used instead of whole eggs. The fat in the yolks adds richness and produces the characteristic golden dough color seen in professional French pastries.
Pure Vanilla Extract: 1 tsp (5ml) acts as a background flavor enhancer. It rounds out the dairy notes of the butter and makes the cookies smell absolutely heavenly as they bake.
All-Purpose Flour: 2 1/4 cups (280g) provide the structural framework. We use all-purpose rather than cake flour to ensure the fork-pressed ridges hold their shape during the oven spring.
Flaky Sea Salt (Maldon style): 1 tbsp (15g) of large crystals is non-negotiable for the visual blueprint. These shimmering crystals are applied just before baking to ensure they don’t dissolve into the dough.
Baking Powder: 1/2 tsp (2g) provides a very slight lift. This ensures the cookies aren’t overly dense, contributing to that “tender interior” visible when the cookie is snapped in half.
Cold Water or Milk: 1 tbsp (15ml) may be needed if the dough is too crumbly. This helps bind the flour and fat without developing too much gluten.
Required Equipment for Professional Results
Achieving the rustic marble aesthetic requires more than just ingredients; you need the right tools to manipulate the dough correctly. A scalloped round cookie cutter (approximately 2.5 inches or 6cm) is essential for those decorative edges. You will also need a sturdy dinner fork to create the signature ridges that catch the salt.
A chilled marble pastry board or a cold countertop is ideal for rolling out the dough. This keeps the butter from melting, ensuring the cookies maintain their shape. Finally, parchment paper or a silicone baking mat is vital for preventing the bottoms from browning too quickly on your baking sheet.
The Step-by-Step Path to Golden Perfection
Phase 1: Creaming for Aeration and Color
Start by beating your room-temperature butter and sugar together until the mixture is pale and fluffy. This process should take about 3-4 minutes. You are looking for a significant color change—moving from a deep yellow to a light cream color. This step incorporates the air that will later expand in the oven.
Add the egg yolks one at a time, followed by the vanilla. The dough should look rich and golden at this stage. If you are a fan of buttery treats, you might also enjoy our danish butter cookies which use a similar flavor profile but a different piping technique.
Phase 2: Integrating the Dry Ingredients
Whisk your flour and baking powder together in a separate bowl. Turn your mixer to its lowest setting and gradually add the flour to the butter mixture. Mix only until the flour streaks disappear. Over-mixing at this stage will lead to a tough cookie, ruining the “melt-in-your-mouth” interior we are aiming for.
The dough should feel like damp sand but hold together when pinched. If it is too dry, add the tablespoon of milk. If you love cookies with a bit more chew, you might want to compare this to our classic chocolate chip cookies later.
Phase 3: The Crucial Chill
Flatten the dough into a disk, wrap it in plastic wrap, and refrigerate for at least 1 hour. This is the “secret” to the visual blueprint. Chilling the dough solidifies the butter, which prevents the scalloped edges from spreading and blurring in the oven’s heat.
Phase 4: Cutting and Pressing the Ridges
Roll the dough out on a lightly floured surface to a thickness of about 1/4 inch (6mm). Use your scalloped cutter to stamp out circles. Now, take your fork and gently press a cross-hatch pattern or simple parallel ridges onto the surface of each cookie. This isn’t just for looks; the ridges create “valleys” that hold the large sea salt crystals in place.
Phase 5: The Final Seasoning and Bake
Place the cookies on your prepared baking sheet. Sprinkle a generous amount of flaky sea salt over the top. Bake at 350°F (175°C) for 12-15 minutes. Watch for the visual cue: the edges should be a deep golden brown, while the centers remain a pale, buttery gold. The smell of toasted butter should fill your kitchen.
Expert Tips for Bakery-Style Salted Butter Cookies
- Use European-Style Butter: Brands like Kerrygold have a higher fat content and lower water content, resulting in a richer flavor and a more tender crumb.
- Don’t Skip the Snap: To achieve that clean break shown in the prompt, ensure the cookies are fully cooled on a wire rack. This allows the internal structure to set.
- Salt Placement: Only apply the salt right before the cookies go into the oven. If applied too early, the moisture in the dough might dissolve the crystals.
- Consistent Thickness: Use rolling pin spacer rings to ensure every cookie is exactly the same height, leading to an even bake across the entire tray.
Storage, Freshness, and Freezing Advice
These salted butter cookies are best enjoyed within 3 days of baking when stored in an airtight container at room temperature. The high fat content keeps them moist, but the salt can eventually draw moisture from the air, making the cookies lose their crispness.
For longer storage, you can freeze the baked cookies for up to 2 months. Alternatively, freeze the cut dough rounds (with the fork ridges already pressed) and bake them directly from the freezer, adding 2 minutes to the bake time. This is a great trick if you also enjoy making tiramisu crinkle cookies in bulk.
Elevating the Experience: What to Serve With Sablés
These cookies are versatile enough to pair with both sweet and savory items. For a classic pairing, serve them alongside a hot cup of Earl Grey tea or a dark roast coffee. The salt in the cookies cuts through the bitterness of the caffeine perfectly.
If you are creating a full dessert spread, consider adding some lemon sugar cookies for a citrusy contrast, or perhaps some almond ricotta cookies for a softer, cake-like texture. For those who enjoy a bit of indulgence, a side of peanut butter truffles (coming soon) creates a wonderful “salty-sweet” theme for your guests.
Frequently Asked Questions
Yes, but reduce the amount of flaky sea salt on top by half to avoid an overly salty flavor profile. Unsalted butter is preferred for precise seasoning control.
Avoid over-mixing the dough after adding the flour. Over-mixing develops gluten, which makes the cookies tough rather than melt-in-your-mouth tender.
They are best for 3-5 days in an airtight container. The high butter content preserves them well, but the salt may attract moisture over time.
Large, flaky sea salt crystals like Maldon are best. They provide a satisfying crunch and a visual shimmer that fine table salt cannot replicate.
This usually happens if the dough was too warm when it entered the oven. Ensure you chill the dough for at least 1 hour and keep the cut rounds cold until the very moment of baking.
The Definitive Salted Butter Cookie Recipe
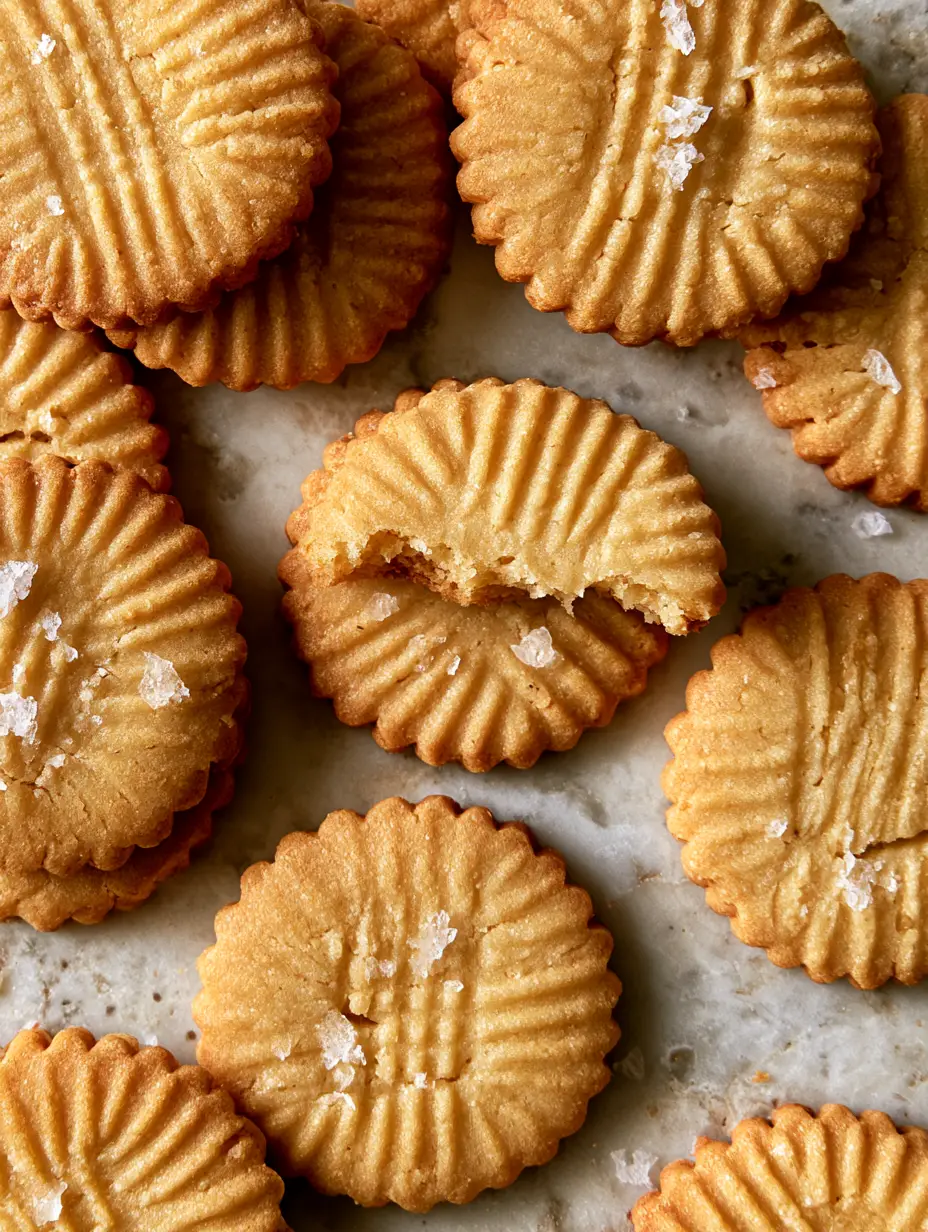
Salted Butter Cookies: The Ultimate French Sablé Recipe with Flaky Sea Salt
Ingredients
Equipment
Method
- Cream the room-temperature butter and sugar in a large bowl until pale and fluffy (about 3-4 minutes).
- Beat in the egg yolks and vanilla extract until fully incorporated and the dough looks golden.
- Slowly fold in the flour and baking powder on low speed until a sandy dough forms. Do not over-mix.
- Wrap the dough in plastic and refrigerate for 1 hour to firm up the butter.
- Roll dough to 1/4 inch thickness. Cut with scalloped cutter and press ridges into the top with a fork.
- Top with sea salt crystals and bake at 350°F (175°C) for 12-15 minutes until edges are golden brown.
Notes
Chilling the dough is essential to maintain the scalloped edge definition.

Closing & Call to Action
Mastering the salted butter cookie is a milestone for any home baker. By focusing on quality butter and the textural contrast of flaky salt, you create a treat that is far greater than the sum of its parts. The visual appeal of those scalloped edges and golden ridges makes them a perfect gift or a stunning addition to your holiday table.
Did your cookies get that perfect golden snap? We would love to hear about your baking journey! Leave a comment below and tell us how yours turned out. Don’t forget to follow us on Pinterest for more visually stunning recipe inspiration and save this recipe to your “Baking Favorites” board!