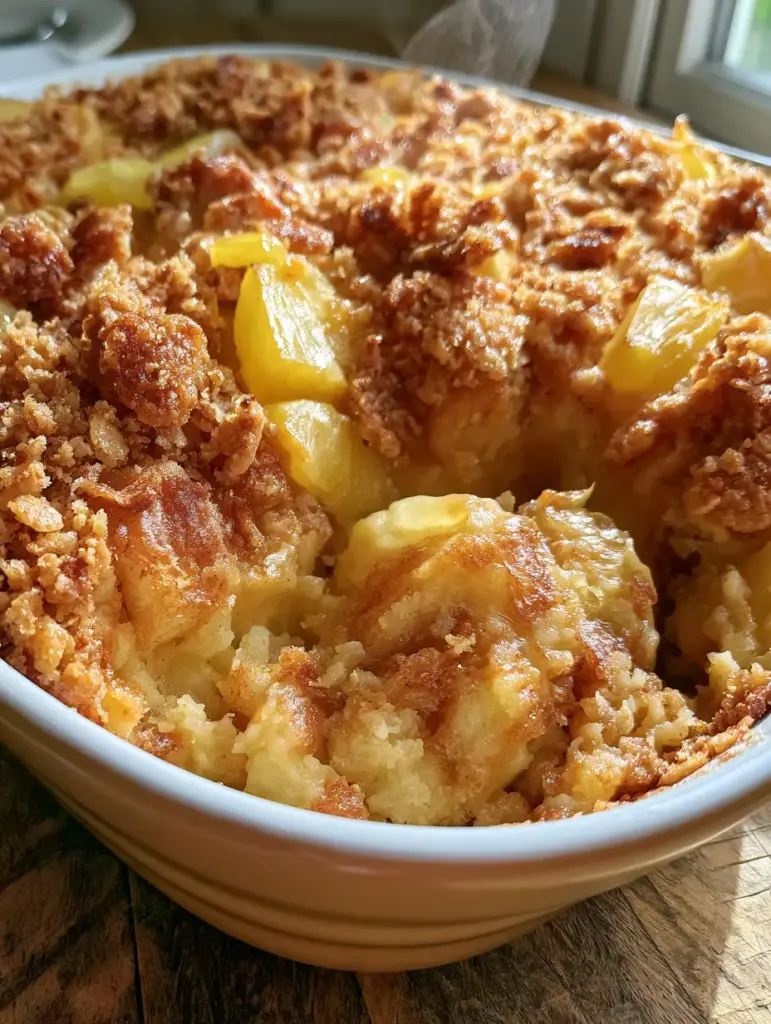
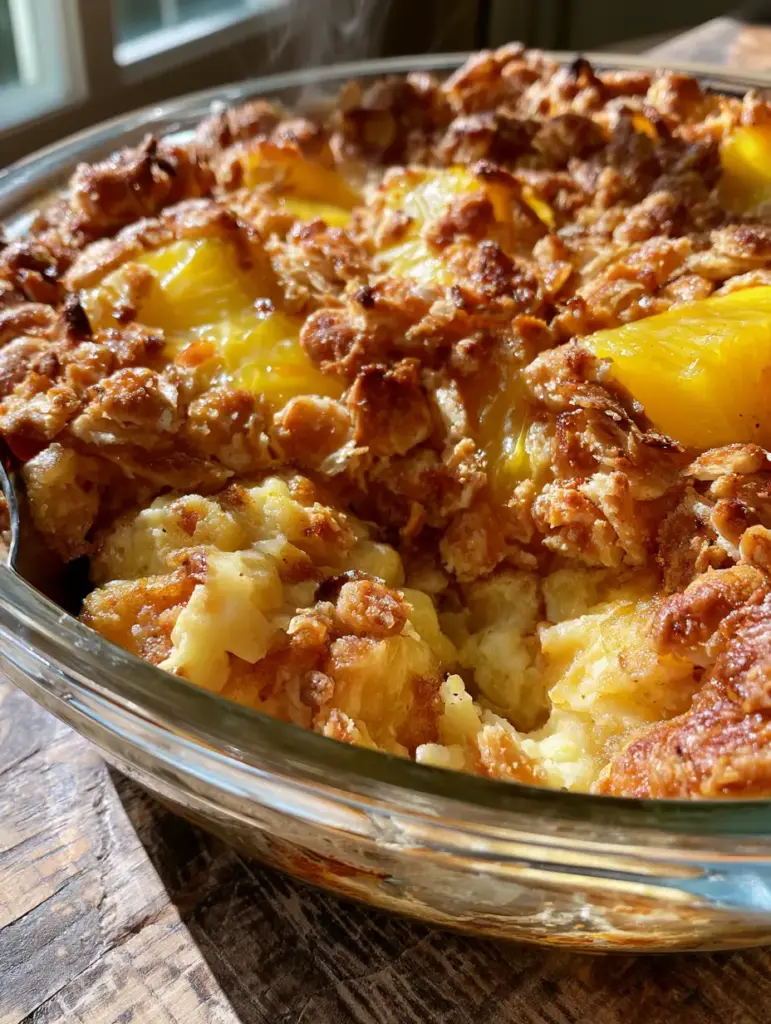
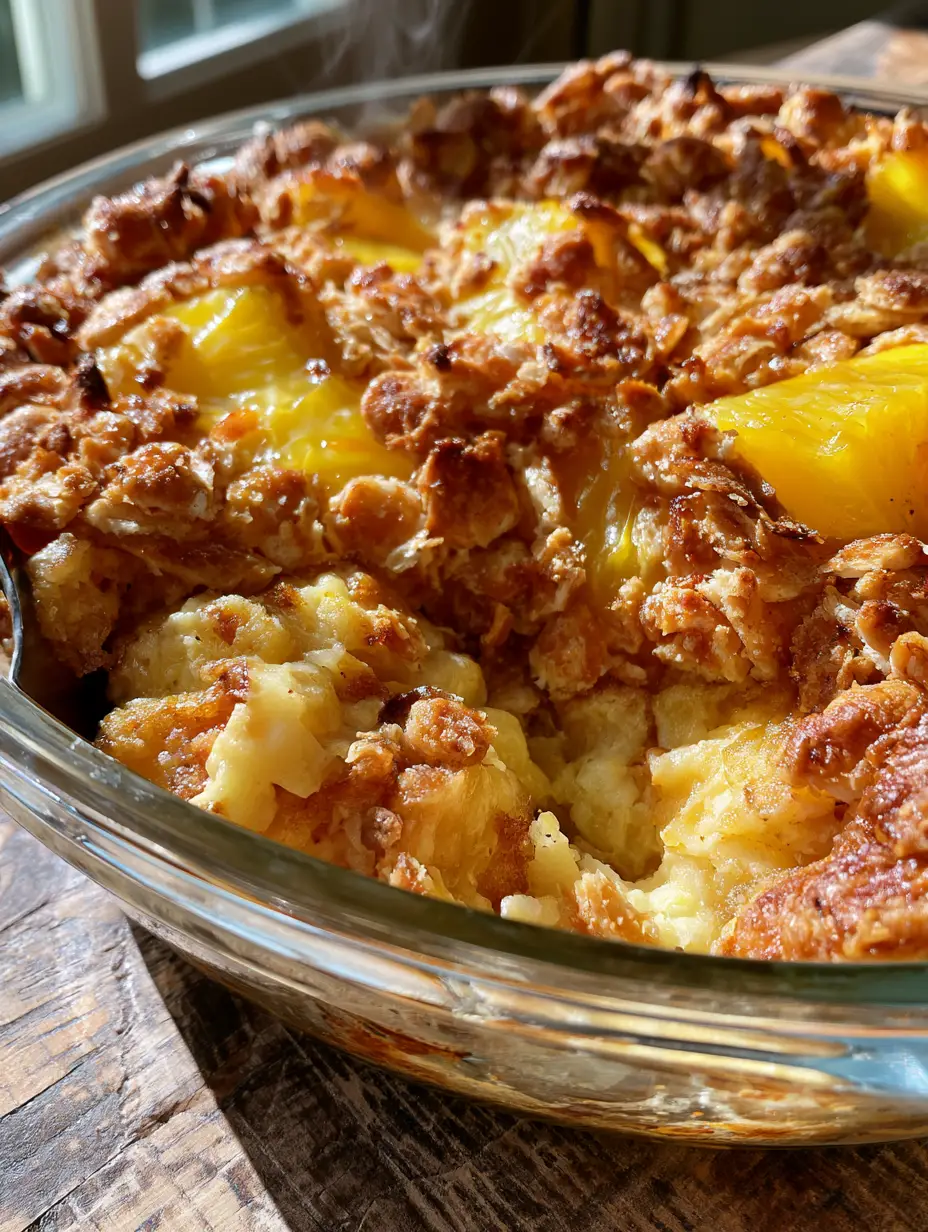
There is a specific, nostalgic magic that happens when the sharp tang of tropical fruit meets the rich, comforting embrace of a classic custard. This scalloped pineapple casserole is the embodiment of that harmony, delivering a side dish that blurs the line between a savory accompaniment and a decadent dessert. As you pull this dish from the oven, you are greeted by the sight of a golden-brown cracker crust, so crisp it shatters under a spoon, revealing a steaming, custard-like interior that pillows around juicy pineapple tidbits.
Inspired by the rustic warmth of a sun-drenched kitchen, this recipe is designed to be the crowning jewel of your holiday spread. Whether it is nestled next to a honey-glazed ham or served as a standalone treat, the contrast between the toasted buttery cracker crumbs and the soft, bread-pudding-like center is unparalleled. The natural window light hitting the glistening yellow pineapple chunks creates a visual feast that is just as inviting as the aroma of caramelized sugar and melted butter wafting through your home.
Why This Pineapple Bake is a Texture Lover’s Dream
- The Crunch Factor: We utilize a thick, double-buttered layer of crushed crackers to ensure every bite has a distinct, audible snap that contrasts the soft base.
- Custard-Pudding Interior: By combining beaten eggs with pillowy bread cubes, we create a structure that absorbs the pineapple juice, resulting in a melt-in-your-mouth “scalloped” texture.
- Balanced Sweetness: While many recipes lean too heavy on sugar, our version balances the sweetness with the salty notes of the cracker topping and the acidity of the pineapple tidbits.
- Visual Elegance: Baked in a classic white ceramic dish, the vibrant yellow fruit peeking through the bronzed crust makes it a centerpiece-worthy addition to any rustic wooden table setting.
Essential Components for the Perfect Scalloped Pineapple Casserole
To achieve the specific “handheld smartphone photo” quality of a perfect bake, each ingredient must play a functional role in the chemistry of the dish. We aren’t just mixing fruit and bread; we are building a structural masterpiece of flavor.
The Tropical Foundation
20 oz (567g) Pineapple Tidbits: We specifically choose tidbits over crushed pineapple to ensure “glistening yellow chunks” are visible in the final scoop. Do not drain the juice entirely, as this liquid gold hydrates the bread cubes and provides the primary flavor profile.
The Structural Custard
5 cups (approx. 250g) White Bread Cubes: Use a sturdy, slightly stale white bread or brioche. These cubes act as the skeletal structure, soaking up the egg mixture to create that signature custard-like bread pudding texture mentioned in our visual blueprint.
4 Large Eggs: These are the binding agents. When beaten thoroughly, they aerate the mixture and set the custard, ensuring the casserole isn’t runny when you take that first scoop.
1 cup (200g) Granulated Sugar: Sugar does more than sweeten; it aids in the caramelization of the edges and helps tenderize the bread fibers for a softer crumb.
The Richness & The Crunch
3/4 cup (170g) Unsalted Butter, melted: Divided between the custard base and the topping. Butter is the vehicle for flavor and the secret to achieving a “thick, crunchy layer” of toasted crumbs.
1 sleeve (approx. 100g) Crushed Crackers: Buttery round crackers (like Ritz) provide the essential salty-sweet finish. Their high fat content allows them to toast into a deep golden-brown without burning too quickly.
Foundational Seasonings (The Invisible Heroes)
1/4 tsp (1.5g) Fine Sea Salt: A pinch of salt is scientifically required to brighten the acidity of the pineapple and keep the sugar from feeling cloying.
1/2 tsp (2.5ml) Pure Vanilla Extract: This adds a layer of aromatic depth that bridges the gap between the bread and the fruit.
Professional Equipment for a Rustic Result
Achieving the look of a rustic kitchen table masterpiece requires a few specific tools. First, a 2-quart white ceramic baking dish is non-negotiable for that clean, high-contrast aesthetic. Ceramic retains heat evenly, which is crucial for setting the custard without over-browning the bottom.
You will also need a large mixing bowl to toss the bread and pineapple, and a separate medium bowl to whisk your eggs and sugar. A heavy-duty silicone spatula helps fold the ingredients without crushing the delicate bread cubes, preserving the “scoop-able” texture. Lastly, ensure you have a wire cooling rack to allow the bottom to set while the steam rises from the top.
Step-by-Step Culinary Blueprint
1. Preparing the Casserole Base
Start by preheating your oven to 350°F (175°C). Grease your white ceramic dish generously with butter. In a large bowl, combine your bread cubes and the pineapple tidbits (with half of their juice). If you’ve enjoyed making silky custard treats before, you’ll recognize the importance of bread-to-liquid ratios here.
2. Crafting the Custard Binder
In a separate bowl, beat the 4 eggs until they are pale and frothy. Whisk in the sugar, vanilla, and 1/2 cup (113g) of the melted butter. Pour this liquid over the bread and pineapple. Fold gently until every cube is saturated. Let it sit for 5 minutes; this “soak time” is the secret to the pudding-like interior shown in the visual prompt.
3. Engineering the Crunchy Topping
Crush your crackers into coarse fragments—avoid turning them into a fine powder, as we want visible texture. Mix these with the remaining 1/4 cup (57g) of melted butter. If you love a buttery crumble topping, this step will be familiar. Spread this mixture in an even, thick layer across the top of the casserole.
4. The Baking Process & Visual Cues
Slide the dish into the center rack of the oven. Bake for 40-45 minutes. Watch for the visual cues: the edges should be bubbling with clear pineapple syrup, and the cracker topping must reach a deep, toasted golden-brown. When you gently shake the dish, the center should have a slight, set jiggle—not a liquid splash.
5. The Rest and Reveal
Remove from the oven and let it stand for 10 minutes. This is critical. The residual heat allows the custard to fully firm up. As it rests, you will see the rising steam captured in the smartphone photo style, indicating the dish is ready for serving.
Expert Tips for Success
- Don’t Over-Process the Crackers: Keep some larger pieces in your cracker mix to catch the light and create that “glistening” effect against the pineapple.
- Bread Selection Matters: Avoid very soft, thin-sliced sandwich bread. A thicker Texas toast or a loaf of French bread holds its shape better within the custard.
- Temperature Control: If the crackers are browning too fast before the custard sets, tent the dish loosely with foil for the last 10 minutes.
- The “Juice” Secret: If you prefer a denser casserole, drain all the juice. For the “soft, custard-like” result in the photo, keep 1/4 cup of the pineapple liquid in the mix.
Storage, Reheating, and Freezing
This scalloped pineapple casserole is best served warm, but it keeps beautifully. Store leftovers in an airtight container in the refrigerator for up to 3 days. To maintain the crunch, reheat in the oven at 325°F (160°C) for 10-15 minutes rather than the microwave, which can make the crackers soggy.
We do not recommend freezing this dish, as the custard base can separate upon thawing, losing that luxurious bread pudding mouthfeel that makes it so special.
What to Serve With This Sweet Pineapple Bake
This dish is traditionally paired with salty proteins. It is the natural companion to a spiral-sliced ham or roast pork loin. If you are building a full brunch spread, consider serving it alongside air fryer bananas for a tropical theme.
For those who love fruit-forward finales, this casserole also pairs exceptionally well with a side of vanilla bean ice cream. If you’re looking for more pineapple inspiration after this meal, check out our pineapple upside-down cookies for a handheld version of these classic flavors.
Frequently Asked Questions
Yes, you can use crushed pineapple, but the texture will be more uniform and less chunky. Tidbits provide the ‘glistening yellow chunks’ seen in professional photos of this dish.
Place the dish on the center rack and mix the crackers thoroughly with melted butter. The butter acts as a conductor to brown the crumbs evenly.
In Southern cuisine, it is traditionally served as a side dish for salty meats like ham, but its sweet custard profile also makes it a popular dessert when paired with ice cream.
Buttery round crackers (like Ritz) are ideal because their high fat content ensures a golden-brown, crispy finish that doesn’t become tough.
Sogginess usually comes from using too much pineapple juice or bread that is too fresh. Ensure you only use 1/4 cup of the juice and use slightly stale, sturdy bread cubes.
The Best Scalloped Pineapple Casserole Recipe
Scalloped Pineapple Casserole: The Ultimate Buttery Holiday Side Dish
Ingredients
Equipment
Method
- Preheat your oven to 350°F (175°C). Grease a 2-quart white ceramic baking dish with butter or non-stick spray.
- In a large mixing bowl, toss the bread cubes with the pineapple tidbits and 1/4 cup of the pineapple juice.
- In a medium bowl, whisk the eggs, sugar, salt, vanilla, and 1/2 cup of melted butter until smooth and slightly frothy.
- Pour the egg mixture over the bread cubes. Fold gently to combine and let sit for 5 minutes to allow the bread to absorb the liquid.
- Transfer the mixture to the prepared ceramic dish. Combine crushed crackers with 1/4 cup melted butter and sprinkle evenly over the top.
- Bake for 40-45 minutes until the topping is a deep golden-brown and the pineapple is glistening. Let rest for 10 minutes before serving.
Notes
Keep some cracker pieces large for extra crunch and visual appeal.
Bring the Warmth of This Casserole to Your Table
There is something deeply satisfying about a recipe that looks exactly like the photo on your screen. This scalloped pineapple casserole delivers on every promise: the crunch, the creaminess, and the vibrant tropical flavor. It is a testament to how simple ingredients like crackers and canned fruit can be transformed into a gourmet experience.
If you enjoyed this recipe, please leave a comment below and let us know how it turned out! Don’t forget to follow us on Pinterest for more kitchen inspiration. Save this recipe to your “Holiday Sides” board by clicking the Pin button below!