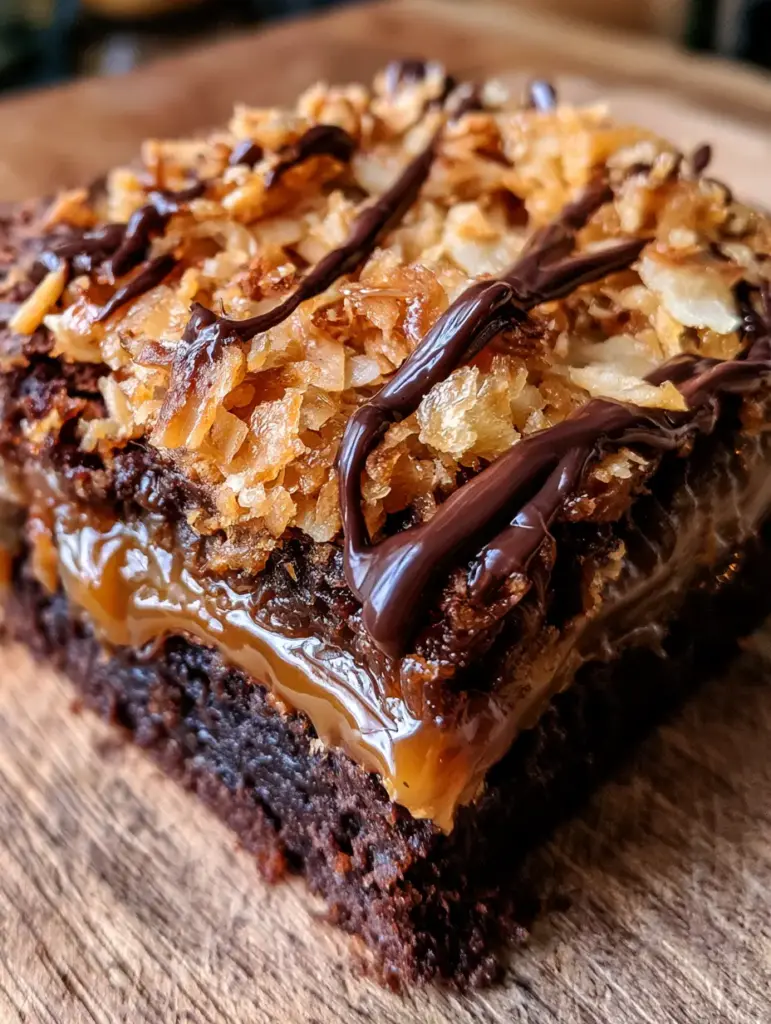
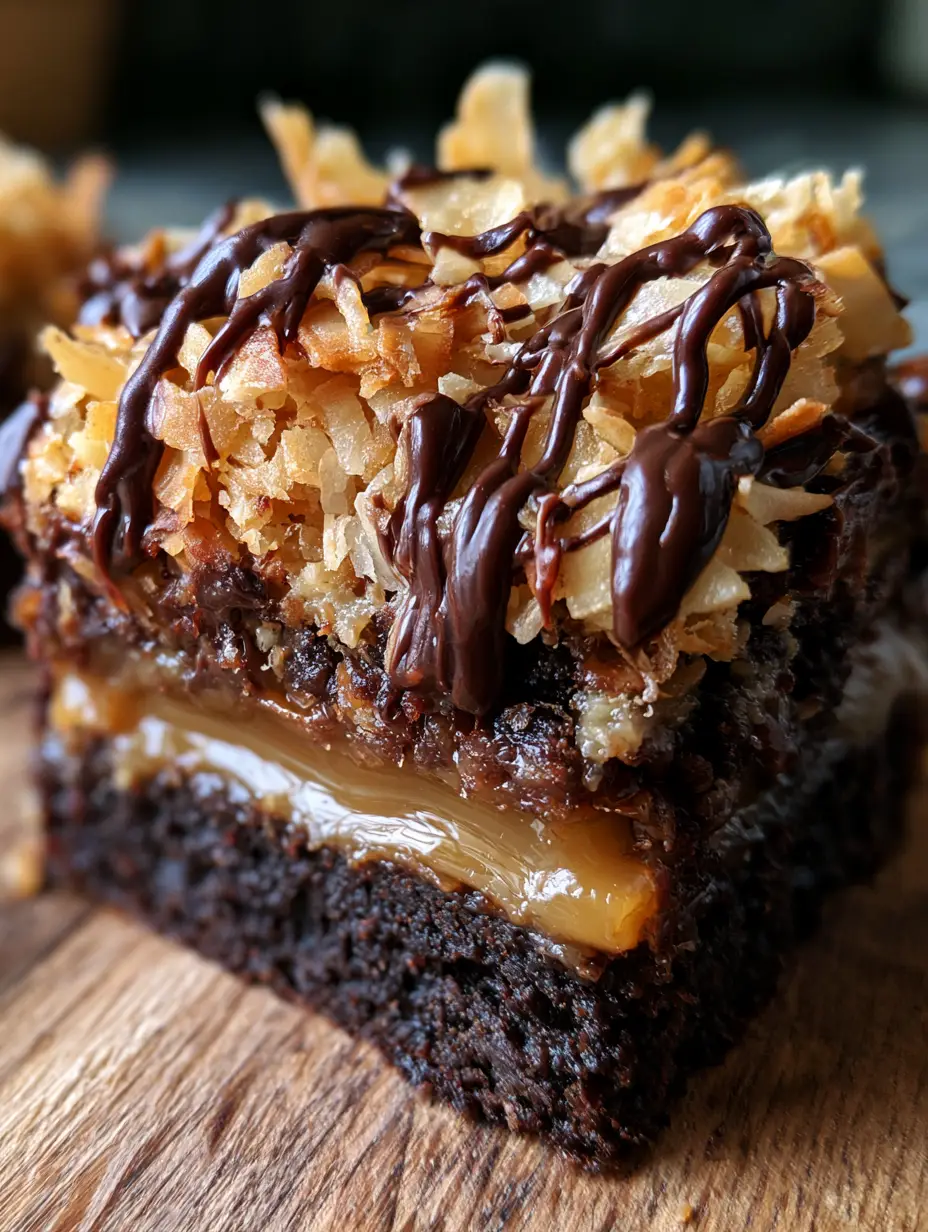
Samoa brownies are the definitive answer to every dessert lover’s craving for the iconic Girl Scout cookie, reimagined as a professional-grade bakery treat. Imagine a base so dark and fudgy that it rivals the finest truffles, topped with a thick, glistening layer of molten caramel that catches the light with every slice.
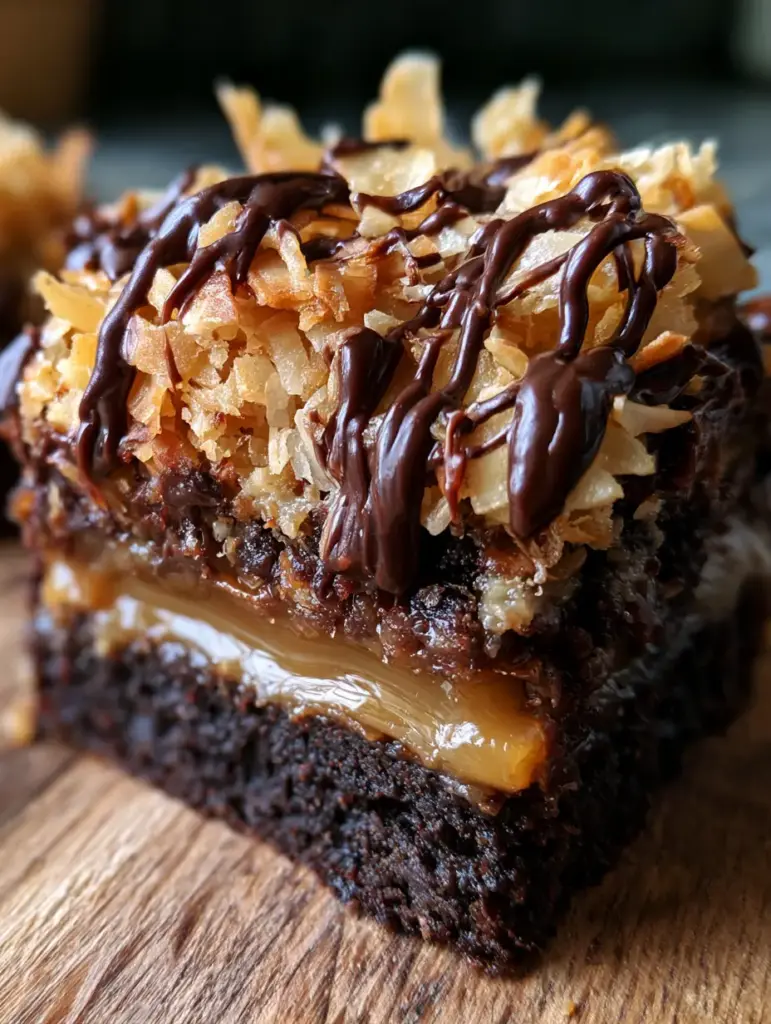
This isn’t just a simple brownie; it is a multi-textured experience that brings together the warmth of toasted coconut and the sharp, sophisticated snap of a dark chocolate ganache drizzle. When you bite into one, you immediately notice the visible moist crumb of the warm brownie contrasted against the crunch of golden-brown flakes.
Whether you are preparing these for a luxurious weekend treat or a holiday gathering, the visual appeal—from the artisan zig-zags of chocolate to the uneven, generous mounds of coconut—makes them a showstopper. Let’s dive into how you can achieve this exact handheld perfection in your own kitchen.
The Architecture of the Perfect Samoa Brownie Layer
- Triple-Layer Texture: A dense, moisture-rich chocolate foundation supports a fluid caramel center and a crisp toasted topping.
- Visual Contrast: The deep mahogany of the brownie base makes the golden hues of the coconut and the sheen of the caramel pop for a camera-ready finish.
- Professional Gloss: We use specific fats to ensure the dark chocolate drizzle remains shiny even after it sets.
- Balanced Sweetness: By utilizing high-quality dark chocolate and sea salt, we cut through the richness of the caramel for a complex flavor profile.
Essential Components for Chocolate and Caramel Bliss
Unsalted Butter (226g / 1 cup): Melted butter provides the fat necessary for that signature “shiny” crackle top on the brownie base while keeping the crumb incredibly tender.
Dutch-Processed Cocoa Powder (95g / 1 cup): This specific cocoa is alkalized to create a darker color and a smoother, more mellow chocolate flavor that mimics the “dark” aesthetic in our visual blueprint.
Granulated Sugar (400g / 2 cups): Beyond sweetness, sugar liquefies during baking to create the fudgy, chewy texture that separates a brownie from a chocolate cake.
Large Eggs (4 total): Eggs act as the primary binder, providing the structural integrity needed to hold up the heavy weight of the caramel and coconut toppings.
All-Purpose Flour (125g / 1 cup): A lower ratio of flour to fat ensures the brownies remain fudgy and moist rather than becoming light and airy.
Espresso Powder (1 tsp / 5g): An “invisible” ingredient that doesn’t make the brownies taste like coffee but intensifies the natural richness of the chocolate.
Sweetened Shredded Coconut (200g / 2 cups): This provides the bulk of the topping; we will toast it to achieve that sharp, defined texture and golden-brown color.
Chewy Caramel Bits or Squares (310g / 11 oz): Melted with a touch of heavy cream, these create the glistening, molten layer that oozes slightly when the brownies are sliced.
Heavy Cream (30ml / 2 tbsp): Added to both the caramel and the chocolate ganache to ensure a silky, pourable consistency that stays soft at room temperature.
Dark Chocolate Chips (170g / 1 cup): These are melted for the final artful drizzle, providing the “zig-zag” finish described in our visual prompt.
The Baker’s Toolkit for Professional Results
To achieve the meticulously sliced layers seen in professional food photography, you will need a 9×9 inch (23×23 cm) square baking pan lined with parchment paper. This allows you to lift the entire block out of the pan for clean cuts.
A heavy-bottomed skillet is essential for toasting the coconut evenly without burning the delicate edges. You will also need a heat-proof glass bowl to create a double boiler for the dark chocolate ganache, ensuring it stays glossy and smooth.
Finally, a sharp chef’s knife dipped in hot water and wiped dry between every single cut is the secret to exposing those decadent internal layers without smearing the caramel into the brownie base.
Step-by-Step Evolution of a Samoa Brownie
Crafting the Fudgy Chocolate Foundation
Preheat your oven to 350°F (175°C). In a large bowl, whisk your melted butter and sugar vigorously for two minutes; this aeration is what helps create the delicate top crust.
Incorporate the eggs one at a time, followed by the vanilla and espresso powder. Sift in the cocoa powder, flour, and a pinch of salt, folding gently until just combined—overmixing at this stage will introduce too much air and ruin the fudgy crumb.
Spread the batter into your lined pan and bake for 25-30 minutes. You are looking for a visual cue: the edges should be set, but the center should still have a slight jiggle, ensuring a moist, “still warm” appearance when served.
Achieving the Golden Toasted Coconut Texture
While the brownies cool, place your shredded coconut in a wide skillet over medium-low heat. Stir constantly for 5-8 minutes.
Watch for the sensory cues: the aroma will become nutty and sweet, and the flakes will transition from stark white to a variegated golden-brown. Remove them immediately from the heat once they reach the color of toasted almonds to prevent scorching.
The Molten Caramel Cascade
In a microwave-safe bowl or small saucepan, combine the caramel bits with the heavy cream. Heat gently, stirring until the mixture is a smooth, glistening liquid.
Pour the molten caramel directly over the cooled brownie base, spreading it to the very edges. The caramel should catch the light, appearing almost mirror-like before the coconut is added.
The Final Drizzle and Assembly
Immediately press the toasted coconut into the warm caramel layer, creating an uneven, rustic mound. Melt your dark chocolate with a teaspoon of coconut oil or cream for that professional ganache sheen.
Using a spoon or a piping bag, create delicate zig-zags across the surface. Allow the brownies to set for at least two hours before slicing to ensure the layers stay distinct and decadent.
Pro Secrets for Bakery-Quality Samoa Brownies
- The Temperature Trick: For the most “ooze” in your caramel, serve the brownies slightly warm, but slice them while cold to get those sharp, clean lines.
- Salt is Key: Sprinkle a few flakes of Maldon sea salt over the caramel before adding the coconut to balance the sugar.
- Toast Carefully: Coconut goes from golden to burnt in about 30 seconds; never leave the pan unattended during the toasting process.
- Don’t Overbake: If a toothpick comes out completely clean, you’ve gone too far. Look for a few moist crumbs clinging to the pick for ultimate fudginess.
Preserving the Decadence: Storage and Refreshing
These brownies are best stored in an airtight container at room temperature for up to 4 days. Because of the high sugar content in the caramel and the fats in the brownie, they stay remarkably moist.
If you prefer a firmer texture, you can refrigerate them for up to a week. To bring back the “inviting warmth” and glistening surfaces described in our blueprint, pop a square in the microwave for 10 seconds before eating.
For long-term storage, wrap individual squares in plastic wrap and freeze for up to 3 months. Thaw at room temperature for an hour, and the toasted coconut will retain its crunch.
Perfect Companions: What to Serve Alongside These Rich Treats
Because these brownies are incredibly rich, they pair beautifully with a cold glass of milk or a bitter espresso. If you are hosting a dessert party, consider offering a variety of textures by serving these alongside no-bake Samoa inspired delights for those who want the flavor without the oven heat.
If you’re looking for a seasonal twist, these chocolatey bars contrast well with the bright flavors of peppermint Christmas brownie creations. For a truly decadent spread, you could even offer a “Cookie-Brownie” hybrid like these ultra-fudgy chewy brookie cookies.
For those who love a hidden vegetable twist in their sweets, try comparing the texture of this recipe to my fudgy zucchini chocolate brownies for a surprisingly moist alternative.
Frequently Asked Questions
Standard caramel sauce is usually too thin and will run off the brownies. If using store-bought, ensure it is a ‘thick’ caramel dip or simmer it down until it reaches a soft-ball stage for better stability.
Chill the brownies in the refrigerator for at least 2 hours to let the caramel set. Use a large, sharp knife dipped in hot water and wiped dry between every cut to expose the clean internal layers.
Toast the shredded coconut in a dry skillet over medium-low heat, stirring constantly. It takes about 5-8 minutes to reach a variegated golden-brown; remove it from the heat immediately once it smells nutty.
Always toast the coconut before adding it to the brownies. The caramel layer acts as a ‘glue’ to hold the pre-toasted, crunchy flakes in place.
Cakey brownies usually result from over-whisking the eggs and flour, which incorporates too much air. For fudgy samoa brownies, fold the dry ingredients in gently by hand until just combined.
The Ultimate Samoa Brownie Recipe Card
Samoa Brownies: The Ultimate Fudgy Caramel Coconut Bar Recipe
Ingredients
Equipment
Method
- Whisk melted butter and sugar for 2 minutes. Add eggs, vanilla, and espresso powder, whisking until smooth.
- Fold in cocoa powder, flour, and salt until just combined. Do not overmix.
- Pour into a 9x9 lined pan and bake at 350°F (175°C) for 25-30 minutes until edges are set but center is slightly moist.
- Toast coconut in a skillet over medium heat for 5-8 minutes until golden-brown and fragrant.
- Melt caramel bits with heavy cream in the microwave in 30-second bursts until glistening and molten.
- Spread molten caramel over cooled brownies, top with toasted coconut, and drizzle with melted dark chocolate zig-zags.
Notes
Ensure the coconut is fully toasted to a golden brown for the best texture contrast.
Closing & Call to Action
Mastering the samoa brownies recipe is about more than just mixing ingredients; it’s about layering textures to create a visual and culinary masterpiece. From the moist, fudgy crumb to the glistening dark chocolate zig-zags, every element of this dish is designed to impress.
If you enjoyed this deep dive into dessert forensics, please leave a comment below and let me know how your caramel layer turned out! Don’t forget to follow The Wholesome Skillet on Pinterest for more decadent recipe inspirations and step-by-step guides.