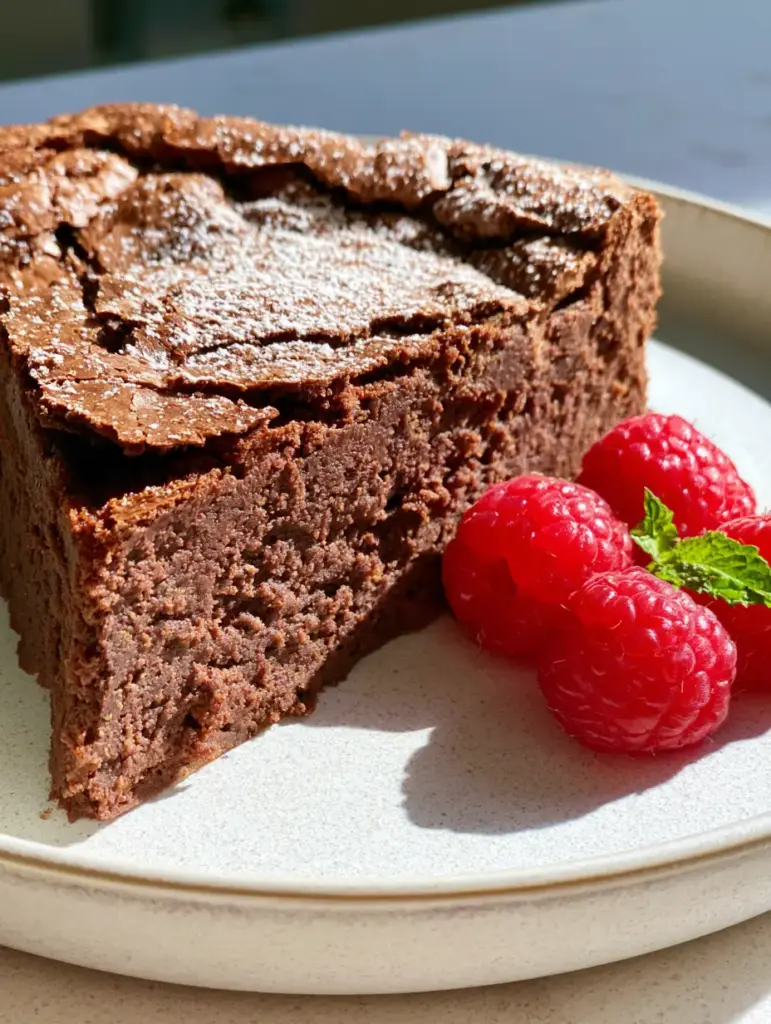
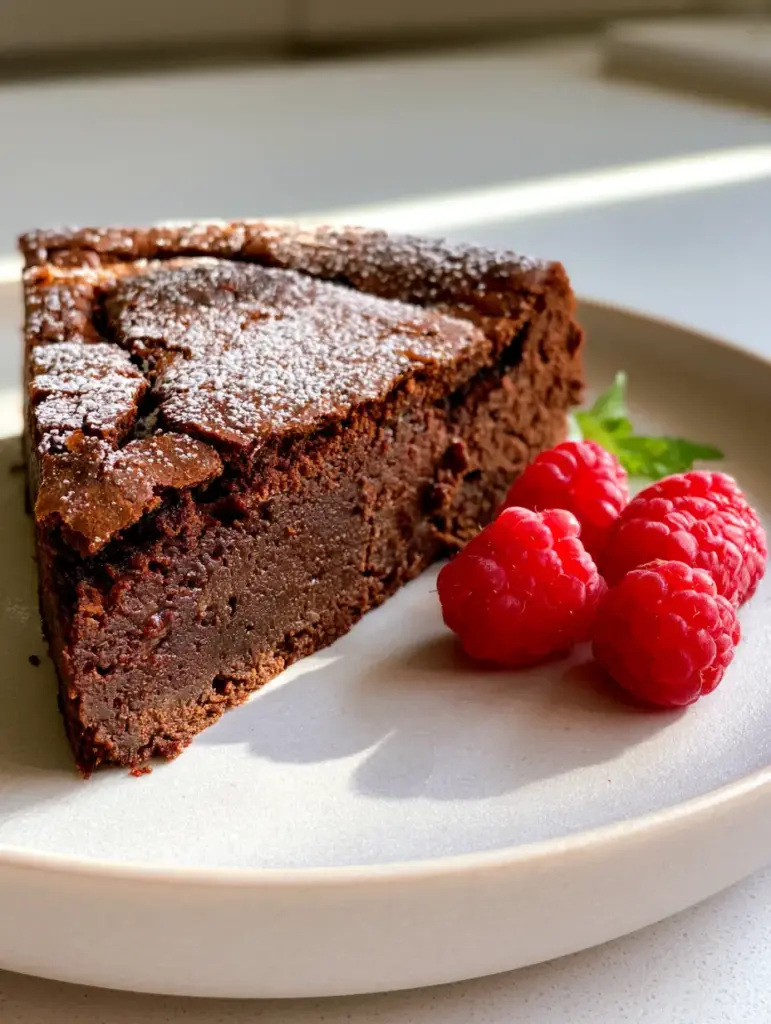
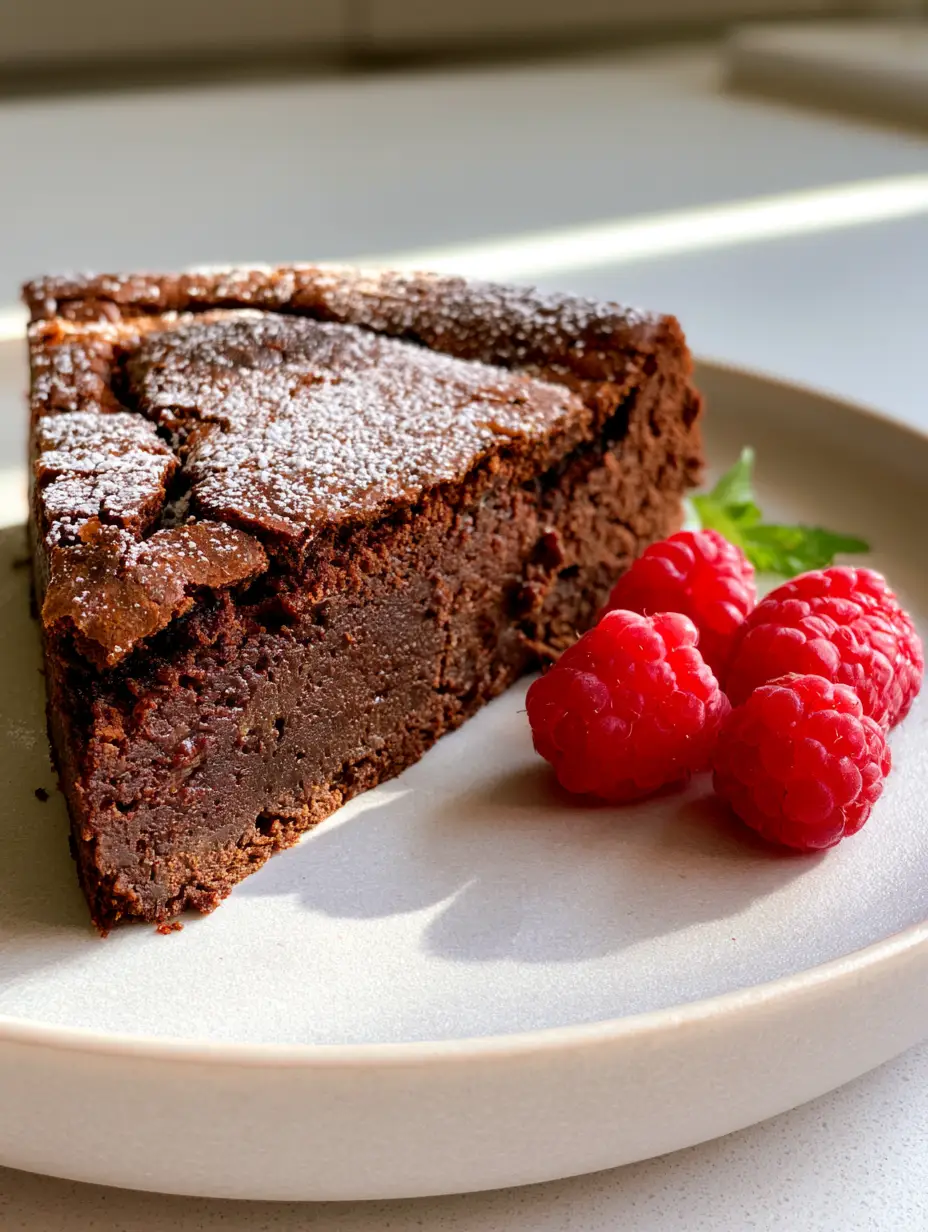
The flourless chocolate cake is the undisputed crown jewel of the dessert world, offering a sensory experience that no standard sponge can replicate. Imagine a thick, decadent slice of torte sitting on a matte white ceramic plate, its edges boasting a slightly crispy, crackled top that shatters under the pressure of a fork. Beneath that delicate crust lies an ultra-moist, dense, fudgy texture with visible richness in the crumb that speaks to the quality of the dark cocoa used.
This isn’t just a dessert; it is a masterclass in chocolate forensics. When you capture that perfect handheld smartphone photo, the natural soft side-lighting from a window highlights the velvety texture, creating gentle shadows that make the chocolate look almost like ganache. To complete the visual symphony, three vibrant, glossy red raspberries and a tiny sprig of fresh mint provide the essential pop of color against the deep, dark canvas of the cake.
Whether you are looking for a showstopper for a dinner party or a gluten-free indulgence that doesn’t compromise on luxury, this recipe delivers. We have engineered this torte to achieve that specific professional food photography style right in your own kitchen. Prepare to dive into a world of intense chocolate saturation and sophisticated simplicity.
The Irresistible Allure of a Professional Flourless Torte
- Ultra-Dense Texture: Unlike traditional cakes, this torte relies on high-quality fats and eggs to create a fudgy, truffle-like consistency.
- The Crackled Crust: A signature visual cue achieved through proper aeration of eggs, providing a sophisticated structural contrast.
- High-Contrast Garnishes: The use of fresh raspberries and mint isn’t just for flavor; it provides the professional aesthetic seen in high-end culinary publications.
- Gluten-Free by Nature: No strange flour substitutes are needed here, as the structural integrity comes entirely from the chocolate and egg proteins.
Essential Components for Chocolate Mastery
To achieve the visual and textural results described in our blueprint, every ingredient must serve a specific culinary purpose. We are moving beyond basic baking and into the realm of chocolate science.
Bittersweet Chocolate (60-70% Cacao): You will need 8 oz (225g) of high-quality chopped chocolate. This provides the primary structure and the “melt-in-your-mouth” fat content that defines a luxury torte.
Unsalted Butter: Use 1 cup (225g) of high-quality European-style butter. Butter acts as the emulsifier that carries the chocolate flavor across the palate and ensures the crumb remains moist even when chilled.
Dark Cocoa Powder: ½ cup (45g) of Dutch-processed cocoa powder adds an extra layer of “dark” visual intensity. It deepens the color and provides a robust, earthy backbone to the sweetness.
Farm-Fresh Eggs: 5 large eggs are the “invisible” engine of this recipe. They provide the lift and the protein structure required to hold the dense chocolate together without the need for flour.
Granulated Sugar: 1 cup (200g) of sugar is essential for more than just sweetness. When whisked with the eggs, it creates the meringue-like structure responsible for that iconic crackled top.
Pure Vanilla Extract and Sea Salt: 1 tsp (5ml) of vanilla and ½ tsp (3g) of salt are the flavor enhancers. They don’t make the cake taste like vanilla or salt; they simply make the chocolate taste more like itself.
Powdered Sugar: A small amount for dusting provides that “delicate snowfall” effect seen in our visual prompt. It highlights the cracks in the crust and adds a final touch of elegance.
Fresh Raspberries and Mint: These are your “hero” garnishes. The raspberries must be glossy and firm, and the mint leaves should be tiny and vibrant to match the handheld photo aesthetic.
Precision Tools for the Perfect Crumb
Achieving a professional-grade flourless chocolate cake requires the right gear to ensure even heat distribution and proper aeration. Without these, you risk a cake that is either too dry or lacks that signature height.
A 9-inch (23cm) springform pan is non-negotiable for this recipe. Because the torte is so fudgy and delicate, attempting to flip it out of a standard cake pan will likely result in structural failure.
You will also need a double boiler (or a heat-proof bowl over a simmering pot) to melt the bittersweet chocolate gently. Direct heat is the enemy of chocolate, as it can cause the solids to seize or the fats to separate, ruining the velvety finish.
A high-speed stand mixer or hand mixer is essential for the egg-whipping phase. To get that crackled top, you need to incorporate significant air into the eggs and sugar, a task that is physically exhausting to do by hand.
The Step-by-Step Guide to Fudgy Perfection
Melting the Chocolate Base
Begin by preheating your oven to 375°F (190°C) and greasing your springform pan with butter, lining the bottom with parchment paper. In your double boiler, combine the 8 oz (225g) of chopped bittersweet chocolate and 1 cup (225g) of unsalted butter.
Stir frequently until the mixture is completely smooth and glossy. Once melted, whisk in the ½ cup (45g) of dark cocoa powder until no lumps remain. Set this mixture aside to cool slightly; if it is too hot when added to the eggs, it will scramble them.
Aerating the Eggs for Structural Integrity
In a large bowl, combine the 5 large eggs, 1 cup (200g) of granulated sugar, vanilla, and salt. Use your mixer to beat these on medium-high speed for about 5-8 minutes.
You are looking for the “ribbon stage”—the mixture should be pale, thick, and when you lift the beaters, the batter should fall back into the bowl in a slow, distinct ribbon that holds its shape for a few seconds. This aeration is exactly how we achieve the slightly crispy, crackled top mentioned in our visual blueprint.
Folding for a Dense, Fudgy Texture
Gently fold the cooled chocolate mixture into the egg mixture using a large rubber spatula. Do not stir vigorously; you want to preserve as much of that incorporated air as possible.
Continue folding until no streaks of egg remain and the batter is a uniform, rich chocolate color. Pour the batter into the prepared pan and smooth the top with your spatula.
Baking and Sensory Cues
Slide the pan into the center of the oven and bake for 30-35 minutes. You must watch for specific visual cues: the edges should be set and starting to pull away from the pan, while the center should still have a slight, jiggle-free firmness.
The top should appear dry and start to form those beautiful, thin cracks. If you overbake it, you will lose the ultra-moist, dense, fudgy texture. Let the cake cool completely in the pan on a wire rack; as it cools, the center will fall slightly, further intensifying the crackled effect on the surface.
Expert Tips for Flourless Success
- Temperature Control: Ensure your eggs are at room temperature before beating. Cold eggs will not trap air as efficiently, leading to a flatter, less textured cake.
- Quality Matters: Since there is no flour to hide behind, the flavor of your chocolate is the flavor of the cake. Avoid “baking chips” which contain stabilizers; use high-quality bars instead.
- The Clean Cut: To get that perfect, thick slice seen in the photo, dip your knife in hot water and wipe it dry between every single cut. This prevents the fudgy center from sticking to the blade.
- Sifting is Key: Always sift your cocoa powder and powdered sugar. Lumps of cocoa will not disappear during the folding process and can create bitter pockets in the crumb.
Preserving the Decadence: Storage and Freezing
This flourless chocolate cake actually improves with age as the flavors deepen and the texture sets. Store any leftovers in an airtight container at room temperature for up to 2 days, or in the refrigerator for up to 5 days.
If you prefer a firmer, more truffle-like texture, serve the cake chilled straight from the fridge. For a softer, more velvety experience, let the slice sit at room temperature for 30 minutes before serving.
To freeze, wrap the entire cake (or individual slices) tightly in plastic wrap and then aluminum foil. It will stay fresh for up to 3 months. Thaw overnight in the refrigerator before adding the powdered sugar and fresh garnishes.
Divine Pairings for Your Chocolate Masterpiece
While this torte is a star on its own, it plays beautifully with other flavors. If you are hosting a large event, consider serving it alongside a strawberry custard cake for a stunning contrast in colors and textures.
For those who want to double down on the cocoa experience, a drizzle of homemade chocolate syrup can add an extra layer of decadence. If you find the dark chocolate too intense, a side of lemon custard cake offers a bright, acidic counterpoint that cleanses the palate.
If you enjoy the combination of fruit and chocolate found in our raspberry garnish, you might also love the flavor profile of a white chocolate raspberry fudge. For a more casual pairing, serve a slice of this torte after a meal of chewy chocolate chip cookies for the ultimate chocolate lovers’ feast.
Frequently Asked Questions
Yes! In fact, the flavor and texture often improve after 24 hours in the fridge. Just wait to add the powdered sugar and fresh raspberries until right before serving to keep them looking fresh.
We do not recommend milk chocolate for this recipe. Milk chocolate has a higher sugar-to-cacao ratio and different fat content, which will result in a cake that is too sweet and may not set with the proper fudgy density.
A toothpick test doesn’t work well for flourless cakes because the center should remain fudgy. Instead, look for the edges to be firm and the top to look dry and crackled while the center still has a very slight jiggle.
Dutch-processed cocoa is preferred because it is neutralized (less acidic) and has a darker color, which provides the deep visual richness and smooth chocolate flavor seen in the blueprint.
It is completely normal for a flourless cake to sink slightly as it cools. Because it relies on air bubbles in the eggs for lift rather than flour, the center settles as it loses heat, which actually helps create the signature crackled top.
The Flourless Chocolate Cake Recipe
Flourless Chocolate Cake: The Ultimate Decadent and Fudgy Torte
Ingredients
Equipment
Method
- Preheat oven to 375°F (190°C). Grease a 9-inch (23cm) springform pan and line the bottom with parchment paper.
- Using a double boiler, melt the bittersweet chocolate and butter until smooth. Whisk in the dark cocoa powder and set aside to cool.
- Beat eggs, sugar, vanilla, and salt on medium-high for 5-8 minutes until thick and pale (ribbon stage).
- Gently fold the cooled chocolate mixture into the eggs with a spatula until no streaks remain, being careful not to deflate the air.
- Pour into pan and bake for 30-35 minutes until the top is crackled and the edges are set.
- Cool completely in the pan. Dust with powdered sugar and serve with 3 raspberries and a mint leaf per slice.
Notes
Ensure eggs are at room temperature to achieve the signature crackled top.
Closing & Call to Action
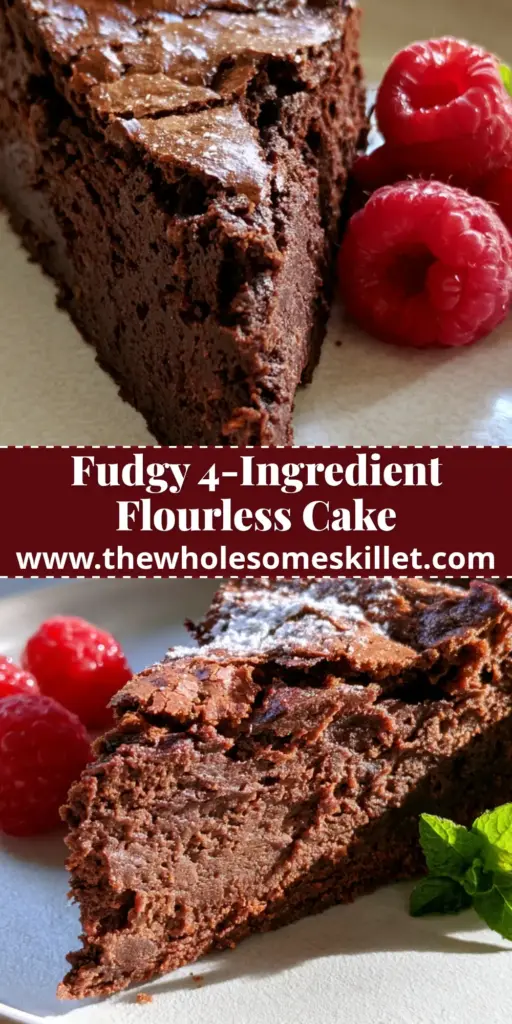
Mastering the flourless chocolate cake is a milestone for any home cook. By focusing on high-quality bittersweet chocolate and the precise aeration of farm-fresh eggs, you can create a dessert that is as visually stunning as it is delicious. The contrast of the crackled top against the fudgy center, accentuated by vibrant raspberries and mint, makes every slice a work of art.
We would love to see your culinary creations! If you make this recipe, please leave a comment below and tell us how your crackled top turned out. Don’t forget to share your photos and pin this recipe to Pinterest so you can find it for your next special occasion!