There is something inherently luxurious about the combination of velvety cocoa butter and the sharp, acidic bite of fresh fruit. This white chocolate raspberry fudge represents the pinnacle of that pairing, offering a dense, creamy texture that melts away to reveal vibrant ribbons of deep red raspberry puree.
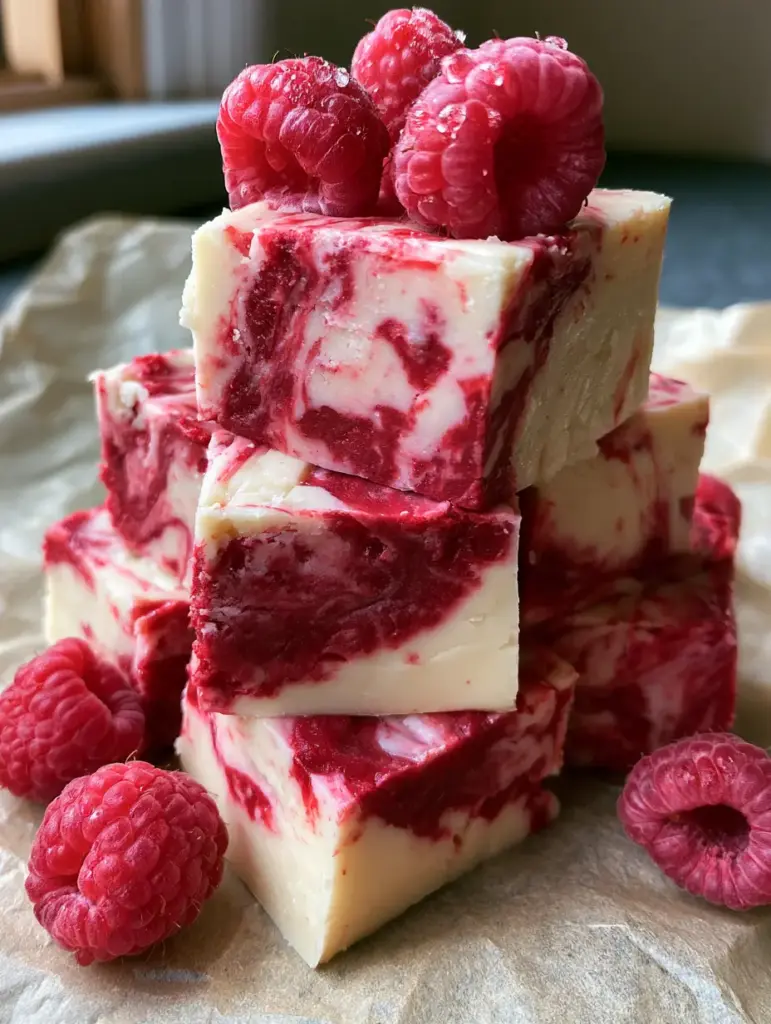
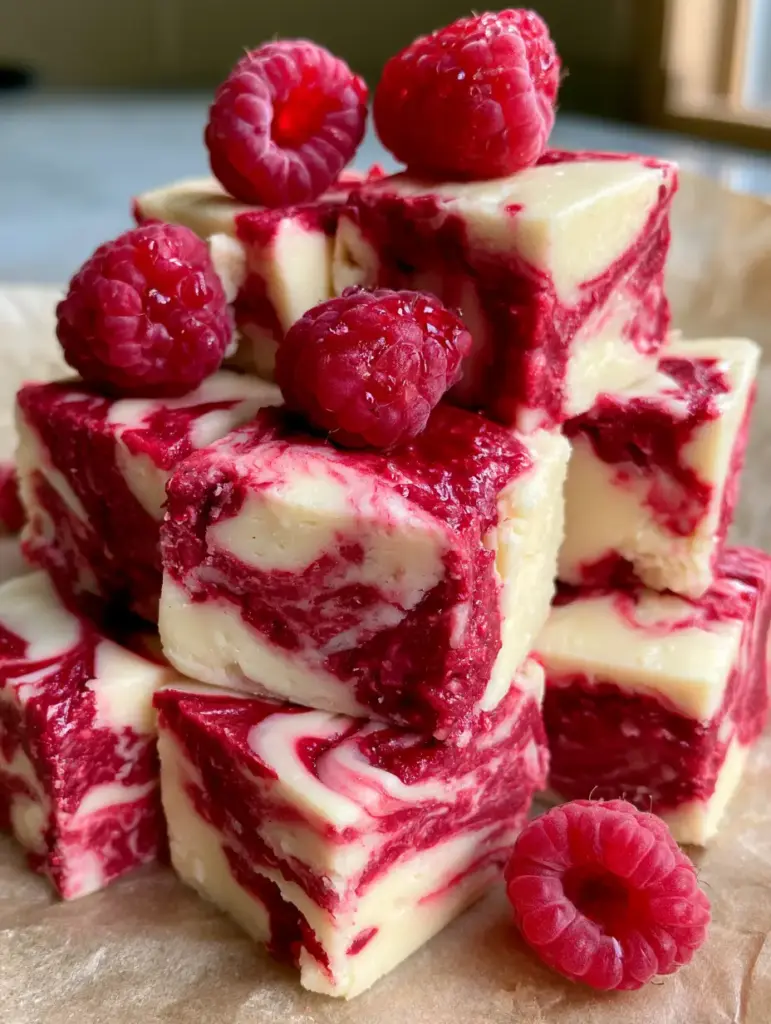
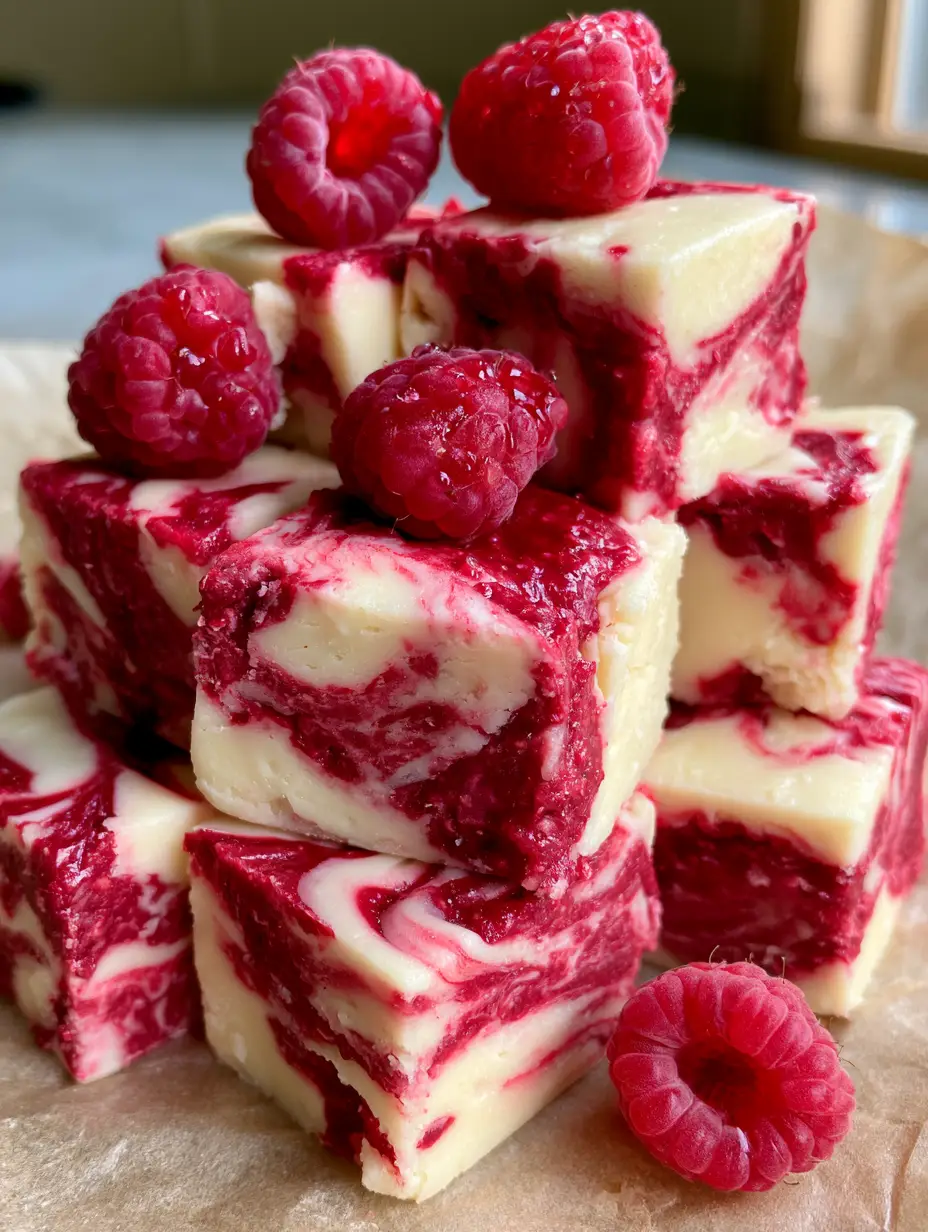
When you look at a stack of these thick cubes, catching the natural morning light from a side window, the visual contrast is stunning. The clean-cut edges reveal a complex marbled interior that looks like a work of modern art sitting atop a rustic wooden surface.
Whether you are looking for a show-stopping addition to a holiday dessert platter or a sophisticated gift for a loved one, this recipe delivers professional results with minimal effort. By following the forensic details of this guide, you will achieve that elusive gourmet finish—complete with plump raspberries decorated with tiny, glistening water droplets.
Why This Raspberry Swirled Confection Stands Out
- Unrivaled Creamy Texture: Unlike traditional grainy fudges, this version uses sweetened condensed milk to ensure a silky-smooth mouthfeel that persists even after days in the fridge.
- Vibrant Natural Color: We bypass artificial dyes in favor of a homemade raspberry reduction, creating a deep red hue that pops against the ivory white chocolate.
- Structural Integrity: This recipe is engineered to hold its shape at room temperature, making it perfect for gifting or serving at parties without fear of it turning into a puddle.
- Perfect Balance of Sweet and Tart: The inherent sweetness of white chocolate is perfectly countered by the zing of fresh berries and a hint of lemon juice.
The Anatomy of Gourmet White Chocolate Raspberry Fudge
High-Quality White Chocolate: You will need 18 oz (510g) of premium white chocolate squares or high-end chips. Avoid “white morsels” that do not contain cocoa butter, as they will not melt smoothly or provide the necessary richness for this raspberry white chocolate fudge variation.
Sweetened Condensed Milk: One 14 oz (397g) can acts as the structural foundation. This ingredient provides the sugar and milk solids needed to create a dense, sliceable texture without the need for a candy thermometer.
Fresh Raspberries for the Puree: Use 1 cup (125g) of fresh berries to create the concentrated swirl. We will cook these down to remove excess moisture, ensuring the fudge sets properly while intensifying the flavor profile.
Fine Sea Salt: A mere 1/4 tsp (1.5g) of salt is the “invisible” hero here. It cuts through the sugar and highlights the delicate floral notes of the raspberries.
Pure Vanilla Extract: Use 1 tsp (5ml) to add depth. Vanilla acts as a flavor bridge between the creaminess of the milk and the brightness of the fruit.
Lemon Juice: 1 tsp (5ml) of fresh lemon juice added to the puree prevents the red color from oxidizing and adds a necessary hit of acid to the fruit reduction.
Fresh Raspberry Garnish: Reserve about 1/2 cup (60g) of whole, plump berries. Just before serving, a light mist of water creates those photogenic droplets seen in professional food photography.
Essential Tools for Clean Edges and Perfect Swirls
To achieve the professional macro close-up look described in our visual blueprint, you will need an 8×8 inch (20x20cm) square baking pan. Lining this pan with parchment paper is non-negotiable; leave an overhang on two sides to act as a “sling” for easy removal.
A heavy-bottomed saucepan is required for melting the chocolate gently. If you prefer a more controlled heat, a double boiler is even better to prevent the white chocolate from scorching or seizing.
For the signature marbling, a small offset spatula or a wooden skewer is the best tool. It allows you to drag the puree through the thick fudge base without over-mixing, which would turn the whole batch a dull pink instead of creating distinct swirls.
Crafting the Vibrant Raspberry Reduction
Concentrating the Fruit Flavor
Start by placing your 1 cup (125g) of raspberries in a small saucepan over medium-low heat. Use a fork to crush the berries as they warm up, releasing their juices.
Add the lemon juice and 1 tbsp (12g) of granulated sugar. Simmer the mixture for 8-10 minutes, stirring frequently, until the liquid has reduced by half and looks like a thick, syrupy jam.
Straining for a Smooth Swirl
For that clean, professional marbled texture, you must remove the seeds. Press the hot reduction through a fine-mesh sieve into a small bowl.
Discard the seeds and let the smooth, deep red puree cool to room temperature. This step is critical; adding hot puree to the fudge base can cause the chocolate to separate.
Mastering the White Chocolate Fudge Base
The Gentle Melt
In a large, heavy-bottomed pot, combine the 18 oz (510g) of white chocolate squares with the 14 oz (397g) of sweetened condensed milk and the salt. Set the heat to the lowest possible setting.
Stir constantly with a heat-proof spatula. You are looking for a visual cue: the chocolate should just begin to lose its shape and blend into the milk. Do not rush this, as white chocolate is notorious for burning at low temperatures.
Achieving the Dense Creamy Texture
Once the mixture is completely smooth and glossy, remove it from the heat immediately. Stir in the vanilla extract.
The fudge will be thick and heavy at this point. If it looks slightly matte, you have achieved the perfect emulsion for a dense, fudge-like bite.
The Art of the Marble Swirl
Setting the Foundation
Pour the white chocolate mixture into your prepared, parchment-lined pan. Use an offset spatula to smooth the top into an even layer, ensuring you push the mixture into the corners for those clean cut edges later.
Immediately drop small spoonfuls of the cooled raspberry puree onto the surface of the fudge. Space them out about an inch apart to allow room for swirling.
Visual Cues for Perfect Marbling
Take your skewer or the tip of a knife and gently swirl the red puree into the white base. Use a figure-eight motion, but stop sooner than you think you should.
To match the visual blueprint, you want to see distinct ribbons of deep red against the white. Over-swirling will result in a murky pink color rather than a vibrant marble effect.
Chilling and Precision Slicing
Allow the fudge to sit at room temperature for 30 minutes before transferring it to the refrigerator. It needs to chill for at least 4 hours, though overnight is best for the cleanest edges.
When ready to serve, lift the fudge out of the pan using the parchment paper sling. Place it on a wooden cutting board.
For those macro-photo-worthy squares, use a long, sharp chef’s knife. Run the blade under hot water and wipe it dry between every single cut. This ensures the white chocolate doesn’t smear into the red raspberry swirls.
Expert Tips for Success
- Temperature Control: Never let a single drop of water enter your melting chocolate, or it will “seize” into a gritty, hard clump.
- The Puree Test: If your raspberry reduction is too thin, the fudge will be soft and messy. Ensure it is thick enough to coat the back of a spoon before straining.
- Quality Matters: Since white chocolate is the primary flavor, use a brand you enjoy eating plain. If you like the flavor of your chocolate in white chocolate cranberry cookies, it will work perfectly here.
- Room Temp vs. Cold: For the best flavor, serve the fudge at room temperature, but always slice it while it is cold from the fridge.
Storage and Long-Term Enjoyment
This white chocolate raspberry fudge keeps exceptionally well. Store the cut cubes in an airtight container with sheets of parchment paper between the layers to prevent sticking.
In the refrigerator, the fudge will remain fresh for up to 2 weeks. For longer storage, you can freeze the fudge for up to 3 months. Wrap the entire block or individual squares tightly in plastic wrap and then place them in a freezer bag.
Thaw the frozen fudge in the refrigerator overnight before bringing it to room temperature for serving. The raspberry swirls will maintain their vibrant deep red color even after freezing.
Perfect Pairings for a Dessert Spread
If you are building a dessert board, this fudge pairs beautifully with other textures. Consider serving it alongside a rich flourless chocolate cake to provide a fruity contrast to the deep cocoa notes.
For a berry-themed event, you could also include raspberry cheesecake danishes or a few raspberry pistachio bars. The combination of the creamy white chocolate and the crunch of pistachios is a classic culinary duo.
If you prefer a more traditional chocolate experience, a stack of this fudge looks beautiful next to salted caramel chocolate fudge, offering guests a choice between bright fruit and salty-sweet indulgence.
Frequently Asked Questions
Yes, frozen raspberries work perfectly for the reduction. Just be sure to simmer them slightly longer to account for the extra moisture inherent in frozen fruit.
Yes, because of the fresh fruit reduction and dairy content, it is best stored in the refrigerator. It can sit out at room temperature for 2-3 hours during serving.
Chill the fudge thoroughly for at least 4 hours. Use a sharp chef’s knife dipped in hot water, wiped dry between every single cut to prevent smearing the raspberry swirl.
This usually happens if the raspberry puree wasn’t reduced enough or if the white chocolate used didn’t contain enough cocoa butter. Ensure the puree is thick and syrupy before adding it to the fudge.
The Ultimate White Chocolate Raspberry Fudge Recipe
White Chocolate Raspberry Fudge: A Creamy No-Bake Masterpiece
Ingredients
Equipment
Method
- Combine 1 cup raspberries, sugar, and lemon juice in a saucepan over medium-low heat. Simmer for 8-10 minutes until thickened and reduced by half.
- Press the mixture through a fine-mesh sieve into a bowl to create a smooth, seedless deep red puree. Set aside to cool.
- In a heavy saucepan over low heat, combine white chocolate squares, condensed milk, and salt. Stir constantly until smooth and glossy.
- Remove from heat and stir in the vanilla extract until fully incorporated.
- Pour the white chocolate base into the lined 8x8 pan. Drop spoonfuls of the raspberry puree on top.
- Use a skewer to gently marble the red puree into the white base using figure-eight motions.
- Chill in the refrigerator for at least 4 hours. Slice with a hot, clean knife into cubes and garnish with fresh raspberries.
Notes
Wipe your knife clean between every single cut to maintain the vibrant white and red contrast.
Final Thoughts on This Elegant Treat
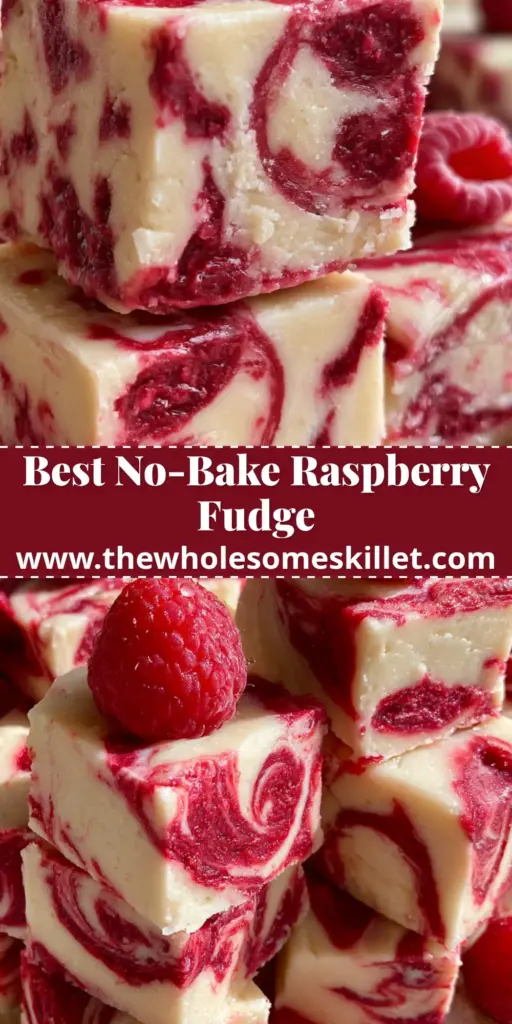
Mastering the balance of a white chocolate raspberry fudge is a rewarding endeavor for any home cook. The combination of the dense, creamy base and the vibrant, tart raspberry swirl creates a sensory experience that is as beautiful as it is delicious.
Don’t forget to garnish your stack with those fresh raspberries and perhaps a light dusting of powdered sugar if you’re feeling extra festive. The morning light hitting the marbled texture truly makes this recipe a photographer’s dream.
If you enjoyed this recipe, please leave a comment below and let us know how your swirls turned out! Be sure to follow us on Pinterest for more gourmet no-bake inspiration and share your creations with our community.