There is a specific kind of magic that happens when you pull a tray of fresh white chocolate cranberry cookies out of the oven. The kitchen fills with the scent of toasted butter and sweet vanilla, while the cookies themselves glow with a perfect golden-brown hue under the natural window light. This isn’t just another cookie recipe; it is a forensic recreation of the ultimate holiday treat, designed to look as good as it tastes.
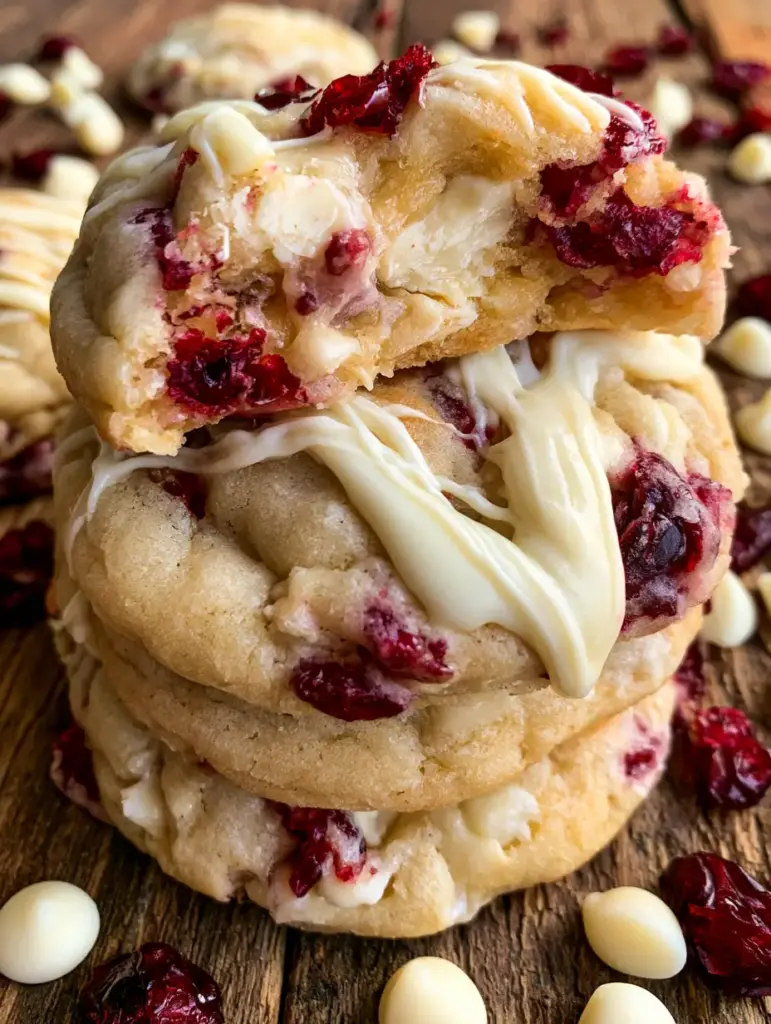
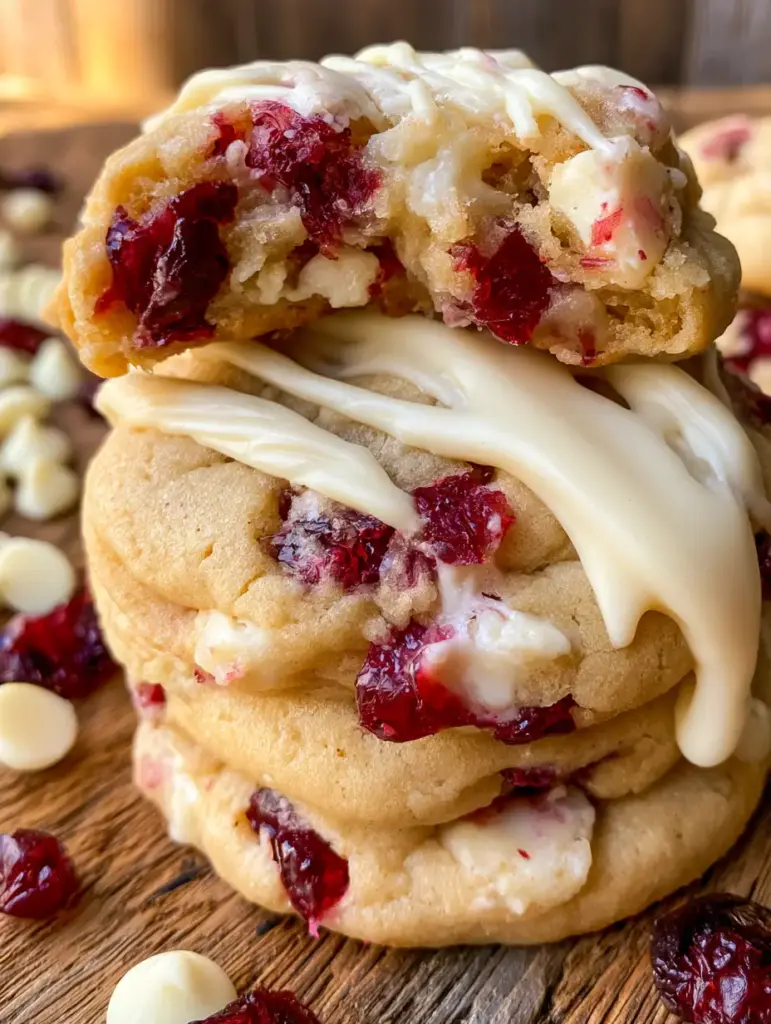
When you look at a close-up, eye-level shot of these cookies, you immediately notice the contrast. The vibrant ruby-red dried cranberries pop against the creamy, melted chunks of high-quality white chocolate. We have engineered this recipe to produce a thick, soft texture that holds its shape while remaining incredibly gooey in the center.
Whether you are styling these on a rustic wooden table for a handheld smartphone photo or simply baking them for a cozy afternoon, the artisanal drizzle of white chocolate on top elevates them to bakery-level status. Let’s dive into the science of how we achieve that iconic “bliss” cookie profile.
Why These White Chocolate Cranberry Cookies Stand Out
- The Perfect Texture: A specific ratio of brown sugar to granulated sugar ensures a chewy center with slightly crisp, golden edges.
- Artisanal Aesthetic: We use hand-chopped white chocolate chunks instead of just chips to create those beautiful, irregular pools of melted cocoa butter.
- Flavor Balance: The tartness of the dried cranberries cuts through the intense sweetness of the white chocolate, creating a sophisticated palate.
- Visual Appeal: A thick, creamy drizzle creates a professional finish that mimics the “bliss” style cookies found in high-end cafes.
The Anatomy of a Perfect Gourmet Cookie
To achieve the result seen in our visual blueprint, we cannot rely on standard pantry staples alone. Each ingredient serves a structural and aesthetic purpose. If you enjoy the creamy profile here, you might also love our white chocolate raspberry fudge for a different take on this flavor pairing.
Unsalted Butter (1 cup / 227g): We start with high-quality butter, softened but not greasy. This provides the foundational fat that carries the flavor of the vanilla and chocolate.
Brown Sugar (1 cup / 200g, packed): The molasses in brown sugar is essential for that “soft and chewy” texture. It also aids in the golden-brown browning process during caramelization.
Granulated Sugar (½ cup / 100g): This helps the edges crisp up slightly, providing the structural integrity needed for a thick, handheld cookie.
All-Purpose Flour (2 ¾ cups / 345g): We use a specific weight to ensure the cookies don’t spread too thin. This keeps them thick and “hefty” on the plate.
Dried Cranberries (1 ½ cups / 180g): Choose vibrant, plump cranberries. If they seem too dry, you can flash-soak them in warm water for 5 minutes and pat them dry to ensure they look “ruby-red” in your final bake.
White Chocolate Chunks (8 oz / 225g): Do not use only chips. Chopping a high-quality white chocolate bar allows for different sized “pools” of chocolate to form, which looks stunning in photos.
Cornstarch (1 tsp / 3g): Our secret weapon for “soft-batch” cookies. It softens the proteins in the flour, resulting in a more tender crumb.
Sea Salt (½ tsp / 3g): Vital for balancing the sweetness of the white chocolate. Without it, the cookies can taste one-dimensional.
Essential Tools for Bakery-Quality Results
To recreate the rustic, handheld photo aesthetic, you don’t need a commercial kitchen, but a few specific tools will help. Having a heavy-duty baking sheet ensures even heat distribution, preventing the bottoms from burning before the centers are set.
A large cookie scoop (3 tablespoons / 45ml capacity) is crucial for uniformity. This ensures every cookie in your stack is the same size, which is vital for that professional, eye-level photography look. Finally, a wire cooling rack is necessary to prevent the cookies from steaming on the bottom, which would ruin the texture.
Step-by-Step Instructions for Cookie Perfection
1. Preparing the Dough Foundation
In a large bowl or stand mixer, cream the softened butter, brown sugar, and granulated sugar for at least 3-4 minutes. You are looking for a pale, fluffy texture. This aeration is what helps the cookies rise and stay thick rather than flattening out like standard chocolate chip cookies.
2. Incorporating the Binding Elements
Add 2 large eggs and 2 teaspoons (10ml) of pure vanilla extract. Mix until just combined. The vanilla extract enhances the “buttery” notes of the dough, making it smell irresistible as it bakes.
3. Sifting and Folding the Dry Ingredients
In a separate bowl, whisk together the flour, baking soda, salt, and cornstarch. Slowly add this to the wet ingredients. Stop mixing the moment you see no more white streaks of flour. Overmixing develops too much gluten, which will make your white chocolate cranberry cookies tough instead of tender.
4. The Visual “Mix-In” Strategy
Fold in the dried cranberries and white chocolate chunks by hand. This ensures the “vibrant ruby-red” berries stay intact and aren’t crushed by the mixer. Reserve a handful of each to press into the tops of the dough balls before they go into the oven—this is the secret to a “picture-perfect” cookie.
5. The Chilling Requirement
Chill the dough for at least 30 minutes. This allows the fat to solidify, which prevents the cookies from spreading too much. If you want that thick, chewy profile seen in our handheld smartphone photo, do not skip this step!
6. The Golden-Brown Bake
Preheat your oven to 350°F (175°C). Scoop large mounds of dough onto your prepared baking sheet. Bake for 10-12 minutes. The “visual cue” you are looking for is pale, set edges and a top that still looks slightly “underdone” or gooey. They will firm up as they cool on the rustic wood surface.
7. The Artisanal Drizzle Technique
Once the cookies are completely cool, melt an additional ½ cup (75g) of white chocolate chips with 1 teaspoon of coconut oil. Using a spoon or a piping bag, create a beautiful, zig-zag pattern across the stack. This creates the “artisanal drizzle” mentioned in our recipe blueprint.
Expert Tips for Visual and Culinary Success
- The “Pan Bang” Method: If your cookies look too puffy, gently tap the baking sheet on the counter halfway through baking to settle the dough.
- Perfect Rounds: Immediately after taking the cookies out of the oven, use a large circular glass or cookie cutter to “scoot” the cookies into perfect circles while they are still soft.
- Chocolate Quality: Use white chocolate that contains real cocoa butter. “White morsels” often contain vegetable oil and won’t melt into the gooey chunks seen in the prompt.
- Light is Key: For the best photos, place your cookies near a window with natural light. The “warm lighting” mentioned in the prompt really brings out the textures of the broken cookie center.
Storage and Preservation
These cookies stay soft for up to 5 days when stored in an airtight container at room temperature. To maintain that “fresh-baked” feel, you can place a slice of white bread in the container; the cookies will absorb the moisture from the bread, staying chewy longer.
You can also freeze the raw dough balls for up to 3 months. Simply bake them from frozen, adding an extra 2 minutes to the cooking time. This is perfect for when you need a quick batch of sweet treats for unexpected guests.
What to Serve with Cranberry Cookies
These cookies are rich and sweet, so they pair beautifully with a variety of textures. For a holiday spread, consider serving them alongside cranberry mousse parfaits to double down on the tart berry flavor. If you’re hosting a dessert party, a chocolate chip pizookie offers a great warm contrast to these handheld treats.
For a drink pairing, a cold glass of milk is classic, but a cup of hot coffee helps cut through the richness of the white chocolate drizzle. If you want to go all out, a drizzle of homemade chocolate syrup over a side of vanilla ice cream complements the cookies perfectly.
Frequently Asked Questions
Fresh cranberries are much more acidic and contain significantly more moisture, which will change the texture of the dough. For this specific ‘bliss’ style result, dried cranberries are highly recommended.
White chocolate has a lower burning point than dark chocolate. Using high-quality bars chopped into large chunks helps, as does ensuring your oven is properly calibrated to 350°F (175°C).
Melt white chocolate with a tiny bit of coconut oil to thin it out. Use a spoon to flick the chocolate back and forth quickly across a stack of cookies to achieve that artisanal, messy-yet-beautiful look.
Cookies usually flatten if the butter was too warm or if the dough wasn’t chilled. Ensure you chill the dough for at least 30 minutes to help the cookies maintain their thick, chewy shape.
The Ultimate White Chocolate Cranberry Bliss Cookie Recipe
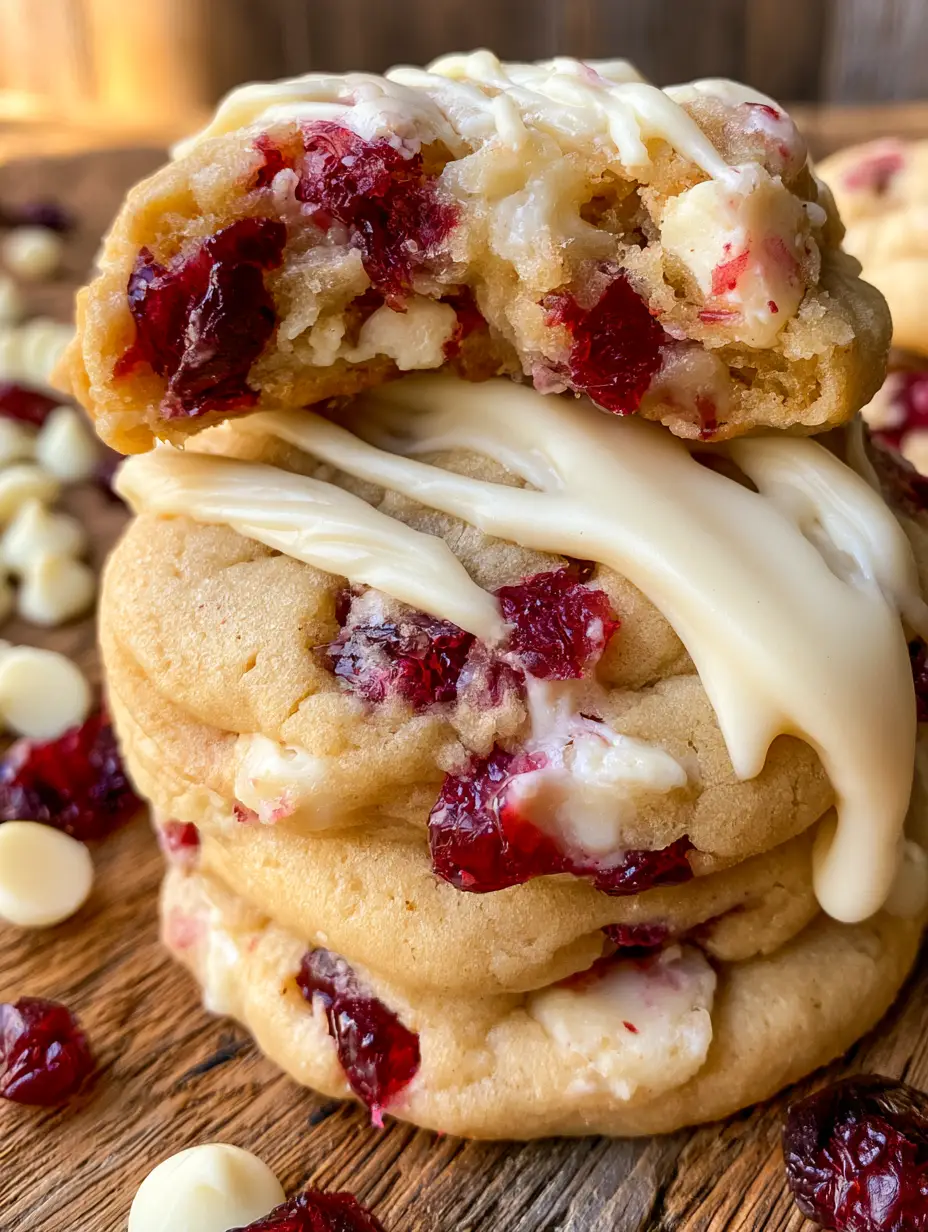
White Chocolate Cranberry Cookies: The Ultimate Thick and Chewy Recipe
Ingredients
Equipment
Method
- Cream softened butter and both sugars in a stand mixer for 3-4 minutes until pale and fluffy.
- Mix in eggs and vanilla extract until just combined.
- Whisk flour, baking soda, cornstarch, and salt; gradually add to the wet mixture until no flour streaks remain.
- Gently fold in white chocolate chunks and dried cranberries by hand.
- Chill the dough in the refrigerator for at least 30 minutes to ensure a thick cookie.
- Scoop 3-tbsp mounds onto a baking sheet and bake at 350°F (175°C) for 10-12 minutes until edges are pale golden.
- Once cool, drizzle with melted white chocolate in an artisanal pattern.
Notes
Chill the dough to prevent the cookies from spreading too thin.

Final Thoughts on These Handheld Delights
Creating the perfect white chocolate cranberry cookies is about more than just following a recipe; it’s about understanding the balance of textures and visual cues. From the rustic wooden background to the gooey interior of a broken cookie, every element of this recipe is designed to satisfy both your cravings and your aesthetic standards.
We hope you enjoy baking (and photographing!) these stunning cookies. If you make them, please tag us or leave a comment below with your results. Don’t forget to follow us on Pinterest for more visually-driven recipes like this one!