There is nothing quite like the sensation of a true peppermint meltaway. It starts with a cool, refreshing hit of peppermint oil that awakens the palate, followed immediately by a rich, velvety cream base that dissolves the moment it touches your tongue. These aren’t your standard hard candies; they are a decadent hybrid of traditional fudge and delicate cream mints, designed to be the centerpiece of your holiday dessert spread.
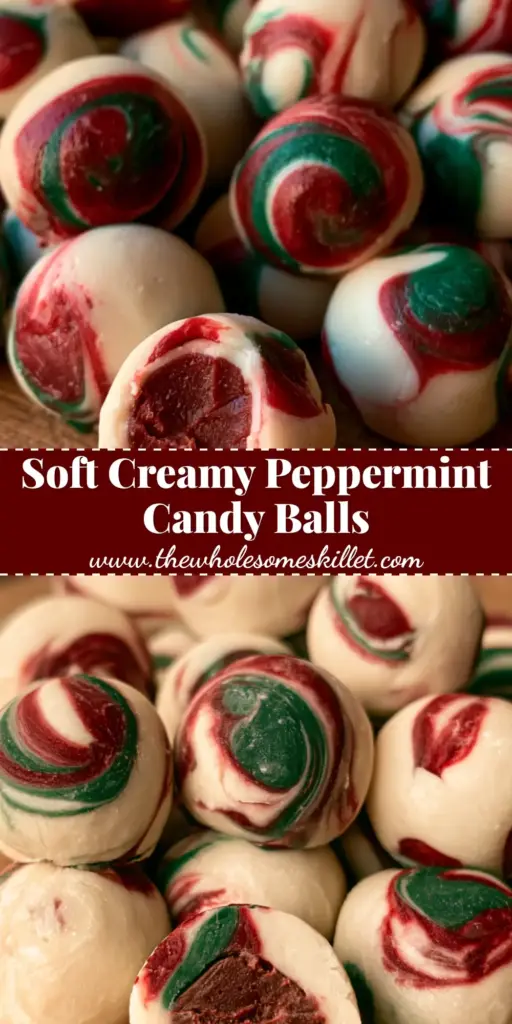
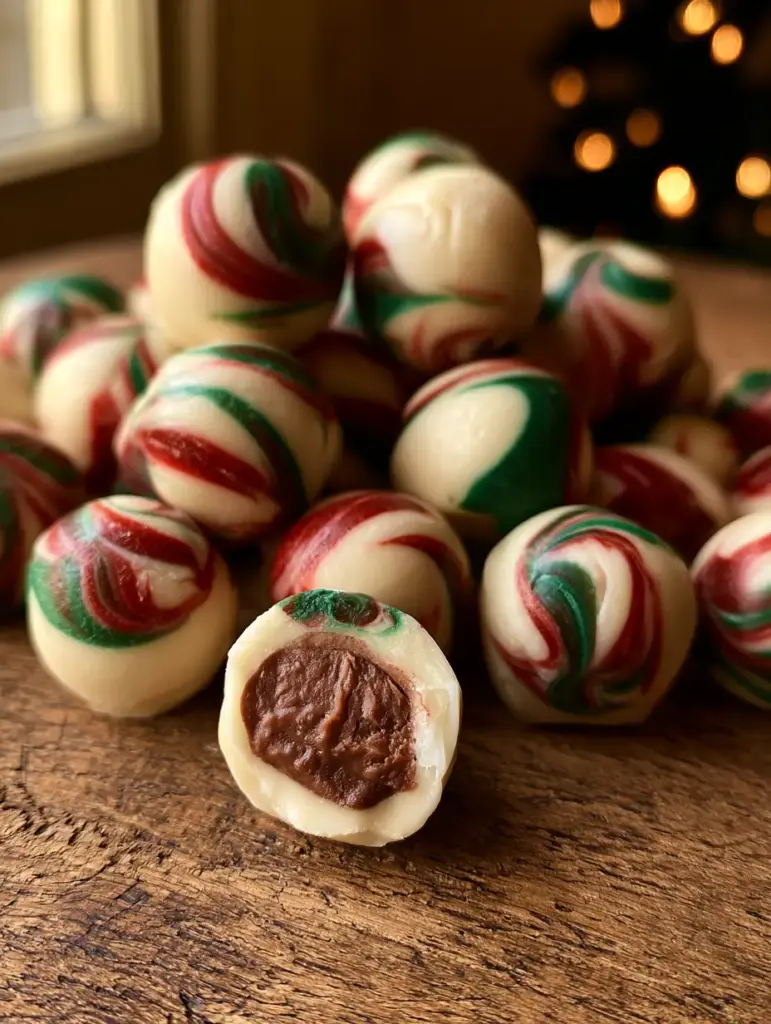
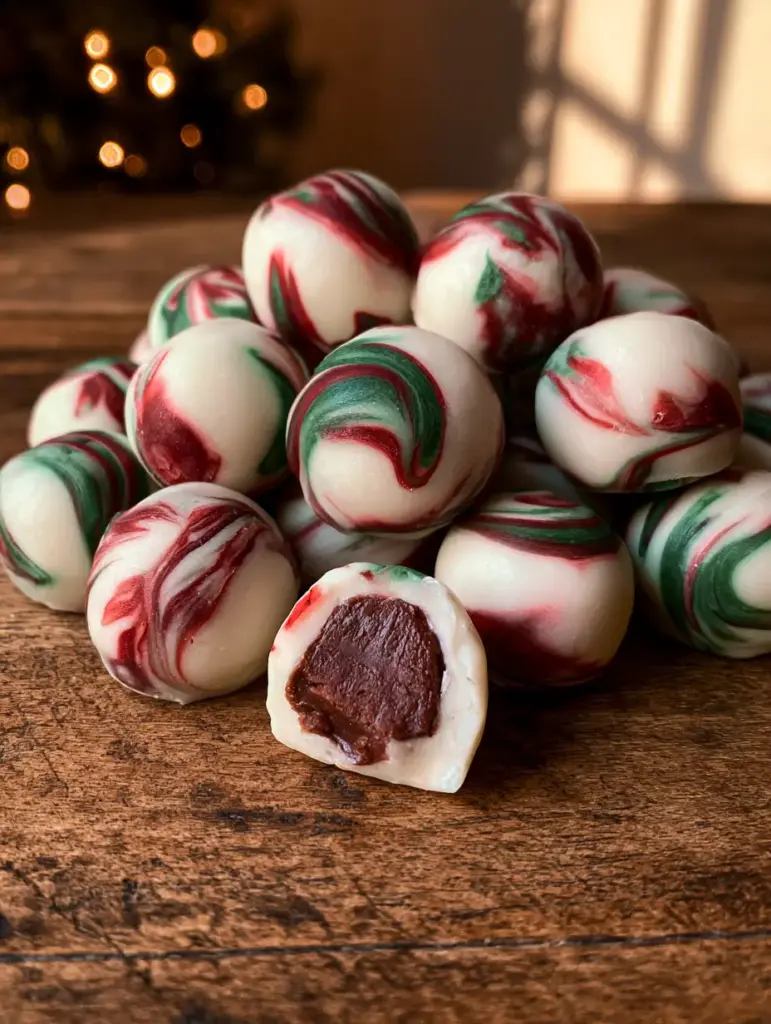
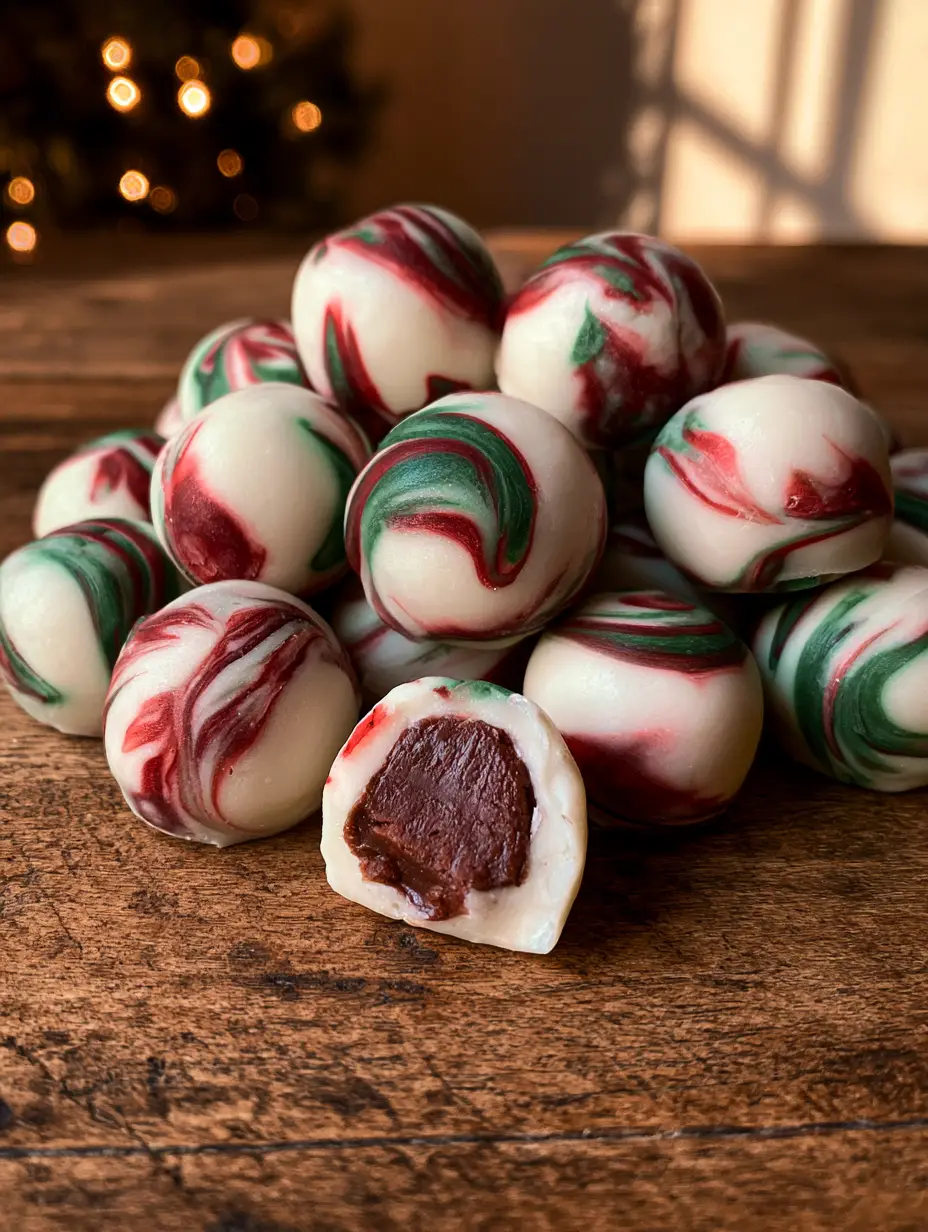
When you look at a heap of these peppermint meltaways resting on a rustic wooden surface, the visual impact is immediate. The vibrant hand-marbled swirls of deep red and forest green pop against the snowy white background of the candy, mimicking the classic colors of the season. Each ball is finished with a fine dusting of granulated sugar, giving them a crystalline shimmer that catches the warm amber glow of nearby Christmas tree lights.
In this guide, we are diving deep into the culinary science of no-bake confections. We will explore how to achieve that dense, fudge-like interior shown in the visual blueprint and ensure your marbling stays crisp rather than muddy. Whether you are a seasoned confectioner or a home cook looking for a standout gift, this recipe delivers professional results with accessible ingredients.
Why These Peppermint Meltaways Are a Holiday Essential
- Unrivaled Texture: The combination of sweetened condensed milk and powdered sugar creates a dense, “fudge-like” interior that is remarkably smooth and soft.
- Hand-Marbled Artistry: By using professional-grade gel colors, you achieve those distinct, vibrant red and green swirls that look like artisanal boutique candies.
- No-Bake Simplicity: Forget the oven; these candies rely on chilling and structural fats to set, making them a stress-free addition to your holiday baking marathon.
- Refreshing Flavor Profile: Unlike extract, pure peppermint oil provides a concentrated, clean mint flavor that perfectly balances the sweetness of the sugar.
The Anatomy of a Perfect Cream Meltaway
To achieve the specific “velvety white texture” described in our visual blueprint, we have to look at the molecular structure of the ingredients. The primary structural components here are powdered sugar and condensed milk, but we need foundational elements to ensure they don’t become a sticky mess.
Sweetened Condensed Milk (14 oz / 396g): This acts as the binder. The sugar already dissolved in the milk provides a syrupy base that prevents the final candy from feeling grainy.
Powdered Sugar (6 cups / 750g): Also known as confectioners’ sugar, this provides the bulk and the “melt” factor. Its fine particle size is what creates that smooth, non-gritty mouthfeel.
Unsalted Butter (1/2 cup / 113g): This is an “invisible” foundational ingredient. Softened butter introduces fats that coat the sugar particles, creating the “velvety” and “fudge-like” interior seen when the candy is split open.
Peppermint Oil (1 tsp / 5ml): We specifically use oil rather than extract. Oil is more potent and doesn’t introduce alcohol, which can affect the setting process of the cream base.
Fine Sea Salt (1/4 tsp / 1.5g): A crucial foundational ingredient. Salt cuts through the intense sweetness of the condensed milk, brightening the peppermint notes.
Red and Green Gel Food Coloring: Gel is superior to liquid for this recipe. Liquid coloring adds moisture that can make the dough too soft to roll; gel provides “vibrant hand-marbled swirls” without changing the consistency.
Fine Granulated Sugar (1/2 cup / 100g): This is for the final dusting. It provides a textural contrast to the soft interior and a beautiful crystalline finish.
Essential Tools for Confectionery Success
To replicate the handheld smartphone photo aesthetic, your candies need to be uniform yet artisanal. You will need a large mixing bowl and a sturdy spatula or a stand mixer fitted with the paddle attachment. The dough becomes quite thick, so mechanical help is preferred.
A small cookie scoop (1-tablespoon size) is vital for ensuring each of the peppermint meltaways is the same size. For the marbling, you will need toothpicks or a thin skewer to swirl the colors. Finally, parchment paper is non-negotiable to prevent the soft cream base from sticking to your work surfaces.
Mastering the Hand-Marbled Swirl Technique
The most striking feature of these candies is the vibrant red and green marbling. To achieve this without the colors blending into a brown hue, you must work with chilled dough. If the dough is too warm, the colors will bleed.
Once your white base is formed, you will divide a small portion of it to be tinted. However, for the most natural “hand-marbled” look described in the visual prompt, we recommend dotting the gel color directly onto the rolled balls or large sections of dough and using a toothpick to fold the color in just 2-3 times. Over-mixing is the enemy of the marble; you want to see distinct ribbons of forest green and deep red.
If you enjoy this peppermint profile, you might also want to try our classic peppermint Christmas cookies or these decadent white chocolate raspberry fudge bites for your holiday platter.
Step-by-Step Instructions for Peppermint Meltaways
Phase 1: Preparing the Cream Base
In a large bowl, cream together the softened unsalted butter and the sweetened condensed milk until the mixture is completely homogenous. Add the peppermint oil and sea salt, whisking until the oil is fully incorporated and you can smell the sharp, refreshing mint aroma.
Gradually add the powdered sugar, one cup at a time. Start your mixer on low speed to avoid a sugar cloud. As you reach the 5th and 6th cups, the dough will become very stiff and heavy—this is the “rich, dense” texture we are looking for. It should feel like soft playdough and not stick to your fingers when touched.
Phase 2: Creating the Vibrant Swirls
Divide the dough into three bowls: one large bowl (about 70% of the dough) remains white. Divide the remaining 30% into two smaller bowls. Use a toothpick to add a small drop of deep red gel to one and forest green gel to the other. Knead the color in until it is solid.
To marble, take a small pinch of the red dough and a small pinch of the green dough, and press them into a tablespoon-sized piece of the white dough. Gently roll the ball between your palms. The friction and rolling motion will naturally create the “vibrant hand-marbled swirls” without muddying the colors. Stop rolling the moment the swirls look distinct.
Phase 3: The Sugar Dusting and Set
Immediately after rolling, roll the ball in a shallow bowl of fine granulated sugar. The sugar should adhere to the “velvety white texture” of the candy, creating a delicate crust. Place the finished balls on a parchment-lined baking sheet.
Chill the candies in the refrigerator for at least 2 hours. This is the “culinary science” step where the fats solidify, transforming the soft dough into a “fudge-like interior” that holds its shape when bitten or split open.
Expert Tips for the Perfect Texture
- Temperature Control: If your kitchen is warm, the butter in the peppermint meltaways will soften too much. If the dough feels greasy, pop it in the fridge for 15 minutes before rolling.
- Sift Your Sugar: Always sift your powdered sugar. Even small lumps can ruin the “velvety” mouthfeel and appear as white spots in the marbled sections.
- Use Peppermint Oil, Not Extract: Peppermint oil is much more stable and provides that high-end confectionery flavor that reminds people of boutique candy shops.
- Avoid Over-Rolling: The more you handle the dough, the more the red and green colors will blend. Two or three quick rotations between your palms are all you need for the perfect marble.
Storage and Gifting Advice
Because these contain condensed milk and butter, they should be stored in an airtight container in the refrigerator. They will stay fresh and maintain their dense texture for up to two weeks. For the best eating experience, let them sit at room temperature for 10 minutes before serving; this allows the “meltaway” quality to truly shine.
If you are freezing them, layer them between sheets of parchment paper so the sugar dusting doesn’t get damp. They freeze beautifully for up to three months, making them an excellent “make-ahead” treat for busy December schedules.
What to Serve With Your Meltaways
These peppermint meltaways are quite sweet and rich, so they pair best with items that offer a bit of acidity or a different textural crunch. They look stunning next to layered peppermint dessert bars for a monochromatic theme. If you want to break up the mint flavor, serve them alongside mini Biscoff cheesecakes for a spiced, caramelized contrast.
For a drink pairing, a dark roast coffee or a bitter cocoa will balance the high sugar content of the candies perfectly. The “velvety” texture of the mints dissolved into a hot cup of coffee is a sensory delight.
Frequently Asked Questions
You can, but you will need to triple the amount (about 1 tablespoon) to get the same flavor intensity. Note that extract contains alcohol, which can slightly alter the setting texture compared to pure oil.
Yes, because they contain butter and condensed milk. Storing them in the fridge ensures they maintain that signature ‘fudge-like’ interior and don’t become too soft at room temperature.
Use gel food coloring and work with chilled dough. Only fold the colors in 2-3 times; over-handling will cause the red and green to blend together into a muddy color.
This usually happens if the butter was too melted or if liquid food coloring was used. Chill the dough for 30 minutes to firm up the fats, or add an extra 1/4 cup of powdered sugar to reach a playdough-like consistency.
Graininess is usually caused by un-sifted powdered sugar or using granulated sugar inside the dough. Ensure you use fine confectioners’ sugar and sift it to remove any lumps before mixing.
The Ultimate Peppermint Meltaways Recipe Card
Peppermint Meltaways: The Ultimate Velvety No-Bake Christmas Candy
Ingredients
Equipment
Method
- In a large bowl, combine the softened butter and sweetened condensed milk. Beat until smooth and velvety.
- Add the peppermint oil and salt. Gradually mix in the powdered sugar until a stiff, dough-like consistency forms.
- Divide a small portion of dough and tint one part red and one part green. Take a small piece of white dough, add dots of color, and roll briefly between your palms to create hand-marbled swirls.
- Roll the marbled balls in fine granulated sugar until fully coated and shimmering.
- Place on parchment paper and refrigerate for 2 hours until the interior is firm and fudge-like.
Notes
Sift the powdered sugar to ensure the most velvety texture possible.
Share the Holiday Magic!
We hope these peppermint meltaways bring a touch of velvety, minty magic to your holiday season. There is nothing quite as satisfying as seeing those vibrant swirls come to life in your own kitchen. If you enjoyed this recipe, please leave a comment below and tell us how your marbling turned out!
Don’t forget to snap a photo of your creations and tag thewholesomeskillet! Pin this recipe to your Christmas Treats board on Pinterest so you can find it every year. Happy rolling!