Butter mints are the quintessential vintage candy, often associated with elegant wedding receptions, holiday parties, and grandmother’s candy dish. These tiny, pillowy squares offer a unique sensory experience: a firm, matte exterior that gives way to a smooth, creamy center that dissolves instantly on the tongue.
Making your own butter mints at home allows you to bypass the waxy, over-processed versions found in stores. By using high-quality butter and real peppermint oil, you create a treat that is vastly superior in both flavor and texture.
In this guide, we will walk through the forensic culinary steps required to achieve that perfect pastel aesthetic and the iconic “melt-away” mouthfeel. Whether you are prepping for a baby shower or just craving a nostalgic sweet, these mints are the perfect project for any home cook.
Why These Pillowy Pastel Sweets Outshine Store-Bought Varieties
- Unrivaled Texture: Achieving a smooth, melt-away creamy texture inside is only possible when you control the moisture content of the heavy cream and butter.
- Visual Customization: From soft mint green to delicate blush pink, you can match these candies to any event theme using professional food coloring.
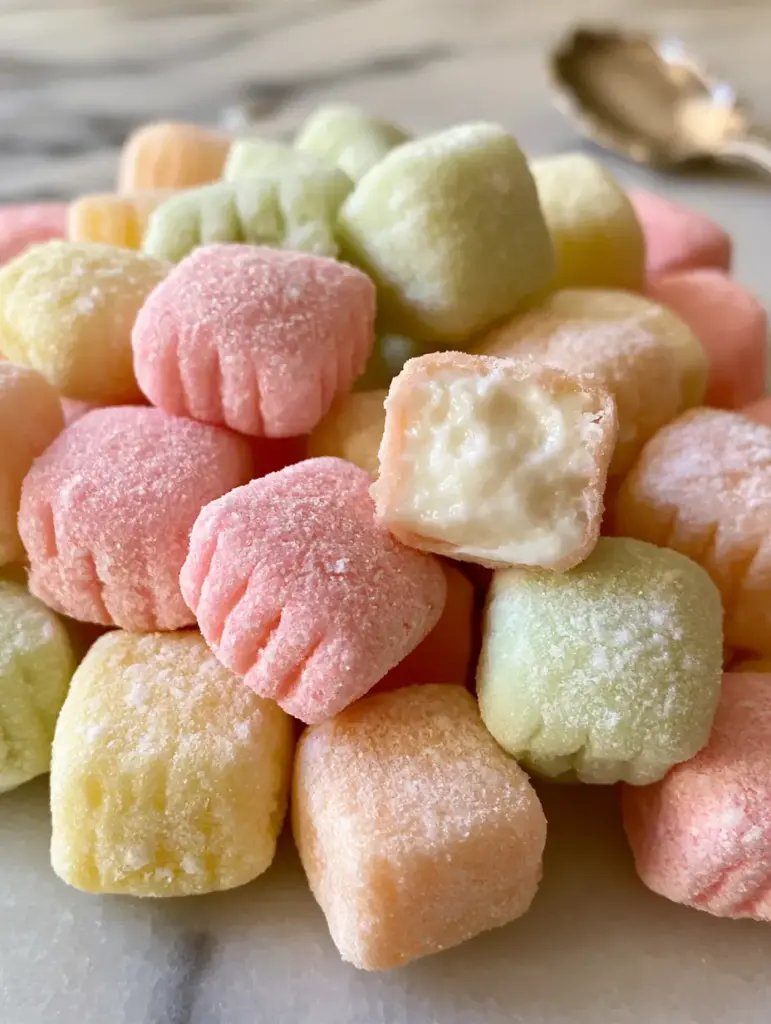
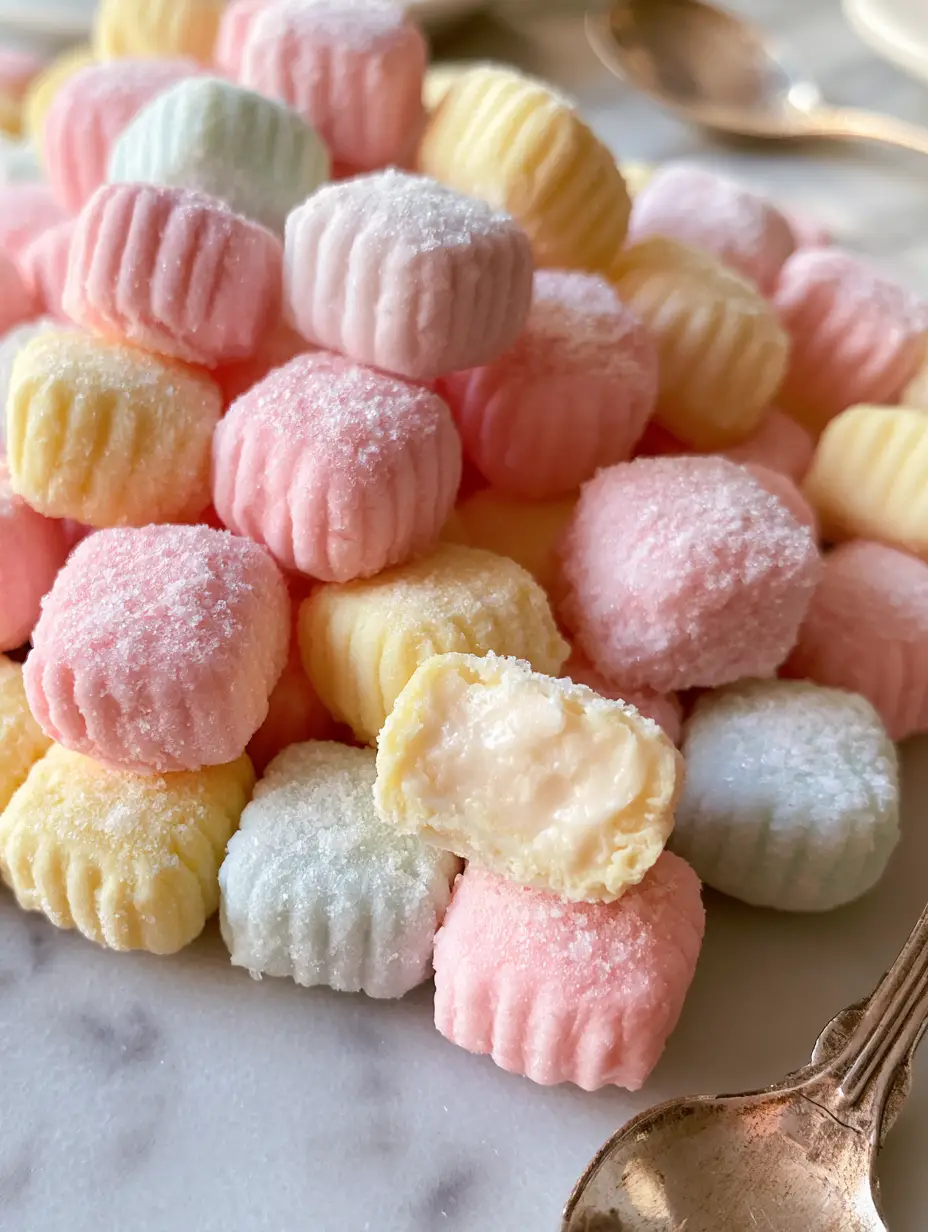
- Artisanal Finish: The delicate fork-crimped edges and superfine sugar dusting provide a “handheld smartphone photo” quality that looks stunning on a marble countertop.
- Potent Flavor: Using peppermint oil instead of extract provides a clean, sharp minty finish without the chemical aftertaste often found in commercial candies.
The Essential Components for a Melt-Away Texture
To achieve the visual and structural results seen in our “Visual Recipe Blueprint,” every ingredient serves a specific chemical purpose. This is not just a mixture; it is an emulsion of fat and sugar designed to be stable yet delicate.
1 lb (454g) Powdered Sugar: This serves as the structural foundation of the mint. It must be finely sifted to ensure the final candy isn’t grainy or sandy on the palate.
1/2 cup (113g) Softened Butter: Use high-quality unsalted butter for the best flavor profile. The fat in the butter coats the sugar molecules, preventing them from recrystallizing and creating that sought-after “butter mint” richness.
1/4 tsp (1.25ml) Peppermint Oil: Peppermint oil is significantly more concentrated than extract. This provides the cooling sensation that defines a true butter mint without thinning the dough with alcohol-based liquids.
1 tbsp (15ml) Heavy Cream: This provides the necessary moisture to bind the sugar and butter into a workable dough. It adds a luxurious “melt-in-your-mouth” quality that water or milk simply cannot replicate.
Pastel Food Coloring: Gel-based colors are preferred as they do not alter the hydration of the dough. A tiny drop is all you need to achieve those soft, vintage hues.
Cornstarch (for dusting): A light cornstarch dusting is the secret to handling the dough without sticking. It also helps create the matte, superfine sugar finish visible in professional food blog photography.
Culinary Tools for Professional Candy Making
To recreate the “heap of soft pastel-colored butter mints” shown in our visuals, you will need a few specific tools. While the recipe is simple, precision in shaping is what separates a hobbyist result from a professional one.
A stand mixer with a paddle attachment is ideal for incorporating the heavy cream into the dense sugar mixture without whipping in too much air. You will also need a sharp bench scraper or a pizza cutter to create those uniform pillowy squares.
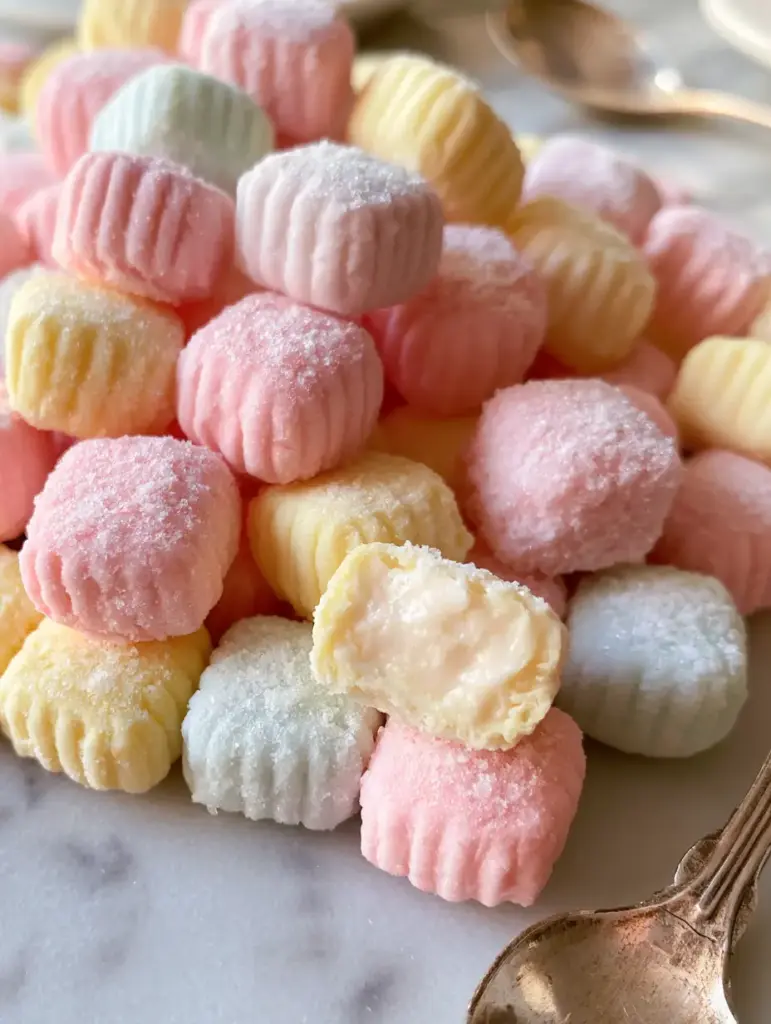
Finally, a small dessert fork is essential for the signature crimping. This isn’t just for looks; the ridges created by the fork increase the surface area of the mint, allowing it to dry more evenly and providing a better “snap” when you bite into it.
Step-By-Step: Crafting Your Signature Homemade Mints
Phase 1: Achieving the Perfect Emulsion
Start by creaming your 1/2 cup (113g) of softened butter in your mixer until it is completely smooth and pale. This ensures there are no pockets of pure fat in your final candies, which would cause them to feel greasy.
Slowly add about half of your 1 lb (454g) of powdered sugar, followed by the peppermint oil and the 1 tbsp (15ml) of heavy cream. Switch to a low speed to avoid a “sugar cloud” in your kitchen, then gradually add the remaining sugar until a stiff dough forms.
Phase 2: Coloring and Kneading
Turn the dough onto a surface lightly dusted with cornstarch. If you are making multiple colors, divide the dough now. Use a toothpick to add a tiny amount of gel coloring to each portion.
Knead the dough by hand until the color is perfectly uniform. You are looking for a texture that feels like soft playdough—pliable, but not sticky to the touch. If it feels too soft, add another tablespoon of powdered sugar.
Phase 3: Shaping and Crimping for Visual Appeal
Roll the dough into long “snakes” or ropes, roughly 1/2 inch (1.25cm) thick. Using a bench scraper or knife, cut the ropes into small squares. To achieve the look in our prompt, press a small fork gently onto the top of each square to create delicate crimped edges.
As you work, keep the candies on a parchment-lined baking sheet. The final touch is a light dusting of superfine sugar or cornstarch to give them that professional, matte finish that reflects natural daylight beautifully.
Phase 4: The Curing Process
This is the most important step for the “melt-away” texture. Leave the mints out at room temperature for at least 24 hours. This allows the exterior to dry and form a delicate shell while the inside remains creamy.
Professional Troubleshooting: How to Avoid Grainy Candy
If your mints feel “sandy,” it is likely due to the quality of the powdered sugar. Always sift your sugar through a fine-mesh strainer before mixing. This breaks up any clumps that might not fully incorporate into the butter emulsion.
Temperature also plays a role. If your butter was too cold when you started, it won’t bond correctly with the heavy cream. Ensure all ingredients are at a true room temperature (around 70°F / 21°C) before you begin the mixing process.
Finally, avoid over-handling the dough with warm hands. The heat from your palms can melt the butter, leading to a greasy texture. If the dough becomes too warm, pop it in the refrigerator for 10 minutes to firm back up.
Preserving the Freshness of Your Peppermint Treats
Once the mints have cured for 24 hours and developed their characteristic snap, they should be stored in an airtight container. Because of the butter and cream content, they are best kept in a cool, dry place.
In a sealed container, butter mints will stay fresh for up to 2 weeks at room temperature. For longer storage, you can refrigerate them for up to a month, or freeze them for up to three months. If freezing, place parchment paper between layers to prevent the delicate crimped edges from breaking.
Delicious Pairings for Your Candy Buffet
Butter mints are excellent palate cleansers and pair beautifully with other rich, buttery desserts. If you are building a dessert table, consider serving these alongside some salted butter cookies to contrast the cool mint with a savory-sweet crunch.
The delicate, melt-in-your-mouth quality of these mints also complements the shortbread-like texture of Danish butter cookies. For a more decadent spread, the sharp peppermint flavor cuts through the richness of white chocolate raspberry fudge perfectly.
If you’re using these as part of a larger baking project, they can be crushed and used as a garnish for a buttery crumble topping on a chocolate tart. Their structural integrity is similar to the flakey layers found in an all-butter pie crust, making them a versatile addition to your confectionery repertoire.
Common Questions About Traditional Butter Mints
No. While similar in appearance, butter mints use heavy cream and butter for a richer, more ‘melt-away’ texture, whereas cream cheese mints are tangier and slightly denser.
You can, but peppermint oil is about four times stronger and provides a cleaner flavor. If using extract, you will need to use more, which can make the dough too sticky.
Yes. This ‘curing’ process is essential to create the thin, matte shell on the outside while keeping the center soft and creamy.
Store them in an airtight container in a cool, dry place for up to 2 weeks, or freeze them for up to 3 months for long-term freshness.
Graininess usually comes from un-sifted powdered sugar or poor emulsion. Ensure you sift the sugar and that your butter is fully softened before mixing.
The Wholesome Skillet’s Signature Butter Mints Recipe
Butter Mints: The Ultimate Melt-in-Your-Mouth Homemade Candy Recipe
Ingredients
Equipment
Method
- In a stand mixer, cream the softened butter until smooth. Gradually add half of the powdered sugar, the peppermint oil, and the heavy cream.
- Add the remaining powdered sugar slowly until a stiff, playdough-like dough forms and pulls away from the sides of the bowl.
- Turn the dough onto a cornstarch-dusted surface. Add gel coloring and knead until the pastel color is uniform and the dough is smooth.
- Roll the dough into 1/2-inch ropes. Use a bench scraper to cut into small squares.
- Press the tines of a small fork into the top of each square to create the signature crimped edge. Dust lightly with cornstarch or superfine sugar.
- Place the mints on parchment paper and let them air-dry at room temperature for 24 hours until the outside is firm.
Notes
Ensure your butter is truly softened to room temperature for a smooth emulsion.
Share Your Pastel Creations!
These butter mints are more than just a candy; they are a labor of love that brings a touch of vintage class to any gathering. The way they snap in half to reveal that smooth, creamy interior is a testament to the science of simple ingredients handled with care.
If you enjoyed making these, please leave a comment below and let us know what pastel colors you chose! Don’t forget to follow us and share your beautiful photos on Pinterest so we can see your handiwork.