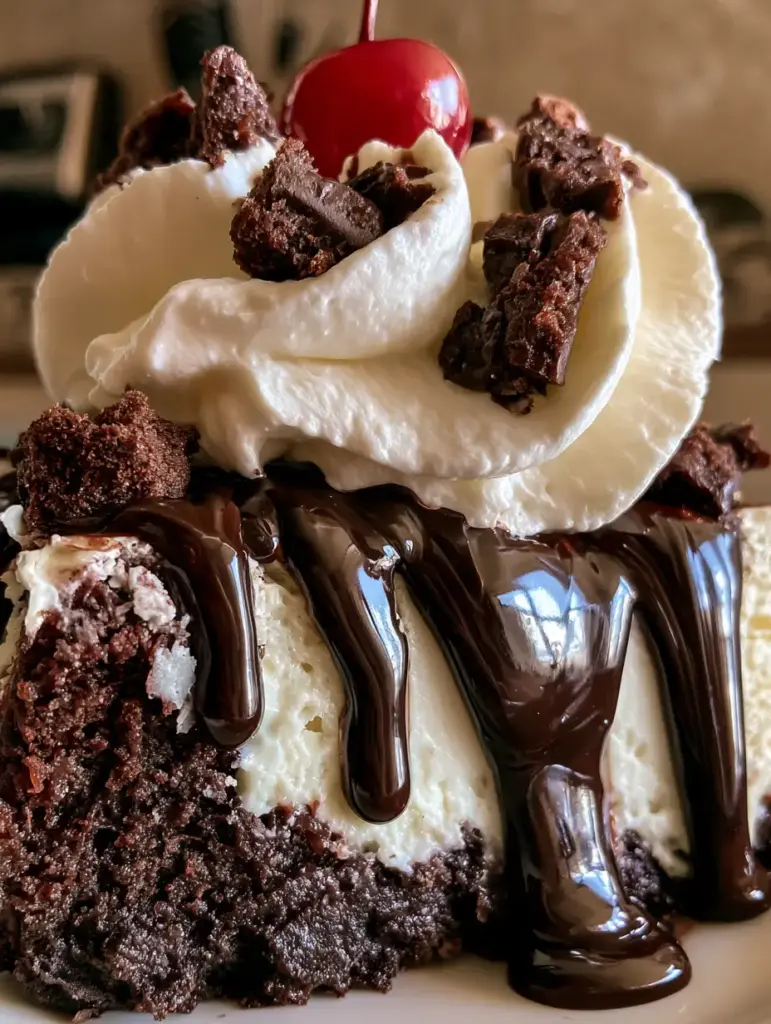
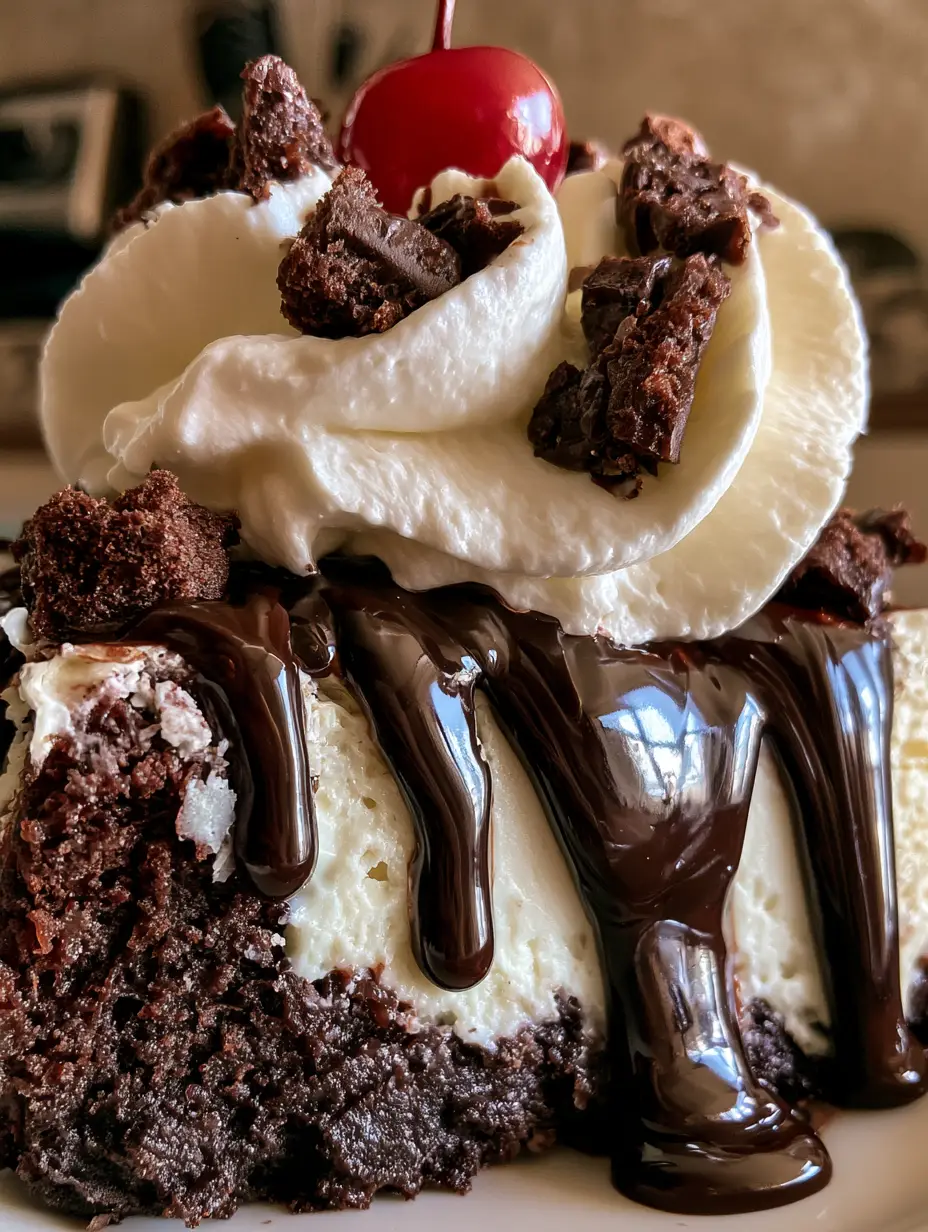
Imagine a dessert that captures the nostalgic joy of a classic ice cream parlor treat but elevates it with the sophisticated, velvety texture of a gourmet bakery. This brownie sundae cheesecake is exactly that—a culinary masterpiece where two iconic desserts collide. From the first glance at that dense, dark chocolate foundation to the sight of glossy ganache cascading down the sides, this recipe is designed to be the showstopper of any gathering.
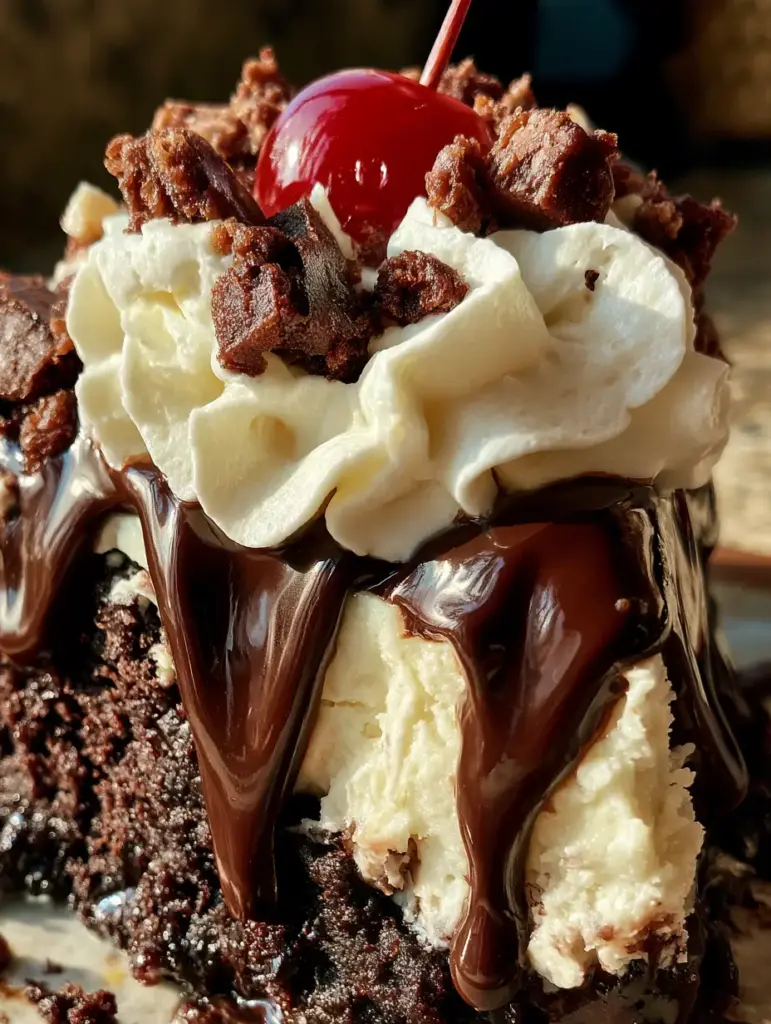
We aren’t just making a cake; we are engineering a multi-sensory experience. The visual contrast between the deep, fudgy brownie layer and the stark white, creamy cheesecake filling is nothing short of breathtaking. When you top it all off with an airy cloud of fresh whipped cream and a glistening maraschino cherry, you create a handheld smartphone-worthy photo opportunity that tastes even better than it looks.
Why This Decadent Brownie Sundae Cheesecake Works
- Textural Harmony: The base provides a dense, chewy bite that perfectly offsets the silkiness of the baked cheesecake layer.
- Visual Spectacle: Heavy chocolate drips and a towering swirl of whipped cream mimic the “over-the-top” aesthetics of a luxury sundae.
- Pro-Level Flavor: By using high-quality dark cocoa and real vanilla bean, we avoid the cloying sweetness often found in store-bought versions.
- Reliable Structure: Unlike a standard sundae that melts, this cheesecake maintains its integrity, making it perfect for dinner parties.
The Anatomy of an Indulgent Brownie Base
Unsalted Butter: 1/2 cup (113g). We melt this to ensure the brownie is dense and fudgy rather than cakey; butter provides the essential fat for a moist crumb.
Granulated Sugar: 1 cup (200g). Sugar does more than sweeten; it helps create that iconic “paper-thin” crackly top on the brownie edges during the initial bake.
Dutch-Processed Cocoa Powder: 1/2 cup (45g). This is crucial for achieving the dark, almost black color seen in the visual blueprint; it offers a smoother, deeper chocolate flavor than natural cocoa.
Large Eggs: 2 eggs. These act as the binder, providing the structure needed to hold up the heavy cheesecake layer above it.
All-Purpose Flour: 1/2 cup (64g). We use a minimal amount of flour to keep the gluten development low, ensuring the base remains “fudgy” rather than “bread-like.”
Essential Ingredients for the Velvety Cheesecake Filling
Full-Fat Cream Cheese: 24 oz (680g). Ensure this is at room temperature to avoid lumps; this is the soul of the brownie sundae cheesecake.
Sour Cream: 1/2 cup (120ml). Adding sour cream introduces a slight tang that cuts through the richness and contributes to a “velvety” mouthfeel.
Heavy Cream: 1/4 cup (60ml). This liquid gold thins the batter just enough to ensure it bakes into a smooth, flat surface without cracking.
Pure Vanilla Extract: 1 tbsp (15ml). A generous amount of vanilla provides the “white” layer flavor profile that defines the sundae aesthetic.
The “Sundae” Finishes: Ganache, Cream, and Cherries
Semi-Sweet Chocolate Chips: 1 cup (170g). Combined with hot cream, these melt into the “glossy chocolate fudge sauce” described in the blueprint.
Heavy Whipping Cream (for topping): 1 cup (240ml). We whip this to stiff peaks to create that “massive, airy swirl” that sits atop the slice.
Maraschino Cherries: 1 jar. These provide the “glistening red” pop of color and the nostalgic finish that screams “sundae.”
Professional Tools for the Perfect Slice
To achieve the result in our visual recipe blueprint, you will need a 9-inch (23cm) springform pan. This allows for clean removal without damaging the delicate brownie edges. A stand mixer or electric hand mixer is vital for aerating the cheesecake filling without over-mixing the eggs. Finally, a kitchen scale is recommended for the most accurate results, though we have provided imperial and metric measurements for your convenience.
If you love the combination of brownie and cream cheese, you might also enjoy experimenting with mini brownie cheesecake bites for your next party. For a different texture profile, consider our loaded cookie dough version which offers a similar decadence.
Step 1: Engineering the Fudgy Brownie Foundation
Preheat your oven to 350°F (175°C) and grease your springform pan thoroughly. In a medium bowl, whisk together the melted butter and sugar until well combined. Add the eggs and vanilla, beating vigorously for about two minutes; this aeration creates the foundation for the brownie’s structure.
Sift in the cocoa powder, flour, and a pinch of salt. Fold gently until no streaks of flour remain. Pour the batter into the pan and bake for 20-25 minutes. Visual Cue: The edges should be set, but the center should still have a slight wobble. Set this aside to cool slightly while you prepare the filling.
Step 2: Crafting the Creamy Cheesecake Middle
Lower the oven temperature to 325°F (160°C). In your mixer, beat the room-temperature cream cheese and sugar until completely smooth—this usually takes 3-4 minutes on medium speed. Scrape down the sides of the bowl religiously to ensure no lumps remain.
Add the sour cream and vanilla, mixing until just combined. Finally, add the eggs one at a time on low speed. Pro Tip: Over-mixing the eggs at this stage incorporates too much air, which causes the cheesecake to rise and then collapse, creating cracks. We want a dense, flat surface to support our sundae toppings.
Step 3: The Low-and-Slow Bake
Pour the cheesecake batter over the par-baked brownie base. Wrap the bottom of the springform pan in three layers of heavy-duty aluminum foil and place it in a large roasting pan. Fill the roasting pan with hot water until it reaches halfway up the sides of the springform pan. This “water bath” (bain-marie) ensures even heat distribution and prevents the cheesecake from browning on top.
Bake for 55-65 minutes. Visual Cue: The edges should be slightly puffed and set, but the center 2 inches (5cm) should still jiggle like gelatin when the pan is gently shaken. Turn off the oven, crack the door open, and let the cake sit inside for one hour. This gradual cooling is the secret to a crack-free finish.
Step 4: Achieving the Glossy Ganache Drip
Once the cheesecake has chilled in the refrigerator for at least 6 hours (preferably overnight), it’s time for the “sundae” transformation. Heat 1/2 cup (120ml) of heavy cream until it just begins to simmer. Pour it over 1 cup (170g) of chocolate chips and let it sit for 5 minutes.
Whisk the mixture slowly starting from the center until it transforms into a “thick, glossy chocolate ganache.” Allow it to cool until it reaches a consistency where it can pour but still hold its shape. Pour it over the center of the cake, using a spatula to nudge the chocolate over the edges to create those “heavy drips” seen in our Midjourney prompt.
Step 5: The Grand Sundae Assembly
Whip the remaining heavy cream with 2 tablespoons of powdered sugar until stiff peaks form. Using a piping bag with a large star tip, pipe a “massive, airy swirl” in the center or on each individual slice. Take a few reserved brownie scraps (you can bake a tiny extra portion of batter or use store-bought bits) and scatter them over the cream.
The final touch is the maraschino cherry. Place it right on top of the whipped cream swirl. Visual Cue: The cherry should be glistening and still have its stem for that authentic “handheld smartphone photo” aesthetic.
Expert Tips for Success
- Temperature Control: Ensure all dairy (cheese, eggs, sour cream) is at room temperature. Cold ingredients will result in a lumpy batter that won’t look “velvety” in photos.
- The Clean Slice: To get the sharp, professional edges seen in the blueprint, dip a long thin knife into hot water and wipe it clean between every single cut.
- Don’t Skip the Chill: A cheesecake needs time for the protein structures to fully set. Cutting it too early will result in a messy, “slumping” slice rather than a sturdy “thick, decadent slice.”
- Ganache Timing: If your ganache is too thin, it will run all the way off the cake. If it’s too thick, it won’t drip. Test a small spoonful on the side of a bowl first.
Pairing and Presentation
This brownie sundae cheesecake is incredibly rich, so it pairs beautifully with a cup of strong, bitter espresso or a cold glass of whole milk. If you’re hosting a dessert bar, consider serving it alongside classic pecan pie cheesecake for a variety of textures. For those who want to lean into the fruitiness, a side of caramelized air-fryer bananas adds a warm, tropical element to the plate.
If you have leftover brownie bits, don’t let them go to waste! You can use them to make decadent cheesecake truffles or even as a topping for a rich poke cake.
Frequently Asked Questions
Yes, you can freeze the cheesecake without the whipped cream and cherry toppings. Wrap it tightly in plastic wrap and foil; it will last up to 3 months.
Yes, you can use a boxed mix, but ensure you only use half the batter for a 9-inch pan to keep the proportions correct. Bake it until just set before adding the cheesecake layer.
The key is using a water bath and cooling the cheesecake gradually. Avoid over-mixing the eggs, which incorporates air that causes the cake to rise and then sink, creating cracks.
This cheesecake will stay fresh in the refrigerator for up to 5 days. For the best visual appeal, add the whipped cream and cherries just before serving.
Ganache consistency depends on temperature. If it’s too runny, let it sit at room temperature for 10-15 minutes. If it’s too thick to drip, microwave it in 5-second intervals until it flows easily.
The Ultimate Brownie Sundae Cheesecake Recipe
Brownie Sundae Cheesecake: The Ultimate Fudgy Over-the-Top Dessert
Ingredients
Equipment
Method
- Whisk melted butter and sugar. Add eggs and vanilla, then fold in cocoa and flour. Bake in 9-inch pan at 350°F (175°C) for 20 minutes.
- Beat cream cheese and sugar until smooth. Add sour cream, vanilla, and eggs. Pour over partially cooled brownie base.
- Place wrapped springform pan in water bath. Bake at 325°F (160°C) for 60 minutes. Cool gradually in oven for one hour before chilling.
- Pour glossy chocolate ganache over chilled cake. Top with whipped cream swirls, brownie crumbles, and a maraschino cherry.
Notes
Ensure all ingredients are room temperature for a smooth filling.
Closing & Call to Action
Mastering the brownie sundae cheesecake is a rite of passage for any serious home baker. It combines the technical skills of cheesecake baking with the creative flair of sundae assembly. The result is a dessert that is as visually stunning as it is delicious. If you enjoyed this recipe, please leave a comment below and share your photos! Don’t forget to follow us on Pinterest for more decadent dessert inspiration.