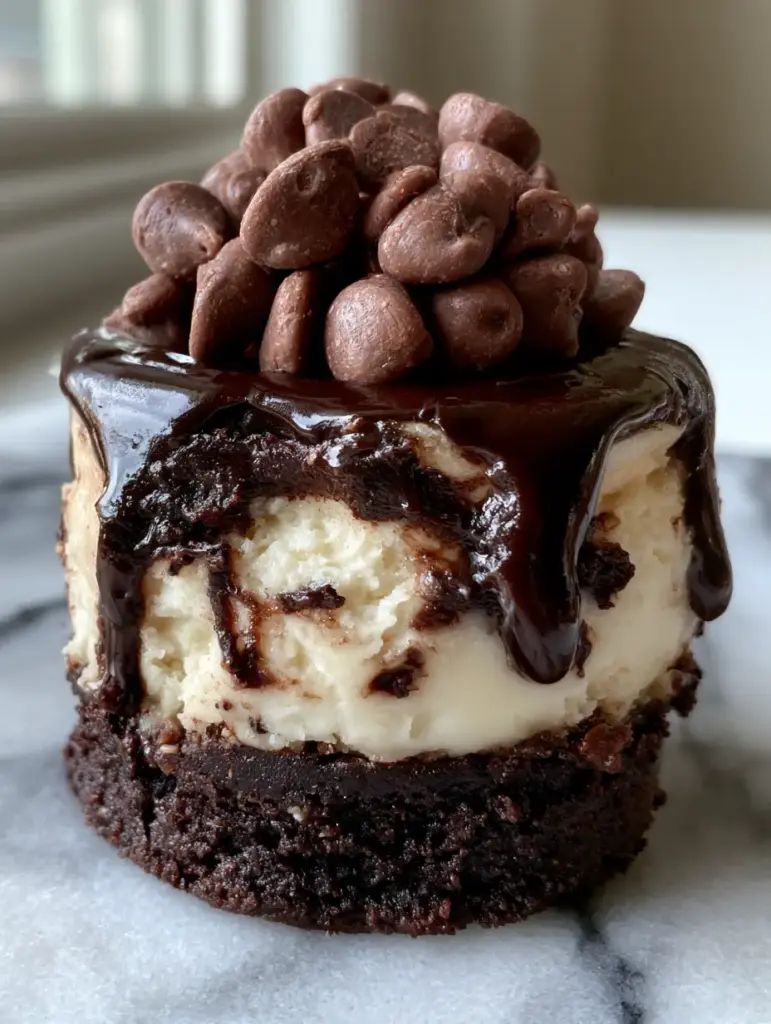
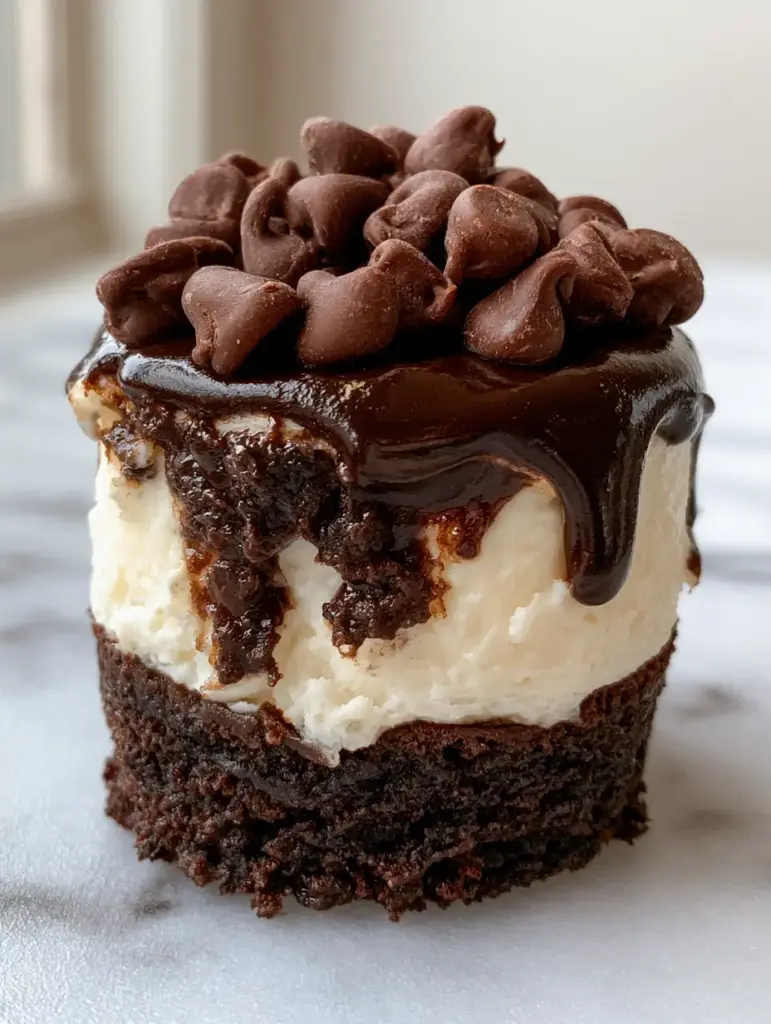
There is something inherently magical about the intersection of a fudgy, dark cocoa brownie and a velvety, cloud-like cheesecake. This brownie bottom mini cheesecake isn’t just a dessert; it is a structural masterpiece of contrasting textures, designed to satisfy the most intense chocolate cravings while maintaining the elegant tang of a classic New York-style cheesecake. Imagine biting through a mountain of semi-sweet chocolate chips, sinking into a pool of liquid dark chocolate ganache, and finally hitting that moist, dense brownie base.
Inspired by the organic beauty of handheld food photography, this recipe focuses on creating those distinct, photogenic layers you see in high-end bakeries. Whether you are hosting a dinner party or simply treating yourself to a gourmet weekend project, these individual treats offer a sophisticated profile that looks stunning on a white ceramic plate against a cool marble background. The secret lies in the dual-stage baking process, ensuring the brownie stays fudgy while the cheesecake remains perfectly smooth and crack-free.
By following this guide, you will master the art of the “messy-yet-perfect” ganache drip and the science of the foundational dark cocoa base. We are moving beyond the standard graham cracker crust to something much more decadent. Let’s dive into why this specific combination is the ultimate upgrade for your dessert repertoire.
Why You Will Fall in Love With These Decadent Mini Treats
- Textural Trifecta: You get the chewy, moist bite of a dark cocoa brownie, the silky-smooth cream cheese filling, and the crunch of semi-sweet chocolate chips all in one mouthful.
- Individual Portions: Perfect for entertaining, these mini cheesecakes eliminate the stress of slicing a large cake and ensure every guest gets a perfect “side profile” view of the layers.
- Visual Showstopper: With the liquid chocolate ganache dripping down the sides, these look like they came straight from a professional food stylist’s studio.
- Make-Ahead Friendly: Cheesecake actually improves with a 24-hour rest, making this the ideal stress-free dessert for busy schedules.
The Essential Components for a Fudgy Dark Cocoa Foundation
To achieve the ultra-realistic, moist results described in our visual blueprint, we must use high-quality fats and specific cocoa types. The brownie base isn’t just a vehicle for the cheese; it is a star in its own right.
Unsalted Butter (1/2 cup / 115g): We melt the butter to create that signature fudgy brownie texture. Using unsalted butter allows us to control the exact seasoning of the dark cocoa base.
Dutch-Process Cocoa Powder (1/3 cup / 30g): This is non-negotiable for that “dark cocoa” look. Dutch-process cocoa is neutralized, resulting in a deeper color and a smoother, more mellow chocolate flavor that won’t overpower the cheesecake.
Granulated Sugar (3/4 cup / 150g): Sugar does more than sweeten; it helps create the moist crumb of the brownie. It binds with the water in the eggs to prevent a dry, cakey texture.
All-Purpose Flour (1/2 cup / 65g): We use a minimal amount of flour here. A low flour-to-fat ratio is what keeps the brownie base “moist and fudgy” rather than bread-like.
Creating the Silky Smooth Cream Cheese Filling
The middle layer of our brownie bottom mini cheesecake requires a delicate balance of aeration and density. We want it thick and creamy, standing tall against the dark base.
Full-Fat Cream Cheese (16 oz / 450g): Always use bricks of cream cheese, not the spreadable tubs. Ensure it is at true room temperature to avoid any tiny lumps in your smooth filling.
Sour Cream (1/4 cup / 60ml): This is the secret to that “tang” and the “smooth” texture. Sour cream softens the protein in the cream cheese, resulting in a melt-in-your-mouth consistency.
Pure Vanilla Extract (1 tsp / 5ml): Vanilla acts as a flavor enhancer for the dairy, making the cheesecake taste “brighter” and more complex against the dark chocolate base.
Large Egg (1): The egg acts as the structural binder. Be careful not to overbeat the mixture once the egg is added, as trapped air can cause the mini cheesecakes to puff and then collapse.
Foundational Ingredients for the Glossy Ganache and Toppings
The visual blueprint specifies a “liquid chocolate ganache” and a “mountain of semi-sweet chocolate chips.” Achieving that glossy sheen requires the right emulsion of fat and chocolate.
Dark Chocolate Chips or Bar (4 oz / 115g): For the ganache, use a chocolate with at least 60% cacao. This provides the “glossy, slightly messy” look that contrasts beautifully with the white cheesecake.
Heavy Whipping Cream (1/3 cup / 80ml): When heated and poured over chocolate, the cream creates a stable emulsion that stays liquid enough to drip but thick enough to cling to the sides.
Semi-Sweet Chocolate Chips (1/2 cup / 90g): These are reserved for the final topping. Their structured shape provides the “mountain” effect and a necessary textural crunch.
Specialized Tools for Professional Mini Cheesecakes
To get that distinct side profile, you need the right equipment. A standard muffin tin works, but there are a few tricks to ensure they release perfectly.
A 12-cup standard muffin tin or a specialized mini cheesecake pan with removable bottoms is ideal. If using a muffin tin, high-quality paper liners are essential to prevent the brownie base from sticking to the metal. You will also need a fine-mesh sieve for the flour and cocoa to ensure no lumps interfere with the fudgy texture. If you enjoy making these individual portions, you might also love our biscoff mini cheesecakes for a spiced cookie twist.
Step 1: Preparing the Fudgy Dark Cocoa Brownie Base
Start by preheating your oven to 325°F (165°C). In a medium microwave-safe bowl, melt the butter. Whisk in the sugar and Dutch-process cocoa powder until the mixture looks like wet sand. Add one egg and a splash of vanilla, beating vigorously until the batter becomes shiny and pulls away from the sides of the bowl.
Gently fold in the flour and a pinch of salt. Place about 1 tablespoon (15g) of batter into each lined muffin cup. Bake for just 8-10 minutes. Visual Cue: The edges should be set, but the center should still look slightly underdone. This “par-baking” ensures the base remains moist while the cheesecake cooks on top.
Step 2: Whipping the Velvety Cheesecake Layer
While the brownie bases cool slightly, beat the room-temperature cream cheese and sugar until completely smooth. Add the sour cream and vanilla, mixing on low speed. Finally, add the egg, mixing just until combined. Pro Tip: Over-mixing at this stage incorporates air, which leads to cracks. We want a “smooth cream cheese filling” as described in the blueprint.
Spoon the cheesecake batter over the par-baked brownie bases, filling each cup almost to the top. Bake for another 15-18 minutes. Sensory Cue: Look for a slight “jiggle” in the center when you gently shake the pan. The edges should be pale and set, not browned. Allow them to cool in the pan for 30 minutes before transferring to the refrigerator for at least 4 hours.
Step 3: Mastering the Glossy Chocolate Ganache Drip
Once the brownie bottom mini cheesecake is fully chilled and firm, it is time for the ganache. Place your dark chocolate in a small glass bowl. Heat the heavy cream in a small saucepan until it just begins to simmer (do not let it boil). Pour the hot cream over the chocolate and let it sit undisturbed for 5 minutes.
Slowly whisk from the center outward until a glossy, liquid dark chocolate forms. If the ganache is too thin, let it sit for a few minutes to thicken. You want it to be pourable enough to create that “slightly messy” drip down the sides of the white cheesecake layer.
Step 4: The Final Assembly and “Mountain” Topping
Remove the mini cheesecakes from their liners. Place them on a white ceramic plate. Using a teaspoon, pour a generous amount of ganache over the center of each cheesecake, encouraging a few drips to run down the sides. Immediately top with a “mountain” of semi-sweet chocolate chips so they stick to the wet ganache. The contrast of the dark drip against the marble background is exactly what makes this dish so visually striking.
If you find yourself obsessed with these layered bites, you should also try our cheesecake truffles or perhaps the decadence of a brownie sundae cheesecake for a full-sized version of this flavor profile.
Expert Tips for the Perfect Mini Cheesecake
- Temperature Control: Ensure your egg and cream cheese are at room temperature. Cold ingredients result in a lumpy batter that won’t achieve that “smooth” filling look.
- The Tap Method: After filling the muffin cups with cheesecake batter, tap the pan firmly on the counter three times to release any trapped air bubbles.
- Water Bath Alternative: For mini cheesecakes, a full water bath isn’t usually necessary, but placing a pan of hot water on the bottom rack of the oven creates steam that helps prevent the tops from drying out.
- Ganache Consistency: If your ganache breaks (looks oily), whisk in a teaspoon of room temperature milk to bring the emulsion back together.
Pairing and Serving Suggestions
These rich cheesecakes pair beautifully with a cup of strong espresso or a cold glass of milk. If you are looking to create a dessert spread, consider adding some raspberry cheesecake danishes for a fruity contrast or some peanut butter cheesecake bites for the ultimate flavor duo.
For a festive touch, you could serve these alongside cranberry mousse parfaits to add a pop of color to your marble countertop presentation.
Frequently Asked Questions
Yes! Freeze them without the ganache and chocolate chips for best results. Thaw in the fridge overnight, then add the fresh ganache and chips before serving for that ultra-realistic look.
Yes, you can use a box mix, but ensure you only use about 1 tablespoon per cup and reduce the par-baking time. However, a homemade dark cocoa base provides a much better fudgy texture for this specific recipe.
Cracking is usually caused by over-mixing eggs or over-baking. Mix your batter on low speed once eggs are added to avoid incorporating air, and remove from the oven while the center still has a slight jiggle.
These will stay fresh and delicious for up to 5 days in an airtight container in the refrigerator. The flavors actually develop and improve after the first 24 hours.
A dull ganache often happens if the chocolate is overheated or if the cream-to-chocolate ratio is off. Ensure you pour hot cream over the chocolate and let it sit before whisking gently to create a perfect emulsion.
The Ultimate Brownie Bottom Mini Cheesecake Recipe
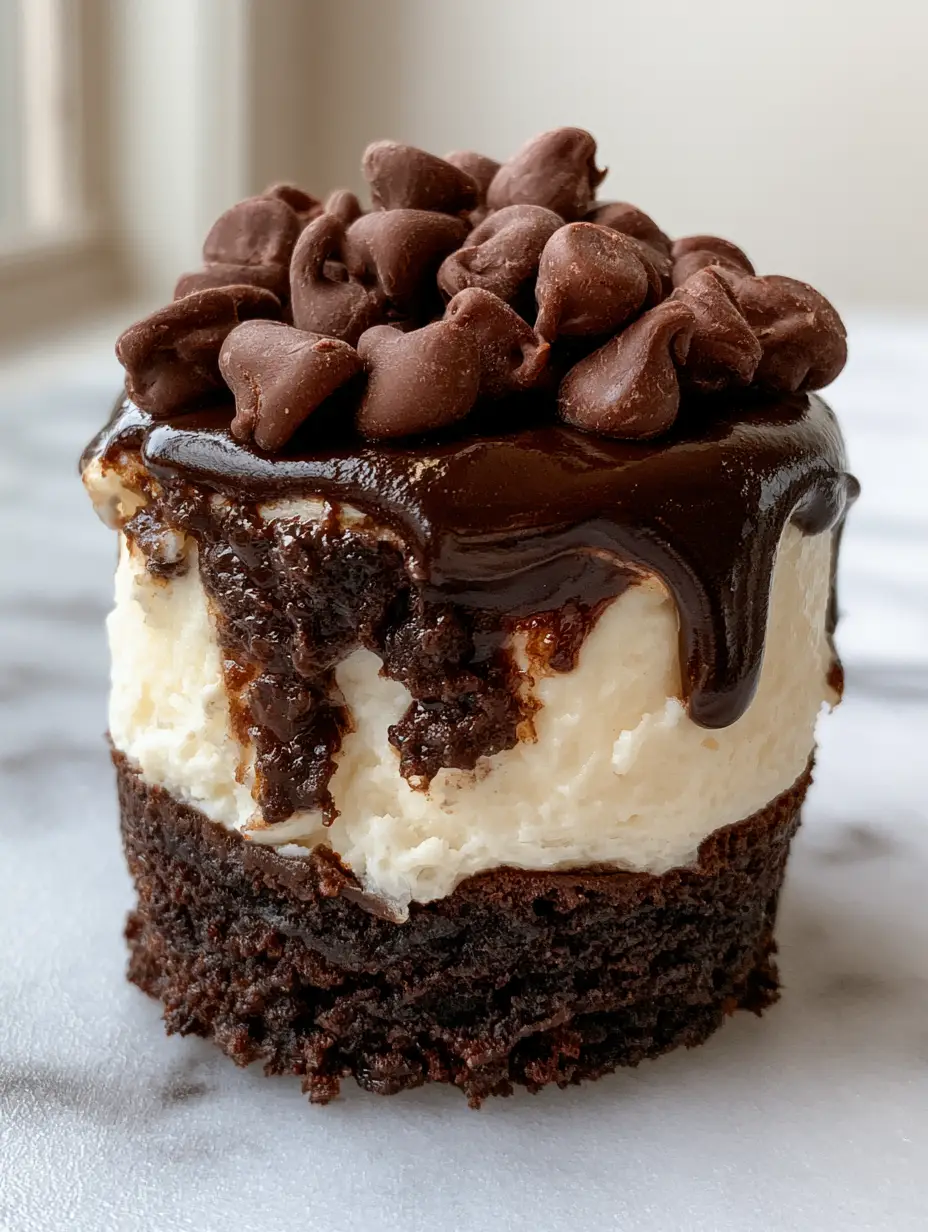
Brownie Bottom Mini Cheesecake with Glossy Ganache and Chocolate Chips
Ingredients
Equipment
Method
- Preheat oven to 325°F (165°C). Whisk melted butter, sugar, and cocoa powder. Add egg and vanilla, then fold in flour until moist and fudgy.
- Distribute 1 tbsp (15g) of batter into 12 lined muffin cups. Bake for 8-10 minutes until edges are set but centers are soft.
- Beat room temperature cream cheese and sugar until smooth. Add sour cream and vanilla, then the egg, mixing on low just until combined.
- Spoon batter over brownie bases. Bake for 15-18 minutes until set with a slight jiggle. Cool in pan, then chill for 4 hours.
- Pour hot cream over chopped dark chocolate. Let sit for 5 minutes, then whisk until glossy and liquid.
- Drizzle ganache over chilled cheesecakes, allowing it to drip down the sides. Top with a mountain of semi-sweet chips.
Notes
Do not over-bake the brownie base or it will become hard instead of fudgy.
Closing & Call to Action
The brownie bottom mini cheesecake is the ultimate intersection of comfort food and gourmet presentation. By following the dual-bake method and mastering the ganache drip, you can recreate this ultra-realistic, professional-grade dessert in your own kitchen. The combination of the dark cocoa base and the mountain of chocolate chips makes for a truly unforgettable experience.
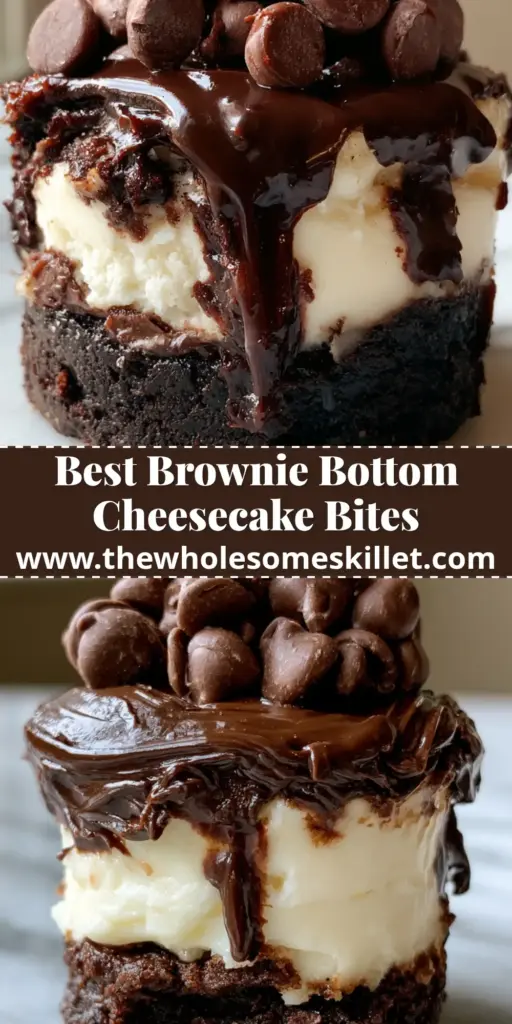
Did you make these? We would love to see your “messy ganache” masterpieces! Leave a comment below and share your results. Don’t forget to follow thewholesomeskillet on Pinterest and pin this recipe to your favorite dessert boards for later!