When the craving for a rich, salty-sweet treat hits, nothing satisfies quite like these oreo peanut butter delights. This recipe is a masterclass in texture, combining a gritty, dark cocoa base with a cloud-like peanut butter center and a mirror-finish chocolate topping. If you have ever swooned over a peanut butter cup, this elevated, handheld version will become your new obsession.
The beauty of these oreo peanut butter delights lies in their simplicity and their striking visual appeal. We are moving beyond the basic potluck bar to create a dessert that looks like it belongs in a high-end patisserie window. Every bite delivers a symphony of crunch, cream, and silk that melts away the moment it hits your tongue.
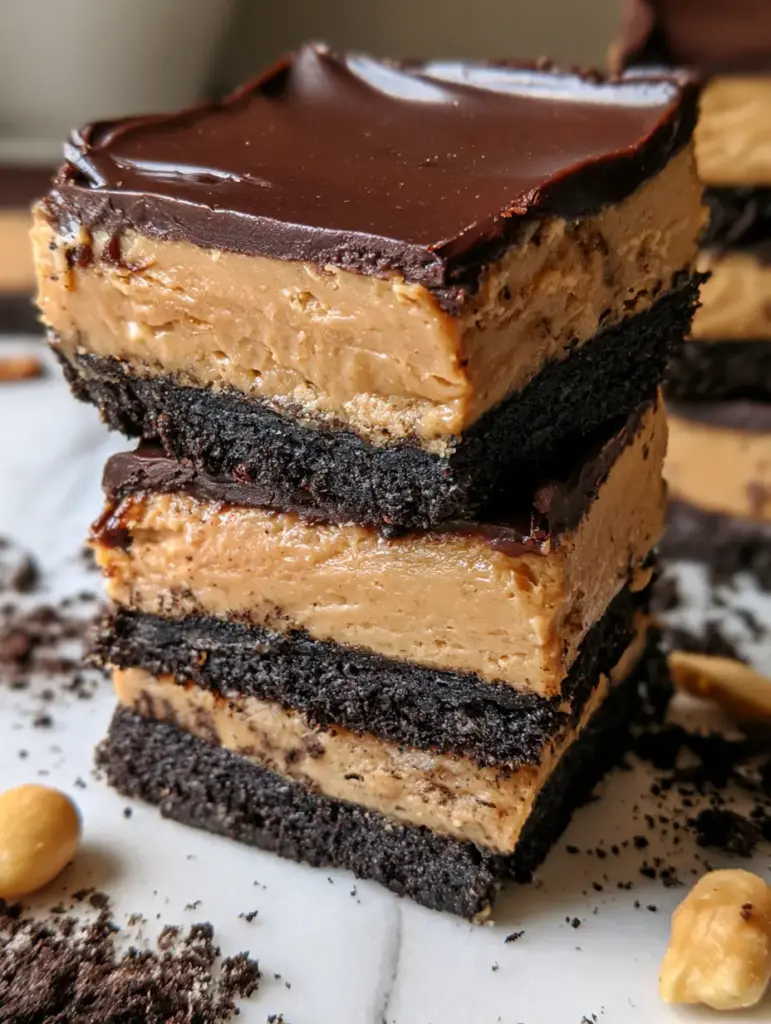
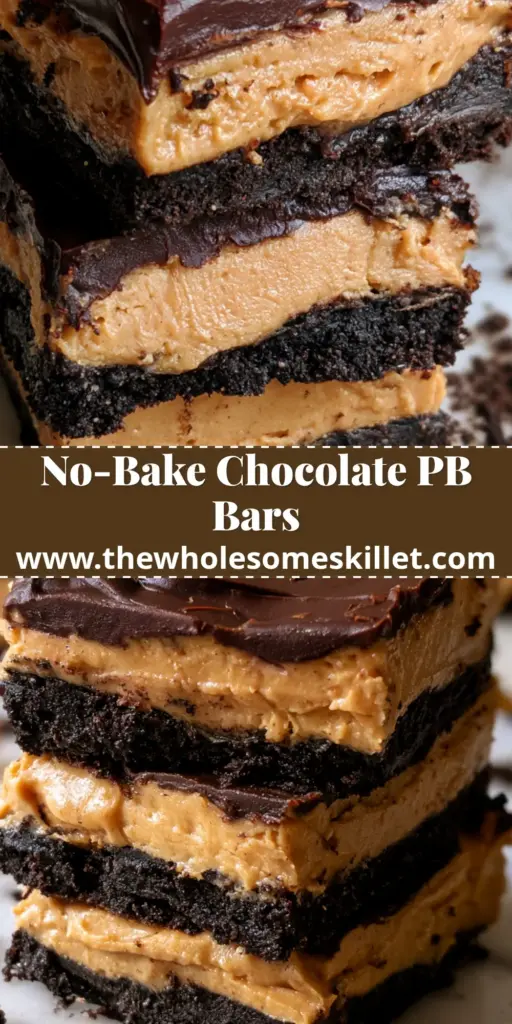
Constructed in three pristine, distinct layers, this dessert is as much a feast for the eyes as it is for the palate. Whether you are serving these at a summer gathering or keeping a stash in the freezer for midnight snacking, the combination of dark chocolate and roasted peanuts is an undefeated champion in the world of desserts.
Why You Will Love These Triple-Layered Treats
- Unmatched Texture Contrast: You get a thick, dark, crumbly Oreo cookie crust paired with a filling that is exceptionally light and smooth.
- Glossy Ganache Finish: The top layer is a thin, glossy, dark chocolate ganache that stays slightly soft, creating that “melted at the edges” look.
- No-Bake Ease: Skip the oven entirely; this recipe relies on chilling to set the structural integrity of the bars.
- Visual Precision: Designed to look stunning on a white marble countertop, these bars feature sharp, clean lines between the black, light brown, and dark mahogany layers.
The Foundation: Essential Ingredients for Success
Creating the perfect oreo peanut butter delights requires a balance of pantry staples and specific fats to ensure the bars hold their shape while remaining tender. Each component plays a vital role in the structural forensic makeup of the final stack.
Oreo Cookie Crumbs: You will need 24 standard Oreo cookies (about 2.5 cups or 300g of crumbs). These provide the “thick, dark, crumbly” base that supports the weight of the filling without becoming soggy.
Unsalted Butter: Use 6 tbsp (85g) of melted butter for the crust and 4 tbsp (56g) for the filling. Butter acts as the primary binder, hardening when chilled to lock the crumbs and the peanut butter in place.
Creamy Peanut Butter: 1.5 cups (380g) of a processed creamy peanut butter (like Jif or Skippy) works best here. Natural peanut butters tend to separate, but a stabilized brand ensures that “visible smooth texture” described in the visual blueprint.
Powdered Sugar: 2 cups (240g) of sifted confectioners’ sugar provides sweetness and structural stiffness to the middle layer. Without this, the peanut butter would be too fluid to stack three high.
Dark Chocolate Chips: 1 cup (170g) of high-quality dark chocolate (60% cacao or higher) creates the sophisticated ganache. This provides the “glossy, dark chocolate” appearance that offsets the sweetness of the filling.
Heavy Cream: 1/2 cup (120ml) of heavy whipping cream is essential for the ganache. It keeps the chocolate pliable so it doesn’t crack when you bite into the bar.
Roasted Peanuts and Extra Oreos: A handful of whole roasted peanuts and a few extra crushed cookies are used for garnish. These add the final artisanal touch that mirrors a professional food photography set.
Must-Have Kitchen Tools for Pristine Layers
To achieve the professional look of the oreo peanut butter delights, you need the right equipment to keep your layers distinct and your edges sharp. A standard 8×8 inch (20x20cm) square baking pan is the ideal vessel for this recipe.
Line your pan with parchment paper, leaving an overhang on two sides. This allows you to lift the entire block of bars out at once, ensuring the “pristine layers” aren’t smudged during the removal process. A food processor is also highly recommended to achieve the fine, sandy texture needed for the dark crust.
Architecting the Perfect Oreo Crust
Processing the Cocoa Base
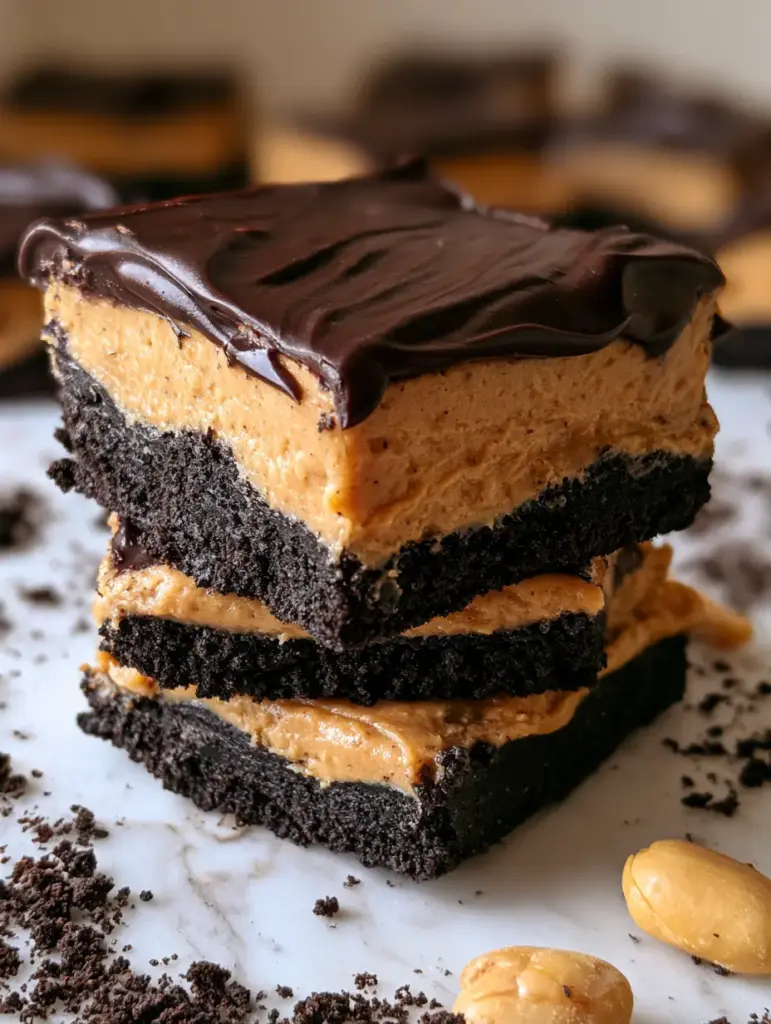
Start by placing your Oreo cookies (cream and all!) into a food processor. Pulse until the cookies are transformed into fine, uniform crumbs with no large chunks remaining. This ensures the crust is “thick and dark” rather than patchy.
Pour the melted butter over the crumbs and pulse again until the mixture looks like wet sand. The butter should be fully incorporated so that the crust doesn’t crumble apart when the bars are sliced. If you enjoy this flavor profile, you might also love our ultimate no-bake Oreo dream dessert.
Setting the Foundation
Transfer the crumb mixture into your prepared pan. Use the bottom of a flat measuring cup to press the crumbs down firmly and evenly. You want a compressed, solid base that can support the rich layers above it.
Place the pan in the freezer for at least 10 minutes. This flash-chill step is a professional secret that prevents the peanut butter filling from pulling up the cookie crumbs, keeping the transition between layers perfectly clean.
Crafting the Silky Peanut Butter Center
Creaming the Filling
In a large bowl, combine the creamy peanut butter and the softened butter. Use an electric hand mixer to beat them together until the mixture is pale and aerated. This creates that “light brown” hue and “visible smooth texture” seen in the visual prompt.
Gradually add the powdered sugar, one cup at a time, mixing on low speed until incorporated. The filling should be thick, similar to the consistency of playdough, but still spreadable. If it feels too stiff, add a teaspoon of milk; if too soft, add a bit more sugar.
Achieving Level Layers
Dollop the peanut butter mixture over the chilled crust. Use an offset spatula to smooth it out into a perfectly level plane. Take your time here; a level middle layer is the key to a professional-looking stack of oreo peanut butter delights.
Once smoothed, return the pan to the refrigerator while you prepare the ganache. For those who can’t get enough of this duo, check out our no-bake chocolate peanut butter clusters for a different textural experience.
The Glossy Ganache Topping
The Science of the Glaze
Place your dark chocolate chips in a small heat-proof bowl. In a small saucepan, heat the heavy cream until it just begins to simmer (do not let it reach a rolling boil). Pour the hot cream over the chocolate and let it sit undisturbed for 5 minutes.
Gently whisk the mixture starting from the center and moving outward. As the emulsion forms, you will see it transform into a “thin, glossy, dark chocolate ganache.” The gloss comes from the fat in the cream perfectly suspended in the cocoa solids.
The Final Pour
Pour the ganache over the chilled peanut butter layer. Tilt the pan slightly to let the chocolate flow to the edges naturally. This creates that elegant, thin coating that characterizes the oreo peanut butter delights. Sprinkle your crushed Oreos and whole roasted peanuts over the top while the chocolate is still wet.
Professional Tips for Perfect Slicing
- The Long Chill: Allow the bars to set in the fridge for at least 4 hours, or ideally overnight. This ensures the ganache is set but remains “slightly melted at the edges” in texture.
- Hot Knife Technique: To get the pristine, distinct layers shown in the prompt, run a sharp chef’s knife under hot water and wipe it dry between every single cut.
- Room Temperature Serving: While they should be stored cold, let the bars sit out for 10 minutes before serving. This allows the ganache to soften slightly for that gourmet mouthfeel.
- Avoid Natural PB: For this specific recipe, the oils in natural peanut butter can cause the layers to slide. Stick to a stabilized creamy brand for the best structural integrity.
Storage and Preservation
Store your oreo peanut butter delights in an airtight container in the refrigerator for up to 7 days. Because of the dairy in the ganache and the butter in the filling, they should not be left at room temperature for more than 2 hours.
For long-term storage, these bars freeze beautifully. Wrap individual squares in plastic wrap and store them in a freezer-safe bag for up to 3 months. Thaw in the refrigerator for a few hours before enjoying. If you like long-lasting peanut butter treats, you should also try our effortless peanut butter fudge.
What to Serve with Your Delights
These bars are incredibly rich, so they pair best with beverages that can cut through the fat. A cold glass of milk is the classic choice, but a bitter espresso or a dark roast coffee complements the dark chocolate ganache perfectly.
If you are building a dessert board, consider adding some melt-in-your-mouth butter biscuits for a neutral palate cleanser, or serve them alongside a decadent peanut butter chocolate dip with fresh apple slices for a bit of acidity.
Frequently Asked Questions
Yes! Use plant-based butter, dairy-free dark chocolate, and coconut cream in place of heavy cream. Oreos are famously ‘accidentally’ vegan, so the crust remains the same.
It is better to use standard Oreos. Double-stuffed cookies have too much cream filling, which can make the crust too soft and greasy, preventing it from holding that ‘thick, crumbly’ texture.
While a food processor gives the most uniform ‘thick and dark’ crumbs, you can place the cookies in a sealed bag and crush them with a rolling pin for a more rustic texture.
The secret to a glossy ganache is the ratio of high-fat heavy cream to dark chocolate. Whisking gently and avoiding air bubbles also ensures a mirror-like finish.
This happens if the bars haven’t chilled long enough or if the knife is cold. Ensure you chill for at least 4 hours and use a hot, dry knife for each cut.
The Complete Oreo Peanut Butter Delights Recipe
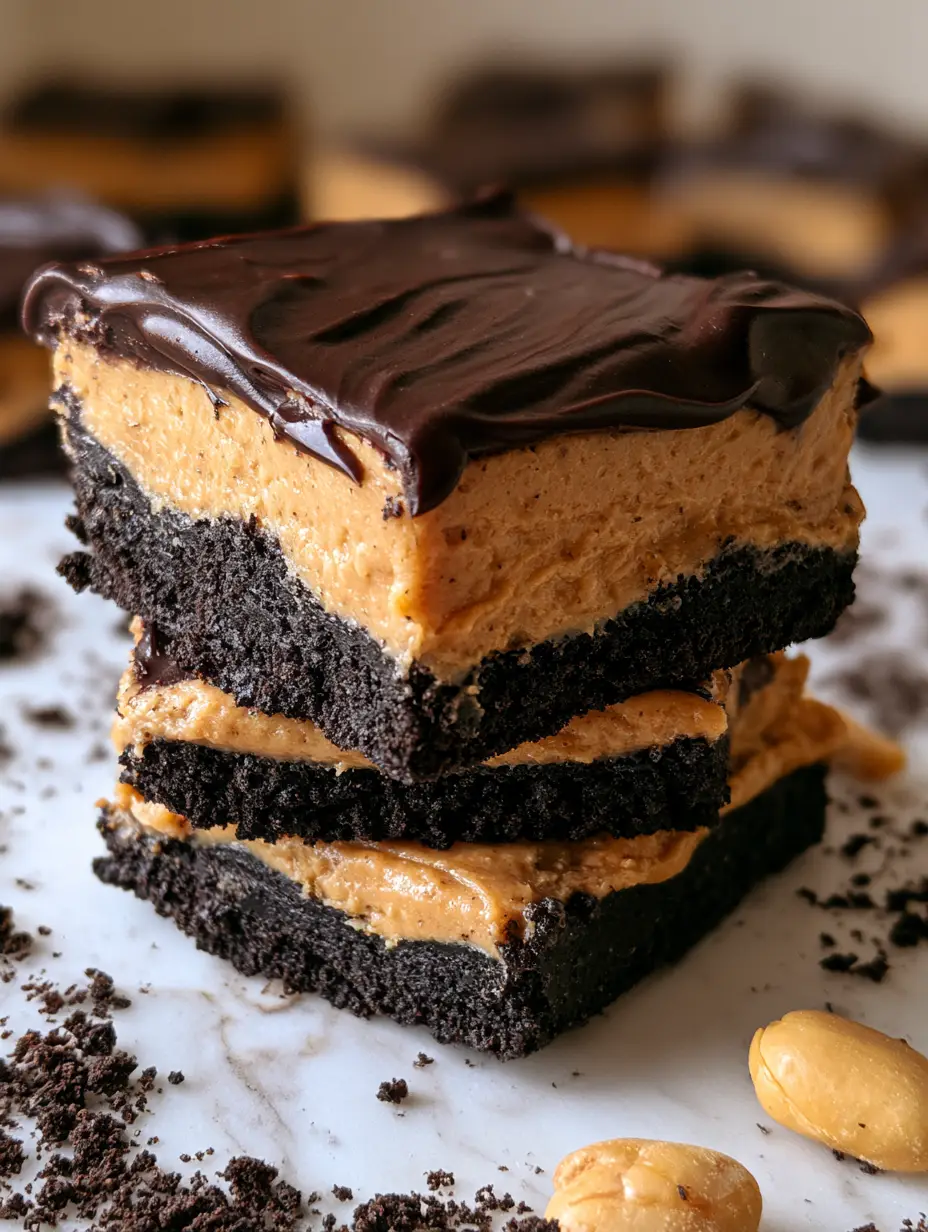
Oreo Peanut Butter Delights: The Ultimate No-Bake Layered Bar
Ingredients
Equipment
Method
- Pulse 24 Oreos in a food processor until fine crumbs form. Mix with 6 tbsp (85g) melted butter.
- Firmly press the crumb mixture into a lined 8x8 pan. Freeze for 10 minutes to set.
- Beat 1.5 cups (380g) peanut butter and 4 tbsp (56g) softened butter until light brown and smooth.
- Gradually beat in 2 cups (240g) powdered sugar until the filling is thick and creamy.
- Spread evenly over the chilled crust using an offset spatula.
- Heat 0.5 cup (120ml) heavy cream until simmering, then pour over 1 cup (170g) chocolate chips. Let sit for 5 minutes, then whisk until glossy.
- Pour over bars, sprinkle with peanuts and crumbs, and chill for 4 hours before slicing.
Notes
Do not substitute natural peanut butter as it may be too oily.
Closing Thoughts on This No-Bake Masterpiece
Mastering the oreo peanut butter delights is a rite of passage for any home cook who loves the combination of chocolate and nuts. By focusing on high-quality ingredients and the forensic details of layering, you can create a dessert that looks like a professional photograph every time. The contrast of the dark, crumbly crust against the light, creamy filling is a sensory experience you won’t soon forget.
If you enjoyed making these, please leave a comment below and let us know how they turned out! Don’t forget to share your pristine layers on social media and follow us at Pinterest for more decadent inspirations. Happy “no-baking”!