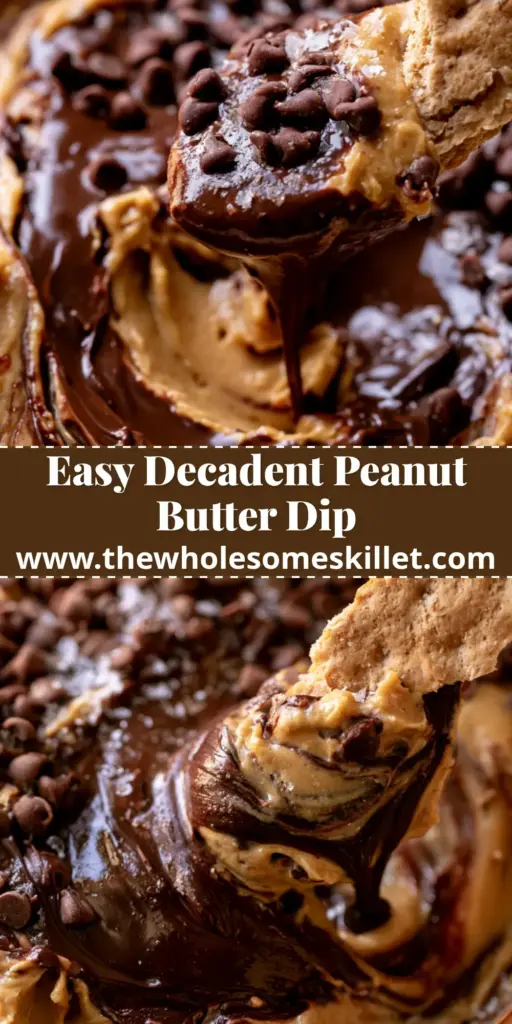
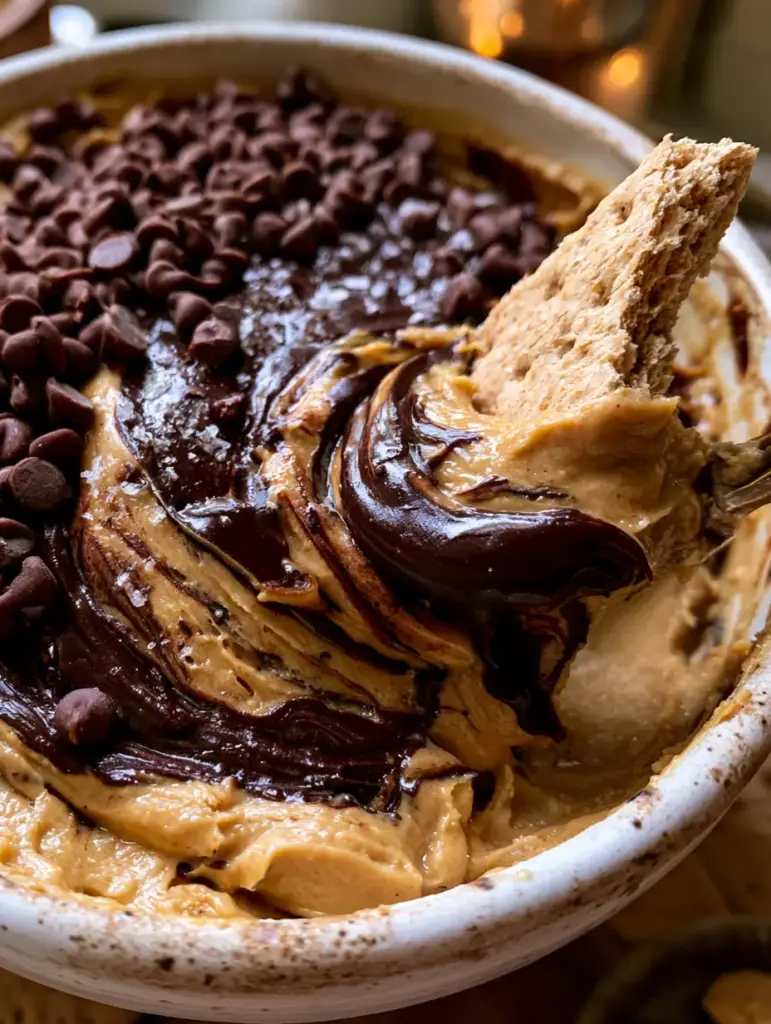
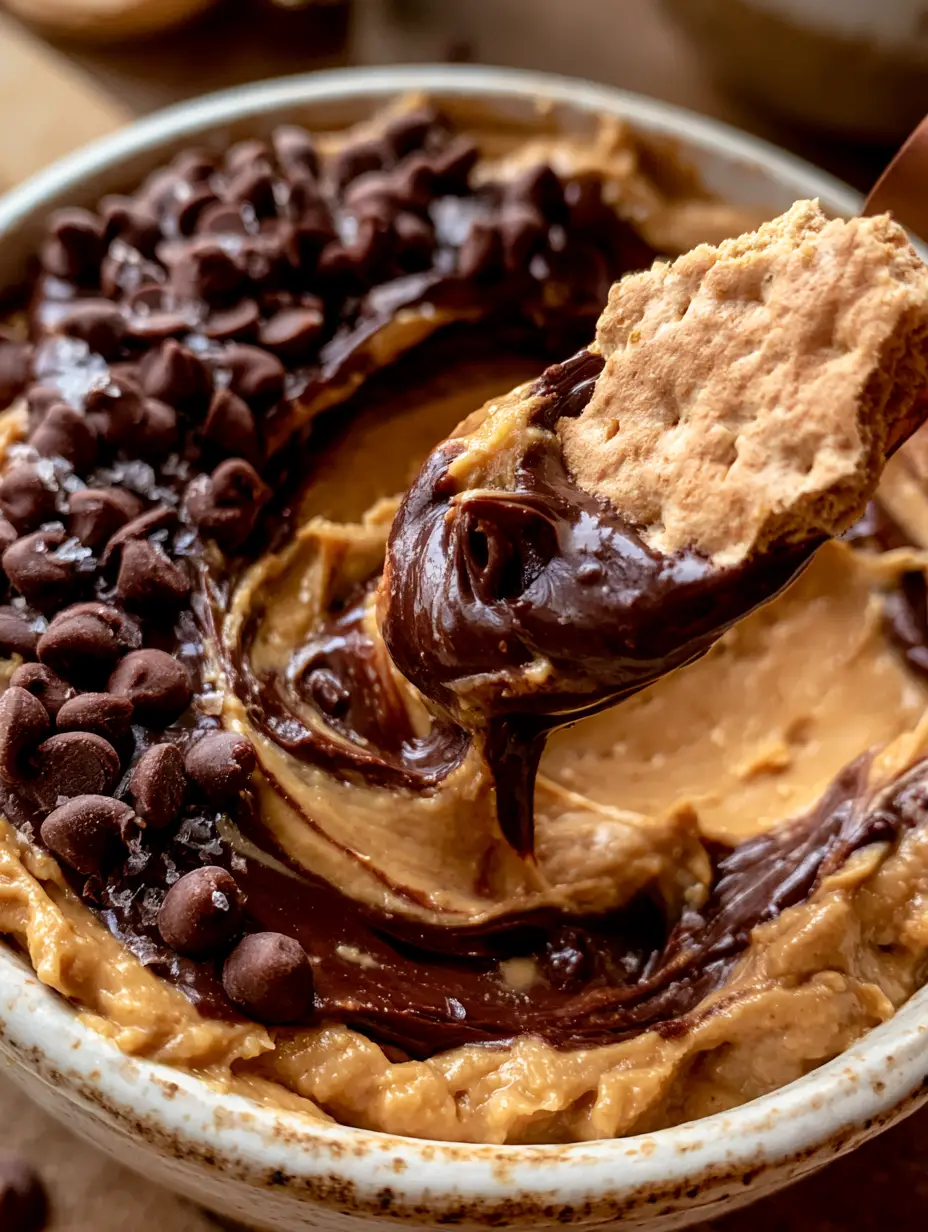
When it comes to the intersection of salty indulgence and sweet decadence, nothing commands the room quite like a perfectly executed peanut butter chocolate dip. Imagine a rustic white ceramic bowl, catching the warm afternoon light, filled to the brim with a golden, aerated cloud of whipped peanut butter and cream cheese. Now, picture thick, molten ribbons of dark chocolate artfully marbled throughout that golden base, creating a visual and textural contrast that is nothing short of hypnotic.
This isn’t just a snack; it is a sensory event. Every scoop captures a dramatic drip of molten ganache, punctuated by the crunch of miniature semi-sweet chips and the delicate, waxy snap of white chocolate sprinkles. A final dusting of flaky sea salt bridges the gap between the rich fats and the sugars, elevating the entire experience to a professional pastry-chef level. Whether you are hosting a high-stakes game night or looking for a centerpiece for your next dessert board, this peanut butter chocolate dip is the answer.
The beauty of this recipe lies in its structural integrity. While it looks like a loose, molten mess in the best way possible, the foundation is a scientifically balanced mousse that holds its peak even after hours on the table. In this guide, we will break down the culinary physics of the perfect swirl and the specific ingredient choices that ensure your dip looks exactly like a high-end food editorial photo.
Why This Decadent Dessert Dip Will Rule Your Next Gathering
- The Texture Trifecta: We combine the structural stability of full-fat cream cheese with the airy lift of whipped peanut butter to create a base that is light yet substantial enough to cling to a pretzel stick.
- Molten Chocolate Technology: Unlike recipes that use hard chocolate chips, our dip features a true dark chocolate ganache swirl that remains fluid and glossy at room temperature.
- Visual Contrast: The golden peanut butter base against the deep obsidian of the dark chocolate, topped with dual-toned chocolate sprinkles, makes this a visual centerpiece.
- Professional Flavor Balance: By incorporating flaky sea salt as a functional ingredient rather than just a garnish, we cut through the richness of the peanut butter to highlight the fruity notes of the dark chocolate.
The Essential Components for a Velvet-Smooth Dip
Creating a professional-grade peanut butter chocolate dip requires more than just mixing ingredients; it requires an understanding of how these fats and sugars interact. We have selected each element for its specific contribution to the “Midjourney-perfect” aesthetic and mouthfeel.
Full-Fat Cream Cheese: 8 oz (226g). This provides the lactic acid tang and the structural foundation; ensure it is fully softened to room temperature to avoid unsightly lumps in your golden base.
Creamy Peanut Butter: 1 cup (256g). Stick to a processed, creamy brand rather than a “natural” stir-style to ensure the oil doesn’t separate and ruin the emulsion of your dip.
Powdered Sugar: 1 cup (120g). We use finely sieved powdered sugar not just for sweetness, but to act as a stabilizer for the cream cheese and peanut butter fats.
Pure Vanilla Extract: 1 tsp (5ml). A foundational aromatic that bridges the nuttiness of the peanut butter with the earthy bitterness of the dark chocolate.
Dark Chocolate Wafers: 1/2 cup (85g). We recommend a 60% cacao content to provide that “molten” look described in our visual blueprint without being overly sweet.
Heavy Whipping Cream: 1/4 cup (60ml). This is the secret “invisible” ingredient that transforms hard chocolate into the flowing, glossy swirls seen in our overhead photography.
Miniature Semi-Sweet Chocolate Chips: 2 tbsp (30g). These add a secondary textural element, providing a distinct “snap” against the otherwise soft mousse.
White Chocolate Sprinkles: 1 tbsp (15g). These provide a high-contrast visual pop against the dark chocolate swirls, adding to the luxurious “handheld smartphone photo” aesthetic.
Flaky Sea Salt: 1/2 tsp (3g). Specifically, use Maldon or a similar large-flake salt to catch the light and provide localized bursts of salinity.
Graham Cracker Dippers & Pretzel Sticks: For serving. The graham crackers provide a honeyed crunch, while the pretzels offer a structural, salty counterpoint.
Precision Tools for Culinary Success
To achieve the “Close-up, overhead shot” quality described in our blueprint, you need tools that prioritize aeration and temperature control. You don’t need a commercial kitchen, but these specific items will make a difference.
- Electric Hand Mixer or Stand Mixer: Essential for whipping the peanut butter and cream cheese until they change color from a dark tan to a light, golden hue.
- Fine-Mesh Sieve: Crucial for removing clumps from the powdered sugar, ensuring the “rich and creamy texture” is perfectly smooth.
- Heat-Proof Glass Bowl: For creating the ganache swirl; glass allows for gentle, even heat distribution when melting the dark chocolate.
- Silicone Spatula: To achieve those “artful swirls” without over-mixing and turning the whole dip into a muddy brown color.
- Rustic White Ceramic Bowl: To match the visual prompt’s aesthetic, which highlights the warm colors of the dip against a clean, neutral background.
The Art of Crafting the Perfect Peanut Butter Chocolate Dip
Following these steps ensures that your dip isn’t just a bowl of mixed ingredients, but a layered culinary experience. We are building the base, engineering the swirl, and finishing with intentionality.
Phase 1: Aerating the Golden Base
Begin by placing your softened cream cheese and creamy peanut butter in a large mixing bowl. Using your electric mixer on medium-high speed, beat the two together for at least 3 minutes. You are looking for a visual cue: the mixture should lighten significantly in color and increase in volume.
Once the base is fluffy, reduce the speed to low and gradually add the sieved powdered sugar and vanilla extract. Mixing on low prevents a sugar cloud and ensures the sugar is fully integrated into the fat. If you enjoy this flavor profile, you might also love our chewy peanut butter cookies for your next baking project.
Phase 2: Engineering the Molten Dark Chocolate Swirl
To achieve the “thick, molten dark chocolate layer” from the Midjourney prompt, we must make a simple ganache. Place your dark chocolate wafers and heavy cream in a small microwave-safe bowl. Heat in 20-second intervals, stirring in between, until the mixture is glossy and liquid.
Allow the ganache to cool for about 5 minutes. If it is too hot, it will melt the peanut butter base; if it is too cold, it won’t swirl. It should be the consistency of thick honey. This technique is similar to the one used in our no-bake German chocolate dream pie.
Phase 3: The Art of the Visual Swirl
Transfer the peanut butter base into your rustic white ceramic bowl. Smooth the top with a spoon, then pour the molten chocolate in three distinct pools across the surface. Use a butter knife or the tip of a spoon to gently drag the chocolate through the peanut butter.
Stop earlier than you think you should. The “visible swirls” mentioned in the visual blueprint depend on maintaining clear boundaries between the golden peanut butter and the dark chocolate. If you over-mix, you lose the professional, marbled aesthetic.
Pro-Tips for an Editorial-Ready Finish
The difference between a home-cooked snack and a food-blogger-quality peanut butter chocolate dip lies in the finishing touches. These tips focus on the “Visual Recipe Blueprint” requirements.
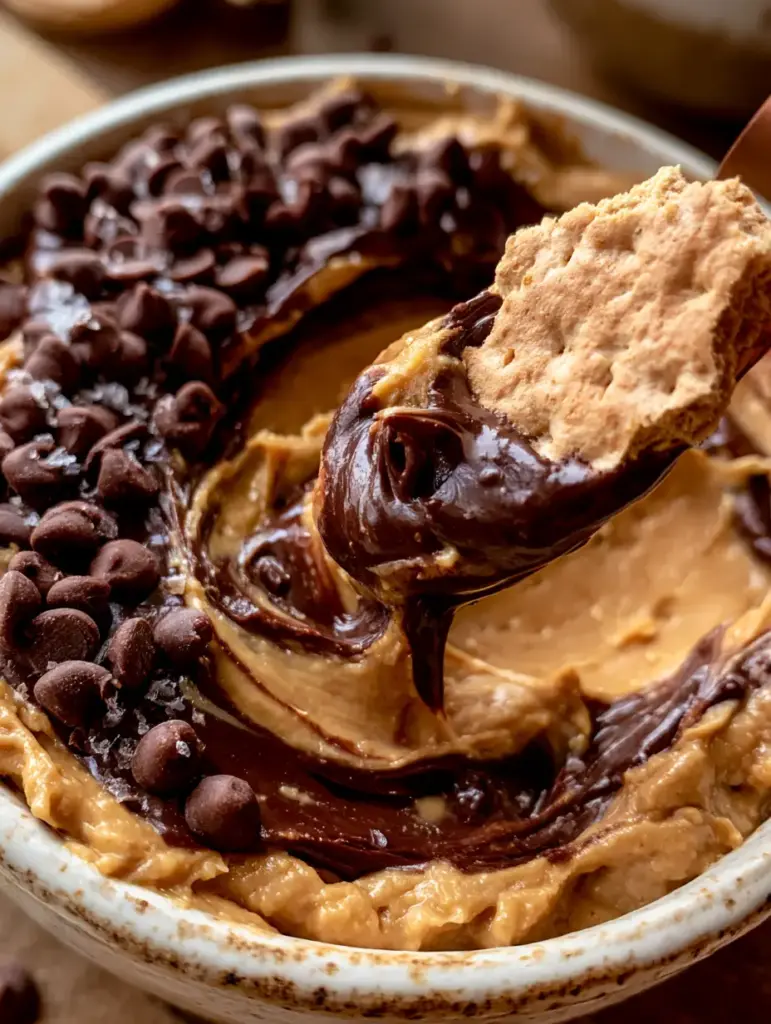
- The Drip Factor: When serving, intentionally break one graham cracker and place it into the dip at a 45-degree angle. This mimics the “perfectly poised” cracker from the prompt and encourages guests to dive in.
- Strategic Garnishing: Don’t just dump the toppings. Place the miniature chocolate chips and white chocolate sprinkles toward the center and along the chocolate swirls to highlight the textures.
- Salt Placement: Sprinkle the flaky sea salt from about 12 inches above the bowl. This ensures an even distribution and prevents any one bite from being overly salty.
- Temperature Management: If you’re serving this at a party, let it sit at room temperature for 15 minutes before guests arrive. This ensures the “molten” chocolate is at its most fluid.
Smart Storage and Make-Ahead Advice
While this dip is best served fresh to maintain the “molten” quality of the chocolate, you can certainly prepare parts of it in advance. The peanut butter base can be whipped and stored in an airtight container in the refrigerator for up to 3 days. However, do not add the chocolate swirls until you are ready to serve.
If you have leftovers, store them in the fridge. Note that the chocolate swirl will firm up. To revive the “molten” texture, you can microwave a small portion for 5-10 seconds, though this may slightly blur the swirl lines. For more peanut-heavy treats that store beautifully, check out our 3-ingredient peanut butter fudge.
Perfect Pairings for Your Dessert Board
While graham crackers and pretzels are the classic dippers mentioned in our blueprint, this peanut butter chocolate dip is incredibly versatile. You can expand your dessert board by including fruit like sliced tart apples or strawberries to cut through the richness.
For a truly indulgent experience, serve this alongside other fan-favorites. It pairs beautifully with no-bake Oreo peanut butter delights for a multi-textured peanut butter spread. If you’re hosting a larger event, consider adding a plate of ultimate holiday peanut butter cookies to round out the table.
Frequently Asked Questions
Yes! You can whip the peanut butter and cream cheese base up to 3 days in advance. However, wait to add the molten chocolate swirls and toppings until just before serving for the best visual appeal and texture.
It is not recommended. Natural peanut butter often separates, which can cause the dip to become oily or grainy. A traditional creamy processed peanut butter provides the best emulsion and velvet-smooth texture.
The secret is creating a ganache by mixing the chocolate with heavy cream. This lowers the melting point, ensuring the swirls stay ‘molten’ and soft at room temperature rather than snapping like a chocolate bar.
The dip itself is gluten-free if you ensure your chocolate chips and sprinkles are certified. To keep the whole serving gluten-free, simply swap the graham crackers and pretzels for apple slices or gluten-free crackers.
Lumps usually happen if the cream cheese is too cold when you start mixing. Always ensure your cream cheese is completely softened to room temperature before whipping it with the peanut butter.
The Ultimate Peanut Butter Chocolate Dip Recipe
Peanut Butter Chocolate Dip: The Ultimate Velvet-Smooth Dessert Masterpiece
Ingredients
Equipment
Method
- In a large bowl, combine 8 oz (226g) softened cream cheese and 1 cup (256g) creamy peanut butter. Use an electric mixer on medium-high for 3 minutes until light, golden, and airy.
- Reduce mixer speed to low. Gradually add 1 cup (120g) powdered sugar and 1 tsp (5ml) vanilla. Mix until just combined and smooth.
- Combine 1/2 cup (85g) dark chocolate and 1/4 cup (60ml) heavy cream in a bowl. Microwave in 20-second bursts, stirring until glossy. Let cool for 5 minutes.
- Transfer peanut butter mixture to a serving bowl. Pour ganache on top and use a knife to create artful swirls, being careful not to over-mix.
- Generously top with 2 tbsp (30g) mini chocolate chips, 1 tbsp (15g) white chocolate sprinkles, and 1/2 tsp (3g) flaky sea salt.
- Arrange graham crackers and pretzel sticks around the bowl. Break one cracker and place it in the center for a dramatic, poised look.
Notes
Use high-quality dark chocolate (60% cacao) for the best 'molten' visual contrast.
Start Dipping and Sharing!
There is something undeniably comforting about the combination of peanut butter and chocolate, and this dip delivers that comfort in a luxurious, elevated package. With its molten swirls, crunchy toppings, and perfectly balanced saltiness, it’s destined to become your most-requested party recipe. The visual appeal of the golden base against the dark ganache makes it a literal showstopper.
If you make this peanut butter chocolate dip, we would love to hear about it! Leave a comment below, rate the recipe, and don’t forget to share your creations on social media. For more visual inspiration and decadent recipes, be sure to follow us and save this pin to your favorite boards on Pinterest. Happy dipping!