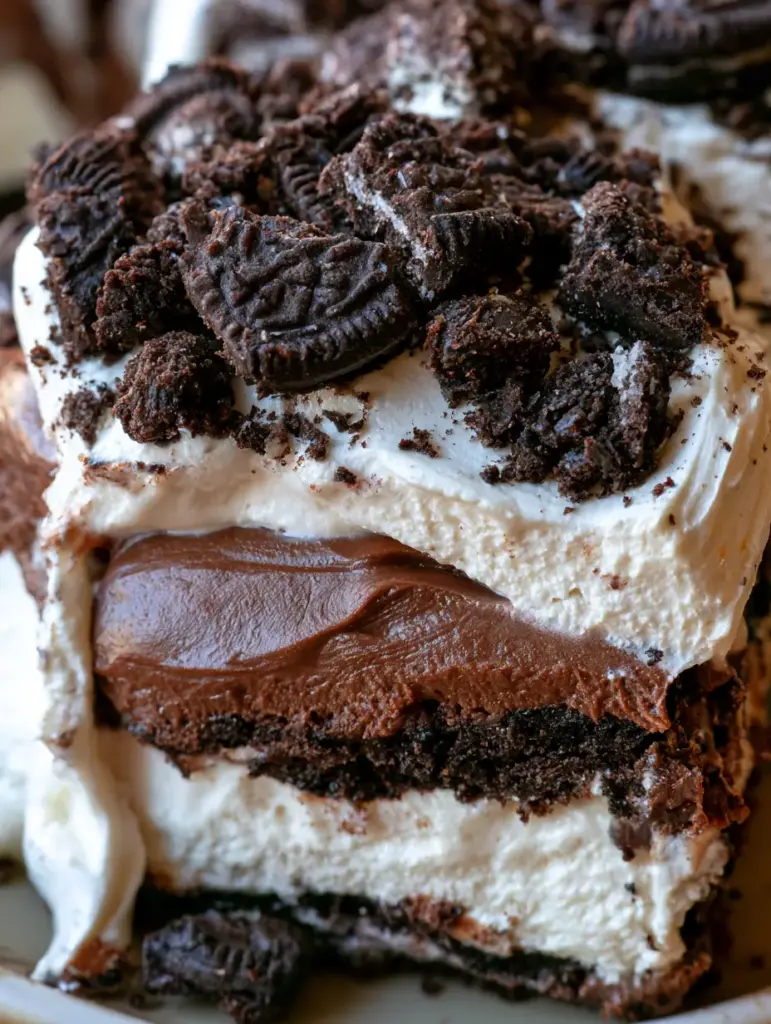
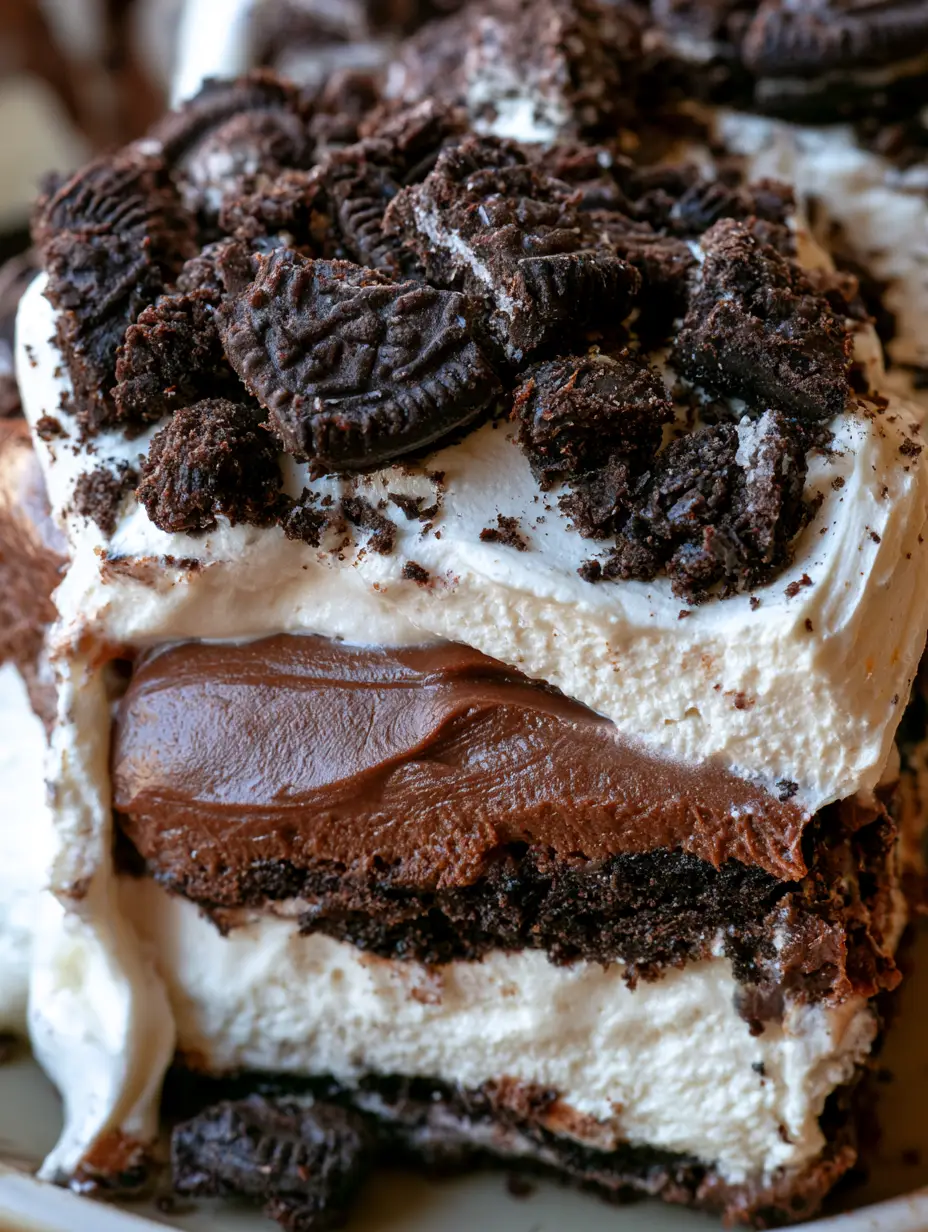
The oreo dream dessert is more than just a sweet treat; it is a visual and textural masterpiece that captures the heart of every cookie lover. Imagine sinking your fork into a perfectly defined slice where a thick, buttery crushed Oreo crust meets a velvety sweetened cream cheese layer, followed by a silky smooth dark chocolate pudding and a cloud-like whipped topping. The experience is finished with a generous sprinkle of large, crunchy Oreo chunks that provide the perfect contrast to the creamy layers below.
When you capture this dish in natural golden hour lighting, the macro details become undeniable. You can see the slight frosting smudge on the side of a freshly cut slice, indicating its incredible creaminess and decadent mouthfeel. This no-bake wonder is a staple for potlucks, family gatherings, or those late-night cravings when you want maximum indulgence with minimal effort.
Much like our no-bake cherry dream dessert, this Oreo version relies on the science of chilling to create those clean, professional-looking layers. Whether you call it Oreo lasagna, lush, or a dream dessert, the result is always the same: a crowd-pleasing victory that looks as good as it tastes.

Why This Oreo Dream Dessert is a Total Showstopper
- Four Distinct, Decadent Layers: Each layer is engineered for a specific texture, from the dense, chocolatey base to the airy whipped finish.
- No-Bake Simplicity: Achieve gourmet results without ever turning on your oven, making it the perfect year-round recipe.
- Forensic Visual Appeal: The contrast between the dark chocolate pudding and the stark white cream cheese layer creates a stunning visual profile.
- Scientific Texture Balance: We use specific ratios of fat and sugar to ensure the layers stay distinct and don’t bleed into one another.
Pantry Essentials for Your Oreo Dream Dessert
To achieve the specific macro-depth and rich flavor profile of this oreo dream dessert, each ingredient must be selected and prepared with care. Here is what you will need to assemble this layered masterpiece:
Standard Oreo Cookies: You will need 1 package (approx. 14.3 oz or 405g) of regular Oreos. The cream filling in the cookies acts as a secondary binder for the crust and adds that signature “dream” flavor throughout the dish.
Unsalted Butter: 6 tbsp (85g) of melted butter is essential. It coats the cookie crumbs, creating a structural foundation that stays firm enough to support the weight of the upper layers.
Cream Cheese: 8 oz (226g) of full-fat cream cheese, softened to room temperature. This provides the tangy counterpoint to the sugar, ensuring the dessert isn’t cloying while offering a stable, dense second layer.
Powdered Sugar: 1 cup (120g) of confectioners’ sugar. This dissolves instantly into the cream cheese, providing sweetness without any gritty texture, preserving the “macro-smooth” look.
Whipped Topping: 1 container (12 oz or 340g) of thawed whipped topping, divided. Half is folded into the cream cheese for fluffiness, and the other half forms the pristine top layer.
Instant Chocolate Pudding Mix: 2 packages (3.9 oz or 110g each) of instant dark chocolate pudding. The “instant” factor is crucial here, as it sets quickly and provides the dark, rich color seen in our visual blueprint.
Whole Milk: 2 ¾ cups (650ml) of cold whole milk. Using whole milk instead of 2% ensures the pudding layer is thick and creamy enough to be sliced cleanly without slumped edges.
If you love these flavor combinations, you should also try our no-bake oreo peanut butter delights for a salty-sweet twist on this classic profile.
Essential Tools for Precision Layering
Creating the perfect oreo dream dessert requires a few specific tools to ensure those layers remain as sharp as a professional photograph. First, you will need a 9×13 inch (23x33cm) glass baking dish. The glass is vital because it allows you to see the beautiful stratification of the chocolate and cream layers from the side.
A food processor is highly recommended for the crust. You want a fine, uniform crumb to ensure the butter binds everything together tightly. If you don’t have one, a heavy-duty rolling pin and a large zip-top bag will work, but aim for the finest texture possible.
Finally, an offset spatula is the secret weapon of professional pastry chefs. It allows you to spread the cream cheese and pudding layers evenly into the corners without disturbing the layer beneath. This tool is what gives you that “frosting smudge” level of perfection when you finally slice into it.
Step-by-Step Guide to the Ultimate Oreo Lasagna
Constructing the Crunchy Oreo Foundation
Begin by pulsing your Oreo cookies in a food processor until they reach the consistency of wet sand. Pour in your 6 tbsp (85g) of melted butter and pulse again until the mixture is well-coated. The smell of chocolate and butter should be intense and rich.
Press this mixture firmly into the bottom of your 9×13 inch dish. Use the bottom of a flat measuring cup to pack it down hard. This creates a structural base that won’t crumble when you lift a slice out. Place the dish in the freezer for 10 minutes to set the butter while you prepare the next layer.
Whipping the Velvety Cream Cheese Layer
In a large mixing bowl, beat the softened 8 oz (226g) cream cheese until it is completely smooth and free of lumps. Slowly sift in the 1 cup (120g) of powdered sugar and 2 tbsp (30ml) of milk, whisking until the mixture is light and airy.
Gently fold in half of your 12 oz (340g) whipped topping. Use a rubber spatula and a “folding” motion to keep the air in the mixture. Spread this white, creamy layer over your chilled crust using your offset spatula. You want to see a clear, distinct white line forming above the dark crust.
Preparing the Silky Chocolate Pudding Layer
In a separate bowl, whisk together the two packages of instant chocolate pudding mix and the 2 ¾ cups (650ml) of cold milk. Whisk vigorously for about 2 minutes until the pudding starts to thicken. You will feel the resistance in the whisk—this is the sensory cue that the starches have activated.
Before the pudding fully sets, pour it over the cream cheese layer. Spread it quickly and evenly. The dark chocolate against the white cream cheese creates that high-contrast visual that makes the oreo dream dessert so iconic. Let this sit for 5 minutes to firm up.
The Final Flourish and Chilling Process
Top the pudding layer with the remaining whipped topping. Spread it to the very edges of the dish to “seal” the layers beneath. Finally, take your remaining Oreos and crush them by hand into large, irregular chunks. Sprinkle them generously over the top.
The most difficult step is the wait. Cover the dish and refrigerate for at least 4 hours, though overnight is best. This chilling time allows the moisture from the pudding to slightly soften the cookie crust just enough so a fork can glide through it, while the cream cheese firms up into a sliceable mousse.
Secrets for the Most Defined Dessert Layers
- Cold Milk is Non-Negotiable: Always use milk straight from the fridge. Instant pudding relies on a temperature shock to set correctly; warm milk will result in a runny layer that ruins the visual definition.
- Softened Cream Cheese: If your cream cheese is even slightly cold, you will get tiny lumps in your white layer. This ruins the macro-close-up aesthetic. Microwave it for 15 seconds if it’s still firm.
- The “Clean Cut” Trick: For those perfect, handheld-smartphone-photo-ready slices, wipe your knife clean with a warm, damp cloth between every single cut. This prevents the chocolate pudding from smearing into the white cream cheese layer.
- Crust Compression: Really muscle that crust into the pan. A loose crust will stay in the pan while the rest of the dessert comes out on your plate.
Keeping Your Dream Dessert Fresh and Creamy
To maintain the integrity of your oreo dream dessert, always keep it refrigerated. Because of the dairy content in the cream cheese and whipped topping, it should not sit at room temperature for more than 30 minutes. When stored in the fridge, covered tightly with plastic wrap or a lid, it will stay fresh for 3 to 5 days.
If you want to prepare this well in advance, you can freeze it! Wrap the dish in a double layer of plastic wrap and then foil. It will last for up to a month. To serve, thaw it in the refrigerator for 4 hours. The texture will be slightly more firm, almost like an ice cream cake, which is equally delicious.
For more no-bake inspiration, you might enjoy our zesty lemon dream pie or even a batch of flaky cherry dessert bites for your next gathering.
What to Serve with This Decadent Treat
Since this oreo dream dessert is incredibly rich and creamy, it pairs best with items that offer a bit of acidity or a different textural profile. A cup of strong, bitter black coffee or a shot of espresso cuts through the sweetness perfectly.
If you are serving this at a brunch, consider balancing the sugar with savory options like our sausage stuffed french toast rolls or a hearty french onion chicken bake. For a full dessert spread, you could add some banana blondie squares or even our samoa brownie recipe to give guests a variety of chocolate and fruit-based choices.
Common Questions About Making Oreo Lasagna
Yes! In fact, it’s better if made at least 8-24 hours in advance. This gives the layers time to set firmly and the crust time to soften just enough for the perfect fork-tender bite.
It is not recommended for the crust itself, as the extra cream can make the base too greasy and soft. Use regular Oreos for the crust, but feel free to use Double Stuf for the topping chunks!
You can, but you must stabilize it with gelatin or extra powdered sugar. Homemade whipped cream is less stable than commercial whipped topping and may cause the layers to weep or collapse over time.
Freeze the dessert for 20 minutes before slicing, and use a sharp knife dipped in hot water (and wiped dry) between every single cut to prevent the layers from smudging.
This usually happens if you used Cook & Serve pudding instead of Instant, or if the milk wasn’t cold enough. Instant pudding needs cold milk and a few minutes to react with the starches to firm up.
The Official Oreo Dream Dessert Recipe Card
Oreo Dream Dessert: The Ultimate No-Bake Oreo Lasagna Recipe
Ingredients
Equipment
Method
- Pulse 36 Oreos in a food processor until fine crumbs form. Mix with melted butter until the mixture looks like wet sand.
- Press firmly into a 9x13 dish and freeze for 10 minutes to set the foundation.
- Beat softened cream cheese and powdered sugar until smooth. Fold in half of the whipped topping. Spread evenly over the crust.
- Whisk pudding mix and cold milk for 2 minutes until thickened. Pour over the cream cheese layer and smooth with a spatula.
- Spread the remaining whipped topping over the pudding. Sprinkle with the extra 10 crushed Oreo chunks.
- Refrigerate for at least 4 hours (overnight is best) to allow the layers to stabilize for clean slicing.
Notes
Use a warm knife for clean, photo-worthy slices.

Closing & Call to Action
The oreo dream dessert is the ultimate testament to how simple ingredients can create a world-class culinary experience. With its distinct layers and rich chocolate flavor, it is guaranteed to be the star of your next event. The combination of the crunchy crust and the silky pudding is a sensory delight that never goes out of style.
If you made this recipe and captured that perfect “golden hour” slice, we want to see it! Leave a comment below and tell us how yours turned out. Don’t forget to follow thewholesomeskillet on Pinterest and share this recipe with your fellow dessert lovers. Happy chilling!