The cherry dream dessert is more than just a sweet treat; it is a visual and textural masterpiece designed to be the centerpiece of any gathering. Imagine diving your spoon through layers of airy whipped cream, velvet-smooth ivory pudding, and golden vanilla cake cubes, all tied together by a vibrant, glossy cherry filling. This no-bake wonder captures the essence of effortless elegance, providing a sophisticated flavor profile that appeals to children and gourmets alike.
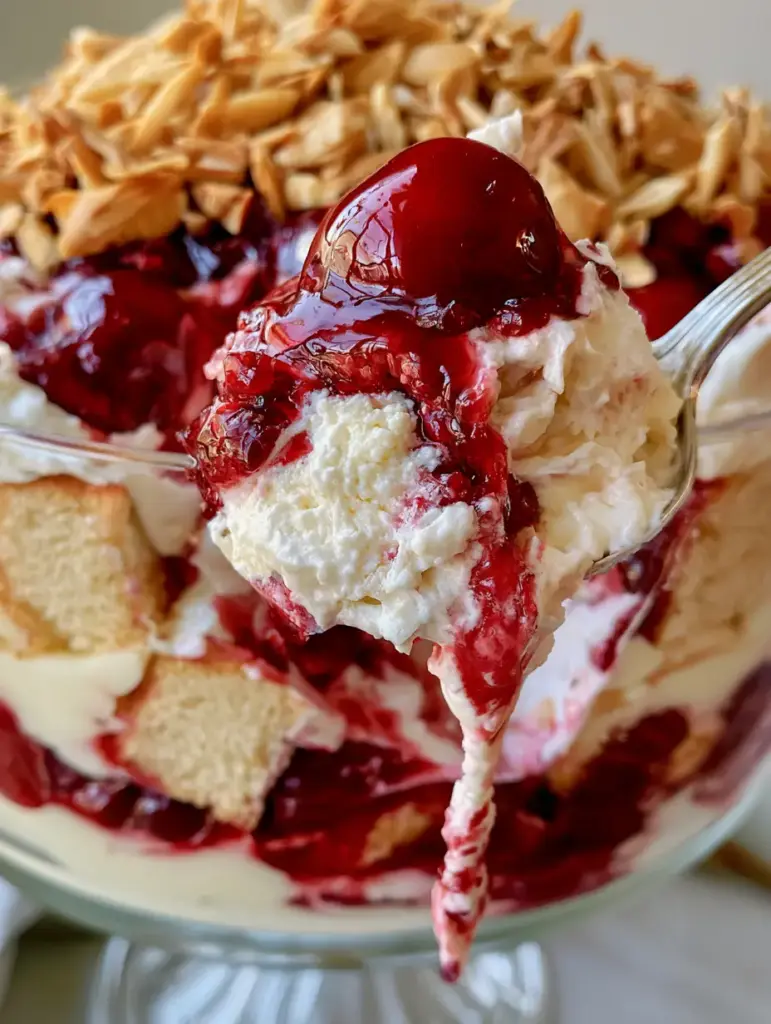
When you look at a perfectly assembled cherry dream dessert, the first thing you notice is the striking contrast of colors. The deep, ruby red of the whole cherries pops against the pristine white of the whipped cream and the soft ivory of the vanilla pudding. It is a dessert that demands attention before the first bite is even taken, making it a favorite for potlucks, holidays, and summer soirées.
Constructing this dish requires no oven time, but it does require an eye for detail. By focusing on the quality of your layers—ensuring the cake is cubed into uniform bites and the almonds are toasted to a perfect golden hue—you elevate a simple layered dessert into a professional-grade culinary experience. This guide will walk you through every scientific nuance and sensory cue needed to replicate the hyperrealistic beauty of the ultimate cherry dream dessert.
Why This Layered Cherry Masterpiece Works Every Time
- Perfect Textural Contrast: The crunch of toasted slivered almonds offsets the pillow-soft layers of cream and pudding.
- Balanced Sweetness: The tartness of the vibrant red cherries cuts through the rich vanilla base, preventing the dish from being overly cloying.
- Visual Sophistication: Utilizing a clear glass trifle dish allows each distinct layer to shine, mimicking the aesthetic of a high-end bakery.
- No-Bake Ease: By using pre-baked vanilla cake or ladyfingers, you save time without sacrificing the structural integrity of the dessert.
The Essential Components for a Glossy Cherry Delight
To achieve the specific visual result of a cherry dream dessert, you must select ingredients that offer both stability and flavor. We aren’t just looking for taste; we are looking for the “gloss” and “plumpness” described in our visual blueprint.
Vanilla Pound Cake or Sponge Cake: You will need 16 oz (450g) of cake. The cake acts as the foundation, absorbing just enough moisture from the pudding to become tender without turning into mush.
Whole Cherry Pie Filling or Compote: 21 oz (595g) of high-quality filling. Ensure it contains whole, plump cherries to provide that iconic “vibrant glossy red” look that defines the dish’s aesthetic.
Instant Vanilla Pudding Mix: Two packages (3.4 oz / 96g each). This provides the “smooth ivory” layer; using whole milk ensures a richer color and a sturdier set compared to skim milk.
Whole Milk: 3 cups (720ml). Cold milk is essential for the chemical reaction with the pudding starch to occur rapidly and smoothly.
Heavy Whipping Cream: 2 cups (480ml). This must be chilled to at least 40°F (4°C) to ensure it whips into the “airy white” peaks seen in the visual prompt.
Powdered Sugar: 1/4 cup (30g). This stabilizes the cream, allowing the layers to remain distinct even after hours in the refrigerator.
Vanilla Bean Paste or Extract: 1 tsp (5ml). Using paste adds tiny black flecks, enhancing the “ivory vanilla” visual appeal and deepening the aromatic profile.
Slivered Almonds: 1/2 cup (50g). These must be toasted until golden brown to provide the necessary “lavish garnish” and nutty aroma.
Must-Have Tools for the Professional Home Pastry Chef
Achieving the “perfectly distinct, visible layers” requires more than just a spoon. You need tools that allow for precision and clean presentation.
A Large Glass Trifle Dish is non-negotiable. Its straight, clear sides are the canvas for your cherry dream dessert, allowing the layering of the golden cake and red compote to be viewed from every angle.
A Rubber Spatula is vital for smoothing the pudding and whipped cream layers. To keep the glass clean, you must spread the fillings from the center outward to the edges carefully.
A Heavy-Bottomed Skillet is required for toasting the almonds. Even heat distribution prevents the delicate slivers from scorching, ensuring they reach that specific “golden” visual cue.
Crafting the Layers: A Step-by-Step Culinary Guide
Preparing the Golden Cake Foundation
Start by cutting your vanilla cake into 1-inch (2.5cm) cubes. Consistency is key here; uniform cubes ensure that each scoop contains a balanced ratio of cake to cream. Place half of these golden cubes at the bottom of your trifle dish, pressing them down slightly to create a stable base.
Mixing the Smooth Ivory Pudding
In a large bowl, whisk together the instant vanilla pudding mix, cold whole milk, and vanilla bean paste. Whisk vigorously for two minutes until the mixture begins to thicken. It should transition from a liquid to a smooth, ivory-colored cream that coats the back of a spoon. Let it sit for 5 minutes to fully set before layering.
Achieving Airy White Whipped Cream Peaks
Pour the chilled heavy cream into a cold bowl. Using a hand mixer or stand mixer, whisk on medium-high speed. Once soft peaks form, add the powdered sugar. Continue whisking until stiff peaks form—look for the cream to hold its shape firmly when the whisk is lifted. This stability is what prevents the cherry dream dessert from collapsing.
Toasting the Almonds for Visual Garnish
Place the slivered almonds in a dry skillet over medium heat. Do not walk away! Shake the pan frequently. As soon as you smell a nutty aroma and see the edges turn a deep golden brown, remove them from the heat and transfer to a plate to stop the cooking process.
Assembly Secrets for Hyperrealistic Results
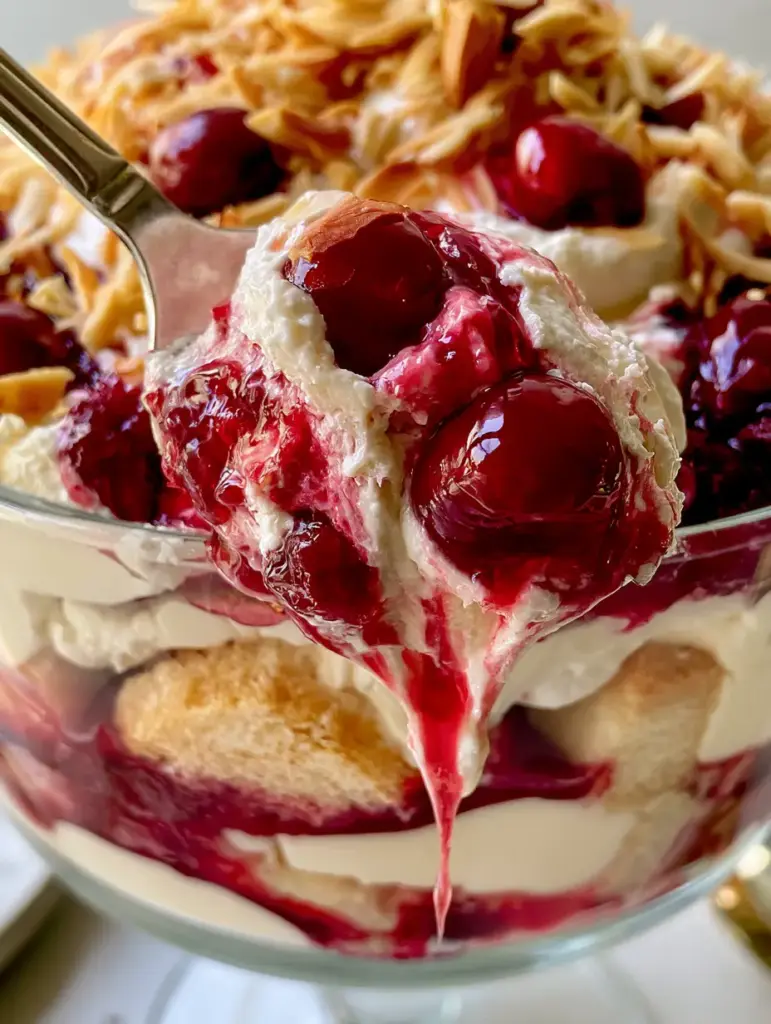
To mimic the “luscious drip of cherry sauce” seen in professional food photography, you must layer with intention. Start with half the cake, followed by half the pudding. Smooth the pudding to the edges of the glass to seal the cake layer.
Next, spoon half of the glossy cherry filling over the pudding. Allow some of the red syrup to naturally migrate toward the glass. Repeat the layers, finishing with a thick, voluminous layer of the airy whipped cream.
Just before serving, sprinkle the toasted almonds generously over the top. The contrast of the white cream and golden nuts creates the “extremely appealing” look described in the Midjourney prompt. If you are looking for a different flavor profile, you might also enjoy this ultimate no-bake Oreo dream dessert.
Expert Tips for Success
- Chill Your Bowl: Place your mixing bowl and beaters in the freezer for 10 minutes before whipping the cream. This ensures maximum volume and stability.
- Uniform Cubing: Use a serrated knife to cut the cake. This prevents the cake from tearing and keeps the “golden vanilla cake cubes” looking sharp through the glass.
- Drain Excess Liquid: If your cherry filling is overly watery, drain a tablespoon of the syrup. You want a “glossy” finish, not a runny one that will bleed into the white cream too quickly.
- The 4-Hour Rule: For the best texture, let the cherry dream dessert chill for at least 4 hours. This allows the cake to soften slightly, creating a cohesive, melt-in-your-mouth experience.
Storage and Make-Ahead Advice
This cherry dream dessert is a fantastic make-ahead option. You can assemble the entire trifle up to 24 hours in advance. Keep it tightly covered with plastic wrap in the refrigerator to prevent the whipped cream from absorbing any fridge odors.
Leftovers will keep for up to 3 days. Note that the cake will continue to soften each day. We do not recommend freezing this dessert, as the pudding and whipped cream will lose their creamy, airy textures upon thawing.
What to Serve With This Cherry Delight
Because this dessert is rich and creamy, it pairs beautifully with light, savory appetizers or other fruit-forward treats. Consider serving it after a meal of one-pan creamy marry me chicken for a truly decadent evening.
If you are hosting a larger dessert bar, this trifle sits perfectly alongside flaky cherry dessert bites or even decadent banana blondie squares for those who prefer a finger-food option. The acidity of the cherries also makes it a great follow-up to a hearty ultimate French onion chicken orzo bake.
Frequently Asked Questions
Absolutely! Simply substitute the vanilla pound cake with your favorite gluten-free sponge cake or ladyfingers. The other layers are naturally gluten-free.
Yes, but you must cook them down with sugar and a cornstarch slurry to achieve the vibrant, glossy red consistency required for the cherry dream dessert layers.
Ensure your pudding is fully set and your whipped cream has stiff peaks. Gently spread each layer from the center out to the edges using a rubber spatula.
Because it contains dairy (pudding and cream), it should not sit out for more than 2 hours. Keep it chilled until just before serving for the best texture.
Almonds can burn quickly. Ensure you remove them from the hot skillet as soon as they turn golden brown, as residual heat will continue to cook them.
The Complete Cherry Dream Dessert Recipe
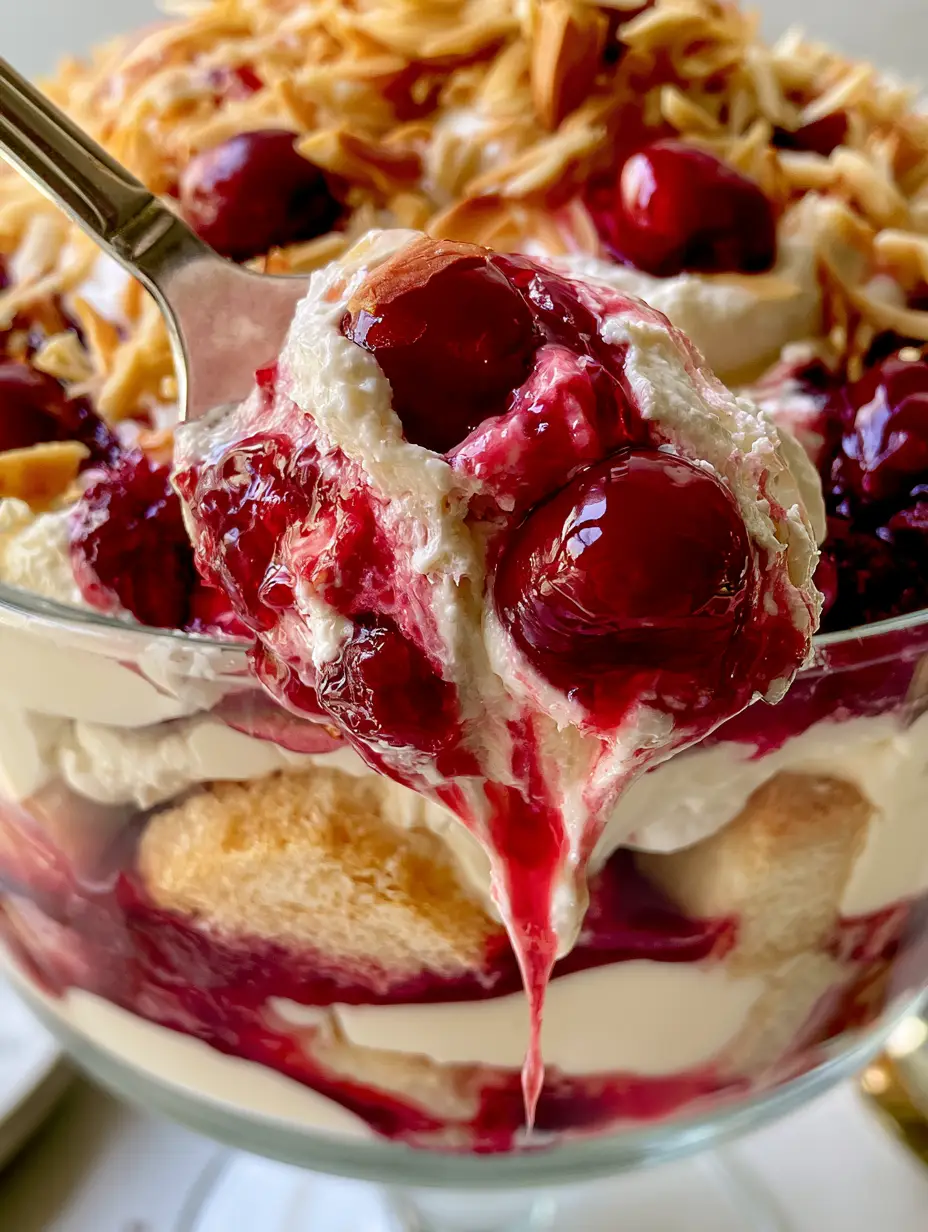
Cherry Dream Dessert: The Ultimate No-Bake Vanilla Layered Trifle
Ingredients
Equipment
Method
- Place slivered almonds in a dry skillet over medium heat. Toast for 3-5 minutes, shaking frequently, until they are golden brown and fragrant. Remove immediately to cool.
- Using a serrated knife, cut the vanilla cake into uniform 1-inch (2.5cm) cubes.
- Whisk cold milk, vanilla bean paste, and pudding mix in a bowl for 2 minutes. Let sit for 5 minutes to thicken into a smooth ivory cream.
- In a chilled bowl, beat heavy cream and powdered sugar until stiff, airy white peaks form.
- Place half of the cake cubes in the bottom of a trifle dish. Top with half of the pudding, spreading to the edges.
- Add half of the glossy cherry filling, letting it drip naturally. Repeat the layers with remaining cake, pudding, and cherries.
- Top with the whipped cream and a lavish garnish of toasted almonds. Chill for at least 4 hours before serving.
Notes
Toast almonds just before serving for maximum crunch.
Closing & Call to Action
The cherry dream dessert is a testament to the fact that you don’t need an oven to create a show-stopping finale to your meal. With its distinct layers of ivory pudding, vibrant cherries, and golden almonds, it is as beautiful to look at as it is to eat. Whether you are a seasoned pro or a kitchen novice, this recipe guarantees success through its simple steps and high-impact presentation.
If you loved this recipe, please leave a comment below and tell us how yours turned out! Don’t forget to share your beautiful creations on Pinterest and tag us. Happy layering!