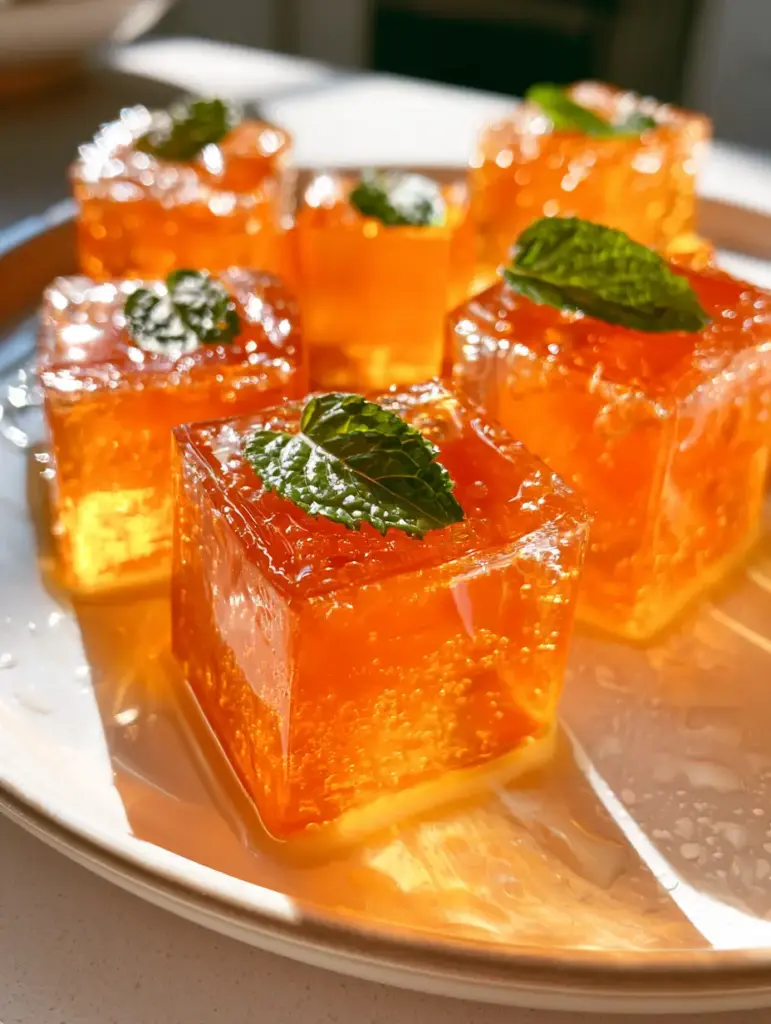
There is something inherently nostalgic and undeniably sophisticated about the perfect citrus-based snack. These gelatin treats are designed to capture the soft natural window light, creating a beautiful orange glow that transforms a simple dessert into a piece of edible art.
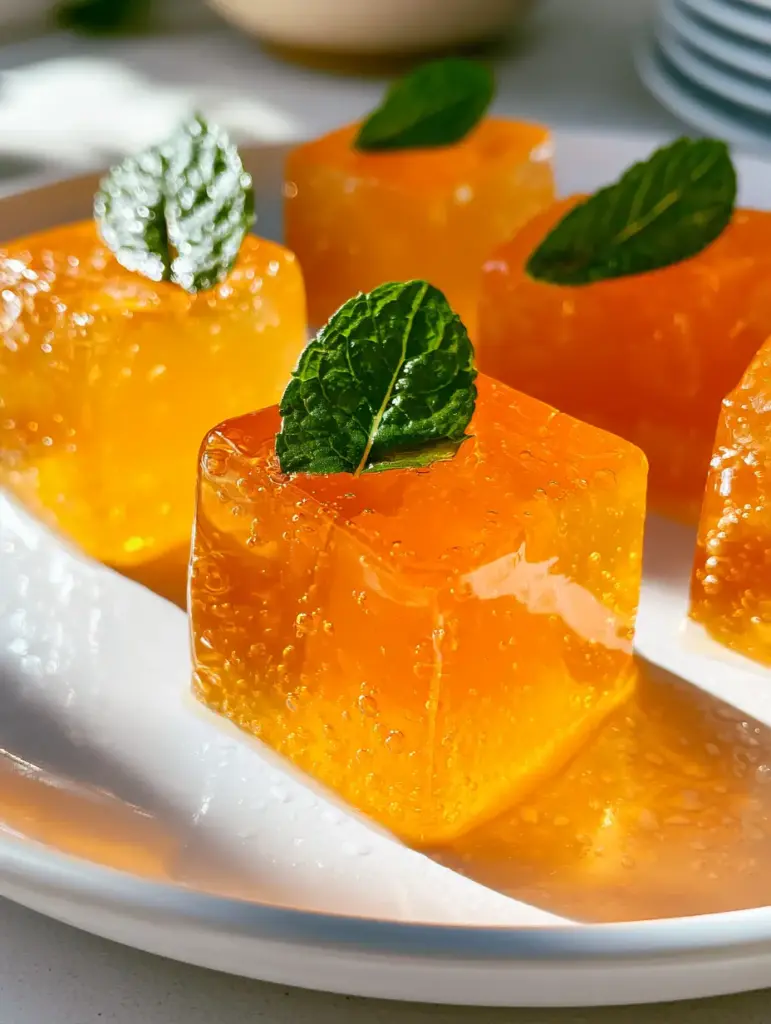
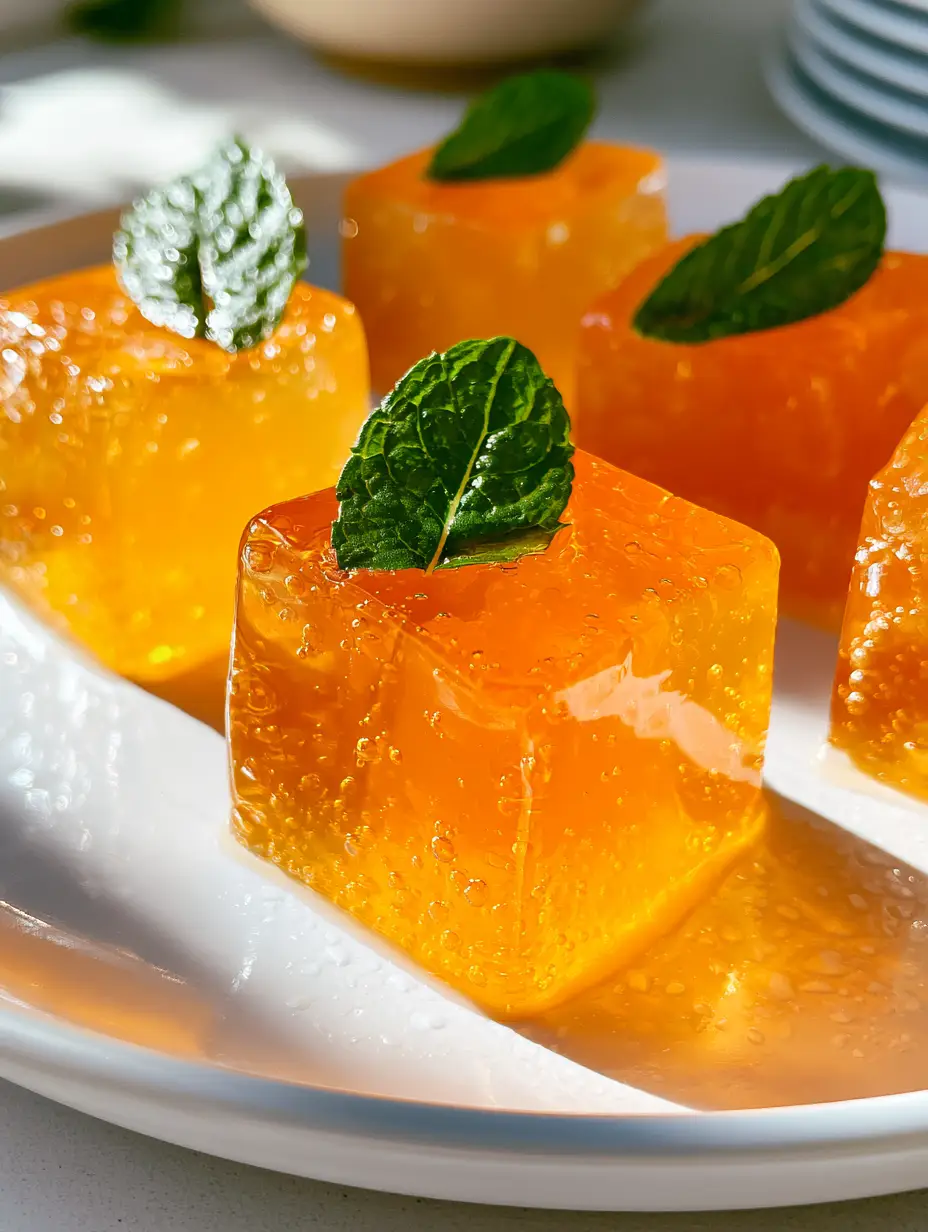
When you look at these vibrant, translucent orange gelatin cubes, you aren’t just looking at a snack; you are seeing the result of precise temperature control and culinary finesse. The crystal-clear finish and the tiny trapped air bubbles catch the light in a way that makes each cube look like a polished gemstone.
Whether you are looking for a refreshing afternoon pick-me-up or a stunning addition to a brunch spread, these treats deliver a firm yet wobbly texture. They are the sophisticated sibling of the childhood classics you remember, elevated with fresh aromatics and high-quality ingredients.
Why These Glowing Orange Cubes Are the Ultimate Refreshment
- Visual Brilliance: The translucency of the orange base provides a high-end, stained-glass appearance that glows under natural side-lighting.
- Structural Perfection: Achieves a firm enough set to be handled as finger food while maintaining a delicate, melt-in-your-mouth wobble.
- Effortless Elegance: Topped with vibrant green mint leaves and served on a minimalist white ceramic plate, these treats define modern food styling.
- Textural Interest: Tiny trapped oxygen bubbles provide a unique internal shimmer that catches the eye and differentiates these from store-bought varieties.
The Science Behind Crystal Clear Gelatin Treats
To achieve the level of clarity seen in professional food photography, the choice of ingredients is paramount. We avoid pulpy juices and cloudy sweeteners to ensure that the final result is as transparent as possible.
Unflavored Gelatin Powder: This is the structural backbone of our gelatin treats. We use high-bloom strength powder to ensure the cubes hold their sharp edges even at room temperature.
Filtered Orange Juice (Strained): To get that vibrant orange hue without the cloudiness, we use juice that has been double-strained through a fine-mesh sieve. This removes all particulates that could settle and dull the translucent finish.
Natural Sweetener (Honey or Agave): 1/4 cup (60ml) of light-colored honey provides sweetness without darkening the orange color too significantly. It also adds a subtle floral note that pairs beautifully with citrus.
Cold Filtered Water: 1 cup (240ml) of cold water is essential for the “blooming” process. This ensures the gelatin granules hydrate evenly, preventing clumps and graininess in the final set.
Fresh Mint Sprigs: These are not just for color; the mint provides a cooling aromatic contrast to the bright acidity of the orange. The vibrant green pop against the orange is a classic color theory win.
Must-Have Tools for High-End Food Styling
To recreate the exact look of our healthy gelatin snacks, you need a few specific kitchen tools. Precision is the difference between a “jello mold” and a “culinary treat.”
A 8×8 inch (20x20cm) glass baking dish is ideal for achieving the uniform height required for perfect cubes. Glass allows you to see the clarity of the mixture before it even sets.
A fine-mesh strainer is non-negotiable for removing foam and pulp. A sharp chef’s knife, dipped in hot water, is the secret to getting those clean, mirror-like sides on every single cube.
The Step-by-Step Blueprint for Vibrant Gelatin Treats
1. The Art of the Bloom
Pour 1 cup (240ml) of cold filtered water into a small bowl. Sprinkle 4 envelopes (approx. 28g) of unflavored gelatin over the surface, ensuring every granule touches the water.
Let this sit for 5 to 10 minutes. You will see the mixture turn into a thick, applesauce-like paste; this is the gelatin “blooming,” which is the secret to a smooth, lump-free texture.
2. Infusing the Orange Base
In a medium saucepan, heat 3 cups (720ml) of strained orange juice and 1/4 cup (60ml) of honey over medium heat. Do not let the mixture reach a rolling boil, as excessive heat can weaken the gelatin’s setting power.
Stir gently until the honey is fully dissolved and the liquid is steaming. The goal is to reach a temperature that is hot to the touch but not bubbling fiercely.
3. Incorporating the Gelatin and Creating Bubbles
Remove the saucepan from the heat and whisk in the bloomed gelatin. Continue whisking until the gelatin is completely transparent and no granules remain visible.
To achieve those signature trapped oxygen bubbles seen in our gelatin drink concepts, whisk the mixture vigorously for 30 seconds before pouring. This incorporates just enough air to create tiny, light-catching spheres inside the cubes.
4. The Precision Pour and Chill
Slowly pour the mixture into your glass dish. If large, unsightly bubbles form on the surface, you can lightly graze them with a spoon, but leave the tiny internal bubbles for that “frozen in time” look.
Refrigerate for at least 4 hours, or ideally overnight. The long chill time is what allows the “firm yet wobbly” texture to fully develop, ensuring the cubes don’t collapse when handled.
5. The Final Cut and Garnish
Once fully set, run a thin knife around the edges of the dish. Dip the bottom of the dish in warm water for 5 seconds to loosen the base, then invert onto a cutting board.
Cut into 1-inch (2.5cm) cubes using a warm, clean knife. Place each cube on a minimalist white ceramic plate and top with a single, perfectly placed mint leaf. For the ultimate “smartphone photo” look, let the plate sit at room temperature for 2 minutes until tiny condensation droplets begin to form.
Expert Tips for Success with Gelatin Treats
- Clarity Control: If your juice looks cloudy, try passing it through a coffee filter. It takes longer, but the resulting “crystal clear” look is worth the effort.
- Avoid Bromelain: Never use fresh pineapple, kiwi, or papaya juice in your gelatin treats. These fruits contain enzymes that break down protein, meaning your treats will never set!
- The Warm Knife Trick: Always wipe your knife clean and dip it in hot water between every single cut. This ensures the sides of the cubes stay glossy and light-reflecting.
- Lighting for Photos: To get that “orange glow,” place your plate near a window during the “golden hour.” The side-lighting will pass through the translucent gelatin, making it look like it’s lit from within.
Storing and Serving Your Refreshing Snacks
These treats are best enjoyed cold, straight from the refrigerator. Because they contain no artificial preservatives, they should be stored in an airtight container to prevent them from absorbing “fridge smells.”
They will stay fresh and firm for up to 5 days. We do not recommend freezing gelatin treats, as the freezing process breaks the protein bonds, resulting in a grainy, syrupy mess upon thawing.
If you are serving these at a party, keep them on a chilled platter. The condensation droplets that form as they meet the air actually add to the “refreshing” visual appeal, making them look even more appetizing.
Perfect Pairings for a Vibrant Dessert Spread
These citrusy cubes are light and acidic, making them the perfect palate cleanser after a rich meal. They pair beautifully with other textured desserts that offer a bit of crunch or creaminess.
Consider serving them alongside a tray of chocolate-dipped orange shortbread to echo the citrus notes. If you want a more “gut-healthy” afternoon snack, you can alternate these with pieces of gut-healing jello.
For a full dessert table, the bright orange color looks stunning next to the deep tones of biscoff mini cheesecakes or the airy texture of homemade cream puffs.
Frequently Asked Questions About Gelatin Treats
Yes, but the texture will be firmer and less ‘wobbly.’ Use 1 teaspoon of agar agar powder for every 1 cup of liquid, and ensure you boil the mixture for 2 minutes to activate the agar.
Vigorously whisk the gelatin mixture for about 30 seconds just before pouring it into your setting dish. This incorporates oxygen that stays trapped as the mixture thickens and sets.
The secret is using double-strained, pulp-free juice and blooming the gelatin in cold water before heating. Avoid boiling the mixture, as this can create cloudiness and weaken the set.
When stored in an airtight container, these treats stay fresh and maintain their texture for up to 5 days. Do not freeze them, as they will lose their structural integrity.
Most likely, the juice contained enzymes from fruits like fresh pineapple or kiwi, or the gelatin wasn’t fully dissolved. Ensure you use only citrus or pasteurized juices to avoid enzyme interference.
The Ultimate Refreshing Orange Gelatin Recipe
Gelatin Treats with Vibrant Orange and Fresh Mint
Ingredients
Equipment
Method
- Place 1 cup (240ml) of cold water in a bowl and sprinkle the gelatin powder over the top. Let it sit for 5-10 minutes until it forms a thick paste.
- In a saucepan, combine the strained orange juice and honey. Heat over medium until steaming but not boiling.
- Whisk the bloomed gelatin into the hot juice until completely dissolved and crystal clear. Whisk vigorously for 30 seconds to incorporate tiny oxygen bubbles.
- Pour the mixture into the glass dish. Refrigerate for at least 4 hours until firm yet wobbly.
- Slice into 1-inch cubes using a warm knife. Garnish with fresh mint and serve on a white plate to showcase the translucency.
Notes
Do not use fresh pineapple or kiwi as they prevent setting.
Closing & Call to Action
Creating these vibrant orange gelatin treats is a masterclass in how simple ingredients can produce extraordinary visual results. The combination of the translucent orange glow and the fresh mint garnish creates a sensory experience that is as beautiful as it is delicious.
If you enjoyed this deep dive into culinary aesthetics, please leave a comment below and let us know how your trapped bubbles turned out! Don’t forget to follow us on Pinterest and share your creations with the community.