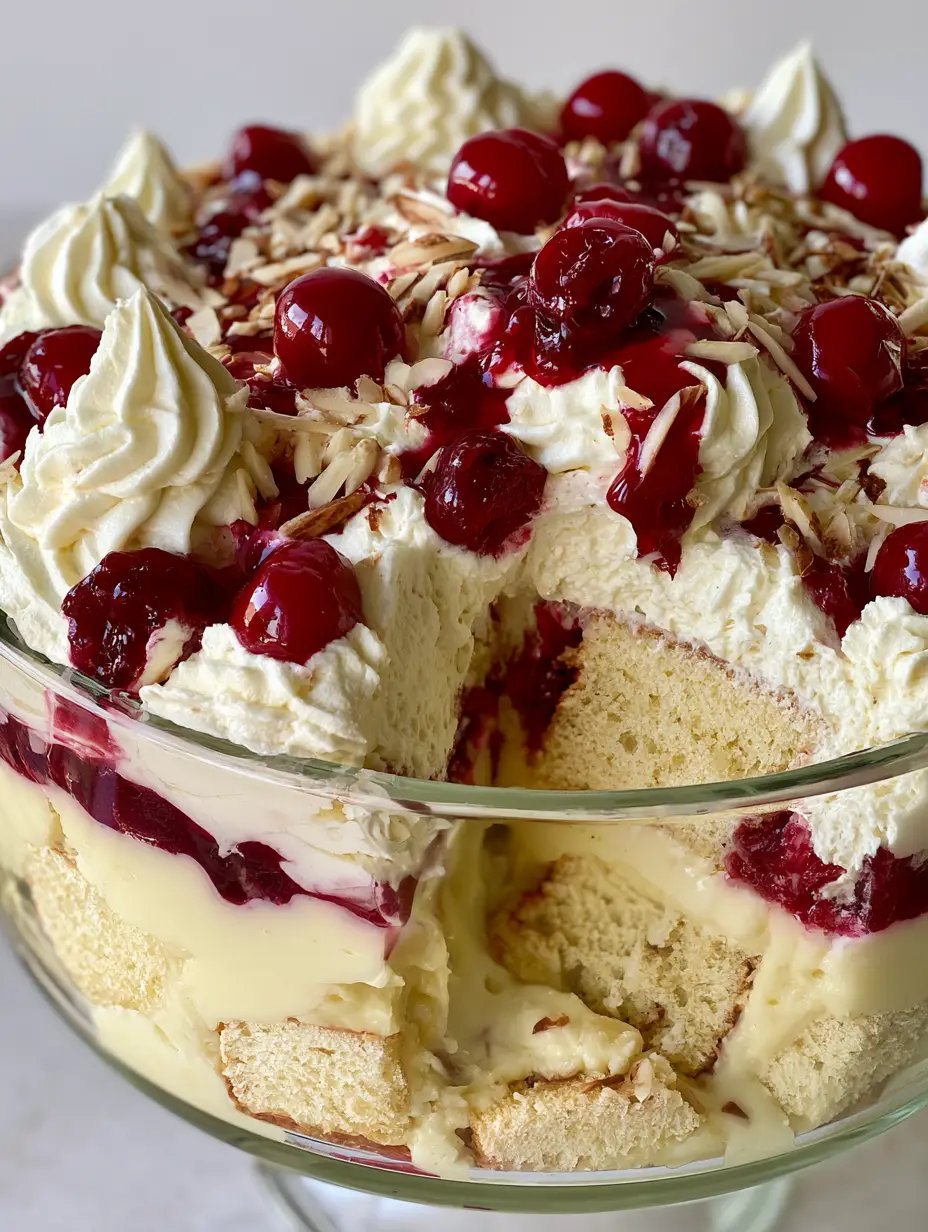
When it comes to show-stopping finales, few things command a table quite like a perfectly constructed cherry dream dessert. This isn’t just a simple treat; it is a visual masterpiece of textures and colors, designed to be seen through the crystal-clear walls of a traditional trifle dish. With its distinct, perfectly defined layers, this dessert offers a symphony of moisture, crunch, and creaminess that keeps guests coming back for seconds.
Inspired by classic mid-century potluck favorites but elevated with modern culinary techniques, this version focuses on the forensic details. We are talking about moist, golden cake cubes that act as the structural foundation, paired with a silky, pale yellow vanilla pudding. The topping is where the magic happens: elegant swirls of piped whipped cream adorned with glistening maraschino cherries and a rich, glossy cherry pie filling.
Whether you are looking for a centerpiece for a summer gathering or a reliable holiday classic, this cherry dream dessert delivers high-impact results with minimal stress. Because it is a no-bake recipe, you can focus entirely on the artistry of the assembly. The contrast between the vibrant red fruit and the toasted, golden slivered almonds ensures every spoonful is as beautiful as it is delicious.
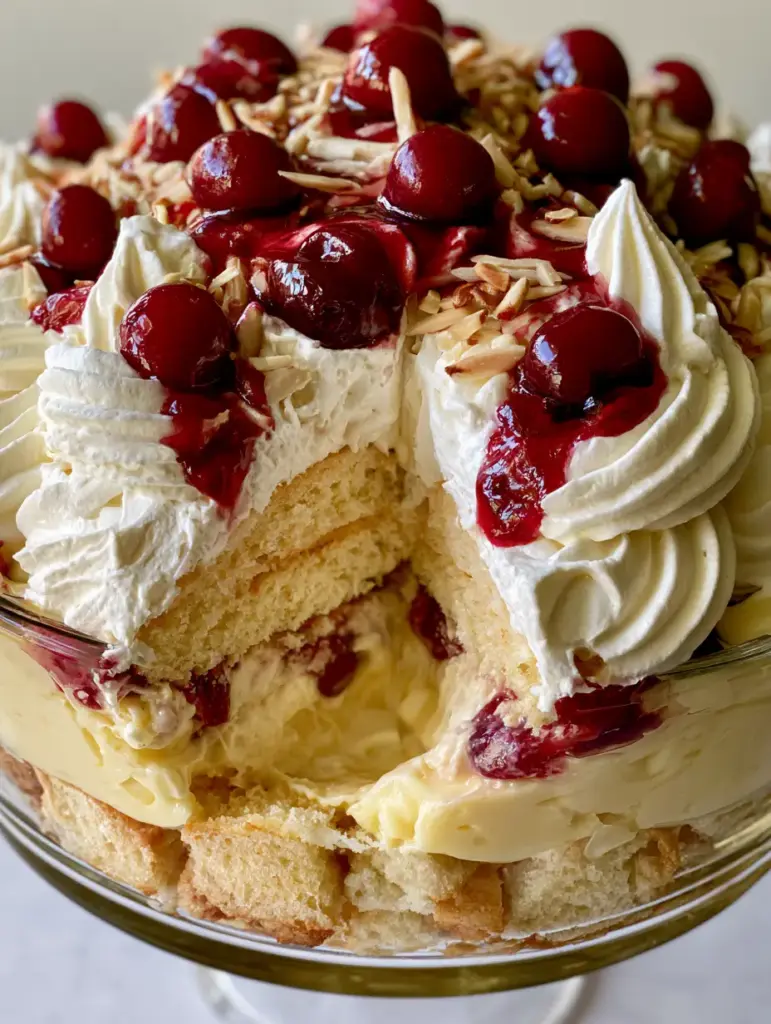
The Anatomy of a Perfect Layered Cherry Trifle
- Structural Integrity: By using dense golden cake cubes rather than crumbs, we ensure the dessert maintains its height and definition even after slicing.
- Visual Contrast: The interplay between the pale yellow vanilla pudding and the deep jewel-toned cherry filling creates a striking aesthetic.
- Textural Harmony: The soft, fluffy whipped cream peaks provide a cloud-like bed for the crunch of toasted slivered almonds.
- Sensory Balance: The tartness of the cherry pie filling perfectly cuts through the rich sweetness of the vanilla bean-infused pudding.
Essential Ingredients for Your Cherry Dream Dessert
Golden Pound Cake or Sponge Cake (16 oz / 450g): You need a cake that is moist but sturdy. A golden butter cake provides the perfect “sponge” to soak up just enough moisture from the pudding without becoming mushy.
Instant Vanilla Pudding Mix (two 3.4 oz / 96g boxes): This creates the signature pale yellow layer. When prepared with cold milk, it sets quickly, providing the necessary viscosity to support the heavy fruit layers above.
Whole Milk (3 cups / 720ml): Use full-fat milk for the richest mouthfeel. This foundational liquid is what hydrates the pudding mix and ensures a creamy, luxurious consistency.
Heavy Whipping Cream (2 cups / 480ml): We aren’t using canned spray here. Freshly whipped cream, beaten to stiff peaks, is required to achieve those elegant piped swirls that hold their shape.
Powdered Sugar (1/4 cup / 30g): This sweetens the whipped cream and acts as a stabilizer. It helps the cream maintain its structure in the fridge.
Cherry Pie Filling (21 oz / 600g): Look for a “premium” variety with a high fruit-to-glaze ratio. This provides the rich, glossy red drizzle seen in the visual blueprint.
Maraschino Cherries (10-12 oz / 300g jar): These glistening, jewel-toned fruits are the crown jewels of the dessert. Be sure to drain them well and pat them dry to prevent red dye from bleeding into the white cream.
Slivered Almonds (1/2 cup / 50g): Toasting these is non-negotiable. The golden crunch they provide is the essential textural counterpoint to the soft pudding and cake.
Pure Vanilla Extract (1 tsp / 5ml): A foundational invisible ingredient that enhances the “dreamy” quality of the cream and pudding layers.
Professional Equipment for a Visual Masterpiece
To achieve the look of a high-resolution food photograph, the right tools are essential. You will need a large, clear glass trifle dish (approximately 3-4 quart capacity) to showcase those perfectly defined layers. A sharp serrated knife is required to cut the golden cake into uniform 1-inch (2.5cm) cubes, ensuring a clean look from the outside.
For the cream layer, a large piping bag fitted with a star tip (like a 1M or 2D) is necessary to create the elegant swirls and peaks described in the Midjourney prompt. A heavy-bottomed skillet is best for toasting the almonds evenly, while a handheld or stand mixer is vital for achieving the stiff peaks in your whipped cream.
Step-by-Step Construction Guide
Preparing the Foundational Components
Start by cutting your golden cake into uniform 1-inch (2.5cm) cubes. Consistency here is key; irregular sizes will lead to uneven layers. Set these aside in a bowl.
In a separate large mixing bowl, whisk together the vanilla pudding mix and the cold whole milk. Continue whisking for 2 minutes until the mixture begins to thicken. It should be a beautiful, pale yellow. Let it sit for 5 minutes to fully set before assembly.
Achieving the Perfect Piped Cream
Pour the cold heavy whipping cream, powdered sugar, and vanilla extract into a chilled bowl. Beat on medium-high speed until stiff peaks form. You will know it is ready when the whisk leaves deep, defined tracks in the cream that do not collapse.
Transfer about two-thirds of the cream into your piping bag. The remaining third will be used as a base layer for the cherries. If you enjoy this technique, you might also like the light texture found in our zesty lemon dream pie.
Toasting the Almonds for Maximum Flavor
Place the slivered almonds in a dry skillet over medium heat. Toss them frequently for 3-5 minutes. Watch for the sensory cues: they should turn a light golden brown and release a distinct nutty aroma. Immediately remove them from the pan to stop the cooking process.
Assembling the Layers
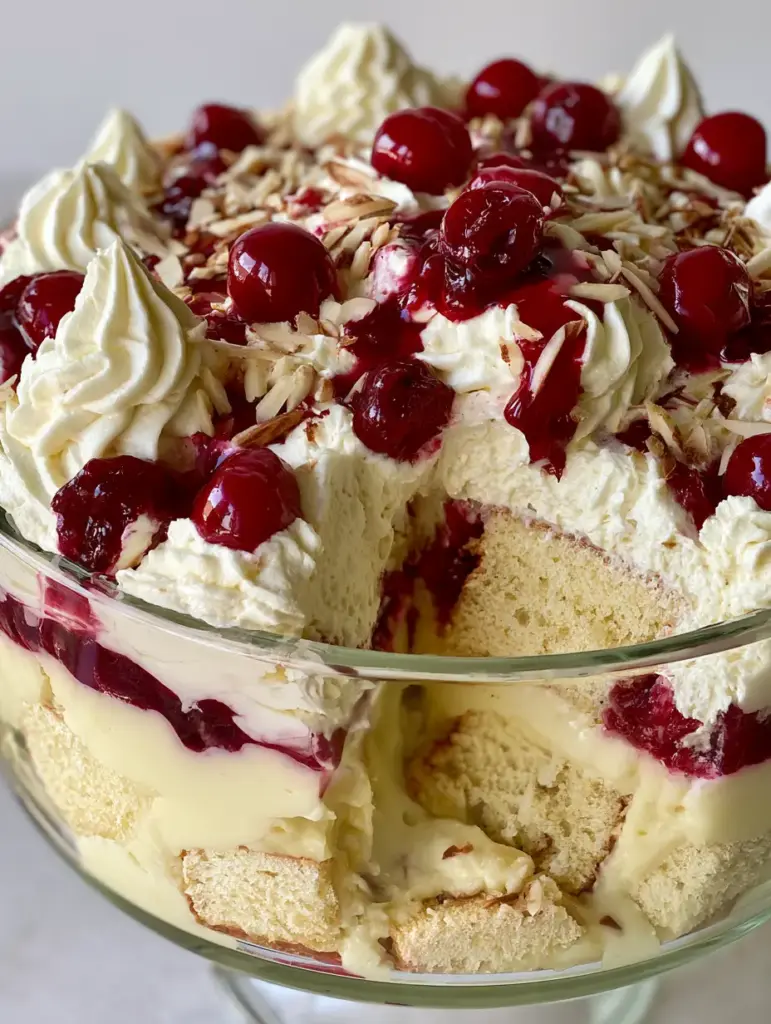
Place the golden cake cubes at the bottom of the clear glass trifle dish. Press them down gently to create a level surface. Pour the pale yellow vanilla pudding over the cake, using a spatula to spread it all the way to the edges of the glass.
Smooth the un-piped portion of the whipped cream over the pudding. Now, take your piping bag and create elegant swirls and peaks across the entire surface. Start from the outside edge and work your way toward the center.
The Final Artistic Flourish
Artfully drizzle the rich, glossy cherry pie filling over the piped cream, allowing some of the glaze to drip into the crevices. Carefully place the glistening whole maraschino cherries on top, allowing some to sink slightly into the cream for a natural, handheld smartphone photo aesthetic.
Finish by sprinkling the toasted slivered almonds liberally across the top. The golden crunch against the red cherries creates a stunning visual contrast. If you love no-bake delights, consider trying our ultimate no-bake Oreo dream dessert for your next event.
Expert Tips for a Stunning Result
- Chill Your Bowl: For the fluffiest whipped cream, place your mixing bowl and whisk attachment in the freezer for 15 minutes before beating.
- Pat the Cherries Dry: Maraschino cherries are packed in syrup. Use a paper towel to pat them dry before placing them on the cream to prevent “bleeding” or staining the white peaks.
- Define the Edges: When adding the pudding and cream, always start by spreading the mixture against the glass wall first, then fill the center. This ensures the layers look perfectly defined from the outside.
- Don’t Over-mix: When folding in flavors or using the piping bag, handle the cream gently to keep those elegant swirls from deflating.
Storage and Make-Ahead Advice
The cherry dream dessert is actually better when made a few hours in advance. This allows the cake cubes to soften slightly and the flavors to meld. Cover the trifle dish tightly with plastic wrap and store in the refrigerator.
This dessert will stay fresh for up to 2-3 days in the fridge. However, for the best visual appeal, add the toasted almonds and maraschino cherries just before serving to maintain the “glistening” look and the “golden crunch.” We do not recommend freezing this dessert, as the pudding texture can become grainy upon thawing.
Perfect Pairings and Occasions
This dessert is the perfect follow-up to a rich, savory meal. It balances the palate after heavy dishes like our ultimate French onion chicken orzo bake or a hearty savory kielbasa cheesy potato bake.
For a themed dessert bar, serve it alongside other easy treats like decadent banana blondie squares or flaky cherry dessert bites. The bright red color makes it particularly suitable for Valentine’s Day, Christmas, or summer 4th of July celebrations.
Frequently Asked Questions
Absolutely! Making it 4-24 hours in advance allows the layers to set and the cake to absorb flavor. Just wait until right before serving to add the toasted almonds to maintain their crunch.
Yes, but ensure they are completely thawed and patted dry. Frozen cherries lack the glistening, bright red ‘jewel’ look of maraschino cherries and are much tarter, so you may need to add a touch of sugar.
Use a large spoon to place the pudding and cream, starting at the edges against the glass. Wiping any stray drips with a damp paper towel before adding the next layer ensures a professional, forensic look.
Use powdered sugar as a stabilizer and ensure your heavy cream is very cold before whipping. For extra stability, you can add a tablespoon of instant vanilla pudding mix to the cream while beating.
A dense golden pound cake or a sturdy sponge cake works best. Avoid light, airy cakes like angel food, as they tend to collapse and become soggy under the weight of the pudding and cherries.
The Complete Cherry Dream Dessert Recipe Card
Cherry Dream Dessert: The Ultimate No-Bake Layered Trifle Recipe
Ingredients
Equipment
Method
- Cut the golden pound cake into uniform 1-inch cubes using a serrated knife.
- Whisk pudding mix and cold milk for 2 minutes until smooth and pale yellow. Let set for 5 minutes.
- Heat slivered almonds in a dry skillet over medium heat until golden brown and fragrant (3-5 minutes).
- Beat heavy cream, powdered sugar, and vanilla until stiff peaks form. Transfer 2/3 to a piping bag with a star tip.
- Place cake cubes in the bottom of the trifle dish. Pour pudding over the top, spreading to the edges.
- Spread the remaining 1/3 of whipped cream over the pudding. Pipe elegant swirls and peaks over the surface.
- Drizzle cherry pie filling over the cream. Add maraschino cherries and sprinkle liberally with toasted almonds.
Notes
Pat the maraschino cherries dry with paper towels to prevent red syrup from bleeding into the whipped cream.
Bringing the Dream to Life
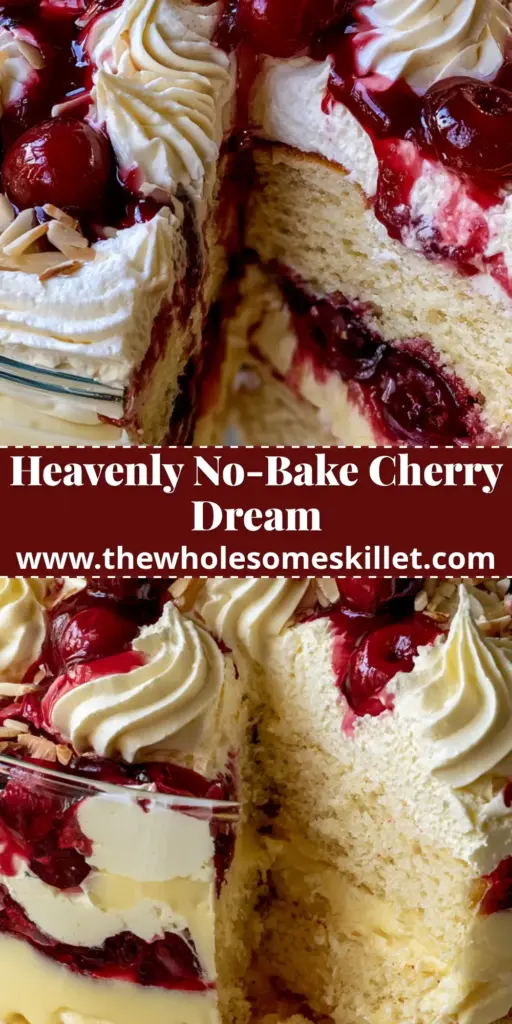
This cherry dream dessert is a testament to the fact that you don’t need an oven to create a world-class dessert. By focusing on the visual cues—the elegant swirls, the jewel-toned cherries, and the toasted almond crunch—you create an experience that starts with the eyes and ends with a satisfied palate. It is a reliable, aesthetic, and absolutely delicious addition to any recipe repertoire.
If you enjoyed making this stunning trifle, please leave a comment below and share your photos with us! Don’t forget to follow thewholesomeskillet on Pinterest for more visually inspired recipes and kitchen tips. Happy layering!