There is nothing quite like the sensory experience of pulling a warm, buttery tray of homemade cheese sticks out of the oven. The aroma of roasted garlic and toasted parmesan immediately fills the kitchen, signaling that something truly indulgent is ready to be shared.
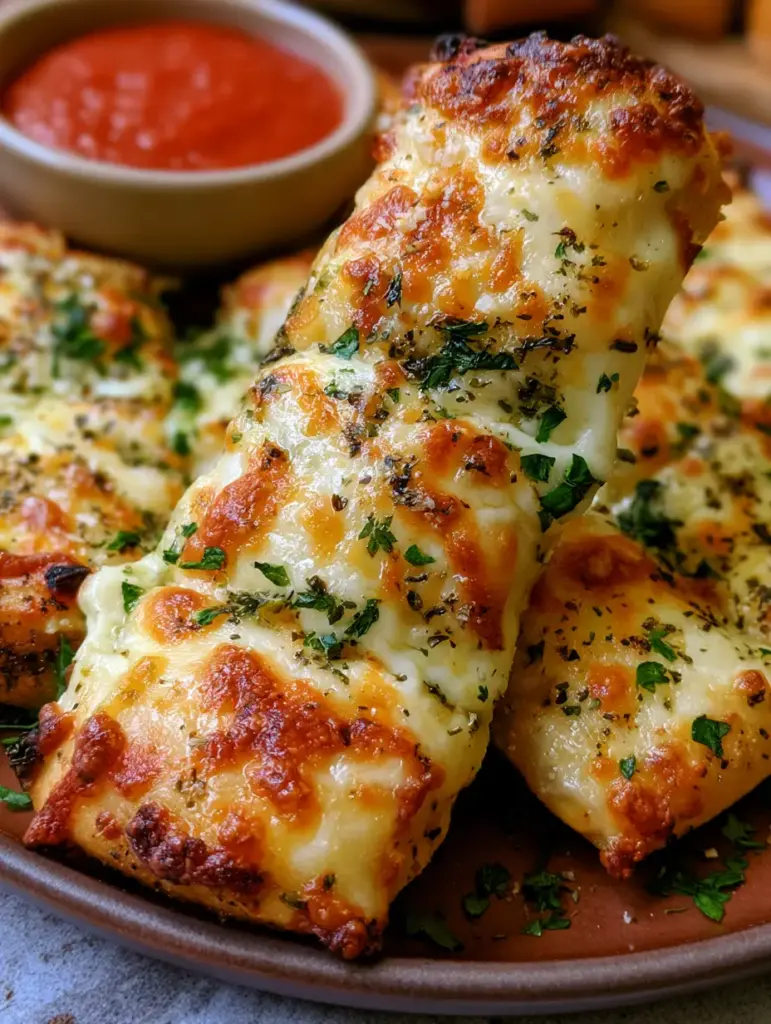
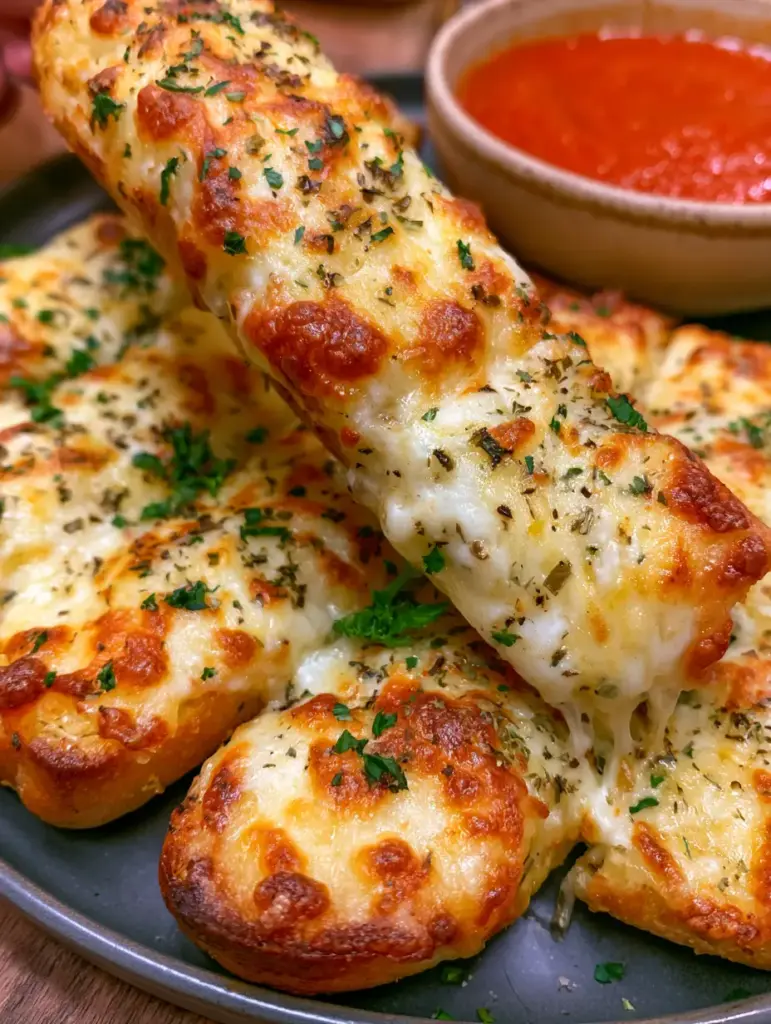
Imagine lifting a single slice and witnessing an epic, stretchy cheese pull that seems to go on forever. That is exactly what this recipe delivers—a perfect balance of fluffy pizza dough, a double-hit of premium cheeses, and a herbaceous finish that rivals any professional pizzeria.
Whether you are hosting a game day gathering or just looking for the perfect side for your favorite Italian chicken pasta, these breadsticks are designed to impress. We have engineered this recipe to achieve that specific golden-brown, bubbly texture seen in high-end food photography, all from the comfort of your own home.
Why These Are the Best Homemade Cheese Sticks You Will Ever Make
- The Ultimate Cheese Pull: By using a specific blend of high-moisture mozzarella, we ensure every bite has that iconic, stretchy texture.
- Double Cheese Dimension: We combine the melting power of mozzarella with the salty, nutty crunch of toasted parmesan for a complex flavor profile.
- Professional Crust Texture: The pizza dough is treated with a garlic-infused butter wash both before and after baking to ensure a soft interior and a crisp, golden exterior.
- Visual Perfection: With blistered cheese bubbles and bright green fresh parsley, these look just as good as they taste.
The Anatomy of a Perfect Cheesy Breadstick: Ingredients & Substitutions
To achieve the results seen in our visual blueprint, every ingredient plays a specific role. From the structural integrity of the dough to the aromatic top notes of the herbs, here is what you will need.
Pizza Dough: You will need 1 lb (450g) of high-quality pizza dough. You can use store-bought refrigerated dough for convenience or your favorite homemade fermented recipe for a deeper flavor.
Melted Butter: 4 tbsp (56g) of unsalted butter acts as the fat source that browns the crust. It carries the garlic flavor deep into the dough’s pores during the bake.
Garlic Powder: 1 tsp (3g) provides a uniform, savory aroma without the risk of fresh garlic bits burning in a high-heat oven. It creates that classic “pizzeria” scent.
Shredded Mozzarella Cheese: 2 cups (225g) of mozzarella provide the bulk of the “pull.” We recommend grating your own from a block to avoid the anti-caking agents found in pre-shredded bags.
Grated Parmesan Cheese: 1/4 cup (25g) of parmesan adds a sharp, salty contrast. Because it has a lower moisture content, it toasts into a beautiful golden-brown crust on top of the mozzarella.
Dried Oregano: 1 tsp (1g) of this earthy herb is baked directly into the cheese. It provides that nostalgic, savory backbone found in traditional Italian comfort food.
Fresh Chopped Parsley: 2 tbsp (8g) of fresh parsley added after baking provides a pop of color and a clean, grassy finish that cuts through the richness of the fats.
Thick Marinara Sauce: 1 cup (245g) of vibrant red marinara is the essential dipping companion. The acidity of the tomatoes balances the heavy cheese and butter profile perfectly.
Invisible Essentials: Don’t forget 1 tbsp (15ml) of extra virgin olive oil for greasing the pan and a pinch of fine sea salt to enhance the dough’s natural flavors.
Essential Kitchen Tools for Bakery-Style Results
To get the handheld, smartphone-photo-worthy results we are aiming for, you need the right gear. A heavy-duty rimmed baking sheet is the most important tool for heat distribution.
A silicone pastry brush is vital for evenly Distributing the melted garlic butter across the entire surface of the dough. This ensures no dry spots and a uniform golden-brown finish.
A sharp pizza cutter or a bench scraper will help you achieve those clean, straight edges that make these homemade cheese sticks look professional. Finally, parchment paper is a non-negotiable for easy cleanup and preventing the cheese from sticking to the pan.
Step-by-Step Instructions to Cheesy Perfection
Preparing the Canvas
Preheat your oven to 425°F (220°C). While the oven heats, take your 1 lb (450g) of pizza dough out of the refrigerator and let it sit at room temperature for at least 20 minutes.
This rest period relaxes the gluten, making it much easier to stretch without it snapping back. Lightly grease a large baking sheet with olive oil or line it with parchment paper.
The Butter and Garlic Infusion
In a small microwave-safe bowl, melt 4 tbsp (56g) of butter. Stir in 1 tsp (3g) of garlic powder until fully combined. The smell should be intensely savory.
Stretch the dough into a large rectangle, about 1/2 inch (1.25cm) thick, on your prepared pan. Use your pastry brush to liberally coat the entire surface with about two-thirds of the garlic butter, saving the rest for later.
Layering the Cheeses and Herbs
Evenly distribute 2 cups (225g) of shredded mozzarella across the dough, leaving a tiny 1/4-inch border for the crust to puff up. Sprinkle the 1/4 cup (25g) of parmesan over the top.
Finally, dust the cheese layer with 1 tsp (1g) of dried oregano. The oregano will slightly toast in the oven, releasing its essential oils directly into the melting cheese.
The High-Heat Bake
Slide the pan into the center rack of the oven. Bake for 12-15 minutes. Look for specific sensory cues: the cheese should be bubbling and showing small brown leopard spots, and the edges of the dough should be a deep, buttery golden-brown.
If you want a more “toasted” look like the one in our prompt, you can broil the sticks for the final 60 seconds, watching very closely to prevent burning.
The Finishing Touches
Remove the tray from the oven. Immediately brush the remaining garlic butter over the hot crust edges. This adds a spectacular shine and a final punch of flavor.
Garnish the entire tray with 2 tbsp (8g) of freshly chopped parsley. The residual heat will slightly wilt the parsley, locking it onto the melted cheese. Let the sticks rest for 3 minutes before slicing to ensure the cheese sets enough for a clean cut.
Expert Tips for Success
- Don’t Over-Flour: Use as little flour as possible when stretching the dough. Excess flour can burn on the bottom of the pan and create a bitter taste.
- Cold Cheese vs. Warm Dough: Ensure your cheese is cold when it goes onto the dough. This allows the dough to cook through perfectly before the cheese becomes overly greasy.
- The Dip Strategy: Always warm your marinara sauce before serving. A cold dip will instantly solidify the cheese pull of your homemade cheese sticks.
- Dough Thickness: For a “Pizza Hut” style, keep the dough slightly thicker. If you prefer a thin-crust style, stretch it further, but reduce the bake time by 3 minutes.
Storage, Reheating, and Freezing
If you have leftovers, store them in an airtight container in the refrigerator for up to 3 days. These are excellent for a quick lunch alongside some savory ham and cheese pastries.
To reheat and maintain the crispness, avoid the microwave. Instead, place the cheese sticks in a toaster oven or air fryer at 350°F (175°C) for 4-5 minutes until the cheese is bubbly again.
You can also freeze these! Flash freeze the sliced sticks on a tray before transferring them to a freezer bag. They will stay fresh for up to 2 months and can be reheated directly from frozen at a slightly lower temperature.
What to Serve With Homemade Cheese Sticks
These cheesy delights are incredibly versatile. They serve as a fantastic appetizer for a heavy meal like roasted beef tenderloin or a lighter pasta dish.
For a full Italian-inspired spread, pair them with lemon ricotta spaghetti or a hearty vegetable white lasagna. The acidity and brightness of lemon-based dishes provide a wonderful contrast to the heavy mozzarella and garlic butter.
If you are looking for more snackable options for a party, consider adding jalapeño cream cheese dip to your appetizer table for guests who like a bit of heat.
Frequently Asked Questions
Yes! You can air fry them at 375°F (190°C) for about 6-8 minutes. Just ensure the dough is rolled thin enough to cook through quickly without burning the cheese.
Absolutely! Store-bought refrigerated dough works perfectly. Just make sure to let it sit at room temperature for 20 minutes before stretching to ensure it doesn’t snap back.
Preheating your baking sheet or using a pizza stone can help. Additionally, don’t overdo the marinara or butter wash on the raw dough, as excess moisture will soak in rather than evaporating.
The best way to reheat is in an oven or air fryer at 350°F (175°C). This restores the crispness of the crust, whereas a microwave will make the dough chewy and soft.
The secret to an epic cheese pull is using high-moisture mozzarella and grating it yourself from a block. Pre-shredded cheeses are coated in potato starch, which prevents them from fusing together and stretching.
The Ultimate Homemade Cheese Sticks Recipe
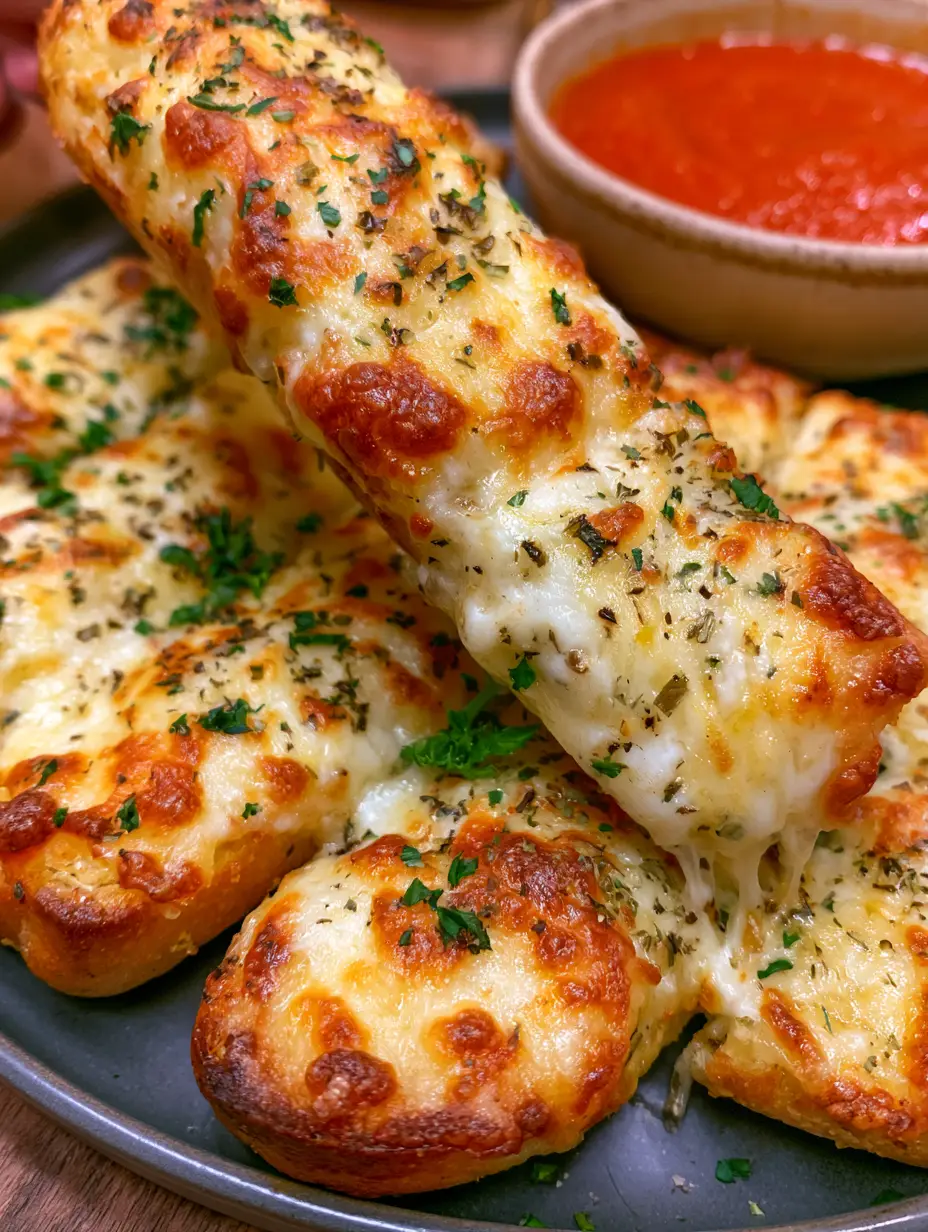
Homemade Cheese Sticks: The Ultimate Cheesy Pizza Hut Copycat
Ingredients
Equipment
Method
- Preheat your oven to 425°F (220°C). Grease a large baking sheet with olive oil or line with parchment paper.
- Stretch the room temperature pizza dough into a large rectangle, roughly 1/2 inch thick, on the prepared baking sheet.
- Mix melted butter and garlic powder. Brush 2/3 of the mixture over the dough surface.
- Cover the dough with shredded mozzarella, then sprinkle with parmesan and dried oregano.
- Bake for 12-15 minutes until the crust is golden-brown and the cheese is bubbly with toasted brown spots.
- Remove from oven, brush edges with remaining garlic butter, sprinkle with fresh parsley, and slice into sticks.
Notes
Ensure the dough is at room temperature before stretching to prevent it from shrinking back.

Join The Wholesome Skillet Community!
We hope these homemade cheese sticks become a staple in your household. There is nothing quite as satisfying as mastering a classic pizzeria favorite in your own kitchen. The combination of that garlic-buttery crust and the epic cheese pull is guaranteed to make this a family favorite.
If you enjoyed this recipe, please leave a comment below and let us know how your cheese pull turned out! Don’t forget to share your photos and tag us, and be sure to follow The Wholesome Skillet on Pinterest for more indulgent comfort food recipes.