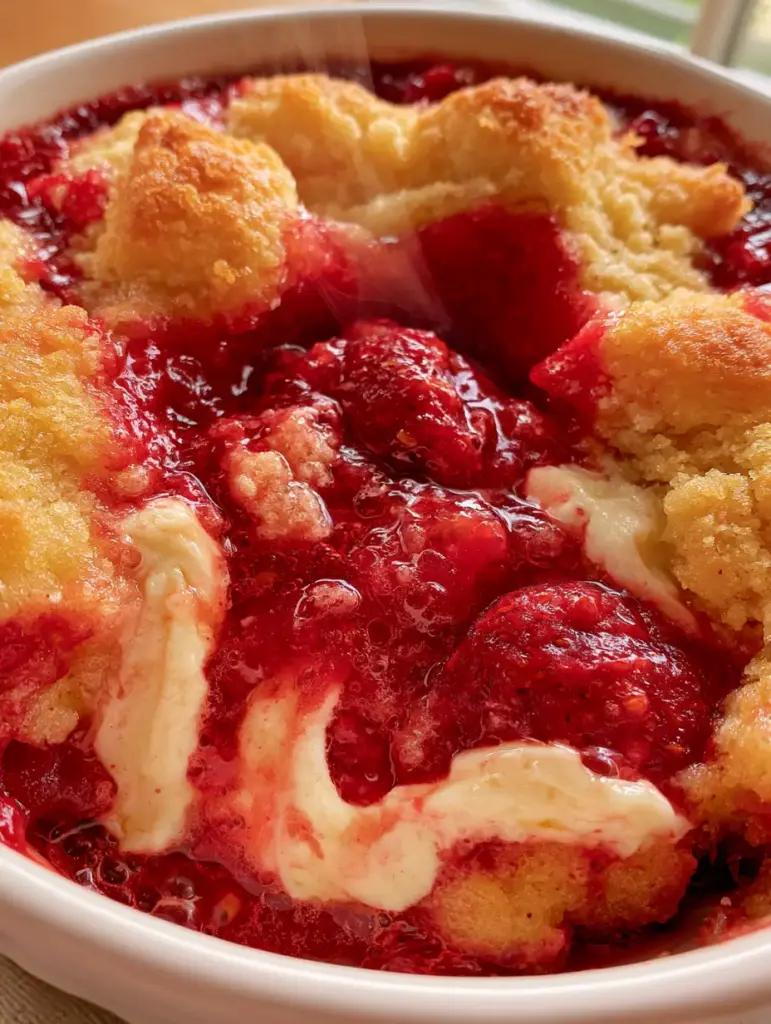
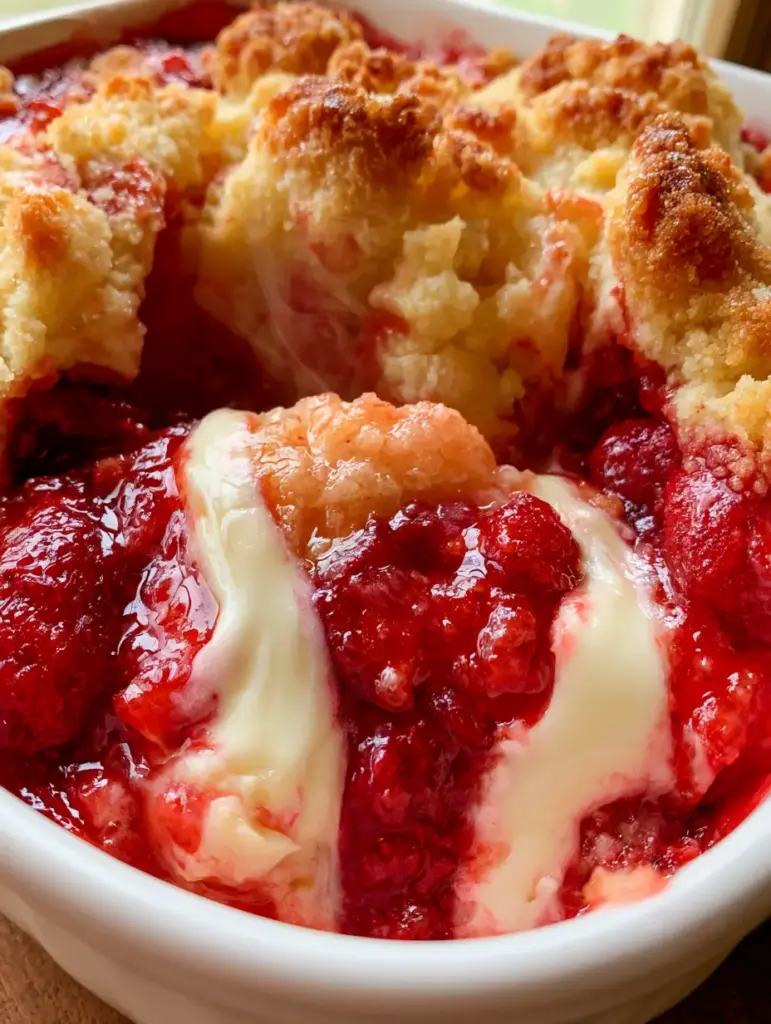
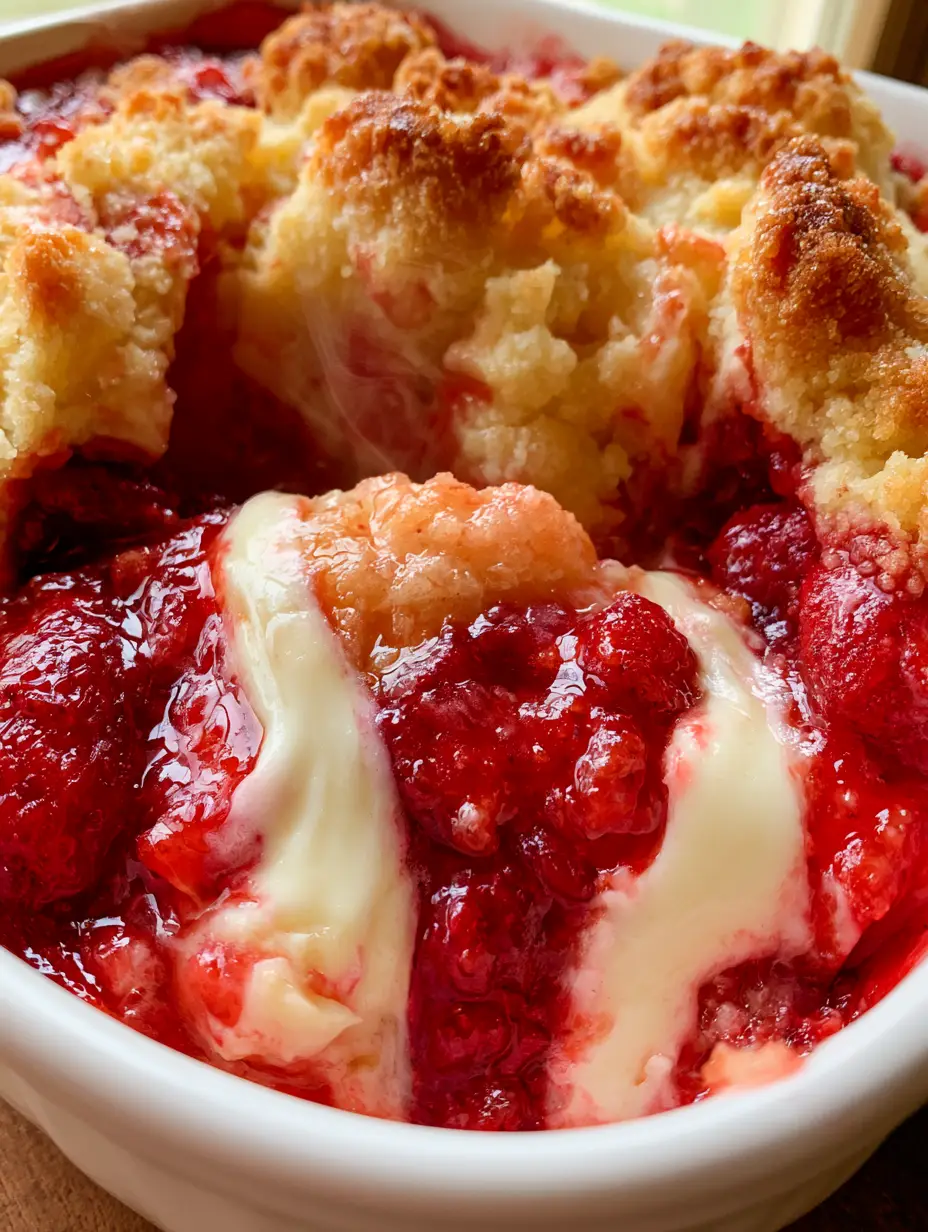
There is a specific kind of magic that happens in the oven when simple pantry staples transform into a gourmet masterpiece. This strawberry cheesecake dump cake is the epitome of that culinary alchemy. Imagine diving your spoon into a white ceramic dish to reveal a subterranean layer of bubbling, glistening red strawberry syrup, thick with whole softened fruit, only to be met by ribbons of melted, tangy cream cheese and a crust that shatters with a buttery, golden-brown crunch. It is the ultimate low-effort, high-reward dessert that looks like it took hours but requires almost no dishes.
When you pull this out of the oven, the first thing you’ll notice is the steam lightly rising from the hot center, carrying the scent of toasted vanilla and cooked berries. The visual contrast between the deep red filling and the thick swirls of white cream cheese makes it an instant showstopper at any gathering. Whether you are a seasoned baker or a kitchen novice, this recipe is designed to deliver consistent, professional-grade results with every single bake.
Why You Will Fall in Love With This Strawberry Cheesecake Delight
- The Texture Contrast: You get the moist, sponge-like base layer that has soaked up the strawberry juices, topped with a crunchy, toffee-like crumble.
- Decadent Cream Cheese Ribbons: Unlike a standard dump cake, the addition of thick cream cheese swirls provides a tangy “cheesecake” element that cuts through the sweetness.
- One-Pan Simplicity: By using the “dump” method, we minimize cleanup while maximizing the depth of flavor through strategic layering.
- Visual Brilliance: The glistening red strawberry pie filling provides a vibrant pop of color that looks incredible under natural window light.
The Anatomy of a Perfect Strawberry Cheesecake Dump Cake
To achieve the specific visual and textural results seen in our professional photography, each ingredient serves a scientific purpose. We aren’t just tossing things in a pan; we are building layers of flavor and structural integrity.
Strawberry Pie Filling: 2 cans (21 oz / 595g each). This provides the “glistening” base and the whole softened fruit pieces that create that iconic bubbling syrup texture. Use a high-quality brand with fruit listed as the first ingredient for the best results.
Full-Fat Cream Cheese: 8 oz (225g), softened to room temperature. This is the “cheesecake” heart of the dish, providing the thick, white ribbons that stay distinct and creamy even after a 45-minute bake.
Yellow Cake Mix: 1 box (15.25 oz / 432g). A yellow cake mix is superior to white or vanilla here because it contains more fats and flavor compounds that react with the butter to create a “golden toasted” finish.
Unsalted Butter: 3/4 cup (170g), thinly sliced or melted. This is the “liquid gold” that hydrates the cake mix. Choosing unsalted butter allows us to control the seasoning precisely and creates those beautiful “melted butter pools” on the surface.
Pure Vanilla Extract: 1 tsp (5ml). We add this to the cream cheese mixture to deepen the flavor profile and provide a floral aroma that bridges the gap between the berries and the cake.
Kosher Salt: 1/4 tsp (1.5g). This foundational ingredient is “invisible” but vital, as it balances the sugars in the pie filling and enhances the buttery notes of the topping.
The Essential Tools for a Messy-Delicious Aesthetic
To capture that “handheld smartphone photo” look with professional results, you need the right equipment. A 9×13 inch (23x33cm) white ceramic baking dish is non-negotiable if you want that high-contrast look between the red berries and the white dish. Ceramic also provides even heat distribution, ensuring the bottom layer becomes a moist sponge cake while the top stays crunchy. You will also need a medium mixing bowl for the cream cheese and a sharp knife or butter slicer for even distribution of the fat.
Step-by-Step Instructions for the Ultimate Bake
Preparing the Berry Foundation
Start by preheating your oven to 350°F (175°C). Pour both cans of strawberry pie filling into your ungreased ceramic dish. Use a spatula to spread them evenly, ensuring the whole softened strawberries are distributed throughout. This creates the “glistening red” base that will bubble up through the crust later.
Crafting the Thick Cream Cheese Swirls
In a small bowl, whip your softened cream cheese with the vanilla extract and a pinch of salt until smooth. Use a teaspoon to drop dollops of this mixture over the strawberry layer. Take a butter knife and gently swirl the cream cheese into the berries. You want “thick ribbons,” not a fully mixed pink mess, so keep your swirls wide and intentional.
The Cake Mix and Butter Layering Technique
Evenly sprinkle the dry yellow cake mix over the top of the fruit and cream cheese. Do not stir! Once the mix is even, place your thin slices of butter across the entire surface. If you prefer the “melted pool” look, you can pour melted butter over the top, making sure to cover as much of the dry mix as possible. This is the secret to the “golden toasted crumbles.”
Baking to Golden Perfection
Slide the dish into the center rack of your oven. Bake for 40–50 minutes. You are looking for specific sensory cues: the edges should be “bubbling” with red syrup, and the center should have a “golden-brown, buttery crumbled” appearance. The smell of caramelizing sugar and cooked strawberries will fill your kitchen when it’s nearly done.
Expert Tips for a Success
- Temperature Matters: Ensure your cream cheese is truly softened. If it’s too cold, it won’t create those smooth ribbons and will instead remain as hard, unappealing chunks.
- The Dry Spot Fix: Halfway through baking, check for any large patches of dry cake mix. If you see them, simply place a tiny piece of butter on that spot to help it hydrate and brown.
- Let it Rest: As tempting as it is to scoop immediately, let the cake sit for 15 minutes. This allows the “moist sponge cake base” to set so it doesn’t run all over the plate.
- Maximize the Crunch: For extra texture, you can sprinkle a handful of crushed graham crackers or sliced almonds over the butter layer before baking.
How to Store and Reheat Your Leftovers
If you have leftovers, this dessert stores remarkably well. Cover the ceramic dish tightly with plastic wrap or transfer to an airtight container. It will stay fresh in the refrigerator for up to 4 days. When you’re ready for more, reheating in the oven at 300°F (150°C) for 10 minutes will help restore the “crunchy” topping, though a quick 30-second zap in the microwave also works for a softer, molten experience.
What to Serve with This Berry Masterpiece
This dump cake is incredibly rich, so it pairs best with items that provide a temperature or acidity contrast. A scoop of cold vanilla bean ice cream is the classic choice, as it melts into the “bubbling syrup.” If you’re looking for more inspiration for your next dessert night, consider trying our strawberry cream cheese cobbler or even a slice of this peach cobbler cheesecake.
For those who love the combination of fruit and cake but want something slightly different, this strawberry banana pudding cake offers a similar comfort-food vibe. If you prefer a tropical twist after a heavy meal, our brazilian coconut cake is a fantastic palate cleanser.
Frequently Asked Questions
While yellow cake mix provides the best golden color and buttery flavor, you can use white cake mix or even a lemon cake mix for a zesty strawberry lemonade twist.
You can, but you will need to macerate them in sugar and cornstarch first to achieve that ‘glistening red syrup’ and ‘bubbling’ texture. Pie filling is recommended for the most consistent results.
Yes, because it contains thick ribbons of cream cheese, any leftovers should be covered and stored in the refrigerator for safety and freshness.
The key is using room temperature cream cheese. If it’s too cold, it will stay in blocks rather than creating the beautiful white ribbons seen in our photography.
Dry spots occur when the butter isn’t evenly distributed. Ensure you cover as much of the dry yellow cake mix as possible with butter slices or melted butter to create that golden toasted crumble.
The Official Strawberry Cheesecake Dump Cake Recipe
Strawberry Cheesecake Dump Cake
Ingredients
Equipment
Method
- Preheat your oven to 350°F (175°C). Spread the strawberry pie filling evenly into the bottom of a 9x13 white ceramic dish, ensuring the whole fruit is well-distributed.
- In a small bowl, mix the softened cream cheese, vanilla, and salt. Drop spoonfuls over the strawberries and use a knife to create thick white swirls throughout the red filling.
- Sprinkle the dry yellow cake mix evenly over the fruit and cream cheese. Top the entire surface with thin slices of butter or a steady drizzle of melted butter to ensure no dry spots remain.
- Bake for 40-50 minutes until the strawberry syrup is bubbling, the cream cheese is melted, and the topping is golden-brown and crunchy. Let rest for 15 minutes before serving.
Notes
If you see dry cake mix spots halfway through baking, add a small pat of butter to those areas.
Closing Thoughts and Joining the Skillet Community
The strawberry cheesecake dump cake is more than just a quick dessert; it’s a testament to how simple ingredients can create complex, nostalgic flavors. The combination of the tart berries, the creamy cheesecake swirls, and that buttery yellow cake crust is a trio that never fails to impress. We hope this becomes a staple in your home for potlucks, weeknight treats, and everything in between.
If you made this recipe and loved it, please leave a comment below and let us know! We love seeing your recreations, so be sure to tag us and share your photos to Pinterest so other home cooks can find this berry bliss. For more easy-to-follow recipes, don’t forget to sign up for our weekly newsletter!