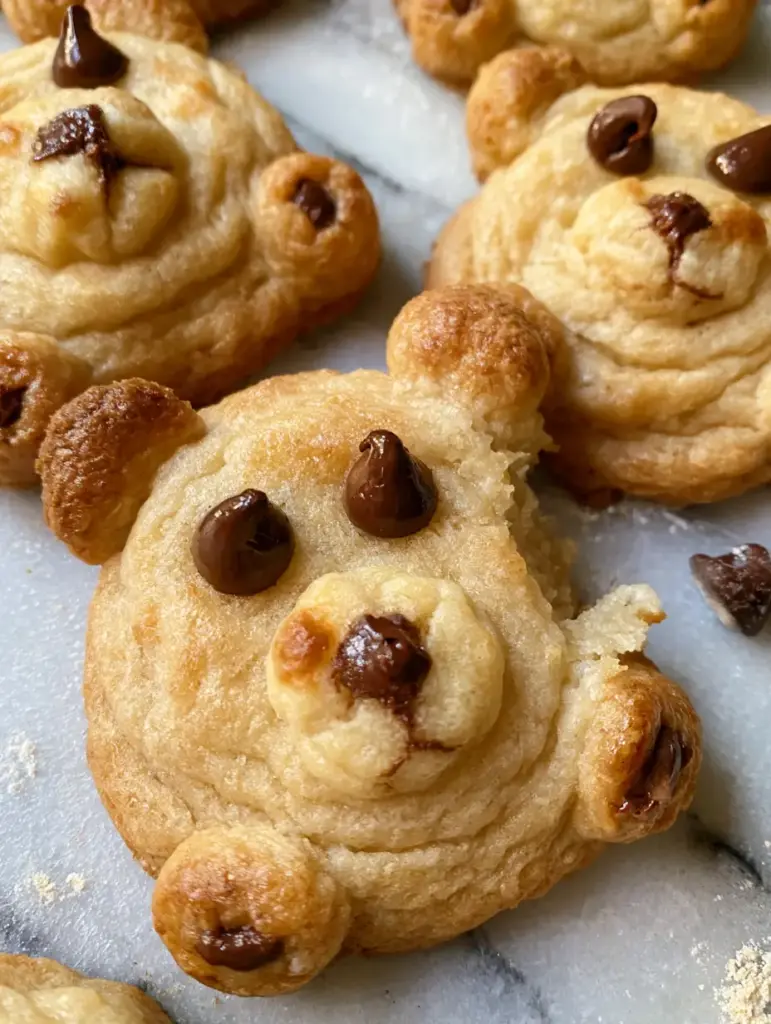
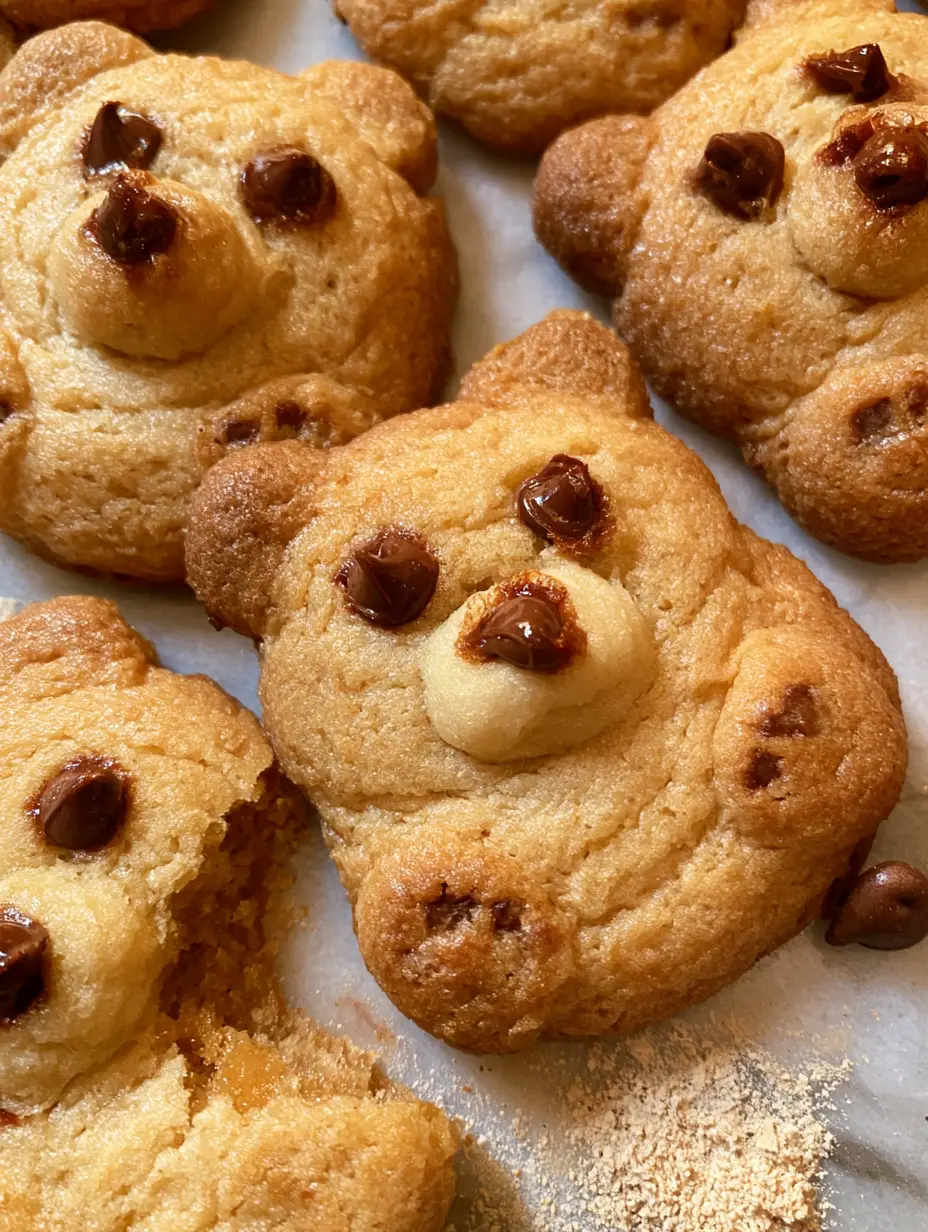
There is something undeniably nostalgic about the aroma of fresh teddy bear cookies wafting through a sunlit kitchen. Imagine a high-angle view of your marble countertop, scattered with a light dusting of flour and a few stray chocolate chips, while a tray of golden-brown bears sits cooling in the gentle morning light. These aren’t just cookies; they are edible art pieces that bridge the gap between whimsical childhood memories and professional-grade pastry craft.
The beauty of these teddy bear cookies lies in their distinct textures—a buttery, golden-brown body contrasted against a soft, raised vanilla snout. When you break one open, you’ll find a tender, chewy interior that melts on the tongue, a hallmark of a perfectly balanced butter dough. Whether you are baking for a themed party or simply looking for a weekend project that tastes as good as it looks, this recipe delivers a bakery-quality result every time.
Why These Handcrafted Teddy Bear Treats Win Every Time
- Visual Precision: We use two distinct doughs to create a multi-dimensional look, featuring a raised, lighter vanilla snout that pops against the golden-brown body.
- Superior Texture: A high butter-to-flour ratio ensures a crumbly yet soft bite, reminiscent of the best crispy Danish butter cookies but with a chewier heart.
- Forensic Detail: Every element from the mini semi-sweet chocolate chip eyes to the large chocolate morsel paw pads is designed to stay in place during the bake.
- Natural Ingredients: No artificial dyes or shortening—just pure vanilla, high-quality butter, and rich chocolate for a flavor profile that rivals classic salted butter cookies.
Essential Components for a Golden, Buttery Crumb
Unsalted Butter (1 cup / 227g): The foundation of our flavor. Use high-fat European-style butter if possible to achieve that signature golden-brown hue and rich mouthfeel.
Granulated Sugar (3/4 cup / 150g): This provides the sweetness and aids in the slight crisping of the edges while keeping the center soft.
Large Egg (1 unit): Acts as the binder. Ensure it is at room temperature to emulsify properly with the creamed butter and sugar.
All-Purpose Flour (2 ¼ cups / 280g): This provides the structural integrity needed to hold the bear shape without spreading too thin during the baking process.
Vanilla Extract (2 tsp / 10ml): We use a generous amount to scent the raised snout dough, giving it a distinct aromatic profile compared to the body.
Mini Semi-Sweet Chocolate Chips: These are specifically chosen for the eyes and nose to ensure they don’t bleed into the dough while baking.
Large Chocolate Morsels: These form the “pads” of the paws, providing a deep, rich chocolate contrast to the buttery base, much like the chunks in thick chocolate chip cookies.
Baking Powder (1/2 tsp / 2g): Just enough to give the cookies a slight lift, especially for the “raised” snout effect, without causing them to lose their bear-like definition.
The Baker’s Tool Kit for Sculpting Bear Shapes
To achieve the professional look seen in the smartphone-style photography of our teddy bear cookies, you will need a few specific tools. A marble countertop or a cool surface is ideal for handling the dough, as it prevents the butter from softening too quickly.
You will need two different sized cookie scoops: a standard 1.5-tablespoon scoop for the body and a teaspoon-sized scoop for the ears and snout. A toothpick or a small piping tip is essential for the final melted chocolate mouth details. Don’t forget high-quality parchment paper or a silicone baking mat to ensure the bottoms of your bears achieve a uniform golden brown without sticking.
Step-by-Step: Sculpting Your Golden Brown Masterpieces
Preparing the Two-Tone Dough
In a large stand mixer, cream the room-temperature butter and sugar until the mixture is pale and fluffy, which usually takes about 3 to 5 minutes. Incorporate the egg and vanilla extract, beating until fully combined. Slowly fold in the flour, salt, and baking powder until a soft dough forms.
Divide the dough. Keep three-quarters of the dough as the “Body Dough.” To the remaining quarter, add an extra tablespoon of flour; this will be your “Snout Dough.” The extra flour keeps the snout lighter in color and firmer so it stays “raised” during the bake.
Forming the Bear Anatomy
Roll the Body Dough into 1-inch (2.5cm) balls for the head and body. For each bear, place one ball on the tray and slightly flatten it. Attach two smaller pea-sized balls at the top for the ears. The dough should feel slightly tacky but shouldn’t stick to your hands.
Take a small pinch of the lighter Snout Dough and roll it into a tiny disc. Press it gently onto the center of the face. You want a “raised” effect, so do not flatten it completely. Place two mini chocolate chips above the snout for eyes and one in the center of the snout for the nose.
Applying the Paw Details and Baking
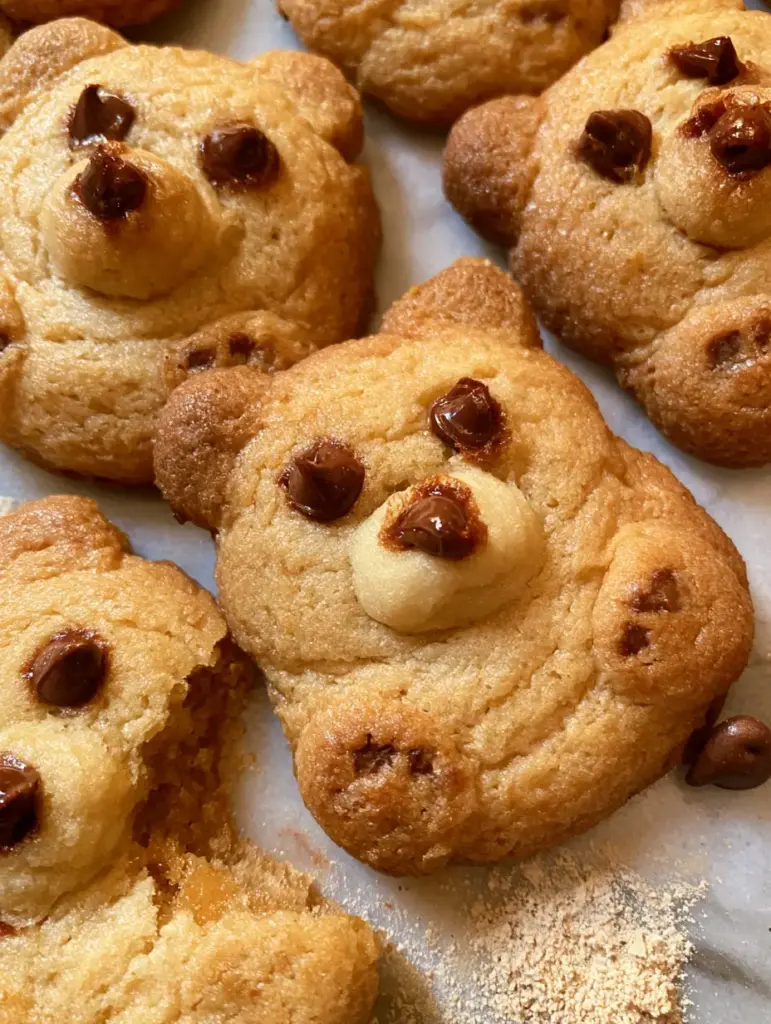
Place two large chocolate morsels at the bottom of the body to represent the paw pads. At this stage, your teddy bear cookies should look like little sculptures. Chill the entire tray in the refrigerator for at least 20 minutes before baking; this is the secret to preventing the ears from melting into the head.
Bake at 350°F (175°C) for 10-12 minutes. You are looking for a “Visual Cue” of light golden browning around the edges of the ears and the base of the body, while the snout remains a pale, creamy vanilla color. The cookies will look slightly soft in the center, but they will firm up as they cool to create that chewy interior.
The Final Artistic Touches
Once the cookies have cooled completely, melt a small handful of chocolate chips in the microwave. Using a toothpick, carefully draw a small “inverted Y” shape below the nose chip to create the mouth. This detail brings the character to life and matches the “melted chocolate” descriptors in our visual blueprint.
Mastering the Perfect Soft-Baked Interior
- Cold Dough is Key: If the butter in the dough gets too warm while you are sculpting the ears, the bears will spread and look like flat puddles. Always chill before the oven.
- The Snout Secret: If your snout dough is browning too much, you can lightly tent the cookies with foil for the last 3 minutes of baking.
- Chocolate Placement: Press the chocolate chips deep enough so they stay anchored, but not so deep that they disappear into the dough as it rises.
- Don’t Overbake: The “soft chewy interior” mentioned in our visual prompt is achieved by pulling the cookies out just as the edges turn golden. They carry over cook on the hot tray.
Preserving Freshness and Freezing Bear Dough
These teddy bear cookies stay fresh and chewy for up to 5 days when stored in an airtight container at room temperature. To maintain the “buttery crumb texture,” place a small piece of white bread in the container; the cookies will absorb the moisture from the bread rather than drying out.
If you want to prep ahead, you can freeze the sculpted, unbaked bears on a tray. Once frozen solid, transfer them to a freezer bag. You can bake them straight from the freezer—just add 2 minutes to the total baking time. This is a great way to have fresh, homemade treats ready whenever a craving for hearty chocolate chip treats or these cute bears strikes.
Perfect Pairings for a Whimsical Dessert Spread
Serving these teddy bear cookies is all about the presentation. They look stunning on a rustic wooden board or a clean marble slab. For a full “Cookie Bar” experience, pair them with other textured delights like zesty lemon sugar cookies for a bright contrast or nutty Mexican wedding cookies for a snowy, powdered sugar effect.
If you are serving these as a snack for kids, a cold glass of milk is mandatory. For an adult twist, these bears are surprisingly delicious when dipped into the creamy espresso foam of a dessert inspired by tiramisu crinkle cookies. The buttery dough holds up well to dipping without falling apart immediately.
Frequently Asked Questions
Yes, but melted chocolate or a chocolate ganache sets firmer, which is better for stacking or transporting the cookies without smudging the bear’s expression.
Yes, you can substitute the all-purpose flour with a high-quality 1:1 gluten-free baking blend. Ensure the blend contains xanthan gum to help the bear shapes hold their structure.
The snout dough contains slightly more flour and less sugar than the body dough, which reduces browning. You can also lightly tent the cookies with aluminum foil during the last few minutes of baking if they start to darken.
Gently press the small ear dough balls into the head dough while both are still at room temperature. The tackiness of the butter dough acts as a natural glue, which will solidify during the chilling and baking stages.
Spreading usually happens if the butter in the dough becomes too soft during the sculpting process. To prevent this, ensure you chill the shaped bears in the refrigerator for at least 20 minutes before baking.
The Ultimate Teddy Bear Cookie Recipe
Teddy Bear Cookies: The Ultimate Soft and Chewy Butter Cookie Recipe
Ingredients
Equipment
Method
- Cream butter and sugar until fluffy. Add egg and vanilla, mixing well.
- Fold in flour, baking powder, and salt. Divide dough, adding 1 tbsp extra flour to the smaller portion for the snouts.
- Roll 1-inch balls for bodies and tiny balls for ears. Attach ears to the head.
- Press a small disc of light dough for the snout. Add mini chocolate chips for eyes and a nose.
- Press two large morsels at the bottom for paws. Chill for 20 minutes.
- Bake at 350°F (175°C) for 10-12 minutes until edges are golden brown.
- Once cooled, use a toothpick and melted chocolate to draw the mouth.
Notes
Use a toothpick for the fine mouth detail to avoid smudging the chocolate.

Conclusion: Bake Your Own Batch of Bear Hugs
Creating these teddy bear cookies is a rewarding culinary journey that combines the precision of dough sculpting with the simple joy of a high-quality butter cookie. With their golden-brown bodies and soft, raised snouts, they are guaranteed to be the star of any dessert table. The contrast of the rich chocolate paw pads and the tender crumb makes every bite a perfect balance of flavor and texture.
I would love to see your kitchen creations! If you bake a batch, please tag your photos and share your results. For more whimsical baking inspiration and step-by-step guides, follow us on Pinterest and join our community of home bakers. Happy sculpting!