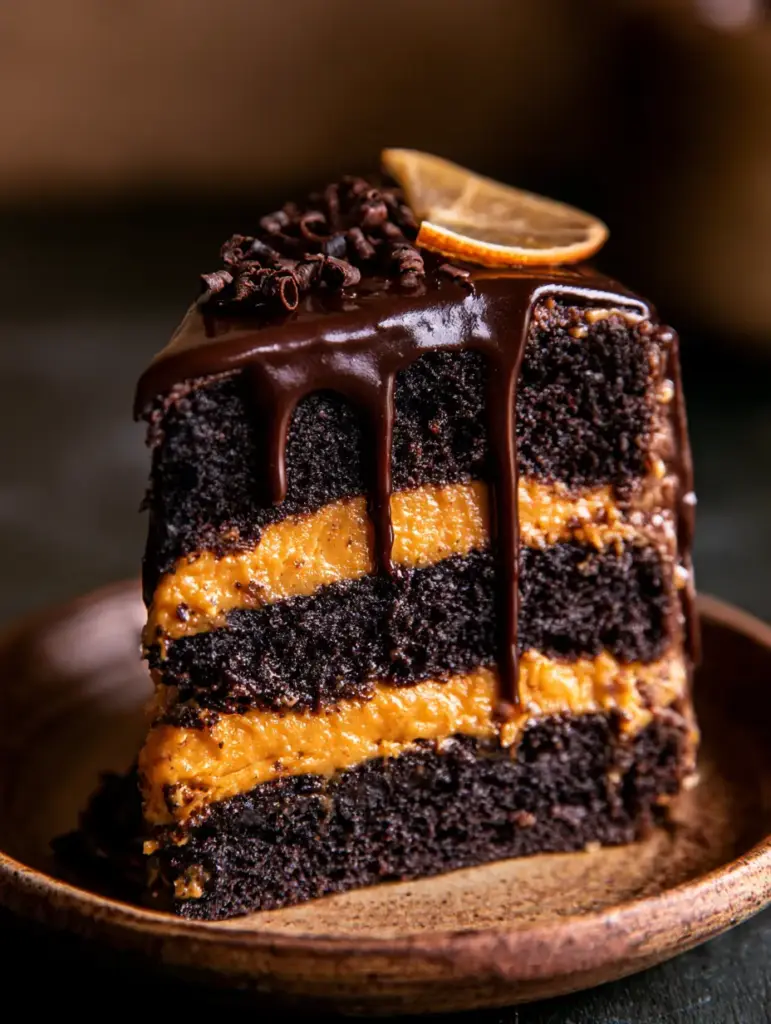
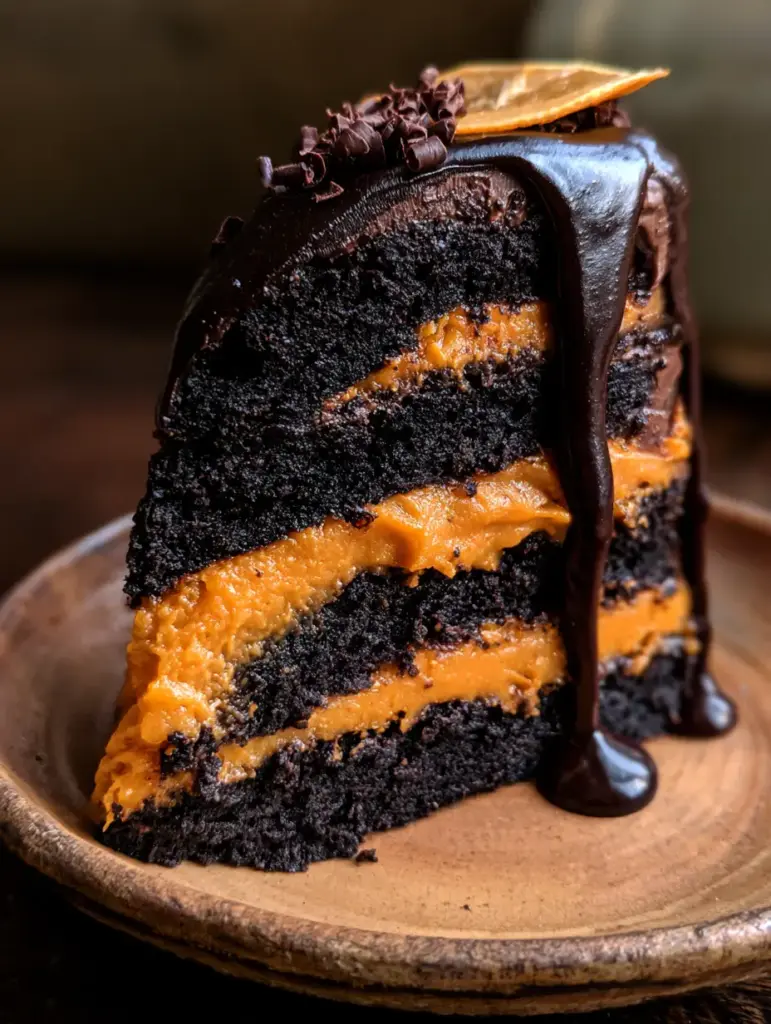
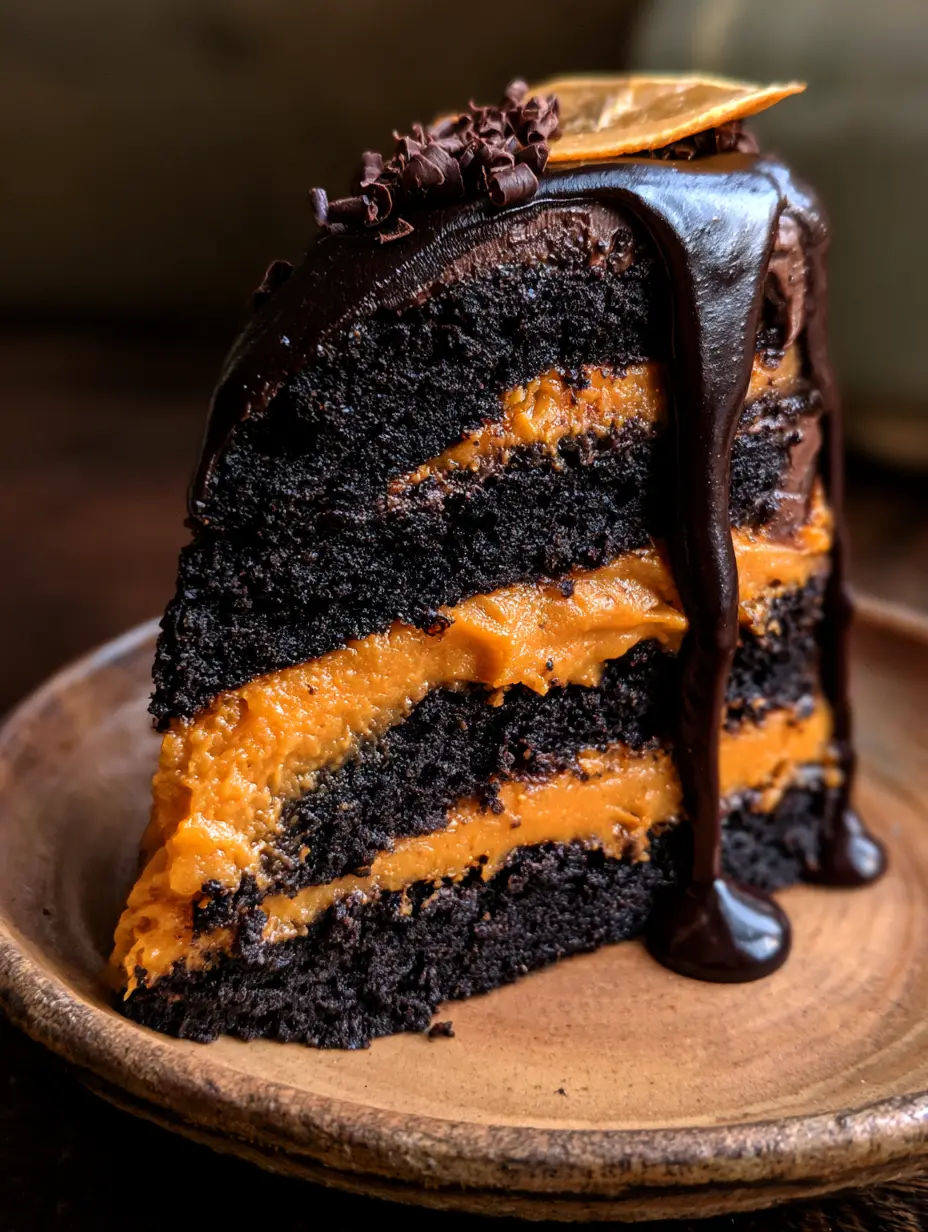
The chocolate orange cake is a culinary study in contrasts, a sophisticated marriage of deep, earthy cocoa and the vibrant, high-toned brightness of fresh citrus. This isn’t just another dessert; it is a visual and sensory experience designed to stop the scroll. Imagine a tall, proud slice where the crumb is so dark it’s almost obsidian, layered against a thick, creamy filling that glows with a sunny orange hue.
When you take your first bite, the glossy dark chocolate ganache yields to a moist, tender sponge, followed immediately by the zesty punch of citrus cream. Every element, from the translucent orange wedges to the delicate dark chocolate shavings, serves a purpose. This recipe bridges the gap between professional patisserie and the home kitchen, ensuring a result that looks exactly like a high-end editorial photograph.
Whether you are celebrating a special occasion or simply craving the ultimate flavor pairing, this cake delivers. The soft window light catching the shine of the ganache drips is a testament to the quality of the ingredients and the precision of the technique. Let’s dive into how you can recreate this handheld smartphone-perfect masterpiece at home.
Why This Citrus-Infused Cocoa Cake Works
- Dramatic Visual Contrast: The juxtaposition of the dark cocoa sponge against the vibrant orange filling creates a striking “wow” factor for every slice.
- Moist Crumb Technology: By blooming the cocoa powder in boiling water, we unlock a deeper flavor and a silky, moist texture that stays fresh for days.
- Balanced Flavor Profile: The bitterness of the dark chocolate is perfectly countered by the acidity and sweetness of the fresh orange zest.
- Professional Glossy Finish: Our ganache technique ensures a mirror-like shine that provides those iconic, slow-moving drips down the side of the cake.
The Architecture of the Perfect Chocolate Orange Cake
To achieve the results seen in our visual blueprint, we must be intentional with our ingredient selection. The chemistry of a dark cocoa sponge requires specific fats and acids to maintain its structure while remaining incredibly soft to the touch.
Dutch-Processed Cocoa Powder: You will need 3/4 cup (75g) of high-quality Dutch-processed cocoa. This variety is treated with alkali, resulting in a darker color and a smoother, less acidic chocolate flavor that pairs beautifully with citrus.
Boiling Water: Using 1 cup (240ml) of boiling water is non-negotiable for “blooming” the cocoa. This process dissolves the cocoa solids and intensifies the chocolate notes throughout the batter.
Fresh Oranges: You will need at least 3 large Navel oranges. We use the zest for the sponge, the juice for the filling, and thin, translucent wedges for the final garnish as seen on our ceramic plate.
Buttermilk: 1 cup (240ml) of room temperature buttermilk provides the necessary acidity to react with the leavening agents. This ensures the cake rises tall while maintaining a tight, professional crumb.
Heavy Cream (35% Fat): For both the orange citrus cream filling and the ganache, you will need 2 cups (480ml) total. The fat content is critical for the stability of the filling and the shine of the ganache drips.
Vegetable Oil: Unlike butter-based cakes, using 1/2 cup (120ml) of neutral oil ensures the chocolate orange cake remains moist even when refrigerated. This is the secret to that “melt-in-your-mouth” texture.
Dark Chocolate (60-70% Cocoa): For the ganache and shavings, use 8 oz (225g) of high-quality bar chocolate rather than chips. Chips often contain stabilizers that prevent the glossy, smooth finish we are looking for.
Essential Tools for a Professional Finish
Achieving the look of an unedited smartphone photo requires the right equipment to ensure clean lines and perfect textures. A tall slice requires structural integrity provided by proper baking pans.
You will need two 8-inch (20cm) round cake pans, preferably with straight sides to ensure your layers are uniform. A rotating cake stand and an offset spatula are vital for applying that thick, vibrant orange filling between the layers of dark sponge.
For the decorative elements, a microplane zester is required for the fresh orange zest, and a sharp mandoline or chef’s knife is needed to achieve the paper-thin orange wedges. Finally, a small vegetable peeler works wonders for creating those delicate dark chocolate curls.
Crafting the Intense Dark Cocoa Sponge
Blooming the Cocoa for Maximum Flavor
Start by whisking your Dutch-processed cocoa with the boiling water in a small heat-proof bowl. As the water hits the cocoa, you will smell a sudden intensification of the chocolate aroma; this is the blooming process in action.
Set this mixture aside to cool slightly while you prepare the dry ingredients. This step ensures that no clumps of dry cocoa remain, leading to a perfectly uniform, dark crumb in your chocolate orange cake.
Mixing the Batter for a Tender Crumb
In a large bowl, whisk together 2 cups (250g) of all-purpose flour, 2 cups (400g) of granulated sugar, 1.5 tsp (6g) of baking soda, and 1 tsp (6g) of fine sea salt. In a separate pitcher, combine the buttermilk, oil, 2 large eggs, and 1 tbsp (15g) of fresh orange zest.
Slowly incorporate the wet ingredients into the dry, followed by the bloomed cocoa mixture. The batter will be thin, but do not be alarmed—this high moisture content is what creates the “moist cocoa sponge” described in our visual blueprint.
Baking to Perfection
Divide the batter evenly between your prepared pans. Bake at 350°F (175°C) for 30-35 minutes, or until a skewer inserted into the center comes out with just a few moist crumbs attached.
Allow the cakes to cool in the pans for 10 minutes before transferring them to a wire rack. They must be completely cold before you attempt to layer them with the bright orange citrus cream filling.
Engineering the Vibrant Orange Citrus Cream
The filling of this chocolate orange cake must be bold in both color and flavor. We achieve this by creating a stabilized citrus cream that holds its shape under the weight of the sponge layers.
Whip 1 cup (240ml) of cold heavy cream with 1/2 cup (60g) of powdered sugar and 1/4 cup (60ml) of fresh orange curd or concentrated orange reduction. For that “vibrant orange-colored” look, a single drop of natural orange food gel can enhance the visual contrast against the dark cocoa.
Whip until stiff peaks form. The cream should be thick enough to be spread in a substantial layer, at least half an inch thick, to mimic the dramatic side view of our target slice.
The Art of the Glossy Dark Chocolate Ganache
To create the “glossy dark chocolate ganache drips slowly down the side,” temperature control is everything. Finely chop your dark chocolate and place it in a glass bowl.
Heat 1/2 cup (120ml) of heavy cream until it just begins to simmer, then pour it over the chocolate. Let it sit for 5 minutes without stirring to allow the heat to penetrate the cocoa butter evenly.
Gently whisk from the center outward until a smooth, shiny emulsion forms. If you want an extra mirror-like finish, whisk in 1 tsp (5ml) of light corn syrup. Let the ganache cool until it reaches the consistency of warm honey before pouring it over the chilled cake.
Expert Tips for a Picture-Perfect Slice
- Chill Before Slicing: For a clean side view that emphasizes the layers, chill the fully assembled cake for at least 2 hours before cutting.
- Hot Knife Technique: Dip your dessert knife in hot water and wipe it dry between every single cut. This prevents the orange cream from smearing into the dark cocoa layers.
- Zest at the Last Minute: Add the fresh orange zest just before serving to ensure the oils are fragrant and the color is bright.
- Mandoline Wedges: If you want translucent orange slices, use a mandoline set to 1mm. This allows the light to pass through the fruit, just like in our Midjourney prompt.
Pairing and Presentation
This chocolate orange cake is a standout on its own, but it pairs beautifully with other textures. Consider serving it alongside a silky chocolate mousse for a double-dose of cocoa, or follow it up with a light citrus loaf for a brunch spread.
If you enjoy the combination of fruit and chocolate, you might also find inspiration in our raspberry and pistachio layers or the deep richness of a cherry chocolate fudge. For a more casual setting, these flavors translated into chocolate crinkle cookies are always a crowd-pleaser.
Frequently Asked Questions
Natural cocoa is more acidic and lighter in color. While it works, you won’t achieve the deep, dark contrast against the orange filling that Dutch-processed cocoa provides.
Allow the ganache to cool until it reaches a thick, honey-like consistency. Test one drip on the side of the cake; if it stays midway, it’s ready to pour.
Using high-quality orange zest and a concentrated orange curd provides the base flavor, while a tiny drop of orange gel food coloring ensures the ‘vibrant’ visual pop.
Store the cake in an airtight container in the refrigerator for up to 5 days. The use of oil in the batter ensures it remains moist even when cold.
Blooming cocoa powder dissolves the solids and releases trapped flavor compounds, resulting in a much more intense chocolate taste and a smoother, darker crumb texture.
The Ultimate Chocolate Orange Cake Recipe
Chocolate Orange Cake: A Decadent Dark Cocoa and Citrus Masterpiece
Ingredients
Equipment
Method
- Whisk boiling water into cocoa powder until smooth. Let cool for 10 minutes.
- Combine dry ingredients, then fold in wet ingredients and bloomed cocoa. Pour into pans and bake at 350°F (175°C) for 30-35 minutes.
- Whip heavy cream, powdered sugar, and orange curd until stiff peaks form.
- Spread orange cream between cake layers. Top with warm chocolate ganache, allowing it to drip down the sides.
Notes
Bloom your cocoa to ensure the darkest possible sponge color.
Join the Wholesome Skillet Community
Creating this chocolate orange cake is an exercise in culinary art. We hope this recipe helps you achieve that perfect balance of dark cocoa and bright citrus in your own kitchen. If you enjoyed this process, please leave a comment below and let us know how your ganache drips turned out!
Don’t forget to follow us on Pinterest for more visual recipe blueprints and professional baking tips. Share your creations by tagging @thewholesomeskillet—we love to see your masterpiece slices!