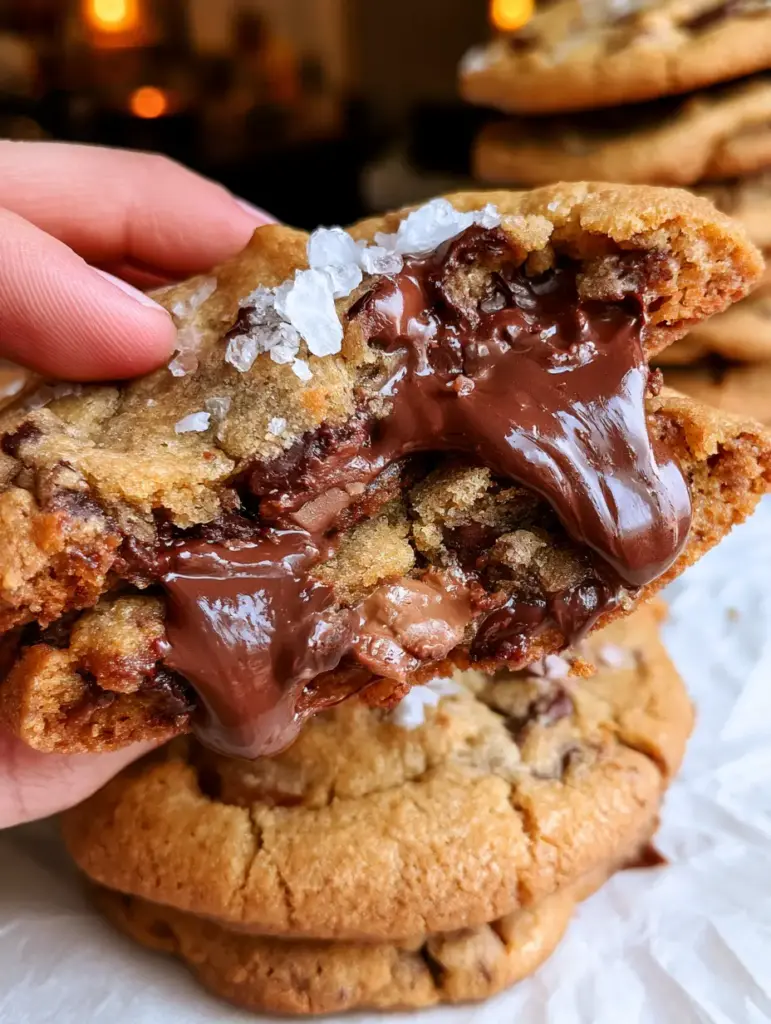
There is nothing quite like the allure of bakery-style chocolate chip cookies that look as if they just stepped off the screen of a professional food shoot. We are talking about massive, thick cookies with deep golden-brown crusts and those signature crinkly edges that signify a perfect exterior crunch. When you pull these cookies apart, the center should be soft, gooey, and borderline underbaked, revealing a treasure trove of melted chocolate.
This recipe isn’t just another standard cookie; it is a masterclass in texture and flavor contrast. By combining dark chocolate chunks, milk chocolate pools, and sweet white chocolate morsels, we create a complex profile that satisfies every craving. A final flourish of flaky sea salt crystals cuts through the richness, elevating these chocolate chip cookies to a gourmet level you can achieve right in your home kitchen.
Whether you are a seasoned baker or a weekend enthusiast, the secret to this specific visual and sensory result lies in the temperature of your ingredients and the timing of your bake. We have meticulously designed this process to ensure your kitchen smells like a high-end patisserie and your cookies look exactly like the molten masterpieces you see on social media. If you love these, you might also enjoy our chewy oatmeal chocolate chip cookies for a different texture profile.
The Secrets to Achieving That Perfect Bakery Texture
- Triple Chocolate Complexity: Using dark, milk, and white chocolate provides varying melting points and sweetness levels for a “molten pool” effect.
- The Gooey Center Technique: We utilize a specific flour-to-fat ratio and high-heat baking to keep the middle soft while the edges crisp up.
- Visual Crinkle Edges: The combination of sugars and a “pan-banging” suggestion creates those beautiful ripples on the golden-brown crust.
- Flaky Salt Finish: Large crystals of sea salt aren’t just for looks; they enhance the cocoa notes and balance the sugar.
Essential Components for Your Triple Chocolate Masterpiece
Unsalted Salted Butter (1 cup / 227g): Use high-quality butter softened to room temperature. This provides the foundational fat that carries the flavor and creates the tender crumb.
Light Brown Sugar (1 cup / 200g): The molasses content in brown sugar is responsible for the chewy texture and that deep, golden-brown hue we are aiming for.
Granulated White Sugar (1/2 cup / 100g): This ingredient is crucial for achieving the crisp, crinkly edges that provide a structural contrast to the soft center.
Large Eggs (2 units): Eggs act as the binding agent and provide structure, ensuring your massive cookies don’t fall apart when you do the “pull apart” test.
All-Purpose Flour (3 cups / 375g): This provides the bulk of the cookie. We measure precisely to ensure the cookies stay thick and don’t spread into flat puddles.
Cornstarch (1 tbsp / 8g): Our secret weapon for a “soft-baked” feel; it keeps the proteins in the flour from getting too tough, ensuring a gooey center.
Baking Soda (1 tsp / 5g): This leavening agent reacts with the brown sugar to create lift and contributes significantly to the browning of the crust.
Dark Chocolate Chunks (4 oz / 113g): Large chunks create those “huge pools of molten dark chocolate” described in our visual blueprint.
Milk Chocolate Chunks (4 oz / 113g): Milk chocolate adds a creamy, classic sweetness that balances the intensity of the dark cocoa.
White Chocolate Morsels (1/2 cup / 90g): These provide a visual pop against the golden dough and a creamy, vanilla-forward finish.
Flaky Sea Salt (1 tbsp / 10g): Used exclusively for topping, these crystals provide the essential visual and flavor bridge.
Tools Required for Professional Results
To achieve the massive, thick look of these chocolate chip cookies, you will need a large baking sheet lined with crinkled parchment paper. The parchment paper not only prevents sticking but helps the bottoms brown evenly without burning. You will also need a large cookie scoop (about 3 tablespoons in size) to ensure every cookie is substantial and uniform.
A heavy-duty stand mixer or electric hand mixer is recommended for creaming the butter and sugars until they are light and airy. Finally, a wire cooling rack is essential to stop the cooking process at exactly the right moment, preserving that underbaked, gooey center.
Step-by-Step Guide to Cookie Perfection
Creaming for Structure and Aeration
Start by beating your room temperature butter with both the brown and granulated sugars. You want to whip these together for at least 3-4 minutes until the mixture looks pale and fluffy. This process incorporates air, which helps the cookies rise and creates the “crinkly edges” as the air pockets collapse in the oven.
Integrating the Triple Chocolate Blend
Once your wet ingredients and dry ingredients are barely combined, it is time to fold in your dark chocolate chunks, milk chocolate, and white chocolate morsels. Do not overmix at this stage! You want the chocolate to be distributed but not broken down, ensuring those massive molten pools are preserved within the golden dough.
The Visual Bake: Cues for Success
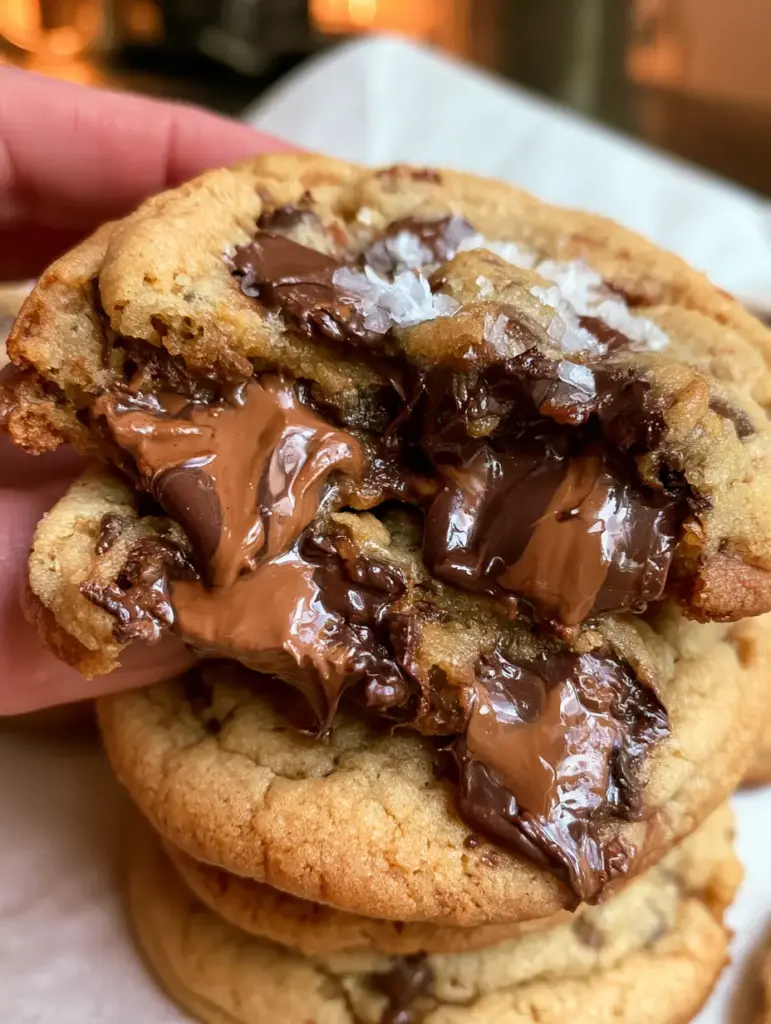
Scoop the dough into large mounds and place them on your crinkled parchment paper. Preheat your oven to 375°F (190°C). Bake for only 10-12 minutes. The “Visual Cue” you are looking for is a deep golden-brown crust on the very edges, while the tops still look slightly pale and “set” but soft. They will look slightly underdone, which is exactly how you achieve the gooey center.
The Finishing Touch
As soon as the cookies come out of the oven, while the chocolate is still liquid and oozing, sprinkle a generous pinch of flaky sea salt over the top. The heat from the cookie will help the salt adhere to the molten chocolate, creating that professional bakery aesthetic.
Expert Tips for Bakery-Style Success
- Chill the Dough: If you have time, chill your scooped dough balls for 30 minutes before baking. This prevents over-spreading and keeps the cookies thick.
- The Pan Bang: Halfway through baking, lift the pan and drop it onto the oven rack. This creates the ripples and crinkled edges seen in professional photography.
- Chunk vs. Chip: Always use chopped chocolate bars (chunks) rather than just chips if you want those massive, oozing pools of chocolate.
- Don’t Overbake: Remember, cookies continue to cook on the hot pan for several minutes after being removed from the oven.
Effective Storage and Reheating Methods
These chocolate chip cookies are best enjoyed warm, but they can be stored in an airtight container at room temperature for up to 4 days. To maintain the “molten” chocolate effect, we recommend microwaving a cookie for 10-15 seconds before eating. This softens the center and makes the chocolate pools liquid again.
For long-term storage, you can freeze the baked cookies for up to 3 months. Simply thaw at room temperature and warm in a toaster oven for 2 minutes to restore the crispness of the edges. You can even use these as a base for a giant chocolate chip pizookie if you have extra dough!
Delicious Pairings for Your Cookie Platter
These rich, salty-sweet cookies pair beautifully with a variety of other desserts. For a sophisticated spread, serve them alongside our salted butter cookies to highlight the different ways salt interacts with dough. If you are hosting a party, they contrast perfectly with the tartness of lemon sugar cookies.
For the ultimate chocolate lover, try serving these alongside a slice of decadent flourless chocolate cake or use a high-quality homemade chocolate syrup for dipping. The interplay of textures between the crunchy edges and gooey centers makes them a standout on any dessert table.
Answers to Your Most Pressing Cookie Questions
Yes! Scoop the dough into balls and freeze them on a tray. Once solid, transfer to a bag. Bake directly from frozen, adding 2-3 minutes to the total bake time.
The crinkly edges come from a combination of high-heat baking (375°F) and the ‘pan-banging’ technique. Halfway through baking, lift the pan and drop it firmly onto the rack to collapse air pockets and create ripples.
Cornstarch acts as a tenderizer. It interferes with gluten development, which ensures the center of these massive cookies stays soft, gooey, and delicate rather than bready.
For large pools of chocolate, you must use chopped chocolate bars or high-quality chunks rather than standard chips. Chips are designed to hold their shape, while chunks melt into beautiful pools.
The Ultimate Triple Chocolate Chip Cookie Recipe
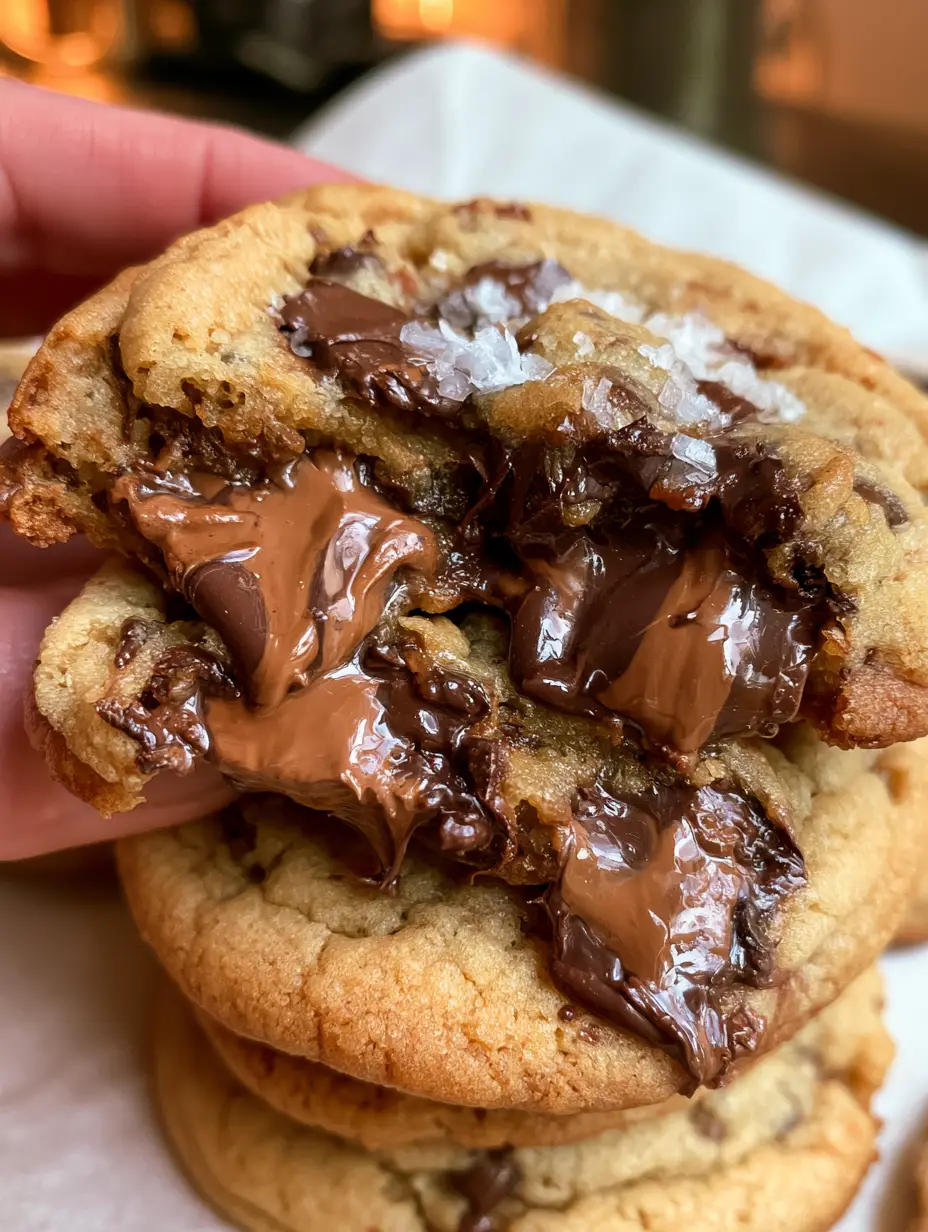
Chocolate Chip Cookies with Molten Triple Chocolate and Flaky Sea Salt
Ingredients
Equipment
Method
- In a stand mixer, cream the softened butter, brown sugar, and granulated sugar for 3-4 minutes until pale and fluffy.
- Add the eggs one at a time, mixing well after each addition and scraping down the sides of the bowl.
- In a separate bowl, whisk the flour, cornstarch, and baking soda. Slowly add to the wet ingredients until just combined.
- Gently fold in the dark chocolate chunks, milk chocolate chunks, and white chocolate morsels by hand.
- Scoop 3-tbsp sized mounds of dough onto a parchment-lined sheet. Bake at 375°F (190°C) for 10-12 minutes.
- Remove when edges are deep golden-brown and crinkly, but the center still appears soft and underbaked.
- Immediately sprinkle with flaky sea salt. Let cool on the pan for 5 minutes before moving to a wire rack.
Notes
Use high-quality chocolate bars chopped into chunks for the best 'pooling' effect.
Bring the Bakery to Your Kitchen
Now that you have the blueprint for the ultimate chocolate chip cookies, it’s time to get baking! These cookies are designed to impress with their massive size, molten chocolate pools, and that perfect balance of sweet and salty. The visual appeal of the golden-brown crust against the white parchment paper makes them a photographer’s dream and a dessert lover’s reality.
We would love to see your results! Leave a comment below telling us how your gooey centers turned out, or tag us in your photos. Don’t forget to save this recipe to your favorite boards on Pinterest so you always have it on hand for your next chocolate craving!