When the crisp autumn air arrives, there is nothing quite like the visual magic of pumpkin strawberries. These adorable treats transform fresh, juicy berries into miniature edible pumpkins, complete with a glossy orange shell and a rich chocolate “soil” base. Whether you are hosting a rustic harvest gathering or looking for a spooky-sweet addition to your dessert spread, these are a guaranteed showstopper.
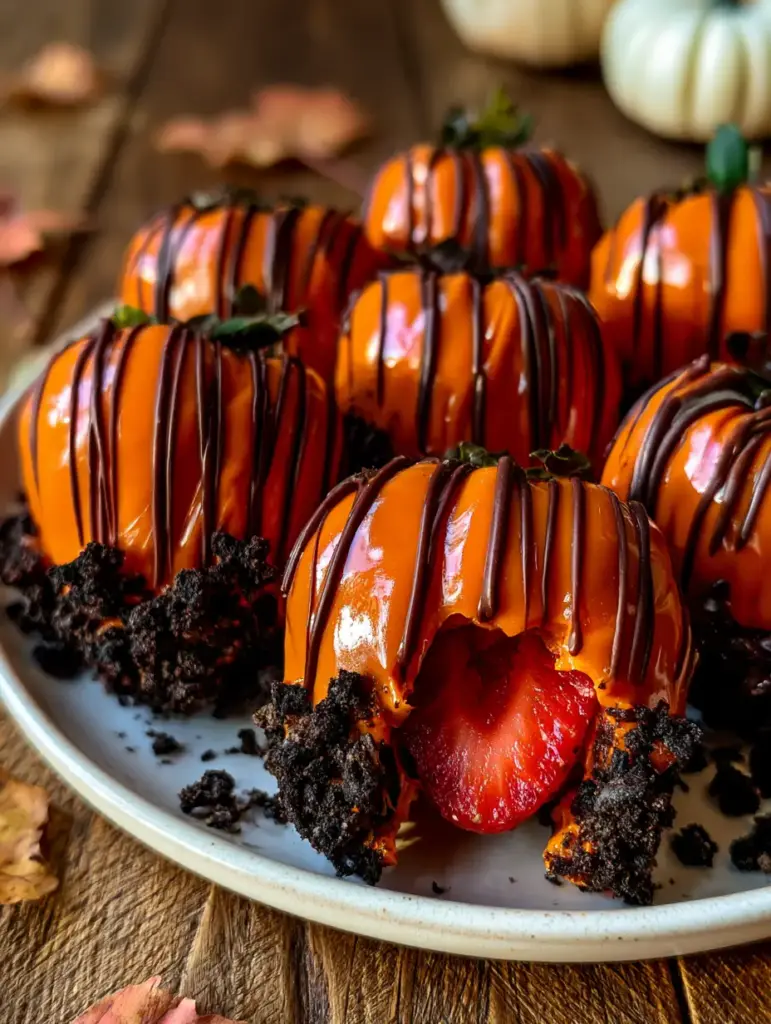
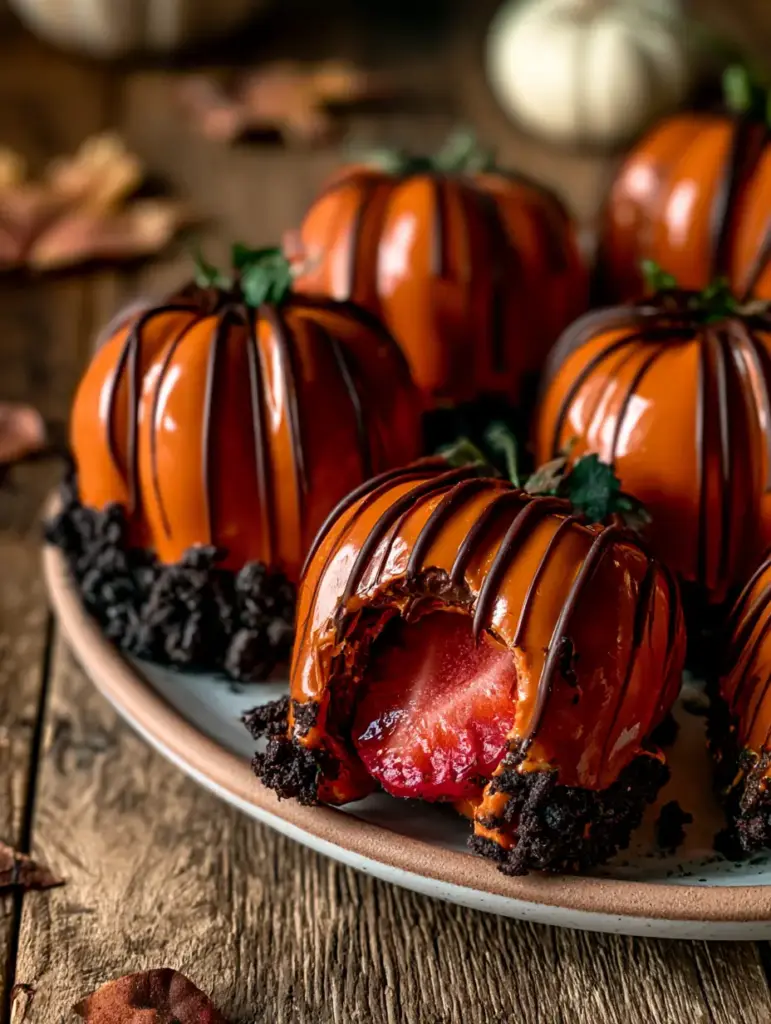
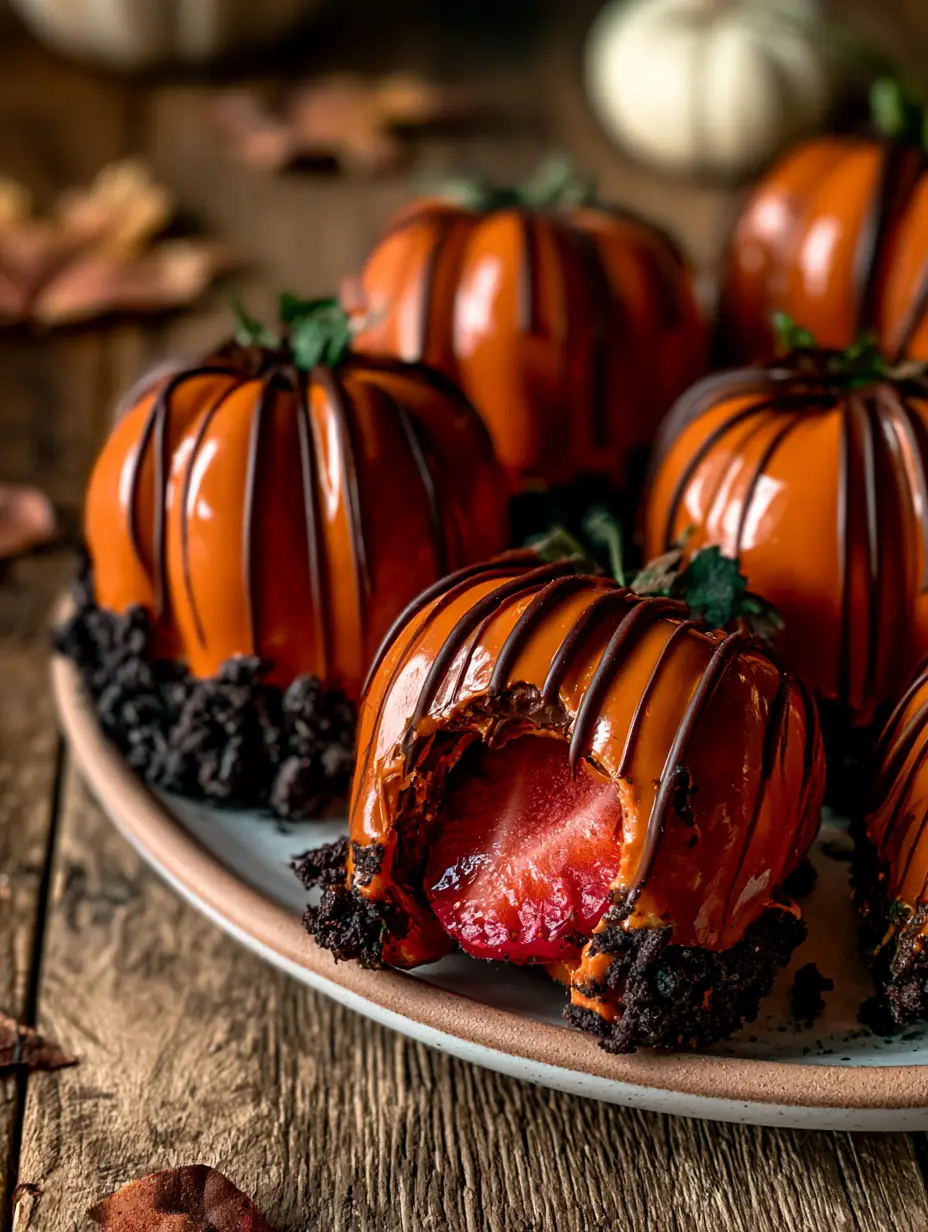
The beauty of this recipe lies in the contrast of textures and colors. A single bite reveals a bright, juicy red interior hidden beneath a snappy candy coating, echoing the vibrant hues of fall. Set against a backdrop of autumn leaves and rustic wood, these berries look like they were plucked straight from a designer patch.
Why These Harvest Berry Pumpkins Are a Seasonal Must-Have
- High-Gloss Finish: The vibrant orange candy coating captures the morning light, creating a professional, mirror-like sheen that pops on any platter.
- Textural Harmony: Experience the crunch of “soil” made from chunky chocolate cookies, the snap of the shell, and the burst of fresh fruit.
- Artisanal Detail: Vertical dark chocolate drizzles provide that signature pumpkin ribbing, making them look remarkably realistic.
- Natural Accents: By keeping the green leafy tops intact, we create a built-in “stem” that adds an organic, fresh touch to the design.
Essential Components for Your Autumn Berries
To create the perfect pumpkin strawberries, you need ingredients that offer both structural integrity and deep flavor. Choosing the right coating is the difference between a dull berry and a masterpiece.
Large Fresh Strawberries: You will need about 1 lb (454g) of firm, ripe berries. Ensure they are completely dry so the candy coating adheres perfectly without sliding off.
Orange Candy Melts: Use 12 oz (340g) of high-quality orange candy wafers. These provide the signature glossy orange candy coating that defines the pumpkin look.
Dark Chocolate Chips: Approximately 1/2 cup (85g) of dark chocolate is needed for the vertical stripes. The bitterness of the dark chocolate balances the sweet candy shell beautifully.
Chocolate Sandwich Cookies: You will need 1 cup (100g) of crushed cookies to act as the “soil.” This adds a chunky, earthy texture to the base of each berry.
Coconut Oil: Just 1 tsp (5ml) mixed into the melts ensures a smooth, pourable consistency. This is the secret to achieving that professional-grade sheen.
Tools for Professional Confectionery Results
Having the right gear makes the dipping process seamless. You will want a microwave-safe glass bowl for melting and a parchment-lined baking sheet for a non-stick setting surface. A small piping bag or a zip-top bag with the corner snipped is essential for creating those delicate vertical dark chocolate stripes. If you enjoy precision in your baking, you might find similar techniques useful when making Biscoff mini cheesecakes or other dipped treats.
The Master Method for Dipping Pumpkin Strawberries
Preparing the Perfect Canvas
Start by washing your berries and drying them thoroughly with paper towels. Any moisture left on the skin will cause the orange coating to seize or pull away. Keep the green leafy tops on, as these act as your handle during dipping and provide a beautiful natural stem for your pumpkin strawberries.
Melting for Maximum Gloss
Place the orange candy melts and coconut oil in a bowl and microwave in 30-second intervals. Stir vigorously between each session until the mixture is silky and flows like lava. This ensures the coating is thin enough to show the strawberry’s shape but thick enough to provide a vibrant, opaque orange color.
The Dip and Soil Application
Hold the berry by the green leaves and submerge it into the orange coating until it is fully covered up to the “shoulders.” Lift and let the excess drip off. Before the coating sets, dip the bottom third of the berry into the chunky crushed chocolate cookies. This creates the “soil” base seen in the visual blueprint, adding a wonderful crunch.
Creating the Pumpkin Ribs
Melt the dark chocolate and transfer it to your piping bag. Carefully drizzle dark chocolate vertical stripes from the top of the orange shell down to the cookie base. These lines should follow the natural curve of the fruit to mimic the segments of a real pumpkin. This detail elevates the pumpkin strawberries from a simple snack to a forensic culinary work of art.
Pro-Level Tips for Confectionery Success
- Temperature Control: Never dip cold berries into hot candy coating, or they may “sweat,” causing the shell to crack. Let berries reach room temperature first.
- The Crumb Trick: For the most realistic “soil,” keep your cookie crumbs slightly uneven. A mix of fine dust and chunky pieces creates better visual depth.
- Thinning the Chocolate: If your dark chocolate is too thick to drizzle, add a tiny drop of oil. You want a steady, thin stream for the most elegant stripes.
- Adhesion Secret: If you find the cookies aren’t sticking, wait 5 seconds after dipping in orange so it thickens slightly, then press firmly into the crumbs.
Preserving Your Harvest Creations
These treats are best enjoyed the day they are made to ensure the fruit remains crisp and the coating stays snappy. Store them in a cool, dry place. Avoid the refrigerator if possible, as the cold can cause condensation to form on the glossy surface, dulling the shine of your pumpkin strawberries. If you must refrigerate, place them in a container lined with paper towels to absorb excess moisture.
Sweet Pairings for Your Autumn Spread
These berries are a fantastic centerpiece, but they play well with others. Serve them alongside pumpkin pie thumbprint cookies for a full-themed dessert board. For a mix of textures, consider adding a bowl of buttery crumble topping over some vanilla bean ice cream. If you are a fan of rich, citrusy notes, these also pair beautifully with chocolate dipped orange shortbread.
Frequently Asked Questions
Yes, but you must use oil-based food coloring. Water-based liquid coloring will cause the white chocolate to seize and become lumpy.
They are best stored in a cool, dry place. Refrigeration can cause the glossy coating to lose its shine due to condensation, though they will last longer in the fridge if necessary.
Pulse your chocolate cookies in a blender only a few times, or crush them in a bag with a rolling pin. You want a mix of fine crumbs and small, chunky pieces for the best texture.
For peak freshness and the best crunch, make them no more than 8-12 hours before serving. Fresh strawberries release moisture over time, which can soften the coating.
This usually happens if the strawberries are damp. Moisture prevents the oils in the candy coating from adhering to the fruit’s skin. Ensure they are bone-dry before dipping.
The Definitive Pumpkin Strawberries Recipe
Pumpkin Strawberries: The Ultimate Festive Fall Dessert Topper
Ingredients
Equipment
Method
- Wash strawberries and dry them thoroughly with a paper towel. Ensure no moisture remains on the skin.
- In a microwave-safe bowl, combine orange candy melts and coconut oil. Heat in 30-second bursts, stirring until glossy and smooth.
- Hold berries by the leaves and dip into the orange coating. Allow excess to drip off.
- Immediately press the bottom of the wet berry into the crushed chocolate cookies to create the 'soil' layer.
- Melt the dark chocolate, place in a piping bag, and drizzle vertical lines down the sides of the berry to create pumpkin ribs.
Notes
Use a toothpick to help guide the chocolate drizzle if you don't have a piping bag.
Sharing the Harvest Spirit
Making pumpkin strawberries is a delightful way to celebrate the changing seasons with flavor and flair. The combination of fresh fruit and rich chocolate is a timeless classic, reimagined for the autumn months. If you enjoyed this tutorial, please leave a comment below and share your results! Don’t forget to follow us on Pinterest and pin this recipe to your favorite fall dessert boards.