There is a specific kind of magic that happens when you combine the effortless nature of a “dump” dessert with the sophisticated layers of a classic New York-style dessert. This strawberry cheesecake dump cake is the ultimate result of that culinary fusion, offering a multi-layered experience that looks like it came from a high-end bakery but requires only a fraction of the effort.
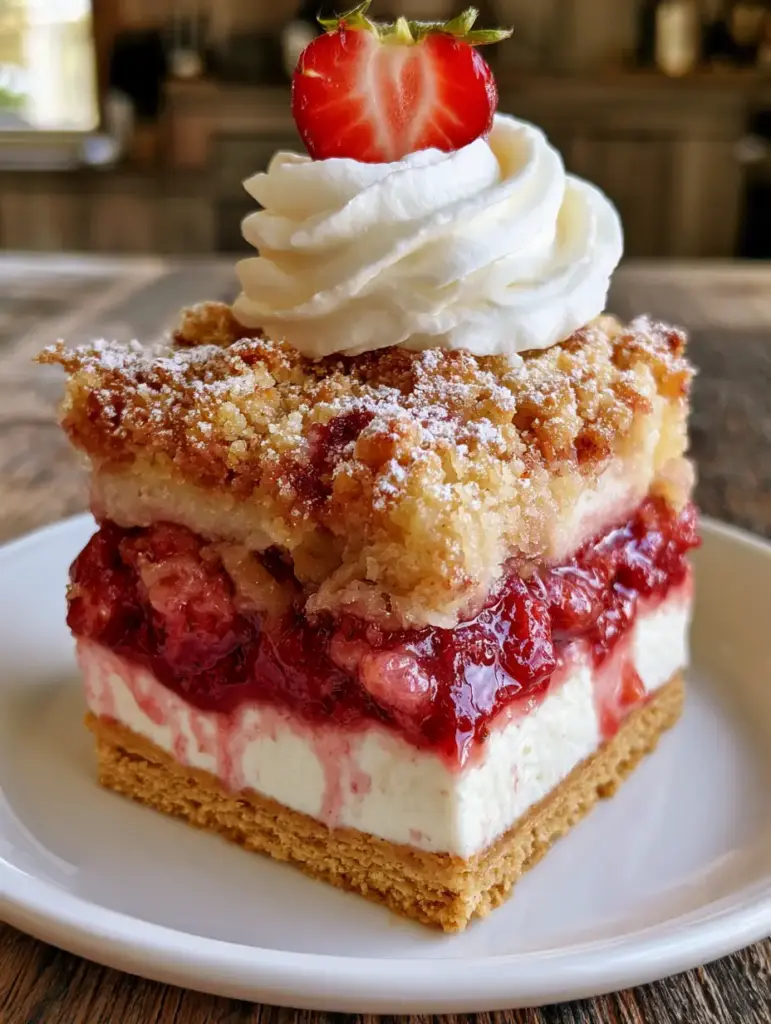
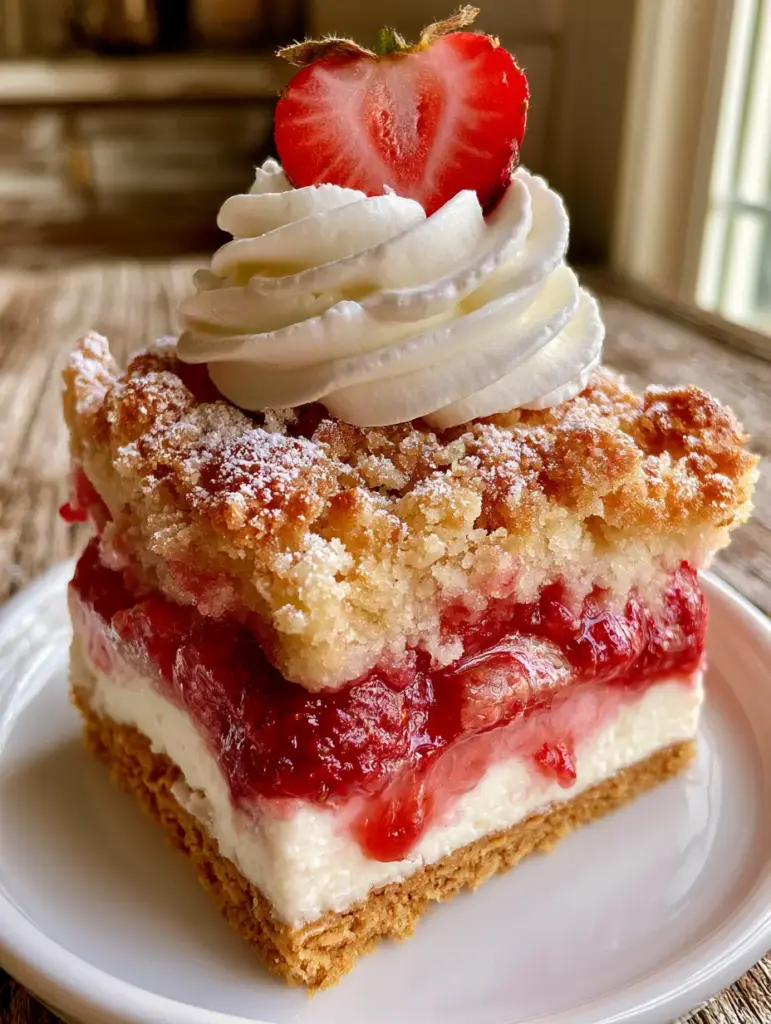
Imagine sliding your fork through a heavy, buttery, toasted golden-brown cake crumble, past a glossy layer of dripping red strawberry preserves, and into a velvety white cheesecake center, all supported by a thick, crunchy graham cracker base. This recipe isn’t just a dessert; it is a sensory journey designed to impress both your palate and your Instagram feed with its vibrant colors and contrasting textures.
Whether you are hosting a summer backyard gathering or looking for a comforting weeknight treat, this dish delivers high-impact flavor. By focusing on foundational baking principles—like the science of a compressed crust and the Maillard reaction on the cake crumble—we elevate the humble dump cake into something truly extraordinary.
Why You Will Fall in Love With This Layered Strawberry Delight
- Textural Contrast: You get the crunch of the toasted golden crust, the silkiness of the cheesecake, and the jammy moisture of the strawberry filling in every single bite.
- Visual Sophistication: Unlike traditional messy dump cakes, this version maintains distinct, beautiful layers that look stunning when sliced and served on a minimalist plate.
- Effortless Luxury: We use clever shortcuts like golden cake mix, but enhance them with real cream cheese and fresh fruit garnishes to maximize the “wow” factor.
- Balanced Sweetness: The tanginess of the cream cheese filling perfectly offsets the sweet strawberry preserves and the buttery cake topping.
The Essential Components for a Perfect Strawberry Cheesecake Dump Cake
To achieve the specific visual and structural results seen in our professional blueprint, you will need a combination of pantry staples and fresh dairy. Each ingredient serves a specific purpose in building the “tall slice” architecture of this dessert.
Graham Cracker Crumbs: 2 cups (200g) of finely crushed graham crackers provide the structural foundation for the cake. These crumbs, when combined with fat, create a dense, golden base that prevents the fruit filling from making the bottom soggy.
Unsalted Butter: 1 cup (225g) of melted unsalted butter, divided between the crust and the topping. Butter is the “glue” for the crust and the fat source that turns the dry cake mix into a rich, toasted crumble.
Cream Cheese: 16 oz (450g) of full-fat cream cheese, softened to room temperature. This is the heart of the “velvety white cheesecake layer,” providing the creamy weight needed to support the layers above it.
Granulated Sugar: 1/2 cup (100g) added to the cream cheese. This sweetens the cheesecake layer just enough to distinguish it from the tartness of the fruit.
Pure Vanilla Extract: 1 tsp (5ml) to add aromatic depth to the cheesecake filling. It bridges the flavor gap between the buttery crust and the bright strawberries.
Strawberry Pie Filling: 2 cans (21 oz / 600g each) of high-quality strawberry preserves or pie filling. Look for brands with “visible fruit chunks” to ensure that glossy, dripping red appearance that characterizes the macro photography of this dish.
Golden Cake Mix: 1 box (15.25 oz / 432g) of golden or yellow cake mix. This serves as the dry base for our heavy topping, which will brown beautifully in the oven’s heat.
Fresh Strawberries: 4-5 large berries, halved with the green stems left on. These are purely for the “bright red, juicy” garnish that provides a fresh contrast to the baked elements.
Heavy Whipping Cream: 1 cup (240ml), chilled, to be whipped into a “tall, perfect swirl” for the final presentation. Fresh whipped cream has a much better structural integrity than canned versions for this specific look.
Powdered Sugar: 2 tbsp (15g) for a light dusting over the finished cake. This adds a professional “fine snow” finish that highlights the toasted textures of the crumble.
Professional Tools for Bakery-Quality Results
Achieving a “tall, perfect slice” requires the right vessel and assembly tools. While the recipe is simple, these items ensure the layers remain distinct rather than blending into a singular mush.
A 9×13 inch (23×33 cm) glass or ceramic baking dish is essential for even heat distribution. A glass dish allows you to monitor the browning of the graham cracker crust from the side. You will also need an electric hand mixer to ensure the cheesecake layer is perfectly smooth and “velvety,” as lumps will ruin the visual transition between the crust and the fruit.
For the garnish, a piping bag with a large star tip is recommended to achieve that iconic “tall swirl” of whipped cream. If you are a fan of layered desserts, you might also enjoy experimenting with creamy cheesecake truffles or even a classic pecan pie dump cake for your next gathering.
Architecting the Layers: Step-by-Step Instructions
Creating the Compressed Graham Cracker Foundation
Preheat your oven to 350°F (175°C). In a medium bowl, combine the 2 cups (200g) of graham cracker crumbs with 1/2 cup (112g) of melted butter and a pinch of salt. Stir until the mixture resembles wet sand.
Press the mixture firmly into the bottom of your baking dish. Use the bottom of a flat measuring cup to pack it down tightly; this ensures a “thick golden graham cracker crust” that won’t crumble when sliced. Bake this layer alone for 8 minutes to “set” the crust before adding the wet ingredients.
Whipping the Velvety Cheesecake Core
While the crust cools slightly, beat the softened cream cheese, 1/2 cup (100g) of granulated sugar, and vanilla extract in a large bowl. Mix on medium-high speed until the texture is completely smooth and aerated.
Carefully spread the cheesecake mixture over the pre-baked crust. Use an offset spatula to push the cream cheese to the very edges, creating a solid white barrier. This layer acts as a moisture seal, keeping the crust crisp while providing the “velvety” mouthfeel promised in the blueprint.
Adding the Glossy Strawberry Preserve Layer
Open your cans of strawberry pie filling and gently pour them over the cheesecake layer. Do not stir! You want the strawberry filling to sit directly on top. If the filling seems too thick, you can give it a very light stir in the can first to ensure the “visible fruit chunks” are evenly distributed.
If you love this fruit-forward approach, you should definitely check out our strawberry marshmallow frosting for your next cake project. The glossiness of the preserves in this step is what creates the “dripping red” effect once the cake is sliced and plated.
The Golden Toasted Crumble Topping
Evenly sprinkle the dry golden cake mix over the strawberry layer. Ensure there are no large clumps of dry mix; use your fingers to break them up into a fine powder. Drizzle the remaining 1/2 cup (112g) of melted butter evenly over the top of the cake mix.
Bake for 38-45 minutes. You are looking for a specific sensory cue: the top should be a “heavy, buttery, toasted golden-brown.” The edges should be bubbling with strawberry juice, and the center should no longer look like dry powder.
Expert Tips for the Ultimate “Macro-Ready” Slice
- The Chill Factor: For the cleanest, “tallest” slices, let the cake cool to room temperature and then refrigerate for at least 4 hours (or overnight). This allows the cheesecake layer to set firmly.
- Butter Distribution: If you see dry spots of cake mix halfway through baking, don’t panic. Simply place small thin pats of butter on those spots to ensure the entire surface toasts evenly.
- Avoid Over-Mixing: When preparing the cheesecake layer, stop mixing as soon as it is smooth. Over-incorporating air can cause the layer to puff up and then collapse, ruining the flat “velvety” look.
- Garnish at the Last Second: Only add the whipped cream and fresh halved strawberry right before serving to prevent the cream from wilting and the strawberry from bleeding into the powdered sugar.
Storage, Reheating, and Make-Ahead Advice
This strawberry cheesecake dump cake is best stored in the refrigerator due to the high dairy content. Cover the baking dish tightly with plastic wrap or aluminum foil. It will stay fresh and delicious for up to 4-5 days.
If you prefer a warm dessert, you can reheat individual portions in the microwave for 20-30 seconds. However, keep in mind that the cheesecake layer will soften significantly when heated. For the best experience, we recommend serving it slightly chilled or at room temperature to maintain the structural integrity of the layers.
While you can freeze this cake, the texture of the strawberry preserves can become slightly watery upon thawing. If you must freeze it, do so without the whipped cream and strawberry garnish, and thaw it slowly in the fridge for 24 hours before serving.
Perfect Pairings for Your Dessert Spread
If you are looking to create a full dessert table, this cake pairs beautifully with other textured treats. Consider serving it alongside crispy cheesecake chimichangas for a fun contrast in form, or perhaps a warm cup of strawberry hot cocoa to lean into the berry theme.
The richness of the golden cake mix also complements deep chocolate flavors. A small slice of this dump cake next to a piece of flourless chocolate cake creates a decadent “black and red” dessert plate that is perfect for Valentine’s Day or anniversaries.
Common Questions About This Strawberry Cheesecake Recipe
Absolutely! This method works perfectly with cherry, blueberry, or peach pie filling while keeping the cheesecake and graham cracker layers the same.
While you can use fresh berries, they won’t provide the same ‘glossy, dripping red’ preserve texture. If using fresh, macerate them with sugar and a bit of cornstarch first to create a thick syrup.
Yes, pre-baking for 8 minutes ‘sets’ the crust and prevents the cream cheese and fruit layers from soaking into the crumbs, ensuring a distinct, crunchy bottom layer.
Use heavy whipping cream with a high fat content (36%+) and whip it until stiff peaks form. Use a piping bag with a 1M or 2D star tip for the most professional visual result.
This happens if the melted butter wasn’t distributed evenly. You can fix this by adding small pats of butter to dry spots halfway through baking or ensuring the cake mix is spread in a very thin, even layer.
The Ultimate Strawberry Cheesecake Dump Cake Recipe
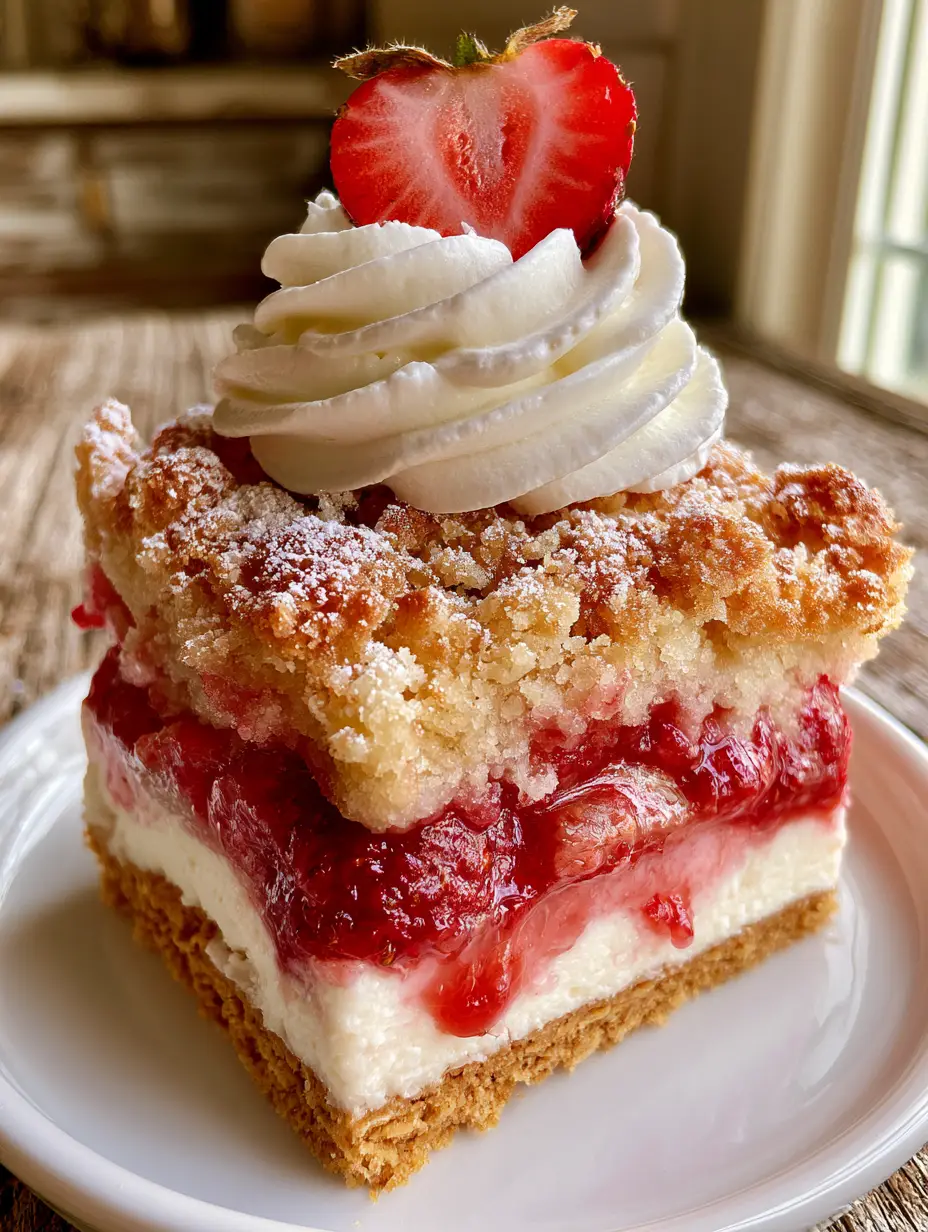
Strawberry Cheesecake Dump Cake with a Thick Graham Cracker Crust
Ingredients
Equipment
Method
- Preheat your oven to 350°F (175°C) and grease your 9x13 inch baking dish.
- Mix graham cracker crumbs and 1/2 cup melted butter; press firmly into the bottom of the dish. Bake for 8 minutes until golden.
- Beat softened cream cheese, sugar, and vanilla until velvety smooth. Spread evenly over the warm crust.
- Pour strawberry filling over the cheese layer. Sprinkle dry cake mix on top, followed by the remaining 1/2 cup of melted butter.
- Bake for 40-45 minutes until the top is a heavy, buttery, toasted golden-brown.
- Cool and chill. Top with a tall swirl of whipped cream, a dusting of powdered sugar, and a fresh halved strawberry.
Notes
Use a warm knife to slice through the cheesecake layer smoothly.
Bring This Berry Masterpiece to Your Kitchen
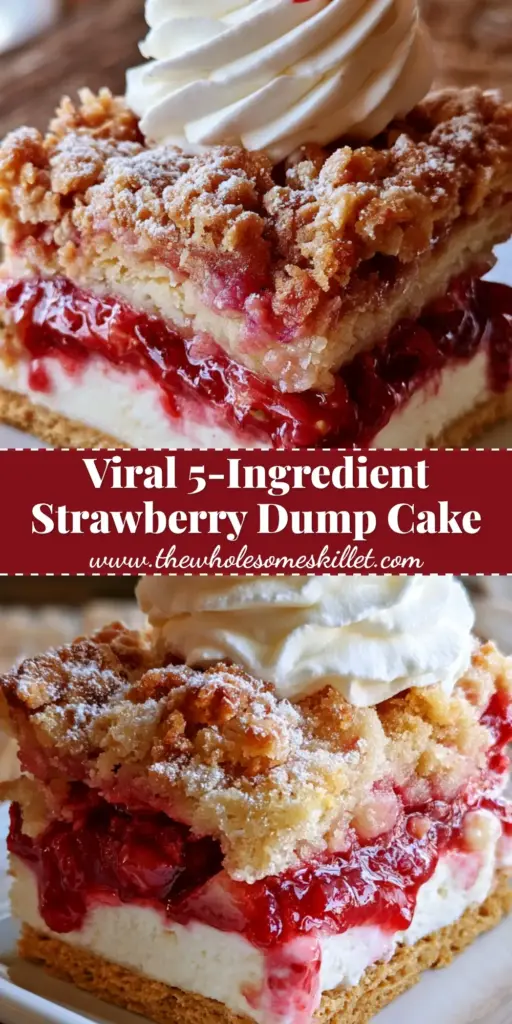
This strawberry cheesecake dump cake is a testament to the fact that simple ingredients, when treated with the right culinary techniques, can produce world-class results. The contrast between the toasted buttery crumble and the vibrant, glossy fruit is something every home cook should experience. The heavy, velvety cheesecake layer elevates this from a simple cobbler to a sophisticated plated dessert.
We would love to see your results! If you make this recipe, please leave a comment below and tell us how your layers turned out. Don’t forget to follow The Wholesome Skillet on Pinterest and share a photo of your “tall slice” with our community. Happy baking!