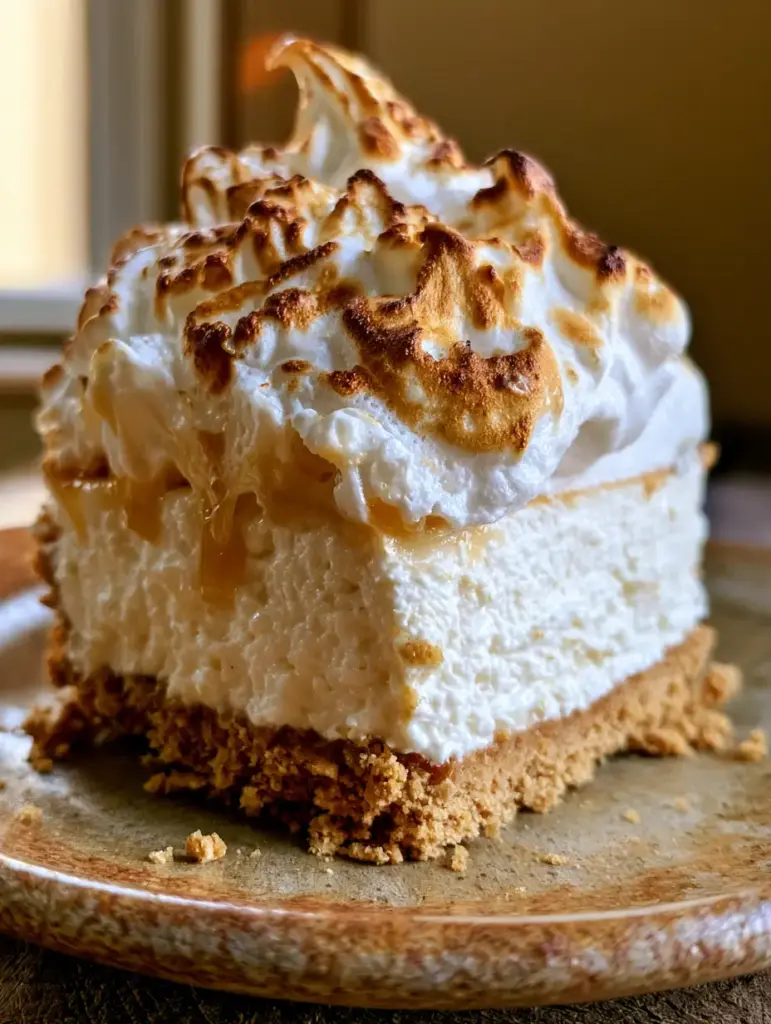
There is something inherently nostalgic about the scent of sugar meeting a flame. This toasted marshmallow cheesecake captures that exact campfire magic but elevates it into a sophisticated, gourmet dessert that looks like it stepped out of a high-end bistro. Imagine a thick slice of dense, velvety cream cheese filling studded with tiny black vanilla bean specks, sitting atop a buttery, golden-brown graham cracker crust that provides the perfect salty-sweet crunch.
The crowning glory of this toasted marshmallow cheesecake is undoubtedly the pile of fluffy white meringue peaks. These aren’t just any toppings; they are meticulously scorched with a kitchen torch to create deep golden-brown ridges and gooey, caramelized drips that cascade down the sides. It is a handheld smartphone photo-ready masterpiece that tastes even better than it looks, bathed in the soft morning light of your kitchen.
Whether you are hosting a summer backyard gathering or looking for a cozy winter treat, this no-bake wonder delivers on every sensory promise. From the first sight of those scorched sugar edges to the final bite of the whipped marshmallow center, this recipe is designed to be the ultimate showstopper for any enthusiastic home cook.
Why This No-Bake Toasted Marshmallow Cheesecake is the Ultimate Crowd-Pleaser
- Visual Masterpiece: The contrast between the pristine white filling and the dark, scorched meringue peaks creates a dramatic, professional aesthetic.
- Textural Harmony: You get the crunch of the crumbly golden graham cracker crust, the silkiness of the whipped cream cheese, and the airy stickiness of the marshmallow meringue.
- Vanilla Bean Elegance: Using real vanilla beans ensures those characteristic specks are visible, signaling high-quality flavor to your guests.
- No-Bake Simplicity: Achieve a dense, stable cheesecake structure without ever turning on the oven, keeping your kitchen cool and your stress levels low.
- Torched to Perfection: The scorched sugar edges provide a smoky, bitter-sweet depth that balances the richness of the dairy.
The Essential Components for a Perfectly Scorched Marshmallow Topping
To achieve the visual and culinary results seen in our toasted marshmallow cheesecake, you must select high-quality ingredients that serve both structural and flavor purposes. We aren’t just looking for sweetness; we are looking for the specific chemistry that allows for those beautiful meringue drips.
Graham Cracker Crumbs: 2 cups (180g) of finely ground crackers act as the foundation. This provides the “crumbly golden graham cracker crust” described in our blueprint, offering a sturdy base for the heavy filling.
Unsalted Butter: 1/2 cup (115g) of melted butter binds the crumbs together. Its high fat content ensures the crust doesn’t become soggy once the moist filling is added.
Full-Fat Cream Cheese: 24 oz (680g) of brick-style cream cheese is non-negotiable. This provides the “dense, creamy white cheesecake layer” that holds its shape when sliced.
Marshmallow Fluff: 1 jar (7 oz / 198g) is folded into the batter. This infuses the core of the toasted marshmallow cheesecake with that unmistakable nostalgic flavor and a light, airy lift.
Vanilla Bean Paste: 1 tbsp (15ml) is used to provide the “vanilla bean specks.” Paste is superior to extract here because it offers concentrated flavor and the visual aesthetic of real bean pods.
Heavy Whipping Cream: 1 cup (240ml) of cold cream is whipped to stiff peaks. This is the “invisible” ingredient that lightens the dense cheese while maintaining structural integrity.
Egg Whites and Granulated Sugar: 4 large egg whites and 1 cup (200g) of sugar form the Swiss meringue. This mixture is whipped into “fluffy white marshmallow meringue peaks” that are stable enough to withstand the heat of a kitchen torch.
Cream of Tartar: 1/4 tsp (1g) acts as a stabilizer for the meringue. It ensures your peaks don’t collapse before you have the chance to achieve those scorched sugar edges.
Pro-Grade Tools for Achieving that Gourmet Kitchen-Torched Finish
To replicate the handheld smartphone photo aesthetic, you need a few specific tools. A standard 9-inch (23cm) springform pan is essential for creating the thick, uniform slice of toasted marshmallow cheesecake that stands tall on a rustic ceramic plate.
A culinary kitchen torch is the most important tool in your arsenal for this recipe. While an oven broiler can brown sugar, it cannot provide the precision needed to create “deep golden brown” ridges and “gooey drips” without melting the entire cheesecake. Finally, an offset spatula will help you swirl the meringue into those signature high peaks.
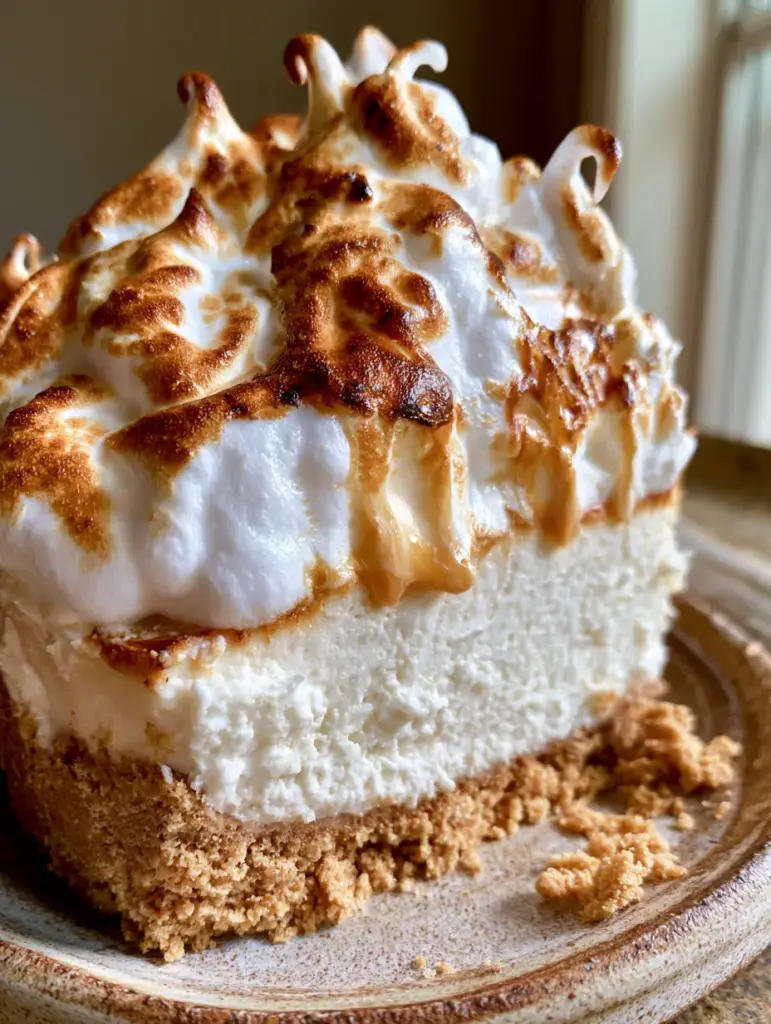
Mastering the Art of the No-Bake Toasted Marshmallow Cheesecake
Step 1: Constructing the Golden Graham Cracker Foundation
Combine your graham cracker crumbs with the melted butter and a pinch of salt in a medium bowl. Press the mixture firmly into the bottom of your springform pan using the flat bottom of a measuring cup. You want a thick, even layer that reaches the edges, ensuring that characteristic crumbly golden graham cracker crust is visible in every slice.
Chill the crust in the freezer for at least 15 minutes. This “sets” the butter, creating a thermal barrier that prevents the filling from softening the crust prematurely.
Step 2: Whipping the Dense Vanilla Bean Filling
In a large bowl, beat the room-temperature cream cheese until it is completely smooth with no lumps. Add the marshmallow fluff and vanilla bean paste, mixing until the “vanilla bean specks” are evenly distributed throughout the white cream. The aroma at this stage should be intoxicatingly sweet and floral.
In a separate chilled bowl, whip the heavy cream until stiff peaks form. Gently fold the whipped cream into the marshmallow mixture using a rubber spatula. This preserves the air bubbles, resulting in a filling that is dense yet light on the tongue.
Step 3: The Long Chill for Structural Success
Pour the filling over your prepared crust and smooth the top with your offset spatula. Cover the pan with plastic wrap and refrigerate for at least 6 hours, though overnight is preferred. This time allows the fats to solidify, ensuring your toasted marshmallow cheesecake yields clean, sharp slices when served on a rustic ceramic plate.
Step 4: Crafting the Fluffy Meringue Peaks
Create a double boiler by placing a heat-proof bowl over a pot of simmering water. Whisk the egg whites and sugar together constantly until the sugar is dissolved and the mixture reaches 160°F (71°C). This pasteurizes the eggs and creates the syrup base for your marshmallow topping.
Transfer to a stand mixer and whisk on high speed with the cream of tartar until stiff, glossy, “fluffy white marshmallow meringue peaks” form. The meringue should be thick enough to hold its shape when the whisk is lifted.
Step 5: The Forensic Finish—Torching and Scorching
Pile the meringue high onto the chilled cheesecake. Use a spoon or spatula to create “peaks” and valleys across the surface. Take your kitchen torch and, using a circular motion, pass the flame over the meringue. Watch for the visual cues: the sugar will first turn a light tan, then deepen into a “deep golden brown,” and finally develop those charred, “scorched sugar edges.”
Focus the heat on the tips of the peaks to create the “gooey drips.” The heat should caramelize the exterior while leaving the interior of the meringue soft and marshmallow-like.
Expert Secrets for the Silkiest Marshmallow Cream Cheese Filling
- Room Temperature is Key: Ensure your cream cheese is completely soft before mixing. If it is even slightly cold, you will end up with tiny lumps that ruin the “dense, creamy white” visual of the filling.
- Don’t Over-Torch: Move the flame quickly. If you hold it in one spot too long, the heat will penetrate the cheesecake layer and cause it to lose its structural integrity.
- Use a Hot Knife: To get the perfect slice shown in gourmet food photography, dip your knife in hot water and wipe it dry between every single cut.
- Stability Tip: If your meringue feels too soft, add an extra 1/8 teaspoon of cream of tartar. This strengthens the protein bonds in the egg whites.
How to Maintain the Gooey Meringue Drips and Crumbly Crust
This toasted marshmallow cheesecake is best served within 2-4 hours of torching. While the cheesecake itself lasts longer, the meringue peaks will eventually begin to “weep” or lose their crisp scorched edges as the sugar absorbs moisture from the refrigerator.
If you have leftovers, store them in an airtight container in the fridge for up to 3 days. Do not freeze the cheesecake once the meringue has been added, as the texture of the toasted sugar will become spongy and unappealing upon thawing.
Decadent Pairings to Elevate Your Dessert Spread
While this toasted marshmallow cheesecake is a star on its own, it pairs beautifully with other textures and flavors. For a “s’mores” themed party, consider serving it alongside peanut butter marshmallow brownies to double down on the campfire vibes.
If you prefer a smaller format for guests to grab and go, you might also like these creamy cheesecake truffles or even biscoff mini cheesecakes for a spiced variation. For those who love the marshmallow element but want a fruitier twist, our strawberry marshmallow frosting can be used as a side dip for extra graham crackers.
Finally, for a warm-and-cold sensation, serve a slice of this cheesecake with caramelized air fryer bananas on the side. The warmth of the bananas complements the scorched sugar edges of the meringue perfectly.
Frequently Asked Questions
While a kitchen torch is best for precision, you can briefly place the cheesecake under a broiler. However, be extremely careful as the heat can quickly melt the no-bake filling.
You can, but marshmallow fluff is less stable than Swiss meringue and will likely melt or run off the sides if torched too heavily.
It is best served within 4 hours of torching. After that, the sugar in the meringue may start to weep or soften due to the moisture in the refrigerator.
Dip a sharp knife into hot water, wipe it completely dry, and make your cut. Repeat this process for every single slice to maintain those clean, professional edges.
A crumbly crust usually needs more melted butter or firmer pressing. Ensure you press the mixture tightly into the pan and chill it thoroughly before adding the filling.
The Ultimate Toasted Marshmallow Cheesecake Recipe
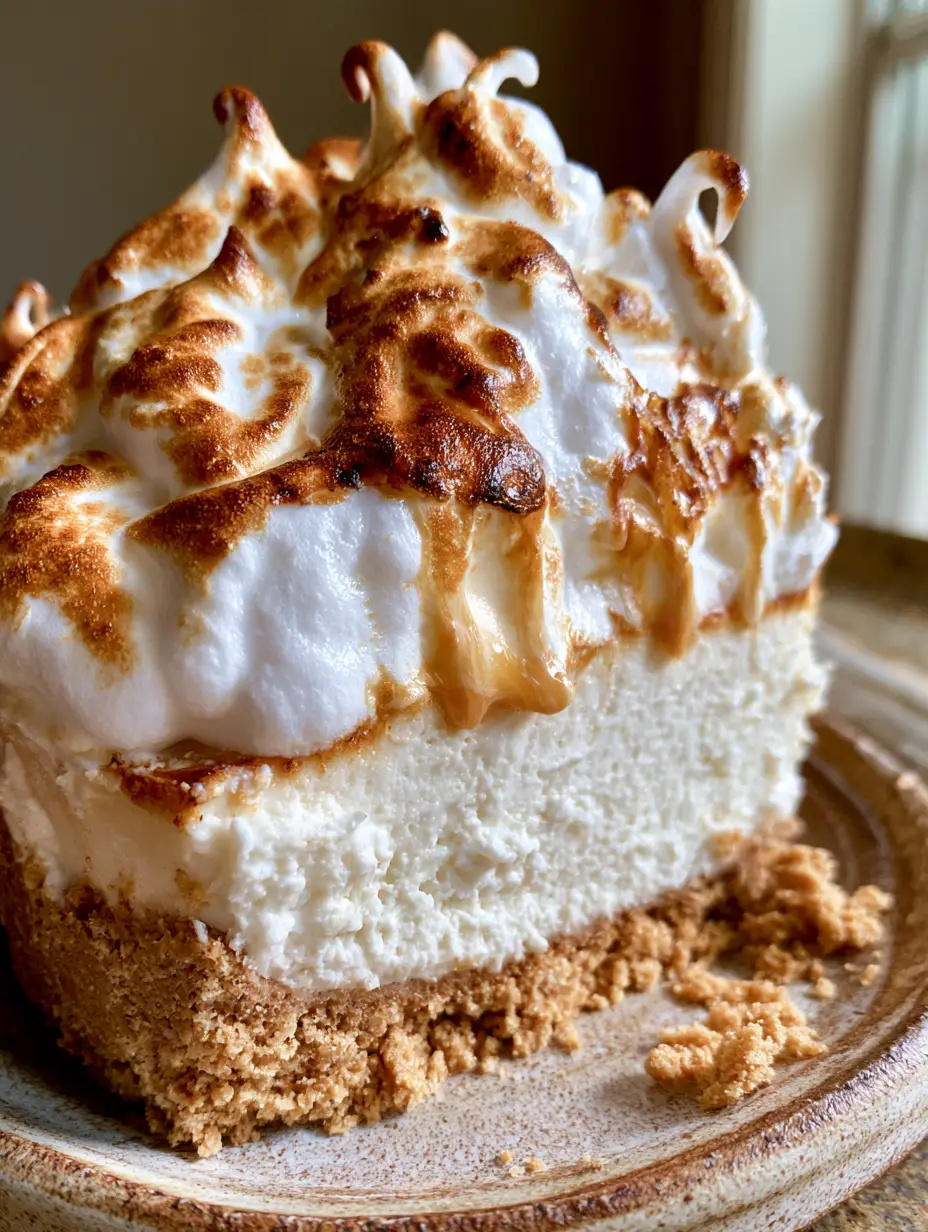
Toasted Marshmallow Cheesecake with Golden Graham Cracker Crust
Ingredients
Equipment
Method
- Combine graham cracker crumbs and melted butter. Press firmly into the bottom of a 9-inch springform pan to form a thick, golden crust.
- Freeze the crust for 15 minutes to set the butter firmly.
- Beat cream cheese, marshmallow fluff, and vanilla bean paste until smooth and vanilla bean specks are visible.
- Whip heavy cream to stiff peaks and gently fold into the cream cheese mixture.
- Spread over the crust and refrigerate for at least 6 hours or overnight until dense and firm.
- Heat egg whites and sugar in a double boiler to 160°F (71°C), then whip with cream of tartar to stiff, glossy peaks.
- Pile meringue on the cheesecake and use a kitchen torch to create deep golden brown ridges and scorched sugar edges.
Notes
Torch the meringue immediately before serving for the best texture.
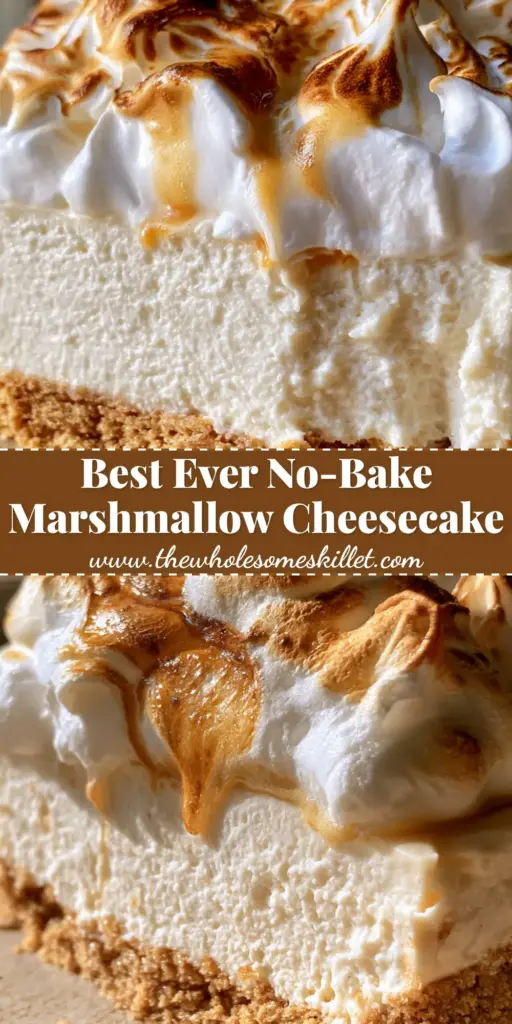
Share Your Campfire Creations!
We hope this toasted marshmallow cheesecake brings a bit of gourmet flair to your home kitchen. There is nothing quite like the satisfaction of torching those meringue peaks to a deep golden brown and seeing the joy on your guests’ faces. If you make this recipe, please leave a comment below and let us know how your scorched sugar edges turned out!
Don’t forget to snap a photo and tag us, or save this recipe to your dessert boards on Pinterest so you never lose track of this campfire classic. Happy torching!