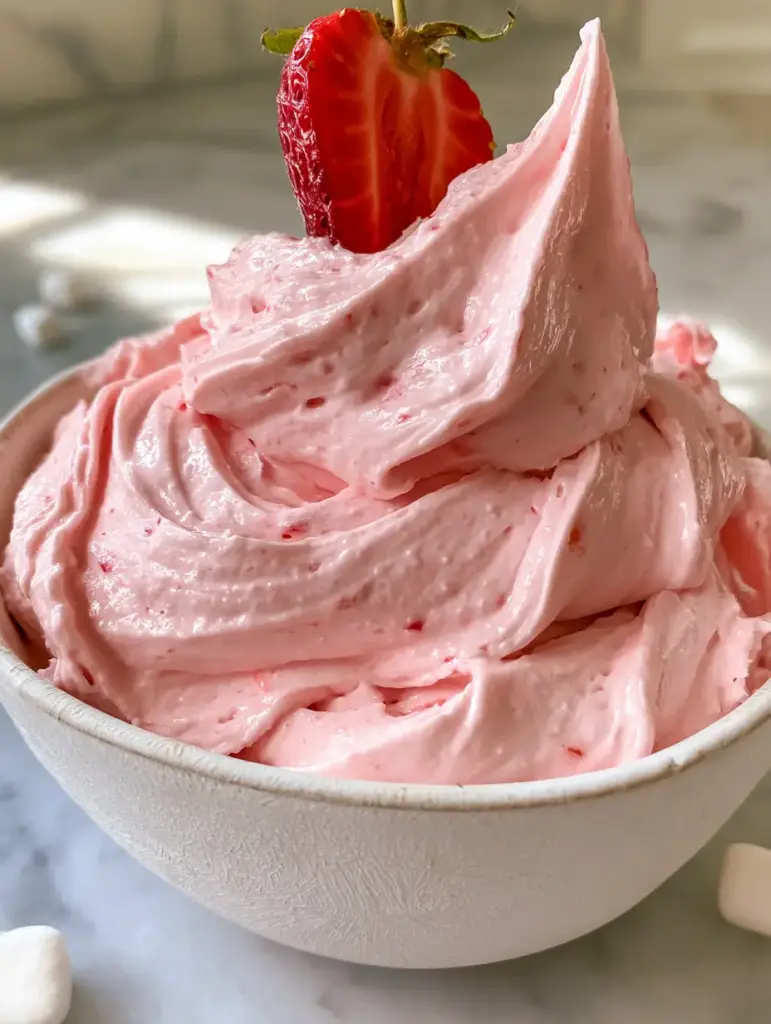
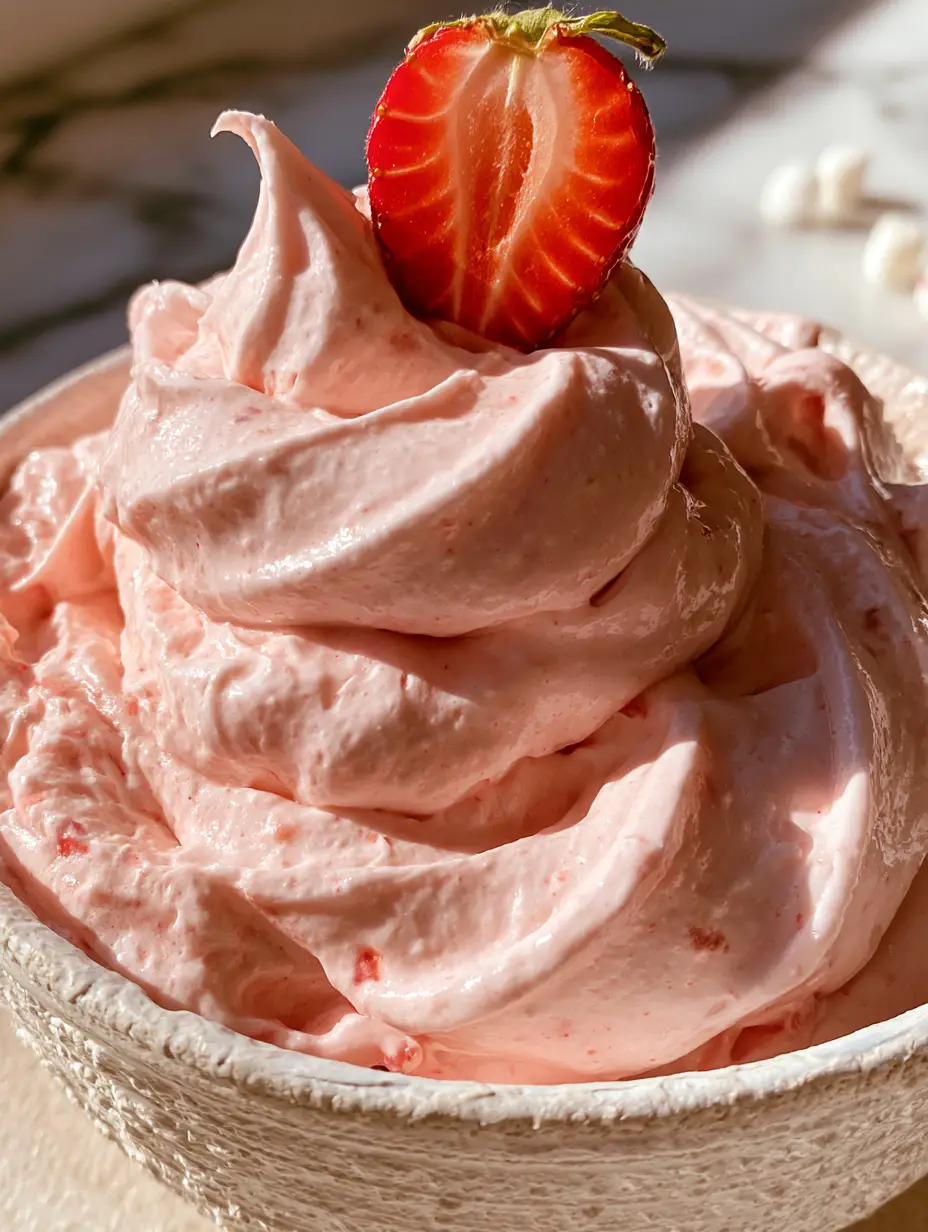
Imagine a massive, decadent swirl of pale pink strawberry marshmallow frosting sitting in a rustic white ceramic bowl, catching the golden rays of a sun-drenched kitchen. This isn’t just any topping; it is a thick, glossy masterpiece that balances the nostalgic sweetness of marshmallow fluff with the bright, acidic punch of real fruit. If you have been searching for a frosting that holds its shape for high-altitude piping while maintaining a silk-smooth mouthfeel, you have arrived at the perfect recipe.
This strawberry marshmallow frosting is a culinary hybrid, bridging the gap between a traditional American buttercream and a cloud-like marshmallow spread. By incorporating concentrated fresh strawberry puree and vanilla bean specks, we achieve a flavor profile that tastes like a gourmet strawberry milkshake. Whether you are swirling this onto a strawberry custard cake or using it to sandwich cookies, the result is consistently professional and visually stunning.
In this guide, we will break down the science of emulsions to ensure your frosting never curdles, and we will show you exactly how to achieve those tiny flecks of real strawberry fruit that signal “homemade” to anyone who takes a bite. Let’s dive into the details of creating the most photogenic frosting in your repertoire.
Why This Thick Pink Frosting Wins Every Time
- Unbeatable Glossy Texture: Thanks to the marshmallow fluff, this frosting has a reflective, high-shine finish that looks incredible in photos.
- Structural Integrity: Unlike whipped cream frostings, this version is sturdy enough for massive swirls and tiered cakes.
- Authentic Strawberry Flavor: We use a reduced fresh strawberry puree to ensure the flavor is concentrated without making the frosting runny.
- Visible Vanilla Specks: The addition of real vanilla bean paste adds a sophisticated visual element and a deep, aromatic finish.
The Secret Ingredients for Strawberry Marshmallow Perfection
To achieve the specific “Visual Recipe Blueprint” results, we must select ingredients that offer both color stability and structural density. Each component in this strawberry marshmallow frosting serves a technical purpose.
Unsalted Butter (2 cups / 452g): We use high-fat European-style butter, softened to exactly 65°F (18°C), to create a stable base. This ensures the frosting is “whipped” but remains firm enough to hold deep ridges from a piping tip.
Marshmallow Fluff (1 jar / 7.5oz / 213g): This is the secret to the glossy finish and the unique “marshmallowy” pull. It provides a lightness that powdered sugar alone cannot achieve, mimicking the texture of a toasted marshmallow cheesecake.
Fresh Strawberry Puree (1/2 cup / 120ml reduced): We start with 1 cup (240ml) of blended strawberries and simmer them down to half. This removes excess water, leaving us with “tiny strawberry fruit bits” and a concentrated pale pink hue.
Powdered Sugar (4-5 cups / 500-625g): Sifted confectioners’ sugar provides the necessary “crust” and sweetness. It works with the butter to create a pipeable consistency that won’t slide off your cakes.
Vanilla Bean Paste (1 tsp / 5ml): We specifically use paste instead of extract to get those beautiful vanilla bean specks. It adds a gourmet touch that complements the fresh fruit perfectly.
Fine Sea Salt (1/2 tsp / 3g): An essential “invisible” ingredient that cuts through the intense sweetness of the marshmallow and sugar. It heightens the perception of the strawberry flavor.
Essential Tools for High-Volume Frosting Swirls
To recreate the “massive, decadent swirl” seen in the rustic white ceramic bowl, you will need the right mechanical help. High-speed aeration is key to this recipe’s success.
A stand mixer fitted with the paddle attachment is preferred over a whisk attachment for this specific strawberry marshmallow frosting. While we want air, too many large air bubbles from a whisk will ruin the glossy, smooth surface. You will also need a heavy-bottomed saucepan to reduce your strawberry puree and a fine-mesh sieve if you prefer a smoother texture—though our blueprint calls for those charming fruit bits!
Mastering the Perfect Strawberry Marshmallow Emulsion
Step 1: Concentrating the Strawberry Essence
In a small saucepan over medium heat, add 1 cup (240ml) of fresh strawberry puree. Simmer the liquid, stirring frequently, for about 10-15 minutes until it has reduced to 1/2 cup (120ml). You are looking for a jam-like consistency with visible tiny strawberry fruit bits. Allow this to cool completely to room temperature before adding it to the fats; adding hot puree will melt your whipped butter instantly.
Step 2: Aerating the Butter Base
Place your softened butter in the bowl of a stand mixer. Beat on medium-high speed for a full 5 minutes. The butter should transition from a yellow hue to a pale, almost white color. Scrape the sides of the bowl twice during this process. This step is critical for achieving that “pale pink” final color—the whiter the butter, the truer the pink will look once the fruit is added.
Step 3: Integrating the Marshmallow Cloud
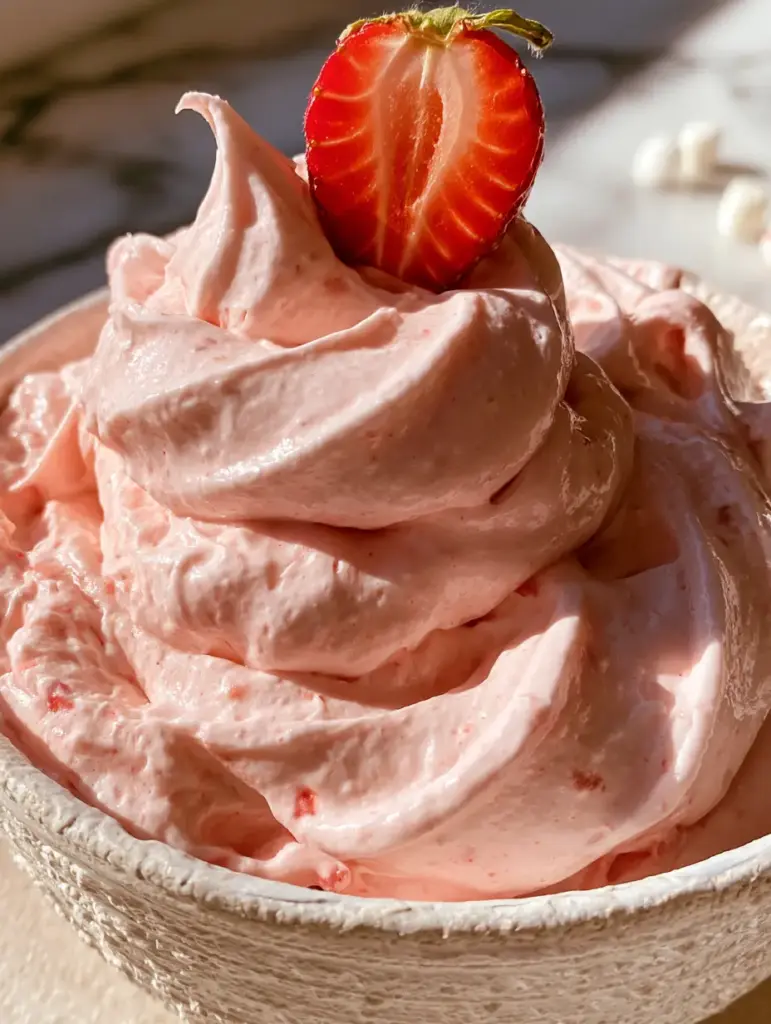
Add the marshmallow fluff to the whipped butter. Beat on medium speed for another 2 minutes until the mixture looks like a seamless, glossy cloud. At this stage, add your vanilla bean paste and sea salt. You should see the vanilla bean specks distributed evenly throughout the white base.
Step 4: Building the Structure
Gradually add the powdered sugar, one cup (125g) at a time, with the mixer on low. Once all the sugar is incorporated, increase the speed to medium and beat for 2 minutes. The frosting should be stiff but smooth. If you are also making sugar cookie frosting, you’ll notice this is significantly thicker and more voluminous.
Step 5: The Final Strawberry Swirl
With the mixer on low, slowly drizzle in the cooled strawberry puree-concentrate. Watch as the frosting transforms into a beautiful pale pink. Ensure the “tiny strawberry fruit bits” are distributed evenly. If the frosting feels too soft, add another 1/4 cup (30g) of sugar. If it’s too stiff, a teaspoon of heavy cream can loosen it.
Expert Tips for Success
- Temperature Control: Ensure your reduced puree is truly cold. If it’s even slightly warm, it will break the butter emulsion, resulting in a soup rather than a massive swirl.
- Sift Your Sugar: Marshmallow fluff is sticky; any lumps in your powdered sugar will become trapped and impossible to beat out later.
- The “Paddle Slap”: After the frosting is finished, let the mixer run on the lowest speed for 2 minutes. This “slaps” out the large air bubbles, leaving you with that ultra-glossy, professional finish.
- Avoid Over-Coloring: The natural pink from the strawberries is sophisticated. If you want a brighter pop, use a tiny drop of gel coloring, but the “Visual Recipe Blueprint” celebrates the natural, pale pink aesthetic.
Storage and Make-Ahead Instructions
This strawberry marshmallow frosting can be made up to 3 days in advance. Store it in an airtight container in the refrigerator. Because of the high butter content, it will firm up significantly when cold.
To reuse, let it sit at room temperature for 2 hours, then place it back in the stand mixer. Beat it on medium speed for 1-2 minutes to restore that glossy, thick texture. We do not recommend freezing this frosting, as the marshmallow fluff can sometimes change texture upon thawing, losing its signature gloss.
What to Pair With Strawberry Marshmallow Frosting
This frosting is incredibly versatile. It provides a beautiful contrast when piped onto strawberry swirl bundt cake or used as a filling for homemade cream puffs. For a truly decadent dessert table, pair it with chocolate-based treats like peanut butter marshmallow brownies.
If you have leftover frosting, it makes an excellent dip for fresh fruit or a topping for a warm strawberry cheesecake dump cake. The brightness of the strawberries makes it a natural partner for vanilla, lemon, or even dark chocolate sponges.
Frequently Asked Questions
Yes, you can substitute strawberry jam, but reduce the powdered sugar by 1/2 cup to compensate for the added sugar in the jam. Note that you won’t get the same fresh ‘tiny fruit bits’ as with a homemade reduction.
Because it contains butter and fruit puree, cakes frosted with this should be kept in a cool environment. If storing for more than a few hours, refrigeration is recommended.
The glossy texture comes from the marshmallow fluff. To maximize the shine, use a stand mixer with a paddle attachment on low speed at the very end to remove excess air bubbles.
The key is reducing your strawberry puree on the stovetop to remove excess water. This concentrates the flavor and color while allowing the frosting to maintain its structural integrity for high-volume piping.
This usually happens if the strawberry reduction is still warm or if it’s added too quickly. Ensure the puree is cold and the butter is properly creamed to create a stable emulsion.
The Perfect Strawberry Marshmallow Frosting Recipe
Strawberry Marshmallow Frosting: The Ultimate Thick and Glossy Recipe
Ingredients
Equipment
Method
- Simmer 1 cup of strawberry puree in a saucepan over medium heat for 10-15 minutes until reduced by half. It should be thick with tiny fruit bits. Cool completely.
- Beat softened butter on medium-high for 5 minutes until pale and aerated.
- Mix in the marshmallow fluff, vanilla bean paste, and salt until glossy and combined.
- Slowly incorporate powdered sugar on low speed, then beat on medium until stiff peaks form.
- Drizzle in the cooled strawberry reduction and mix until the frosting turns a pale pink with visible fruit flecks.
Notes
Use a paddle attachment to minimize large air bubbles for a glossier finish.
Closing & Call to Action
This strawberry marshmallow frosting is the perfect marriage of fruit-forward flavor and professional-grade texture. Its glossy finish and thick peaks make it a showstopper for any celebration. Once you try the method of reducing the strawberry puree, you will never go back to using watery, fresh berries in your buttercream again!
Did you achieve that perfect massive swirl? We would love to see your creations! Leave a comment below and tell us what you paired this frosting with. Don’t forget to share your beautiful photos and pin this recipe to your favorite dessert boards on Pinterest so you never lose this recipe!